
A new (read OLD) way of printing!
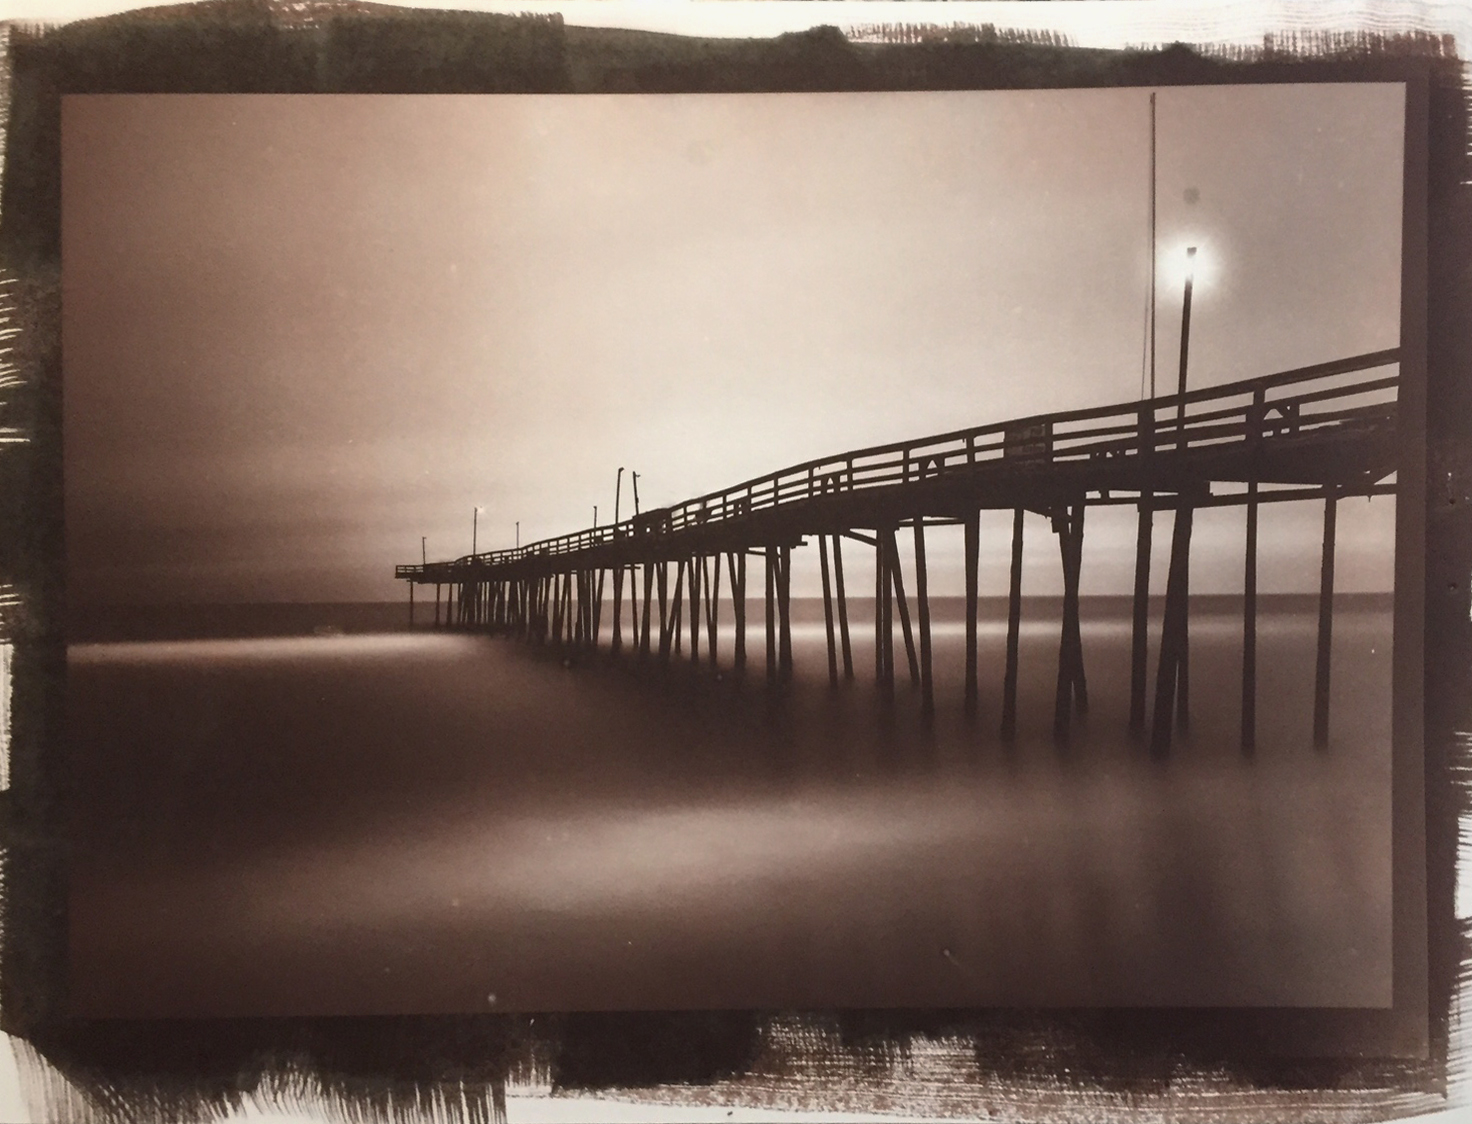
8×12″ Van Dyke Brown Print
Alternative Printing from History!
Van Dyke Brown is an early photographic printing process. The process was so named due to the similarity of the print color to that of a brown oil paint named for Flemish painter Anthony van Dyck.
The Vandyke brown print is based on the first iron-silver process, the argentotype, invented in 1842 by the English astronomer, Sir John Herschel. Both processes utilize the action of light on ferric salts and their chemistry is very similar. The Vandyke process gets its name from its similarity in color to the deep brown pigment used by the Flemish painter Van Dyck. Vandyke brown prints are very simple and economical to make, with the sensitizer consisting of three readily available chemicals. Clearing is carried out in water and fixing is done in a weak solution of hypo.
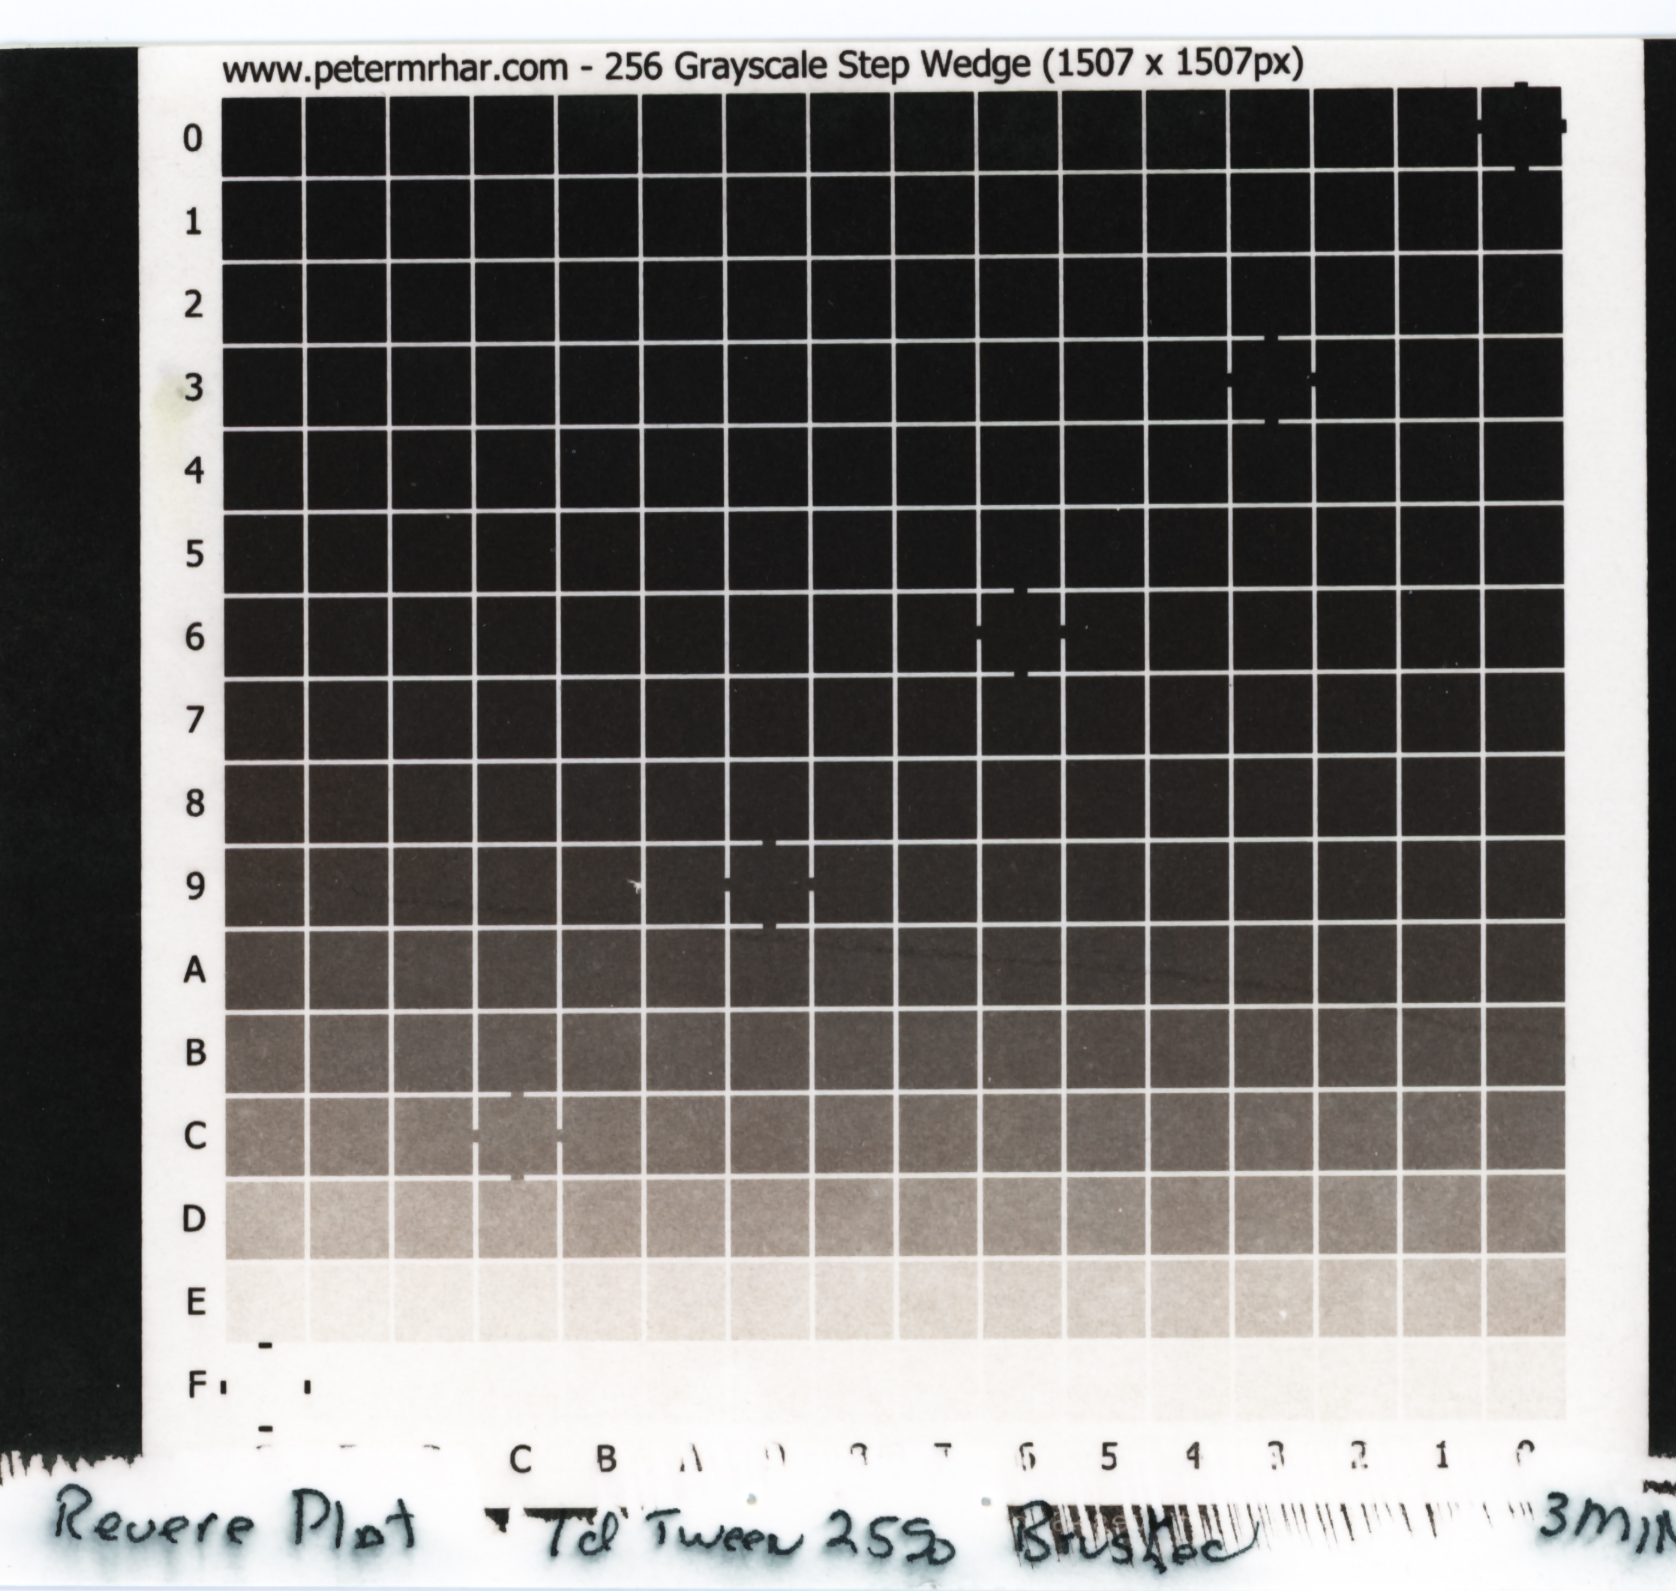
Van Dyke Brown Step Wedge Calibration Chart for 3 Min Exposure
As you can see, this is a very early way of printing developed a long time before our current Silver Salt paper process. The images are a deep brown instead of the normal black and white that we are used to seeing. They are somewhat easy to create provided that you have done your homework and created the proper calibration images to create a calibration Gradient Map or Curve to apply to your negatives which adjust them for loss of mid tones in the printing process.
This is strictly a CONTACT PRINTING technique that requires a true negative that is placed on top of paper that YOU as the artist coat yourself with the Van Dyke Brown emulsion that you mix from simple chemistry! The coating process is done with a special brush that requires a very light touch or a glass coating rod that you use to push a line of liquid emulsion across the paper.

B&W Negative for Van Dyke Brown Print exposure calculated for 3 Min with the calibration applied.
The liquid emulsion is measured by the number of drops from a glass eye dropper into a small glass then with a drop of two of a wetting agent like Tween 20 to help the coating process. The paper/emulsion is allowed to dry then the negative which was created using my Epson 7900 printing on transparency material is placed on top of the coated paper. This sandwich is then placed in a printing box filled with 12 Fluorescent Black Light tubes which then expose the paper with UV light. The exposure for the current paper I am using (Revere Platinum) has been calibrated to 3 or 4 min based upon the test chart above.

Van Dyke Brown Print, Over Exposed by 1.5 stops.
This process is a POP process in which the image after being exposed can be seen on the paper once removed from the UV box. It is orange and yellow in color. It is placed in 2 consecutive distilled water baths that remove the yellow and darken the orange. Then it is placed in the fixer solution (Sodium thiosulfate) for 2 min. When the image is placed in the fix, it IMMEDIATELY changes from orange to a very dark brown and white picture. Finally the print is placed in a live water wash for 30 min then dried!
This is a simple process that creates beautiful images that will leave you breathless as you view them! I am going to further develop and learn the process over the next month or two before I start on mastering the Platinum/Palladium printing process as well!
Look forward to many more posts on the processes as I master them!

First class example as ever.
Having no access to darkroom processes these days, I’d be, dare I say it, very interested in a digital process for this type. Perhaps a LR preset or similar.
Apologies for being slightly off topic.
Roger, this type of printing can be done under a 60w light bulb and it will not affect the print. It takes a high output UV source for the exposure. I do them in my garage for now! I setup a table there to work.
Hello Mark, only printing? No preset? It’s beautiful
Peternadort, this is strictly a chemical process. I am unsure of your question.
Your post is about the history of the printing. Thanks for telling the alternative printing style by using chemical compositions and by the contact printing process. It’s a nice and knowledgeable post for me. i like your post. Keep it up.
Thanks for the kind comments.