How To: Extreme Macro High Speed Photography and the Fuji X Pro 1
Macro photography is hard work. There are so many technical issues to overcome that you have to be a very patient person with the correct camera equipment. Now, add in the complexity of HIGH SPEED WATER DROP COLLISIONS to the mix and you are faced with one of the more complex camera and photographic setups and skills necessary to capture great images. Most people think that water drop photography is purely luck or done with high speed computer controls. While this statement is partially true, you still have to overcome the normal issues associated with macro photography in the 1:1 image ration realm. By this I mean that a penny photographed is the same size as if laid on the camera sensor, hence 1:1!
Macro issues are tough:
- VERY NARROW Depth Of Field (DOF), with the drop collisions being wider than what the camera can keep sharp.
- Getting enough light on the subject to artistically present it with depth.
- Getting the camera lens to focus at 1:1 with enough distance from the drops to keep water from splashing onto the front of the lens.
Now, add in the issues with water drops:
- The inability of the shutter to stop the motion of the water movement.
- Setting up several flash units in manual mode for stop action work around 1/120000 second.
- Controlling the water drops for number and size, interval.
- Keeping the water drops round and on target.
- Controlling the flash firing delay to .001 second starting at about .150 second out to .500 second.
- Setting up the camera shutter speed to allow all of this high speed stuff to happen (which actually requires a long exposure!)
- Getting all of this without breaking the bank!
There are dozens of articles on the WEB about doing this in your sink with a baggy full of water and a pin hole in the bottom. This can indeed be a fun experiment, but one that is doomed to failure. Anyone who actually thinks they might enjoy this ALWAYS move up to some sort of computer controlled water drop machine. A unit that will:
- Number of Drops
- Size of Drops
- Interval between Drops
- Camera Trigger
- Flash Trigger
- Upper Water Tank
- Computer controlled valve
Now the Camera equipment list:
- ANY camera with interchangeable lenses.
- Macro Lens at 1:1 (or the ability to modify an existing lens with extension tubes and/or close up diopter filters)
- Remote shutter release.
- 1 to 3 external flash units capable of being set in Manual at 1/64 power with stands.
- PC flash wiring cables and a 1 to 3 wiring adapter (this is the inexpensive stuff)
- Colored gels.
- Difusers, Reflectors, and Colored Glass Sheets.
- Small STABLE table tripod.
- Food Coloring
- Glycerin
- Dish Soap
- …
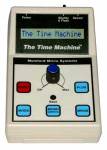
I LOVE water drop photography so I choose a timing controller and a water drop controller from The Time Machine. It is a small system of 2 small electronic boxes that run on 9v batteries (still on the original battery after a year). There are about 3 companies out there that sell these control systems, but to me, this one was the easiest and lowest in cost. The learning curve is short, but still, you will be required to do your homework and READ THE MANUAL (RTFM). They even pack a bag of M&M candy in with it and tell you to go sit down, snack and read!
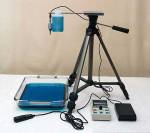
The Drip Kit from the same company provides you with the 2nd box and upper water tank/valve/holder that talks to the Time machine through 1 simple cable. It is easy to setup and understand! This is what it looks like from the dealer (right). Believe me when I tell you that this is the device that makes high speed water drop photography possible! The entire kit cost me about $350 and was worth every penny.
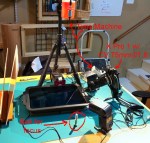
OK, now then, here is an image of MY actual setup. Notice that there is nothing uncluttered about it! The thing is messy, disorganized and tons of fun! You could even call it addictive!
TIP: I have also shown in the above image a large BOLT that I place in the lower tray of water, allow the drops to fall on it and use the threads as my focus points!
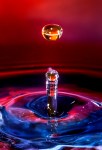
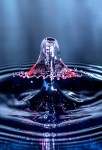
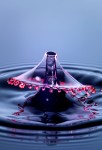
Did you notice that I am using 2 different colors of water? Red on top and blue in the bottom tray? This allows the colors to mix in the resulting collisions and give some very interesting color mixes as shown in the next photograph. For this image I used 2 flashes off to the left and right low on the water. One was normal white and the one one the right had a red gel attached to further bring out the red colors. Then I placed a blue & white mottled glass plate beyond the lower pan with the 3rd light positioned behind it with a white piece of paper between the flash and the glass plate! Look at the colors in the water foreground, the collision and the backdrop. It all comes together!
TIP: Add a squirt of Glycerin and a SINGLE DROP if liquid JOY soap to the upper water container. This will give good mushroom caps with attatched drops moving away. You will also want to add Glycerin to the lower water container along with your food coloring.
TIP: For the bottom tray, use a NON SHINY BLACK pan. This will keep the flashes from reflecting back into the lens and not cause the pans colors, writing, or texture to influence the image.
Some people use MILK in the upper water container for some very good and interesting results! The KEYWORD here is experimentation!
Some Thoughts on Camera Equipment!
Traditionally, I have always used Canon equipment for my water drop photography, but have totally switched now to my Fuji X Pro 1 camera system. It is smaller, lighter and gives much better images. I wanted to use my Fuji 60mm F/2 macro lens for this but it had several issues:
- It was too close to the water drops and was getting covered in water/food color/glycerin.
- It was subject to a central hot spot (bad one) when using flashes on water! Nothing I did seemed to fix this issue!
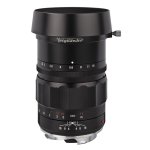
So I got out my Voigtlander 75mm f/1.8 M mount lens, 2 Leica 10mm extension tubes and a Canon 500D +2 Diopter filter and have been using is successfully for quite a while now! I am using the Fuji M to X mount adapter as well. This is a sharp lens with an easy, smooth focusing.
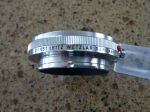
Finding extension tubes was a little difficult for the Leica M mount lenses. Finally, I did find 3 OUFRO / 16469Y extension Rings at Igor’s Camera Exchange as well as on Ebay. But the Ebay versions were easily 2 to 3 times the cost! These tubes are very well made and even though they are bright silver on the outside, they are mat black on the inside where it counts. They are tight and have ZERO camera/lens play!
Now, why use the X Pro 1 with its mechanical shutter release when I could use a Olympus OMD with its electronic one? Asking this question is really asking: Why not allow the TIme Machine to trigger the camera’s shutter? Well, for water drop photography, having the controller trigger the shutter release is not necessary. The normal shutter speed is typically around .5s and since we are shooting in the dark, it is no big deal to set a 1 second exposure and have no impact o the image. What you do:
- Fire the camera shutter.
- Fire the Time Machine.
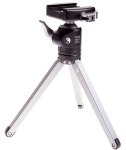
The rest is simply history! But the plain truth of it all is that it simply works! I LOVE the X Pro 1 and lens combination. The camera gives STUNNING images and it is small and light! What more do you need? Being light, it enables me to use a small table tripod from Really Right Stuff that is a joy to use. Complete with a great ball head, the camera is steady and does not move at all.
Ok it is time to talk about the Time Machine!
This controller allows you to control all aspects of the Drip Module through simple push buttons. It is easy to use and requires minimal button pushes to achieve your desired effect!
- Mode. The controller has about 15 modes for different types of photography. For this post, we are interested in Drops.
- Number of Drops. A count of how many drops to make when you press its fire button.
- Drop Size. A timer (in .001 seconds) that controls how long the valve is open thus how large the drop is. You have to be careful with this one because larger drops will move around as they fall and strike off center or out of round!
- Drop Interval. A timer (in .001 seconds) that delays the time between the drops.
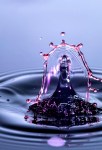
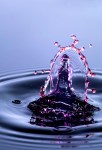
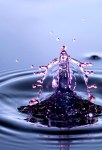
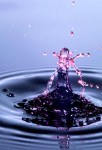
- Flash Delay. A timer (in .001 seconds) that delays the flash firing from the first drop. Normally set to between .115 and .300. By changing this timer you can directly control the state of the collision!
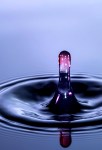
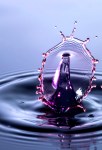
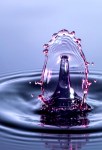
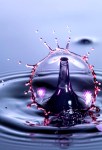
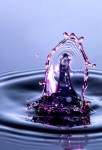
- Advance. An incremental timer counter that will adjust the Flash Delay (in .0001 seconds) from the previous shot. This control will allow you to take a sequence of shots with an incremental Flash Delay and give the ability to see a stop motion display of the collision sequence! (see the end gallery of this post for a 20 shot sequence)
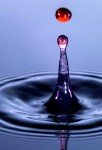
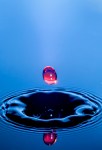
Here is an image of an imminent drop collision. I got this by adjusting the Flash Delay timer down to the point that the first drop had hit the bottom water and bounced back up and the 2nd drop was falling to the point of almost reaching the rising column of water when the flashes fired! The red was obtained by using a red glass background and firing a flash through it towards the drops from behind!
Again please note the mixture of blue and red in the water as provided by food coloring as well as gels on the flash units!
Yes, I realize that this has been a long post. I am going to end it here with a gallery of 20 stop motion images where I set up the Time machine as follows. I hope that you both enjoyed and learned something about water drop photography here! When I setup to do this it is always in my gallery and I always post about it on Facebook as to invite other photographers to bring their cameras over and give it a try! Follow me on Face book at https://www.facebook.com/mark.hilliard.33 to get notified of these photographic opportunities!
Now, On to the sequence shots!
This is a sequence shoot. The Time Machine was setup as follows:
- 19″ Drop from valve to lower water surface.
- 2 Drops
- Drop Interval at .057
- Drop Size at .040
- Flash Delay at .260 for first shot
- Advance at .0010 second. This amount of time is added to the Flash Delay after each shot.
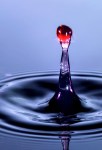
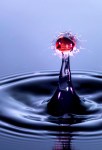
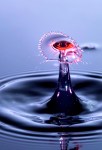
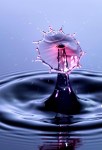
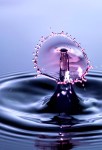
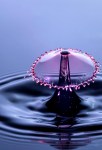
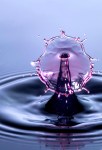
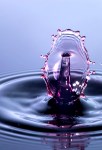
So, here then are a sequence of 20 images taken with the exact same setup of water drops showing the difference made by shifting the Flash Delay timer UP by .001 second between shots!
Please, let me know what you thought of this post!
- 1
- 2
- 3
- 4
- 5
- 6
- 7
- 8
- 9
- 10
- 11
- 12
- 13
- 14
- 15
- 16
- 17
- 18
- 19
- 20
- Really Right Stuff Table Top
- Leica 10 mm M to M extension tube
- CV 75mm f/1.8
- About to happen…
- Red & Blue water mixing in a collision!
- My VERY cluttered setup!
- The Complete Setup, Uncluttered
- The Time Machine
- The Perfect Bell
- Bombs Away, Red upper water source, Blue lower!


![photo[2]](https://markhilliardatelier-blog.com/wp-content/uploads/2012/10/photo21.jpg?w=593&h=568)


Pingback: A Treatise on High Speed Water Drops with the Fuji X Pro 1 & Voigtlander 75mm f/1.8 | Thoughts about the new Fuji X Pro-1 | Scoop.it
Pingback: A Treatise on High Speed Water Drops with the Fuji X Pro 1 & Voigtlander 75mm f/1.8 | Fujifilm X Series | Scoop.it
Great post, Mark. Sorry i missed your demo the other day but I had to be out-of-town. Thanks for you time and effort in posting this.
Thanks Bill, they are a lot of fun!
Thanks Bill, they are a lot of fun!
Pingback: A Treatise on High Speed Water Drops with the Fuji X Pro 1 & Voigtlander 75mm f/1.8 | Mark Hilliard | Fuji X-Pro1 | Scoop.it
Thanks for sharing your tips. Very interesting article:)
Thanks and you awe quite welcome!
Thanks Mark. This is great info. I hope I have some to show you someday!
Joanne, you are quite welcome! If you get into town give me a call and we can set it up for you to play!
Pingback: A Treatise on High Speed Water Drops with the Fuji X Pro 1 & Voigtlander 75mm f/1.8 | fujifilm x-pro1 | Scoop.it
Pingback: A Treatise on High Speed Water Drops with the Fuji X Pro 1 & Voigtlander 75mm f/1.8 | x-pro 1 photos and tips | Scoop.it
Pingback: Putting the Fuji X-E1 Thru Its Paces… | Mark Hilliard Atelier's Blog