
830nm Infrared Conversion on the Fuji X100s
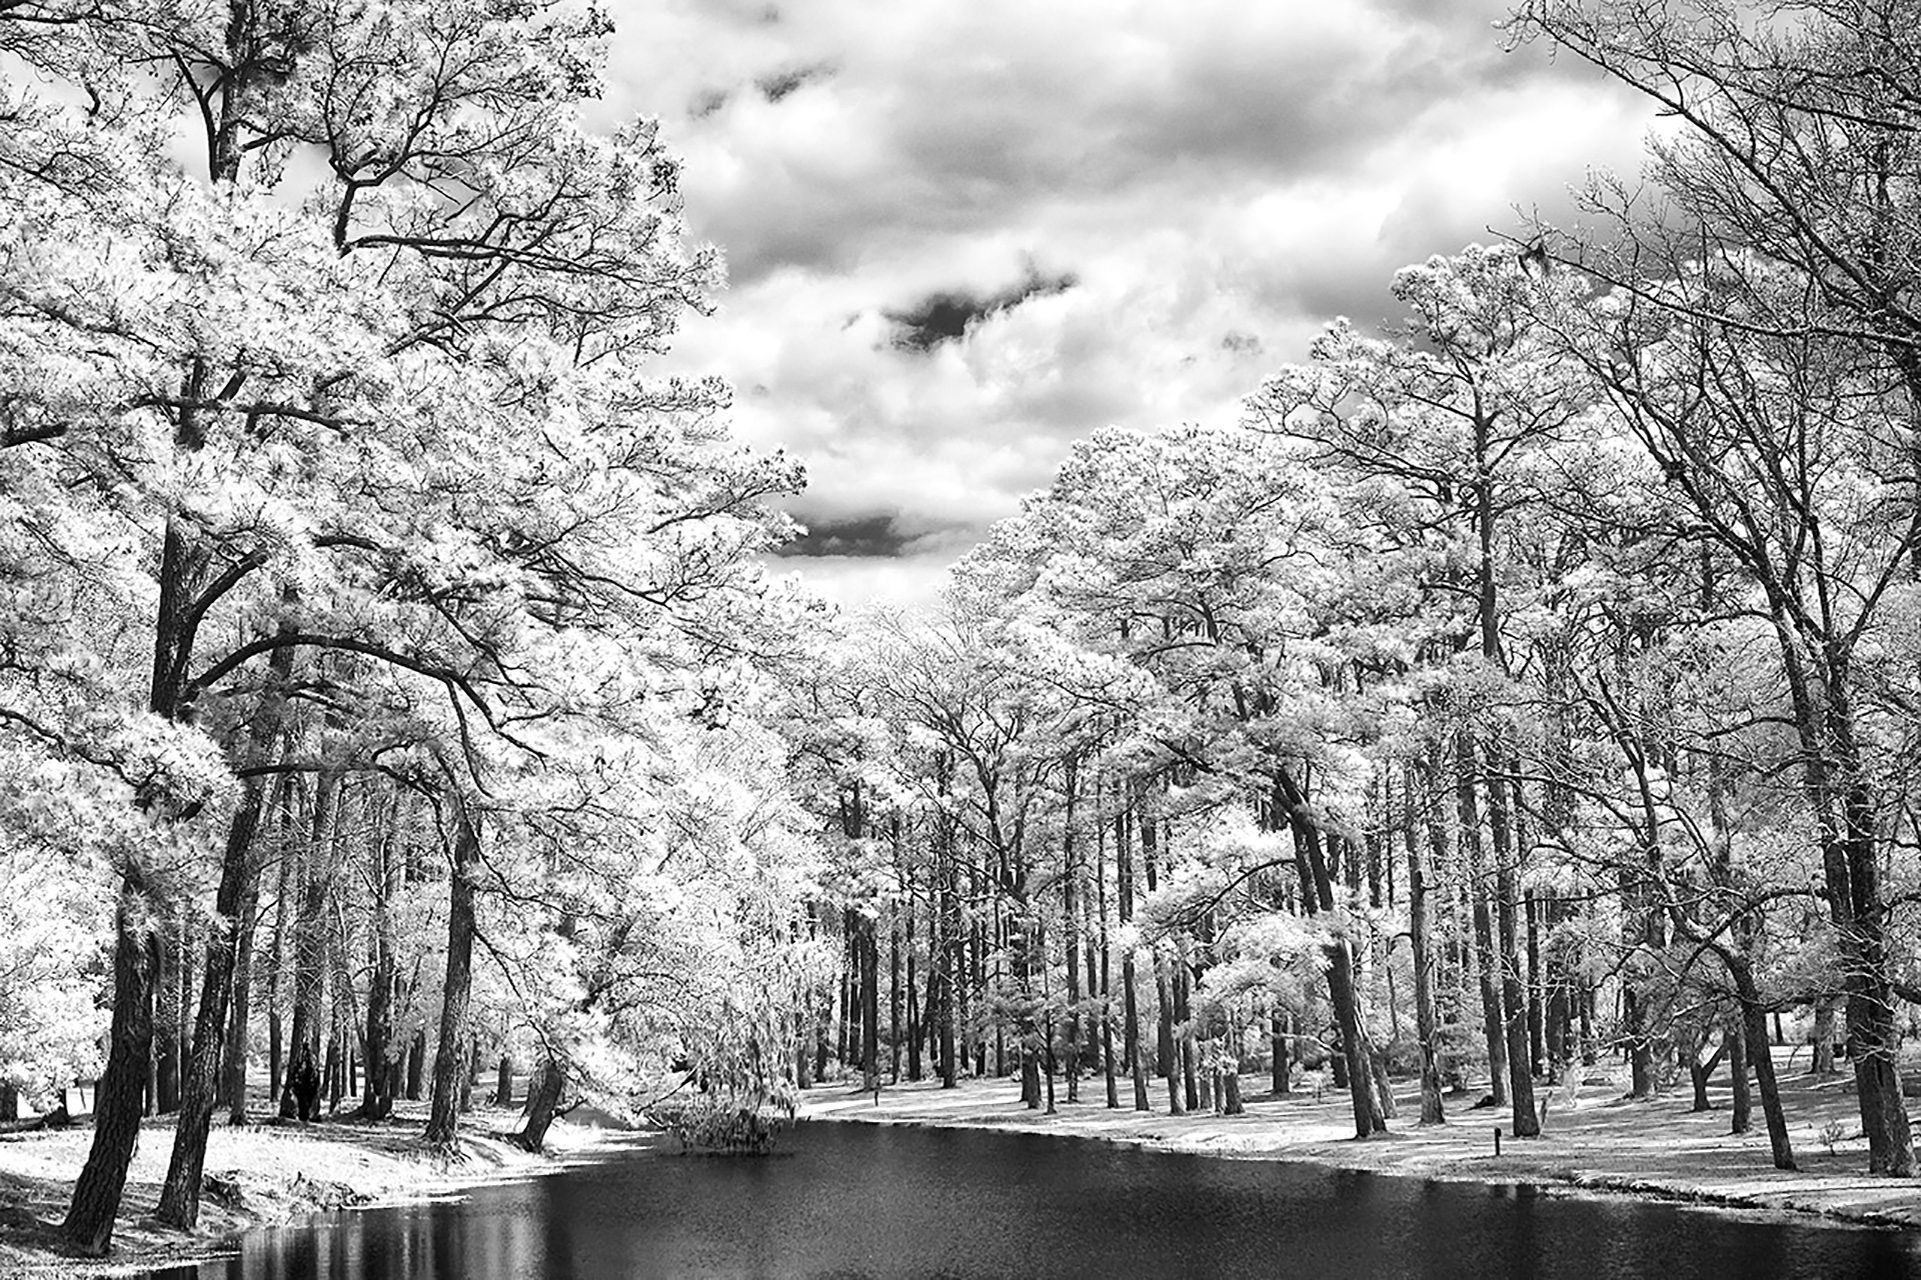
Image 1: Oak Reflections, 830nm
Infrared photography with digital camera systems have been around for several years now and a lot of photographers have embraced this different spectrum of photography. Infrared is wildly popular in photography and fine art galleries now and my workshops are full of lots of talented photographers who desire to learn or expand their infrared skills.
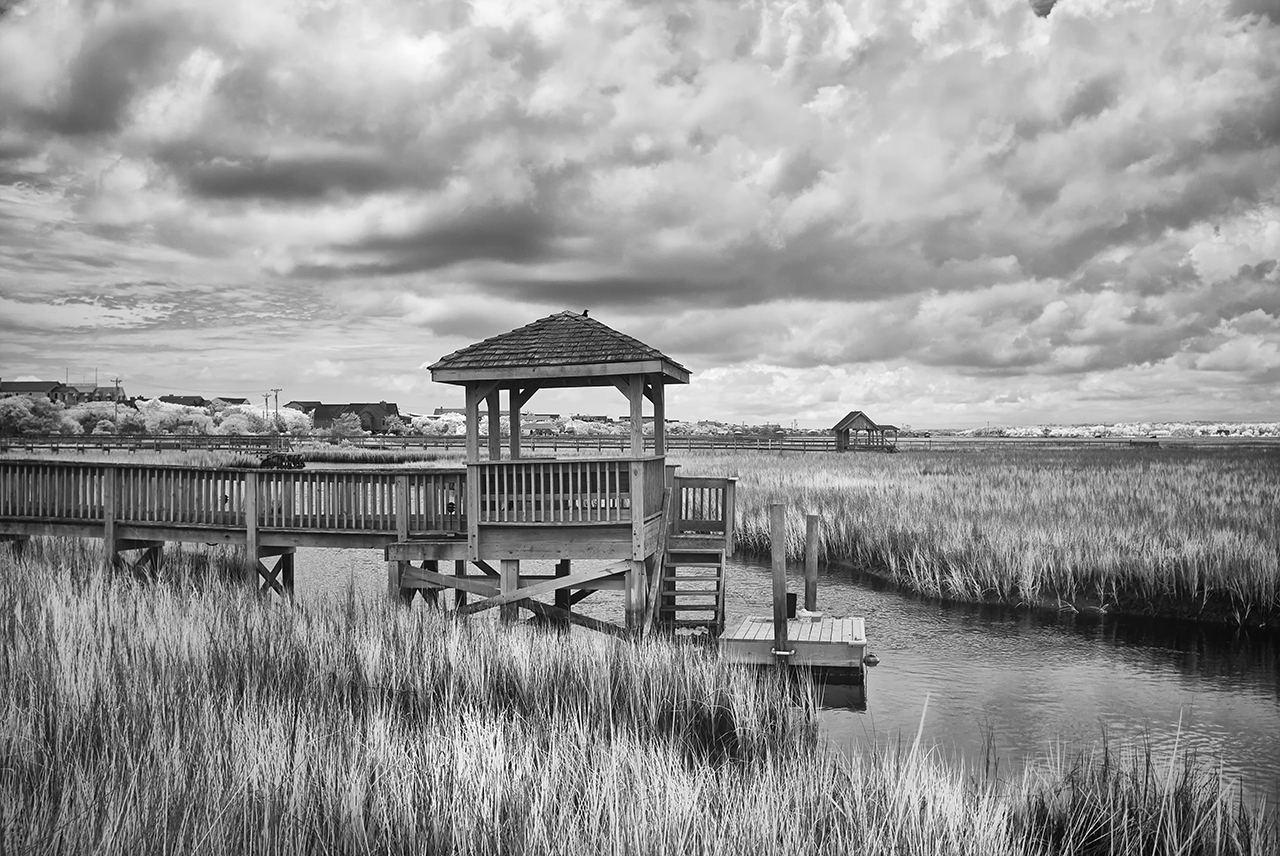
Pawleys Marsh, 830nm X100s
The typical starting point for most infrared shooters is 720nm (standard) or 590nm (Goldie) IR conversions. We have all seen the amazing color images that these two conversions can generate. As previously discussed, we always process not only in Faux Color, but for B&W also. The B&W images are usually more accepted among the arts community though.
Image 3: Pawleys Marsh, 720nm
But did you know that with each increase in the IR Nano Meter band (the frequency goes down as the number goes up) that the contrast levels go up in B&W as well? This increase in the NM band starts to generate the most stunning, contrasty, ethereal images that have to be seen to be believed! The higher you go in the NM range also increases the white “glow” around the leaves and grass and the blue sky takes on a deep black. This effect is named the “Wood Effect” after doctor Robert Wood who discovered it 1910. What happens is that the leaves get a bloom or glow of white around them that generate that wonderful ethereal feel in the image. Take a look at image 1 which was taken at 830nm. Do you see the dark black where the blue sky is? Look at the leaves on the trees and how they take on the pure bright whites! Now compare that to 720nm image above in Image 2. The most striking difference is the gray sky rather than black, plus the leaves are grayer rather than white.
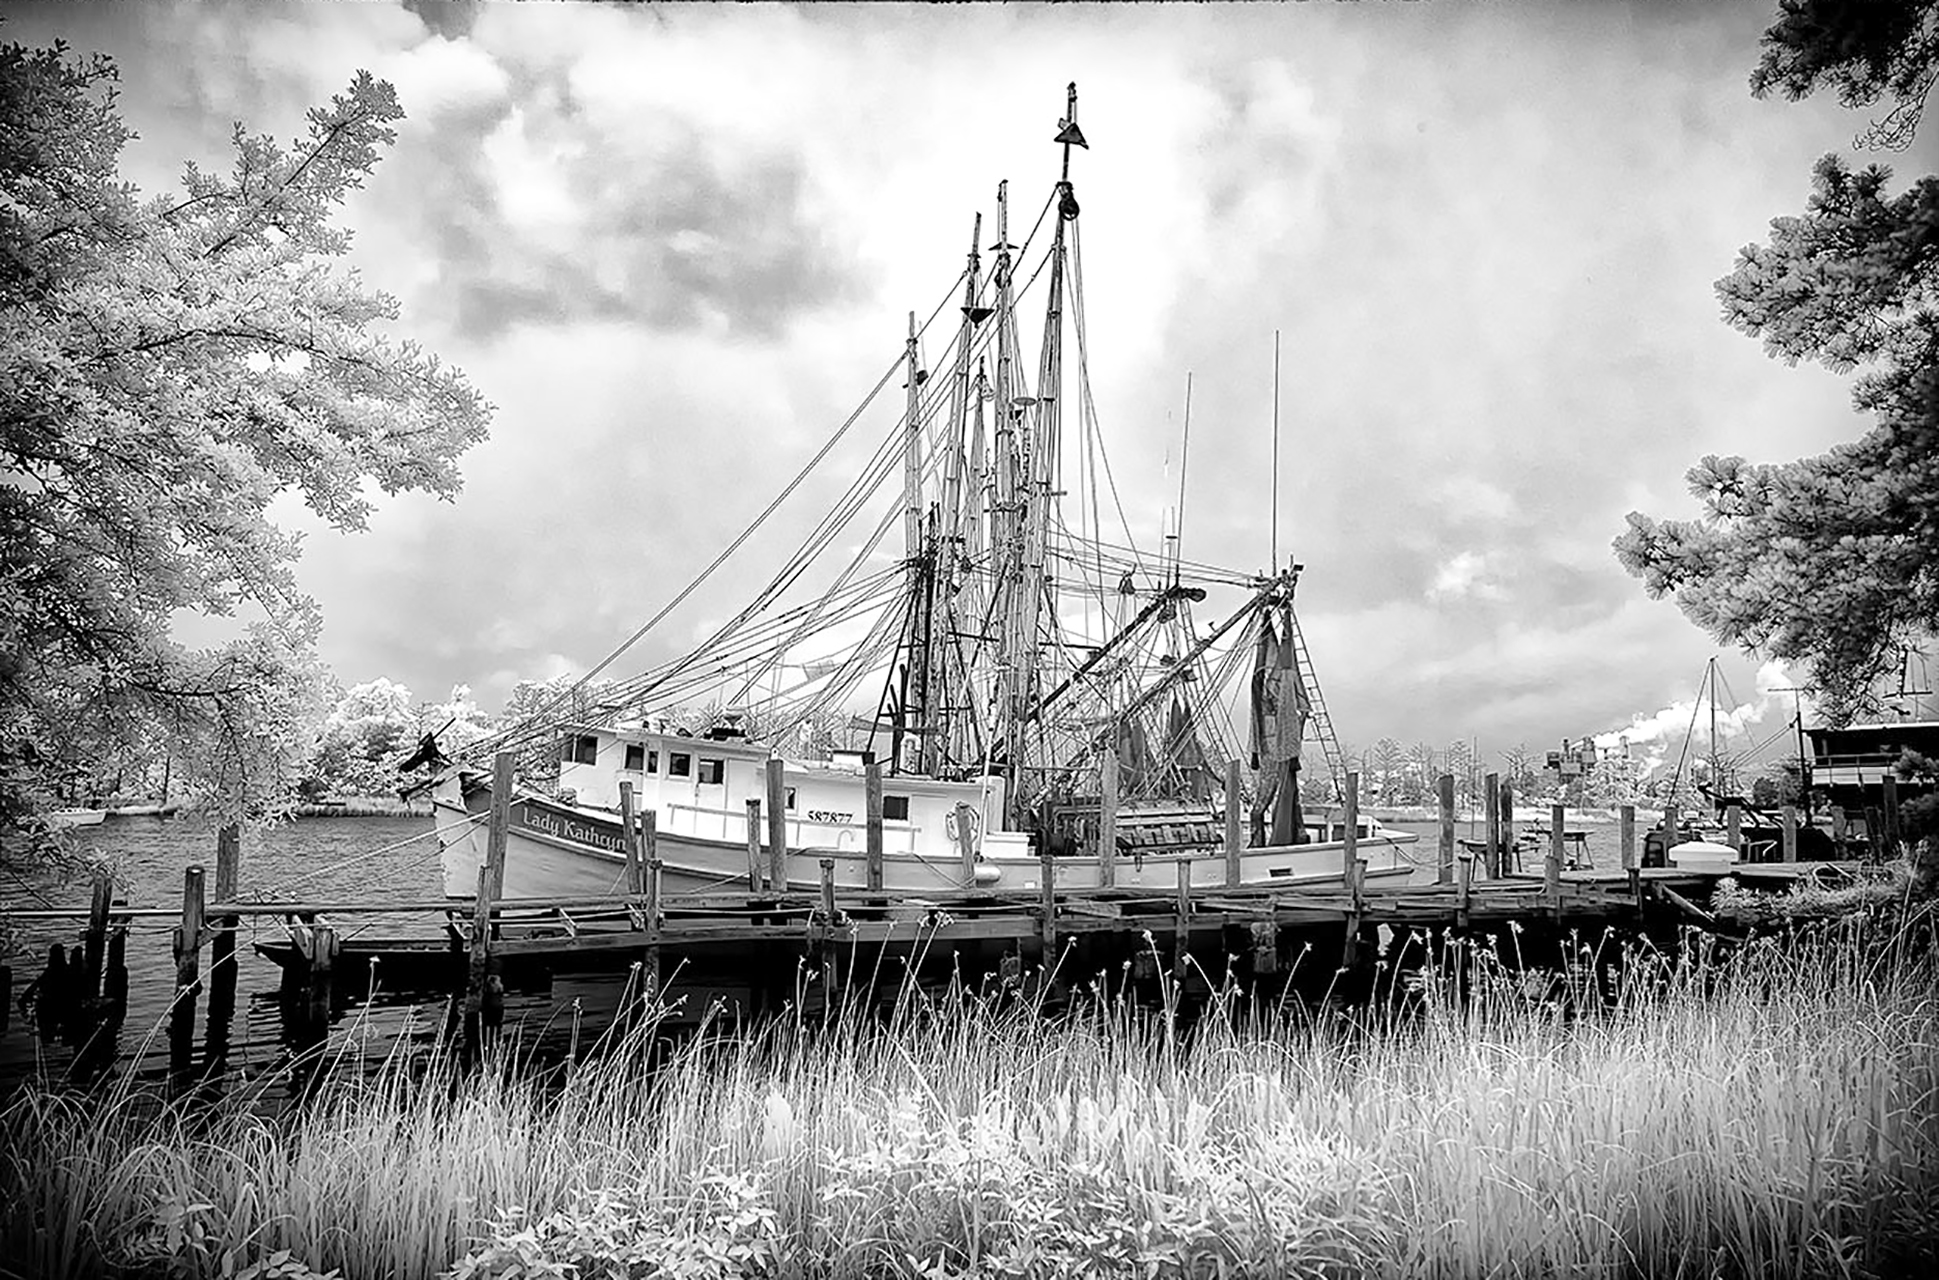
Image 3: Shrimp Boat at 830nm
I would like to suggest that if you shoot in IR or are interested in doing so then you should consider a deep contrast IR conversion beyond 800nm. There are a lot of benefits to be found in that spectrum. This new spectrum sees ONLY in B&W, which will force you to visualize your scene in B&W.
The benefits to a Deep B&W IR conversion are:
- Extremely sharp images.
- Wood Effect bloom on plant leaves.
- Dark moody skies.
- Only works in B&W
- Post processing is easy and quick using Nik Viveza and Silver EFX for texturing and contrasts. Photoshop CC, Elements or Lightroom, they all work for Deep B&W IR!
- White Balance is easy.
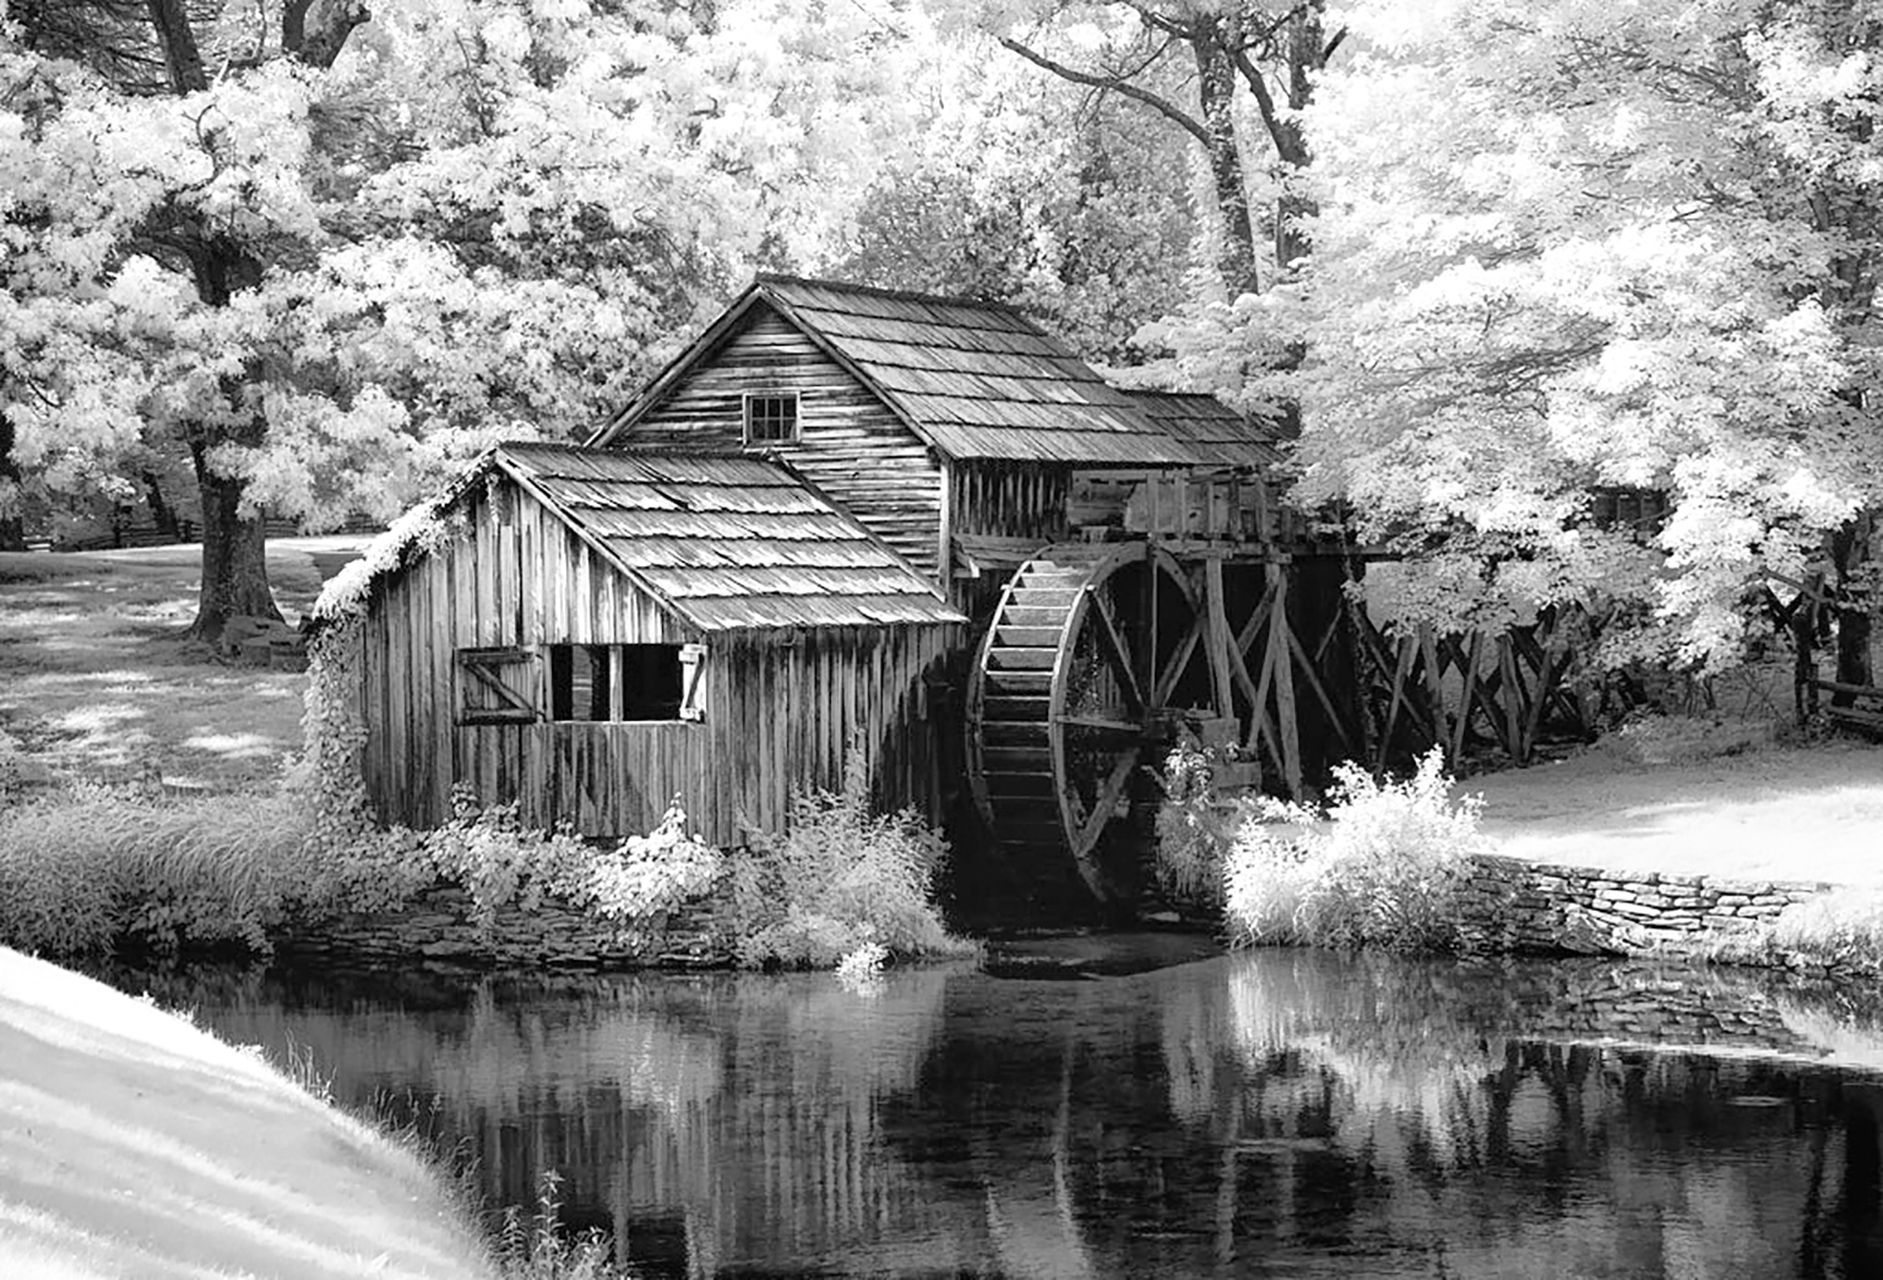
Image 4: Mabry Mill, 830nm
There are several ways to have a camera converted to deep B&W above 800nm.
- The easiest is to simply take ANY digital and have it converted by removing the internal UV/IR blocking filter and replacing it with a 800nm, 830nm or a 850nm internal filter. With this type of conversion you can use any digital camera type or style because only the sensor will see the infrared light and you will either see the scene via the optical path or via a live view from the sensor. Typically, this type of conversion should cost around $300 to $350 thru any of the normal conversion companies.
- If you are shooting a Full Spectrum or Dual Spectrum conversion then you can purchase and attach a B+W 093 830nm filter to your camera lens! This filter blocks ALL visible light so you MUST have a camera with a live view only to use this otherwise you will never be able to see thru the optical path to focus and compose. The Full Spectrum camera is one that has had the internal UV/IR blocking filter removed and replaced with clear glass and the Dual Spectrum conversion is where the internal UV/IR blocking filter is removed and replaced with a strong UV filter.
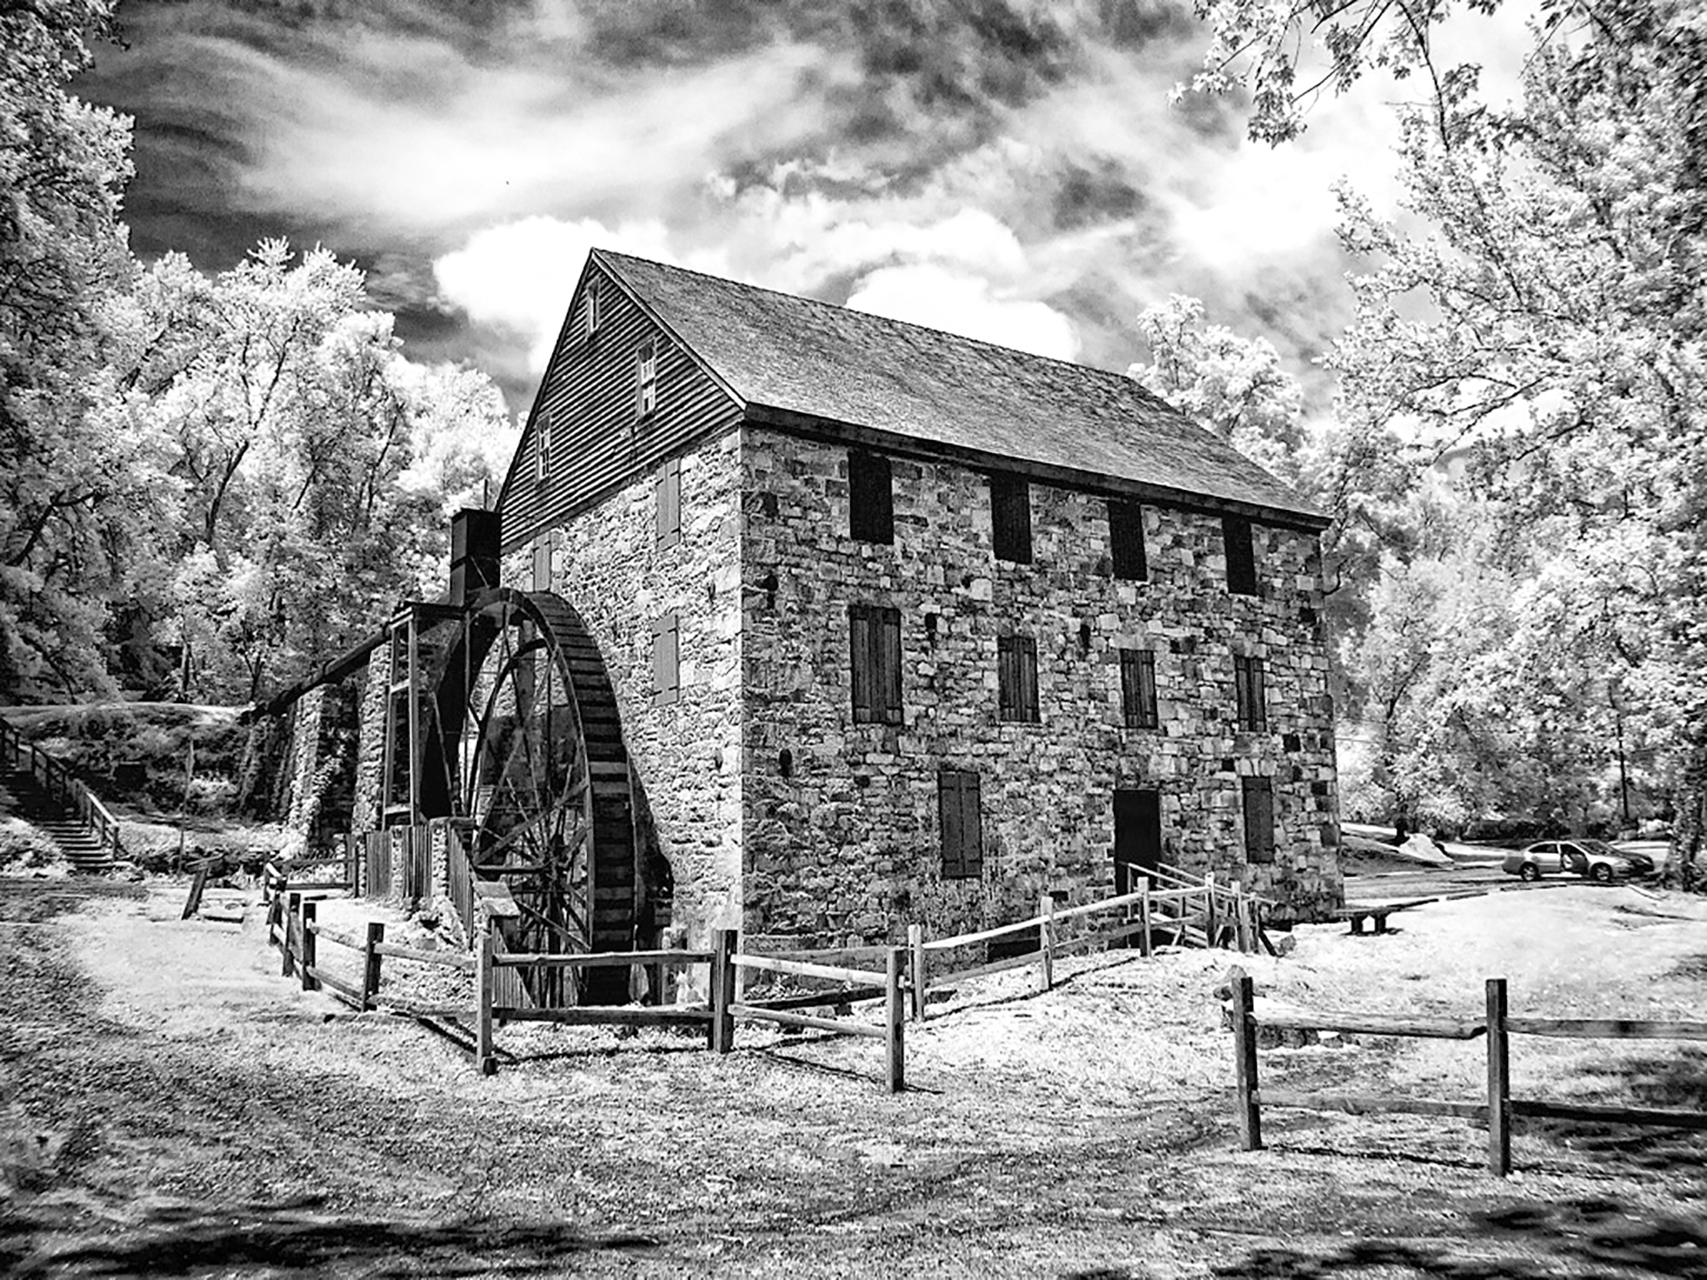
Image 5: Rock Run Mill, 830nm
With either the full or dual conversions you can shoot every of the following light spectrums:
- Ultra Violet Full Spectrum *
- UG1 UV & IR Full Spectrum *
- 047b In Camera Faux Color Full Spectrum *
- 530nm Faux Color Full & Dual Spectrum
- 590nm Super Color Full & Dual Spectrum
- 630nm Pinkie Faux Color Full & Dual Spectrum
- 665nm Enhanced Color Full & Dual Spectrum
- 720nm Standard Full & Dual Spectrum *
- 800nm B&W Full & Dual Spectrum *
- 830nm Deep B&W Full & Dual Spectrum *
- Normal Visible Color Full & Dual Spectrum
* Requires Live View capable camera
Now, Normal Visible Color simply means that your camera can take normal color images as it did from the factory! This means that you have a multi purpose camera that can take anything.
The only issue is that if you have a Full Spectrum conversion you need to stack a B+W 486 reflective IR/UV blocking filter on your lens with a LDP CC1 absorption filter to get back to good normal color.
For the Dual Spectrum conversion you only need to put the B+W 486 reflective IR/UV filter on your lens and it is back to normal color!
Disadvantages to the Full or Dual Spectrum Camera Conversion:
- More expensive to convert.
- External filters for each of our lens sizes.
- Color filters (530 – 665nm) are not expensive but the B+W 093, B+W 486 and the LDP CC1 filters are VERY expensive.
- Your camera MUST have a live view mode to focus and compose.
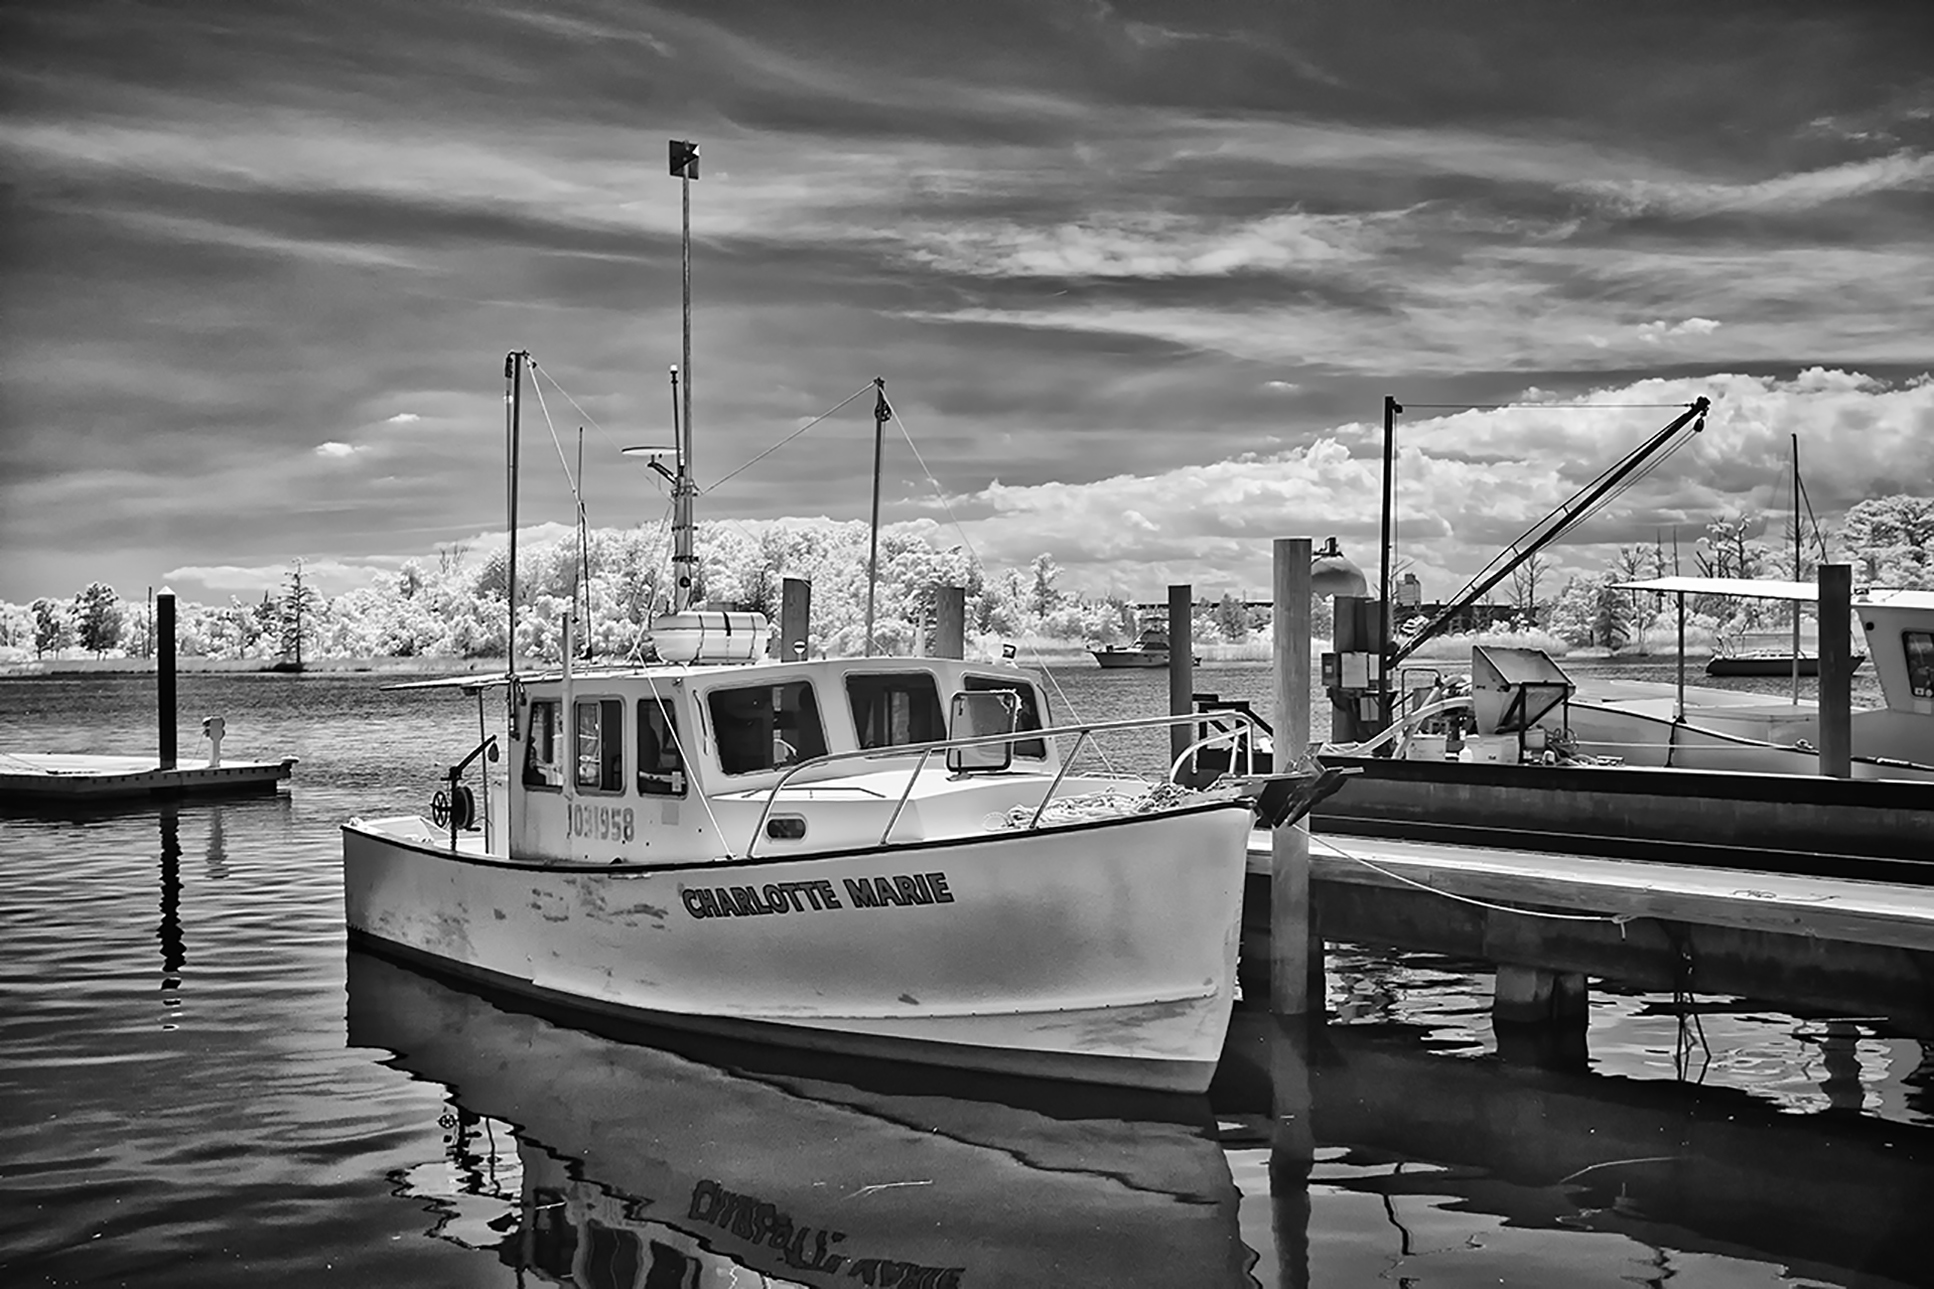
Image 6: Charlotte Marie, 830nm X100s
I have several cameras converted to above 800nm and several full spectrum and a new dual spectrum converted Fuji X100s. The images that I am getting from the Fuji with a B+W 093 830nm filter are the sharpest and most stunning deep IR images that I have ever produced! But that doesn’t mean that you need to go out and purchase that one. Any camera with live view will work great with the 830nm spectrum. Keep in mind though, that the more modern your camera is the higher the usable ISO will be!
You can contact Mark at his web site at http://www.MarkHilliardAtelier-blog.com for information on his Color & IR workshops, which he teaches with Jamie Davidson, and for his IR Post Processing DVD Tutorials!
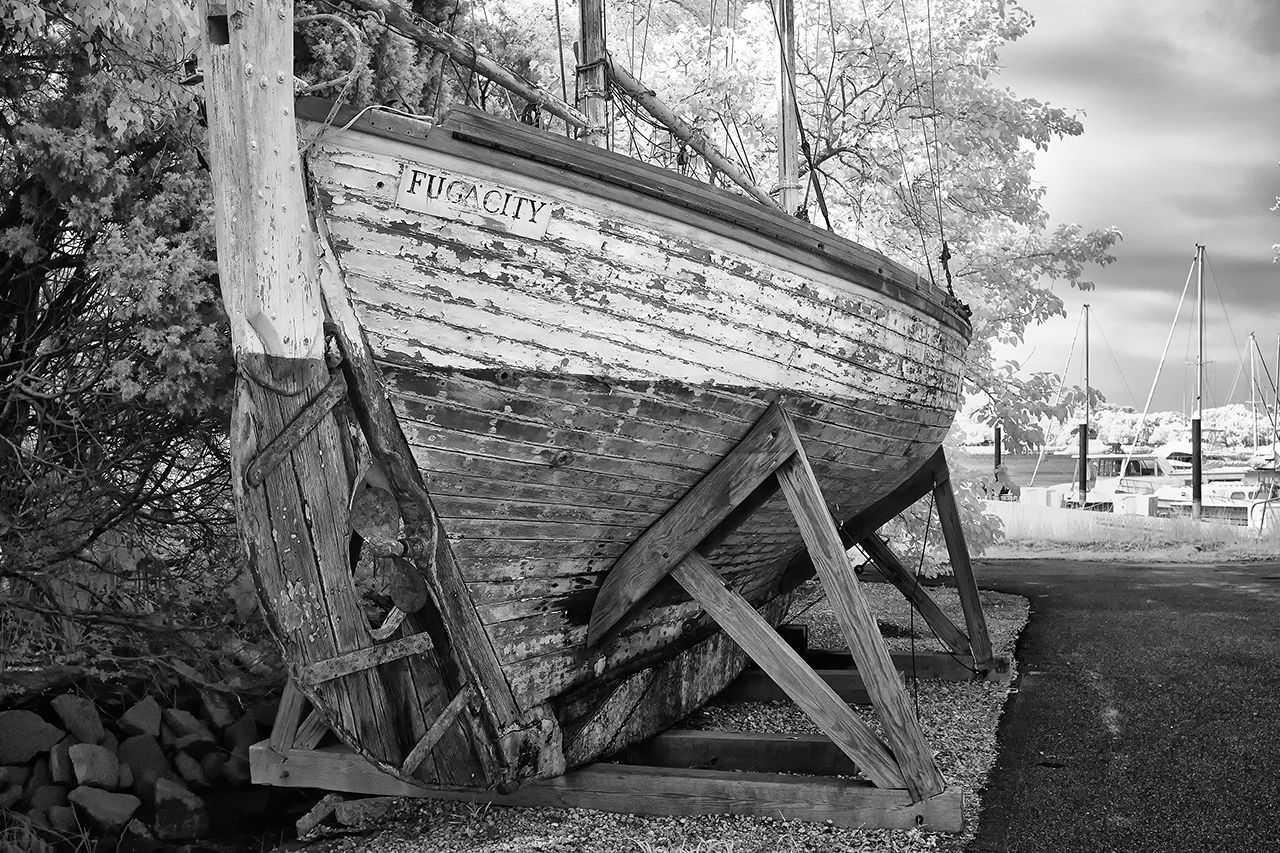
Fuga City, 830nm, Georgetown, SC

Wonderful, especially shrimp boat.
Thanks, it is a lot of fun to play with!
Thanks Mark for spreading Ir and for the info.Been thinking of getting my old D200 converted to 850nm,I do a lot bw from my 665m D200.
You are quite welcome!
Pingback: Going to the Dark Side: 830nm Infrared and the...
Mark, do you have a “steps” for post processing these 830’s, or do we just wing it through Nik?
For now, just wing it. It is pretty easy but I will do a detailed recipe post in a few days.
Nice article, Mark. 850 doesn’t seem to get the attention that 720 and 590 do, and as you have shown, it makes for some great b/w images with a unique look. My D300 is 720 and I simply add an 850 screw-on filter and I have the benefits of both worlds. I have noticed that highlights tend to blow out easier on 850, so I really have to keep a close eye on the histogram. But, maybe that’s just me and its not a systematic issue. I do know one thing for sure, seeing your lovely coastal shots has got me hankering for a tide water trip.
Yes, I did the same Frank with a 720nm Fuji X Pro 1. But I have to tell you that this one is sharp as all get out! Remember our biggest workshop of the past several years is the Grills and Mills workshop in September!!
I loved Image 3: Shrimp Boat at 830nm. GREAT PICTURE !
Thanks!
Apart from the infrared matter, I is every day more difficult to find well composed pictures, congratulations.
Thanks for the kind comment!
Hello Mark, am hoping to take stunning images like yours. I have just had my Fuji X-E2 back from ACS having ordered its conversion to 830nm and have taken a sample pic, RAW as recommended, Custom WB on my lawn, and when I look at the Raw file in Lightroom it is toned. I was expecting it to be completely B&W. I did a channel swop in Photoshop and the red sky turned blue and the leaves came out pink. It is too late to contact them at this moment but I suspect they have installed a 720nm in error. My quick question is – should my Raw files be tinted?
At 830nm your raw files should be “dirty” looking or muddy. A channel swap should do nothing. I suspect that they installed the wrong filter also. Send me a raw converted image with no processing as a jpg and I will tell you what they did. BUT, do not despair, you can purchase a B+W 093 and put it on your lens to make your camera deep contrast B&W. First send me the file!
Is there any benefit to be gained using a 850nm filter rather than a 830nm filter?
Not really. They are very close.
Hi Mark. I travel alt n business and have found the x100f makes a great travel camera for me. I could slip a x100s in and have it converted to 850nm. It would be a very flexible kit. The x100s is very reasonable now and dont think i would need the newer sensor for IR. Still think it is a worthy ir camera?
Yes, it makes for an amazing conversion. Make sure you get the AR coating on your conversion from Kolari to keep hotspots under control!
Hi Mark, Quick update. I have pivoted from the x100 series to the xe4 and m mount lenses which also do well with IR. Just sent off an xe1 to be converted to 830nm. Headed to the Badlands in a month and excited to try it out. This is a tiny kit of five lenses, two bodies, a small flash and trigger all in a hadley small bag. I enjoy your work. Have you ever shot the Falling Spring Mill in Van Buren, Mo? I did some IR shots and a sunrise there last summer. There is a waterfall behind the mill. Thanks again for the inspiration.
Paul, thanks for the update! I always liked using the X series cameras. I am playing with one of the new mirrorless Canon systems converted to full spectrum now from Kolari
This is a very inspiring article.
I want to know:
Thinking about converting the Fujifilm x100s after this article here.
But if:
720 nm – will there be hotspots even with the AR?
If …..850 nm – 1) Fewer hotspost than 720 nm ? and important: Longer exposure ?
Thanks from Denmark
Steinar
The hotspots are totally dependent upon the lenses used rather than the camera body. I am getting ready to convert a Fuji GFX50r to 720nm. There is a way to defeat hotspots on any lens. Go to my youtube channel and look there on using a special white filter to stop hotspots totally but know that you HAVE to use Capture One Pro software to enable this option…
I had the x100s converted a long time ago and had very little issues with it I believe, but it has been a very long time…..
1) It is the Fujifilm x100S, but does the 850nm gives longer exposures ?
2) About your youtube – hotspot removal with capture one pro ? – Is it this:
“Intro to Basic Infrared Post Processing with Mark Hilliard” – if not, can you ploease give a link ?
Thank You