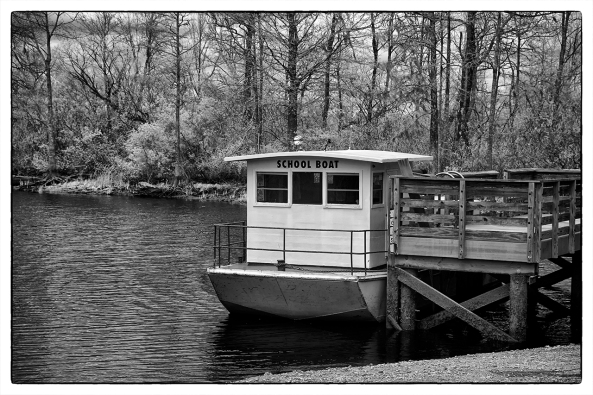
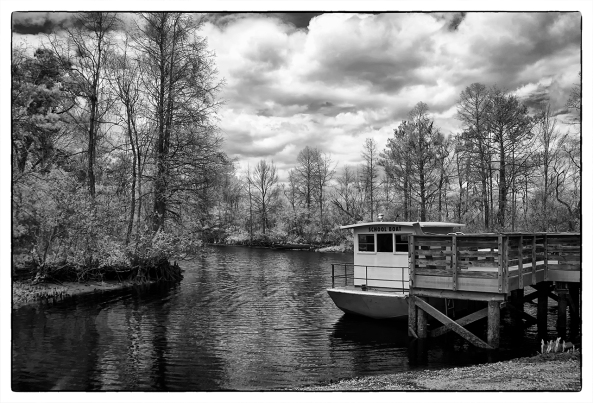
The Accidental Photograph!


Sometimes even the best of us get surprised!


The Carson Elizabeth

Fuji GF670 Medium Format

Fuji GF670

Now, here is one image that I REALLY like! This is a 6×7 negative from my Fuji GF670, a folding rangefinder camera with a really bright rangefinder and a fixed 80mm Voigtlander lens shot on Rollei IR400 film and processed yesterday in Xtol stock and wet mount scanned today… 

Sounds normal right?   Well this was a VERY OLD roll of film, and has been sitting in my shop for over a year marked “Stand Develop” ( a special developing process where you use Rodinal 1:100 in the tank for an hour with no agitation that works on all B&W films of different ISO values) because I forgot what ISO I shot it at!  I actually got tired of seeing it in my to do can in the fridge and yesterday threw it onto a 2 film reel with a roll of  Ilford FP4+ film and set up my Filmomat for the FP4! The FP4+ turned out as expected,  but the IR400  was a complete surprise.   

Carson Elizabeth, Shrimper in Georgetown, SC on 120 film

There was only one good image from the IR400 but OMG was it ever good! Just looking at it gives me the hot sweats!! As I looked at the processed roll of IR400 I realize that I had changed ISO mid roll and that is why I marked it stand. The other images on the IR400 were not worthy of scanning  but this single image still made it a  big win for me!

Oh, for the curious, my FIlmomat is a computerized film developing machine that is the tabletop sized and will do 35mm, 120, 4×5 and 5×7 films.  For the 120 it will do 2 rolls at a time.    Here is a video that shows it in action…


Data: GF670 with 80mm lens and Rollei IR400 with no filter processed as FP4+ yesterday and wet mount scanned today.

Goodness, I had forgotten how difficult the film is to handle with its very thin film base!

For those of you who are interested in the fine art of FILM PHOTOGRAPHY AND SELF PROCESSING, join me on my new G+ page HERE and learn and share!

Using M mount glass on the Sony A7rii camera


The AMAZING just got better….

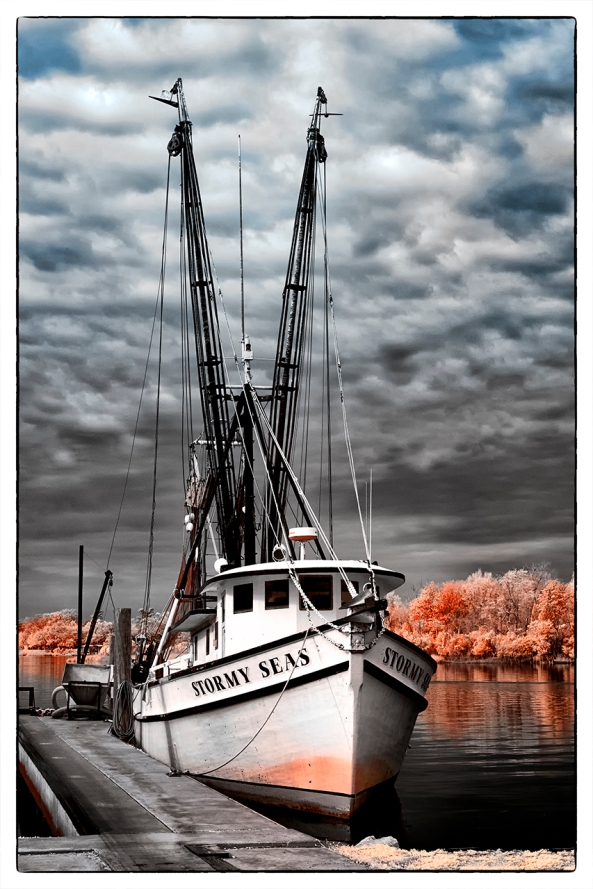
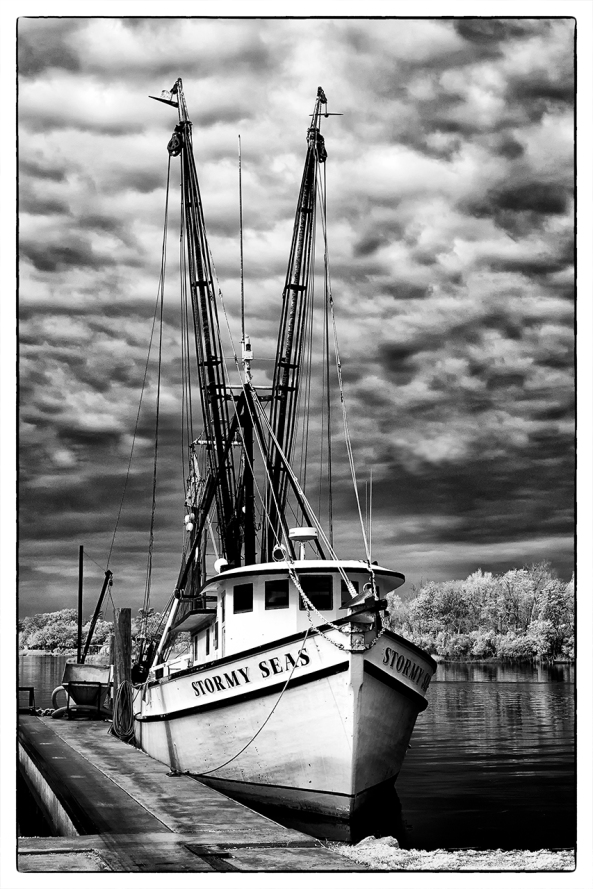
Stormy Seas with the Voigtlander 12mm Ultra Wide Heliar M Mount Lens and the Techart Auto Focus Leica to Sony adapter

Stormy Seas with the Voigtlander 12mm Ultra Wide Heliar M Mount Lens and the Techart Auto Focus Leica to Sony adapter

Look closely at the image above.  It was taken with a Voigtlander M mount 12mm Ultra Wide Heliar lens and the Techart M to FE AUTOFOCUS adapter on a Sony A7rii camera. The cleat on the bottom right is about 6 inches from the front of the lens!  The color rendering is amazing and there is very little distortion that is normally found with an ultra wide lens!   I can hear you asking how I accomplished this!

I recently picked up the Techart M to FE Sony mount adapter for my Leica and Voigtlander lenses.  It has been my desire to use them on the Sony A7rii, A6300 and A6500 cameras.

The Techart auto focus adapter is amazing. I actually moves the lens in and out to get a sharp focus.  It has several rules that you must follow to use it and as long as you do it will provide great service.  It is quite fast!

  • Use a center focus point on the camera
  • Set your camera aperture to f/2 and leave. It there
  • Set the real aperture directly on the lens.  
  • Don’t try to focus with the lens set to f/22, keep it around f/8 or f/11
  • The Exif data will shot f/2 but the exposure meter will correctly meter the subject.
  • Don’t try to use a heavy lens on the adapter unless you support it.

12mm Voigtlander M lens with the Techart autofocus M to FE adapter

12mm Voigtlander M lens with the Techart autofocus M to FE adapter

Here is a link to a short video demonstration of the Techart M to FE adapter on my Sony A7rii:


B&W work with this lens as well as my other Voigtlander and Leica M mount lenses are just as sharp weather in color or monochrome!

Stormy Seas with the Voigtlander 12mm Ultra Wide Heliar M Mount Lens and the Techart Auto Focus Leica to Sony adapter

Stormy Seas with the Voigtlander 12mm Ultra Wide Heliar M Mount Lens and the Techart Auto Focus Leica to Sony adapter

I also have and use a Metabones M to FE adapter which gives the same results but with manual focus only.   Sometimes manual focus is necessary depending upon your subject but reguardless of focus type both adapters and all of my M lenses work wonderfully on the A7rii camera system!

Stormy Seas with the Voigtlander 12mm Ultra Wide Heliar M Mount Lens and the Techart Auto Focus Leica to Sony adapter

Stormy Seas with the Voigtlander 12mm Ultra Wide Heliar M Mount Lens and the Techart Auto Focus Leica to Sony adapter

If you have a selection of M lenses then the cost of a M to FE adapter is well worth the money.  But I am VERY impressed with the new autofocus adapter!


Please let me know what you think!


B&W Camera Systems: Functionality/Creative Power/Affordability/Film/Digital ??


Getting your BEST B&W image!

Outer Banks Pier, Monochrom Camera System

Outer Banks Pier, Monochrom Camera System

I wish to share some images and thoughts from the Leica M Monochrom B&W ONLY camera system. I know that it is NOT FILM and a very expensive camera system, but it comes as close as you can get in a wonderfully usable B&W only system!  

Most people will take a color image then  convert  it to B&W in post processing but it will never be the same as actually shooting in B&W with a digital or film system!  Yes you can get close but you loose the amazing gradations and tonality that is part and parcel to world class B&W images.

Dugger Creek Falls, Linville, NC M Monochrom

Duggers Creek Falls, Linville, NC M Monochrom

The Pier on the top, is in the Outer Banks and is a 4 min exposure using a Leica Elmerit 28mm lens and the creek below is is in the New River Gorge in West Virginia. It is Dunloupe Creek and a 8 second exposure using the AMAZING 50mm Summilux lens. As you can see, the graduations and clarity are simply amazing. The water takes on a distinct Platinum tonality!

Why am I showing you these? Well at the end of the post I will give you a link for 2 videos where a Fuji X100T and a Leica M are compared for street photography and for a discussion on the Leica M B&W. The videos are  quite entertaining and shows why sometimes a more expensive camera can be worth the money…

Sometimes!

Dunloupe Creek, New River Gorge WV, M Monochrome

Dunloupe Creek, New River Gorge WV, M Monochrome


It can be very hard balancing the desire between camera systems and affordability, but sometimes, with SPECIAL cameras the money takes a back seat. I own 3 Leica camera systems, and 1 of them I could have done without (Leica M240), another is an amazing film system (Leica M7) and then there is the M Monochrom. The Monochrom is scary amazing with crazy good B&W output to even consider shooting color then converting. I have NEVER considered the money spent on it to be wasted! In fact, I am considering selling/trading the M 240 but will keep the Monochrom and M7 film body along with most of my Leica and Voigtlander glass.

Glade Creek Grist Mill, Babcock State Park, WV, M Monochrome

Glade Creek Grist Mill, Babcock State Park, WV, M Monochrome

For me shooting in B&W is a soul centering event. I take it very seriously and slow. When you consider how working in Monochrome strips away the confusion of color leaving the soul of the image then you can understand why I am looking for the very best way to capture the best possible image.  

  • Shooting in color then converting to B&W works but is a compromise and will only give you a compromise image.
  • Shooting in film generates a purest form of B&W image and by far is the best way to do it but requires extensive time for setup, capture, development, wet scanning then printing! One roll of 120 film in the 6×7 format will generate 10 images.  Processing takes about 45 min then it has to go into a film dryer overnight.  Lastly, comes wet mount scanning which can take 1/2 hour per exposure.  Now, I do not scan every image, I choose the very best images from the roll (usually 3 or 4) and only scan those.  All in all there is about 8 hours of work involved with that single roll!  It is a slow process to be sure but very fulfilling and leaves me with a great sense of inner peace. 
  • Now, along came the M Monochrom camera from Leica, a full frame 19 mega pixel sensor with NO COLOR FILTERS over the image wells. This means that there is no anti-aliasing filter, and no brayer array.   So effectively you get a 19 x 3 megapixel image (no brayer layer means every pixel well generate a true monochrome data value different from its neighbors!)  which is crisp and has film like gradations  that are difficult to differentiate from a film negative!
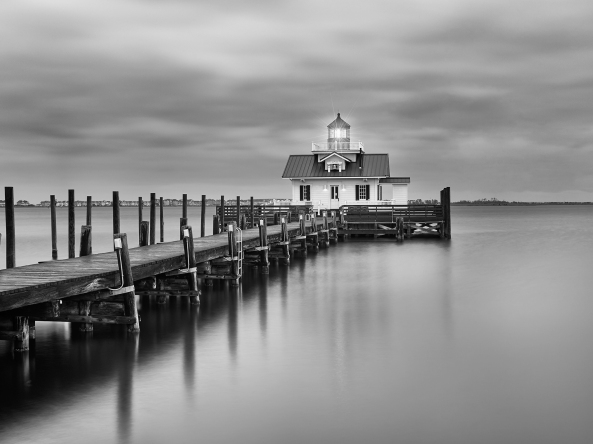
Roanoke Marsh Light, Outer Banks, M Monochrom

Roanoke Marsh Light, Outer Banks, M Monochrom

Aside from doing all of this in film (which I still work in all of the time) the M Monochrome (or its sisters) is the ONLY GAME IN TOWN! Hence, the cost of the system takes on new meaning since it is such a specialized digital system!

Sometimes I will put the film away and take out the Monochrom system.  It is not quite the same as film in the overall process but it certainly is when the finished products are compared!

This is something to consider…

Here are the video links:


Going Home to Mama…. Returning to Film!


The joys of returning to our photographic roots…

Pier

Murrells Inlet Fleet, Polaroid Type 55 4×5 film, Wet Mount Scan

Have any of you considered film photography?

There is something about working with film that is very calming which can center one’s soul allowing you to really connect with your art. For me it was like going home to Mama.  The feeling of working with your hands as part of creating your art will make it more involved and enable you to to really influence the hidden nuances in your work. It will add a bit more complexity to your workflow but trust me it is worth the effort.  The single largest change is forcing you to slow down in your creative process, it forces you to really consider every part of your workflow. It really is not any more difficult than digital photography, but it is a bit more involved.

Polaroid 900, Tmax 100 4x5 @ 64, Perceptol

Polaroid 900 with a Fujinon 150mm lens, Tmax 100 4×5 @ 64, Perceptol 1:1 developing

Take a really close look at the details in this image, click on it and look at it in the full screen mode.  Look at the GEARING on the edge of the wheel.  The detail there will take your breath away!

Film Cameras

Olympus XA 135mm

Olympus XA 135mm

I have way too many film cameras to list them all, some really small like the Olympus XA which is the worlds smallest 35mm rangefinder and a joy to use.

I also have an Olympus RC 35 camera that is another fixed lens rangefinder. It is simple and fun to use and can be found for very little money.  I have mine rebuild and given a bright blue suite that suites it quite well!

My Custom Olympus 35 RC Film Camera, one of dozens of film systems I shoot.

My Custom Olympus 35 RC 

My Leica M7 Film Body

My Leica M7 Film Body

My last 35mm camera system is a Leica M7 system. It has interchangeable lenses and is one of the best built camera systems that I have.  Couple it with the world class Leica lenses and you have an unbeatable 35mm system.

Confusion, Petri 7S 35mm, Eastman XX flim

Confusion, Petri 7S 35mm, Eastman XX flim

Fuji GF670 Medium Format

Fuji GF670

Fuji GF670

Fuji GF670

Moving up to Medium Format 120 film systems I have three.  I have the Voigtlander Bessa IIIw system that is 6×7 format and the Fuji GF670 camera (also sold under the name of Bessa III) with a longer 85mm lens (left & right). The 670 is my medium format travel camera of choice.  Not only is it a functional camera with a built in meter but it is attractive and it always will draw a crowd when I get it out to use! Another nice point to the GF670 is that it folds down on itself to a thin easy to store camera in your bag!

Mamaya RZ Pro II system

Mamaya RZ Pro II system

And lastly the Mamaya RZ Pro II SLR ( Right) with interchangeable lenses and a world class metering system. This camera is large and heavy but easy to use and a very powerful camera system! I have a f/4 65mm and f/4 180mm lens for it.  I also have both the waist level finder and a metering prism with spot and matrix!  Like I said, heavy and big, but I use it for ultra long exposures on the coast with the Fuji Acros 100 film which has almost NO RECIPROCITY failure up to 140 seconds then only 1/2 stop after that!   The film base is a little on the thin side but still my film of choice for long exposures.

Stormy Seas, Fuji GF670, Tmax 100, Perceptol 1:1, Wet Mount Scan

Stormy Seas, Fuji GF670, Tmax 100, Perceptol 1:1, Wet Mount Scan

Beautiful!

Polaroid 110 with 90mm lens converted to 4×5!

My 900 converted to 4x5 by Alpenhause Kamera Werke

Polaroid 900with 150mm Fujinon lens converted to 4×5

Moving up to 4×5 Large Format cameras, I have three. first I have a Shen Hao cherry field camera.  Functional as it is beautiful.  I rarely take it out, rather I am using a Polaroid 900 converted to 4×5 with a Fujinon 150mm lens and a Polaroid 110B camera converted to 4×5 with a Schneider Super Angulon 90mm lens.  It is a beauty and very wide!

Yes, as you may have noticed, some of these cameras are quite large.  This is due to the negative size.   Let me give you some idea as to why digital cameras can never come close to the resolution of film.

Focus Test - Epson Wet Adapter Across 100 Perceptol 1:2 Springmaid Pi

Montreat Cascades, 4×5 Tmax 100 developed in Perceptol and wet mount scanned.

Lets start with medium format:

  • Medium Format 6×7 format makes an image 2 1/4 inches tall and much wider.  Scanned at native resolution of 6400 dpi on an Epson 850 Pro scanner gives me a file resolution of 16452 x 19668 dpi or a print size at 300 dpi of 4.5 feet by 5.3 feet!  This is huge.
  • Large Format of 4″ x 5 ” scanned at 6400 dpi (native) gives a file size of 29107 x 36070 dpi or a print size of 8 feet x 10 feet!  There is not a digital camera system in the world that can come more than a small fraction of this!

Film

Film has turned wildly popular again in the past several years and many of the big film manufacturers have started increasing their film production lines again. This is especially true in the medium format lines (120) and 4×5 large format films! Film can be found in single rolls or in bulk almost everywhere again.  The big box companies like B&H, Adorama and many others carry almost every type and format that you could ever want!

Processing in B&W has never been easier at home with eco friendly chemistry with no darkroom needed. Only an initial outlay of around $150 will get you started. Cameras can be found anywhere for next to nothing!  You will need:

  • Dark Bag, a cloth bag that it light proof with arm sleeves that enable you to put your film, developing tank, reel an lid inside with your arms to move the film into a light tight developing tank!
  • Developing Tank, I recommend a stainless steel version.
  • Film Reels, I like the Hewes stainless steel ones.
  • Developer, comes either in a powder or a Liquid.  I like Perceptol and/or Rodinal R09.
  • Fixer, to remove un-used silver
  • Liquid wetting agent to prevent drops to dry on your negative.
  • Clips to hang you film up to dry!

You can scan your film into your computer with a good Epson scanner like the 700, 750, 800 or 850.  You can also buy an adapter for your camera allowing you to scan by photograph!

While I work in both color and B&W, digital and film I find time after time I pick up a film system and load it up with a good B&W film. The process of developing your film can really help you connect to your work as well.

I like several films, here they are in order of favor:


  1. Kodak Tmax 100 in 35, 120 and 4×5, very small grain, good dynamic range easy to process
  2. Fuji Acros 100 in 35, 120 and 4×5, very small grain, good dynamic range NO RECIPROCITY FAILURE, easy to process
  3. Rollei IR400 in 35, 120 and 4×5, Infrared or normal B&W, good dynamic range, easy to process
  4. Rollei Retro 80S in 35 and 120, amazing clarity and sharpness, good dynamic range easy to process
  5. Eastman XX in 35, motion picture film used in B&W movies of the 50’s, smooth gradient transitions.


As an example here is the top image from last week of the fishing fleet taken on 20 year out of date Polaroid Type 55 monochrome instant film. The camera is also a Polaroid 900 that my daughter sent me years ago from a garage sale that I had converted to 4×5 with a Fujinon 150mm lens. A MOST beautiful camera in a bright new blue suite that is just fun to use. It is both rangefinder and ground glass focusing that forces you to slow down and really consider each and every image you capture!

The Type 55 film, even outdated, works flawlessly and generates amazing images where the edge markings add to the artistic impact of your subject

Pelican Dock - Type 55 4x5 Film, Wet Scan

Pelican Dock – Type 55 4×5 Film, Wet Scan

So what do you think?  Are you tempted to try this out?  It is easy.  For starters, you can look at the continuing education departments at a local college or hight school.  Most offer B&W film photography with darkroom work.  This will teach you enough to allow you to determine if you would like to further investigate this wonderful medium!

You can also contact me and request info on one of my film workshops held in Pawleys Island SC.  I would love to have you and share this amazing link to our past!

Please let me know what you think of this post!

My Thoughts on the Art of travel photography…


Or… What I Did On My Summer Vacation!

Warning, LONG post…

Canyon Lands Pano, Sony A7rii with the 24-240 and polarizer

Canyon Lands Pano, Sony A7rii with the 24-240 and polarizer


Devils Tower

Devils Tower

Travel Photography… Say it, let it roll off your tongue, think about it!  I bet that the first thing that comes to mind are images from National Geographic, fine, super saturated color photographs that could take you anywhere in the world by simply looking at them!  You know the kind, they enabled you over the years to travel vicarisly around the world just with the magazine and its images!  

But is that what travel photography really is? 


What is the intent of travel photography  to document a place or a trip?  Is it designed to tell a story on an individual level or to the masses?

A6300-3886- S1_500-Whodos Bryce-2016 1 copy

Well for me, it is a combination of the two.  Most importantly, the images are to refresh the memories of the trip.  But there is a real market out there for well done travel photography whether in print publications, web, advertising or fine art prints.  It can be quite profitable if you work at it and can step back and look at your own images in terms of the above markets.  Even the housing deceration market has room for this type of photography provided that you can simplify your work to show colors and contrasts over locations.

Jordan, My 7 year old photographer grandson

Jordan, My 7 year old photographer grandson

For this trip, and pretty much all the time when I am shooting digital, I exclusively use the Sony 42 mpix A7rii camera system and the new Sony A6300 for high speed work with Sony G lenses or Sony Zeiss lenses. They are very well suited to this type of photography and give you enough (42 mix)  resolution to get amazing images yet still have room to crop!

The drive for this post was a recent  two week trip out West with my wife and 7 year old grandson Jordan who I am teaching film photography and darkroom processing to (photographically, I had grand plans for him this trip).  Given time I plan on turning him into a photographic GOD for something fun while making sure he is a Rocket Scientist!

We flew into Rapid City, SD and picked up a one way rental car and our first night in a long string of hotels.

Devils Tower

Devils Tower

Our Itinerary:

  • Prairie Dog

    Prairie Dog

    Day 1. Rapid City layover and rest.

  • Day 2. Pick up rental car and drive to Mt. Rushmore in the morning and then the Devils Tower in the afternoon. Continue on 1/2 way to Codie, WY.
  • Day 3. Famous Hot Springs of Thermopolis, Wyoming then an afternoon visit and guided tour to the most successful dinosaur dig on our continent.
  • Day 4. Codie WY for several stops including the famous old west town and the Codie Rodio.
  • Day 5-7. Yellowstone for 3 days in a park lodge.
  • Day 8. Leave Yellowstone, drive thru and stop along the way in the Tetons finishing in Jackson WY.
  • Day 9. Drive just north of Salt Lake City in the town of Herbor for a 3 hour train ride around the valley.
  • Day 10-12. Drive to Moab for 3 nights and visit Arches and Canyonlands National Parks with extra boat and jeep rides thru the park as well as Dead Horse Point State Park.
  • Day 13. Early morning drive to Bryce National park for 2 days of Bryce National Par
  • Day 14. Drive to Salt Lake for flight home on day 15.

Drugstore of the West, Cody, WY

Drugstore of the West, Cody, WY

So as you can see there was a well thought out family plan for travel and location visits!  But, I also had a plan, my photographic plan!

So lets talk first about my TRAVEL photographic equipment plan.  I wanted to travel light (yea right).  No backpack, rather a small rolling camera case that would fit into the over head of a small commuter plane so that I would not have to check it.  I would not have room for a film camera… Dang!

So here is what I brought along:

  1. Sony A7rii camera body
  2. Sony a6300 camera body for Jordan
  3. Sony 24-240mm one lens does it all for Jordan
  4. Sony 24-70 Zeiss f/4
  5. Sony 70-200 G f/4
  6. Tamron 150-600 for those exotic animals I expected to see
  7. And yes… A Olympus XA 35mm film camera (but it is the worlds smallest rangefinder) with 6 rolls of Tmax 100
  8. Filters, ND for long water falls and polarizers for all of the rest in 67mm and 72mm.
  9. Batteries an chargers (both cameras used the same)

This was a good plan (or so I thought) until our very first stop at Mt. Rushmore where Jordan informed me that the 24-240 was too long and heavy.  Oh well, I took that and gave him the 24-70.

RULE ONE:   No camera plan survives first contact with a 7 year old!

Ok, so at least the part of the photographic plan of me being able to NOT check my camera equipment worked! (I did put all of my insulin and supplies in the camera case just to prove my need to have the case with me but did not need it).

RULE TWO: A super  zoom really works best when you have to carry lots of glass around while traveling.  See Rule One, Jordan did me a favor here!

Yes, I know that one would not normally trade a light 24-70 Sony/Zeiss f/4 lens for a 24-240 f/3.5-5.6 Sony super zoom but I have to be honest, I was VERY impressed with the super zoom!  It was not really that much heaver but it was longer. I NEVER put on the 24-70 after that.

Things to look for on a cross country western trip:

  1. Wildlife
  2. Landscapes & Vistas
  3. Unique rock formations
  4. Waterfalls
  5. Wild colors
  6. Unique photographic visions

Trip Highlights!

Yellowstone
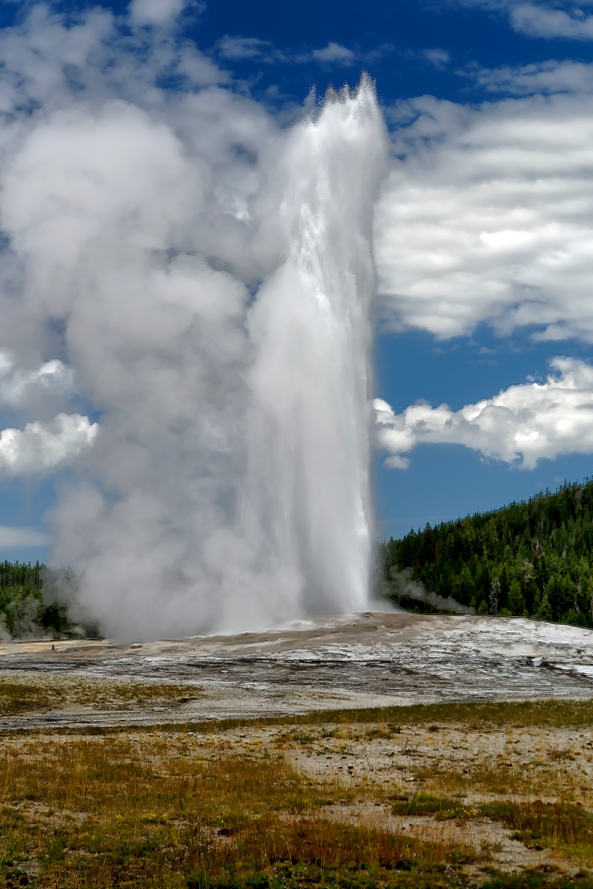
Old Faithfull

Old Faithful

Querimony: To Questionably Moan & Complain!

I expected great things of Yellowstone and that showed in the number of days there as well as staying in the park.  Yellowstone is HUGE, so much so that you have to allow for HOURS of driving time from location to location.  The roads are all good, 2 lanes with adequate pull offs.  BUT having said that there are rules of behavior in pulling off and rules for how you treat the wildlife.   I cannot tell you how many people (especially foreign visitors) who would jump out of the car (still in the road) and run off into the fields right up to the wildlife.  To say that this is bad behavior is an understatement.  It for one, keeps others from being able to photograph the wildlife and two puts the peoples lives in grave danger that approach the wildlife!  Yet this happened almost every time wildlife was near the road.  The park rangers had simply given up on trying to educate people who would not listen. They spend most of their time dealing with the MANY dreadful traffic accidents that happened every day.  The traffic jams were terrible whenever an animal was near.  Sometimes this was due to the animal being on the road but most of the time it was because people parked right in the middle of the road who left their cars. 

Buffalo on the Yellowstone

Buffalo on the Yellowstone river in the early morning mist

I am going to share a few of my favorite images from Yellowstone with you.   It is a good cross section of what you can expect to see while visiting!


Blue Pool, Prismatic Spring Yellowstone

Blue Pool, Prismatic Spring Upper Yellowstone


Prismatic Spring Yellowstone

Prismatic Spring upper Yellowstone


Yellowstone Antelope

Yellowstone Antelope, North Entrance


Teal Pool, Upper Yellowstone

Teal Pool, Upper Yellowstone

And last….


Lower Yellowstone Falls Detail

Lower Yellowstone Falls Detail 1 second  Exposure with 10 stops of ND

I would travel again to Yellowstone but in the spring or fall in order to see more of the wildlife there.  I realize that in the heat of August even the animals would move to higher locations in order to reduce the heat.  The only wildlife I really saw in abundance on this trip were Buffalo, Elk and Antelope.  

Moab, Arches & Canyonlands National Parks

Delicate Arch

Delicate Arch

The Moab area offered some of the most amazing locations of our trip.  I had thought that nothing could beat Yellowstone, but Moab came very close.   

Sandstone Arch, Arches

Sandstone Arch, Arches

There are 3 offerings here, the Arches National Park, Canyonlands National Park and the Dead Horse Point State Park.  ALL three are must see locations.  For me Arches was the best, but honestly, we spent time exploring all three in detail (well sort walk detail).  We also paid extra for a boat trip on the Colorado River thru Canyonlands for a low view and a back country jeep tour to see area and arches not available to the general public in Arches!  If you get here I advise that you do both side trips.

Courthouse Rock, Arches

Courthouse Rock, Arches


Whale Tail Arch, Backcountry Tour

Whale Tail Arch, Backcountry Tour


Windows Arch on the Back Country Tour, Arches

Windows Arch on the Back Country Tour, Arches


Dead Horse Point

Dead Horse Point. Look at the lower left corner 1/3 up to see the dead horse outline.


Canyon Lands, Isle in the sky

Canyon Lands, Isle in the sky


General Utah


High Desart Train Pano

High Desart Train Pano

So…. I had this vision stuck in my head of a parked line of freight train box cars parked in the high desert with a mesa behind them.  I found myself looking to the sides of the car as we traveled endless miles through Wyoming and Utah.  Finally my wife asked me what I was looking for and when I told her she made a point to help me look and stop me when we came upon them.  I know that out West there are ultra long stretched of road.  Most are 4 lanes with lots of traffic.  If you see that special scene make sure that you safely stop so as not to irritate the 7 year old in the back seat, pull safely off to the side of the road as you watch for the perfect compositional setup and get out and shoot it!  DO IT!  

Because

RULE THREE:   There are NO GO BACKS!  If you see a subject or scene on the side of the road immediately stop and shoot it!

Bryce National Park

Whodos in Bryce Canyon

Whodos in Bryce Canyon

To say that Bryce National Park is anything less that amazing is an understatement.  It was right up there with Arches and Yellowstone in amazing views, colors and the wow factor!  This is the location that I would choose to visit again to try some different styles of photography.  The colors of the Hodoos are simply amazing and full of wild colors and contrasts.  

Natural Bridge Bryce

Natural Bridge Bryce

RULE FOUR:   Revisit those scenes and compositions as many times a possible!

While in Arches, my 7 year old grandson decided that he had enough nature and vistas after driving Arches all day long.  I took them (at my wife insistence) back to the hotel and went back out to Arches and drove it again in different light conditions and the 2nd time there were clouds in the sky.  This made for much better images that I would not have gotten if I did not go back out again!

Final thoughts on what makes travel photography great!

Now as you have seen here, I presented this trip as a travel log.  Attempting to document the many wonders of the high plains in the west. For images that have the possibility of selling you need to:

  • Pay more attention to your editing, scene selection and composition.  
  • You must re-visit local scenes several times in order to get the best light and clouds.  
  • You MUST shoot with your best equipment in order to produce high resolution images for future publication.
  • In your post processing you must choose only your best images and throw the non used images out.
  • Be your WORST critique and select only what you would consider to be world class images.  Case in point, the image above of the Court House Rocks in Arches.  Yes it is a nice image but the lack of clouds in the sky reduce its impact to the point of it being a weak image!

Hood Valley, Bryce Canyon, Sunset overview.

Hood Valley, Bryce Canyon, Sunset overview.

This type of travel photography is more difficult that personal travel images traditionally done by the millions of photographers who roam the country.   These types of images are still travel photography but basically serve to show and remember your great trips!  They will include more family member in the scenes, less care about the total compositional elements because those are simply not as important to the memory of the trip and locations! They are just as important, but will not generally generate income from sales and publication. 

Colophon:  Very Important Lessons Learned:

  1. NEVER, and I do mean NEVER plan a 14 day photographic trip with a 7 year old and expect him to be excited beyond the first week.   I would have been better off leaving the A6300 and 24-70 f/4 at home thus lightening my load and giving him MY camera when he desired to take a photograph!
  2. Make SURE that you explain to the said 7 year old that “NO!  There are places that not only will there be no TV but also no internet!  (I was able to get around this most of the time with my iPhone as a hot spot for his iPad!)
  3. Build in several fun days (as viewed by a 7 year old) that includes things like movies, water parks and so on!  This is a small price to pay for 7 year old mental health and will refresh his young mind and keep it open for those wonderful scenes you travel to!
  4. How can you get those great travel shots when your walking is limited?  As a cranky 63 year old man, make sure that you plan photographic stops THAT YOU CAN DRIVE TO!  We (actually my thoughtful wife) did this ahead of time thus insuring my mental health and happiness at the stops we made!
  5. Take the time to occasionally stop at nice restaurants  that actually serve wine and beer (this will assist with the mental healty of said wife!)  Happy marriages are NOT built and fast food places in a rush!
  6. If you desire to shoot medium format film, you damn well better plan on space for the camera and film!  Regrets upon your return will leave a sour taste in your mouth!
  7. Be flexible, very flexible.  This will leave you happy in the hotel at night!
  8. Take your pain drugs! (See #7)
  9. If you see a photo subject on the side of the road STOP!  There are no go backs! (see RULE THREE about this very thing and really your wife know this and will support your urges to stop in the middle of nowhere!
  10. Wildlife… What wildlife?  How did I miss all the great shots of wolves, coyotes, and bears?  I was in Yellowstone for heavens sake!  The lesson here is to make sure you check the season for high animal activity.  I have listened to my photographer Son talk about so much wildlife in Yellowstone that it was not safe to drive!   I guess he should have mentioned when he was there!  Oh well.  I AM happy with what I actually did see (Buffalo, Antelopes, Elk and Prairie Dogs)
  11. Stop at EVERY overlook in every park.  You will be happier having done so (and vicariously so will your wife).  You will hate yourself when you return home only to have a photographer friend tell you that the one overlook you skipped was the only one you should have stopped at!
  12. If you find a scene that is magical for you revisit at a different time of day.  This is VERY IMPORTANT and promote photographic health for those who have heeded these magic words.
  13. Would I do it all over again with a 7 year old?  YOU BET!!  But I would plan differently.  If I take any of my grandkids I need to remember that it is their vacation as well.  This means that you build in days doing fun stuff for their age also!

Please let me know what you think of this long post!  I welcome all feedback.


Bryce Canyon

Bryce Canyon in camera pano

Learning To See The SOUL Of Your Image: Black & White


Removing The DISTRACTION of COLOR!

Do you enjoy the purity of a finely crafted B&W image?  


Look closely at the image below of the neither regions of the Folley Beach Pier.  This was taken with a B&W only DEEP CONTRAST Infrared camera converted by KolariVision.com with their new AR coating.  Look at the detail and depth captured here.  Do you think that if the sand was actually in color that you would even notice the pier going off into the distance past the initial structure? This is what the power and purity of B&W gives to us!

Fuji X100s 850nm Deep Contrast B&W Infrared: Under The Folley Beach Pier

Fuji X100s 850nm Deep Contrast B&W Infrared by KolariVision.com with their new AR coating: Under The Folley Beach Pier

I love working in B&W,  so that I would only create them if the market would support such endeavor.   There is something about a well crafted monochrome image, having the distraction of color removed leaves you with the soul of the image.  

I find that it is so powerful for me that I look at EVERY scene I approach with B&W in mind.  Yes, I can visualize in B&W.  So can you!  It only takes a little practice… OK, a LOT of practice really, but it is well worth the investment in time and energy!

I am so into fine art B&W that I even have a Leica Monochrom digital camera that is dedicated to it in that it only takes B&W images!   Not to mention digital B&W infrared cameras!  

But DON’T forget film…. Which really is a post for another day.

The baby blue is a Olympus 35RC rangefinder  that I had rebuilt, cleaned and given a nice new set of baby blue clothes!  The second is a Polaroid 900 that my daughter found at a garage sale and sent to me.  I kept it in a display case for a year or 2 then sent it off to  WWW.Alpenhause.com where Steven Icanberry took it apart, cleaned, re-gasket, replaced the lens with a Fujicon 150mm lens and added a 4×5 film back.  He also calibrated the internal rangefinder to the new 150mm lens and gave it an adult blue suite!  It is a dream camera come true! 


My Custom Olympus 35 RC Film Camera, one of dozens of film systems I shoot.

My Custom Antique Olympus 35 RC Film Camera, one of dozens of film systems I shoot.

Polaroid 900 converted to 4x5 with a Fujicon 150mm lens.

Polaroid 900 converted to 4×5 with a Fujicon 150mm lens converted by Steven Icanberry

I shoot 35mm, 120mm and 4×5 film systems.  Usually, I will expose about a dozen rolls a week in 120, Develop, Dry and Scan then treat them as I would a digital image except for the fact that I will never be starting with a color image!

Rollei IR400 Film - M7 28mm Elmarit - Rodinal 1-50

Rollei IR400 Film – M7 28mm Elmarit – Rodinal 1-50 processing, scanned and printed

I mainly  shoot with my Sony A7rii camera and a selection of 4 lenses in my normal day to day work.   I shoot in COLOR but always process both color and B&W in post processing.   I can just hear you say “why not just shoot in B&W in camera?”   Well the easy answer is while you can do so, you will get much better B&W images by shooting in color then post processing to get the best possible color image, THEN convert to B&W.  I use The NIK filter Silver EFX Pro for my B&W conversions, and by feeding it a finished color image it will have enough data to generate a wonderful B&W image!

Here is an example of just what I mean:

Sony A7rii w/ Sony/Zeiss 24-70 f/4 lens.

Sony A7rii w/ Sony/Zeiss 24-70 f/4 lens.  Daddy’s Girls, Bluffton, SC

First an image of Daddys Girls, a shrimp boat out of Bluffton, SC.   The image is a great one, full of colors and textures with an interesting sky!  I feel that in color this makes a wonderful image and think that there is a market out there for it.  I spent the time with the image during post processing to bring out the colors, textures and contrasts to make the image pleasing.

Sony A7rii w/ Sony/Zeiss 24-70 f/4 lens.

Sony A7rii w/ Sony/Zeiss 24-70 f/4 lens. Daddy’s Girls, Bluffton, SC

Then, and ONLY THEN I ran the image through Nik’s Silver EFX Pro B&W converter.   I Chose a deeply sepia tinted output with a slightly scratched texture and a minor border.  This to me is a pure image with which you can witness and feel the soul of the scene!

Sony A7rii w/ Sony/Zeiss 24-70 f/4 lens.

Sony A7rii w/ Sony/Zeiss 24-70 f/4 lens.  Stormy Seas, Head On with the clouds of tropical storm Colin.

Another example from the Sony that I took and post processed today is this image of the shrimper Stormy Seas, likely the MOST PHOTOGRAPHED shrimp boat in South Carolina, IN COLOR.  

Again, I shot in COLOR in order to have as much data as possible for the B&W conversion. Again I found myself in a sepia mood and processed it as the examples above!  As you can see, it has a totally different look, feel and emotional impact from its color version above!

Sony A7rii w/ Sony/Zeiss 24-70 f/4 lens.

Sony A7rii w/ Sony/Zeiss 24-70 f/4 lens. Stormy Seas, Head On with the clouds of tropical storm Colin.

B&W images can be really powerful in their emotional impact.   There was a time when B&W was all you could have, then color became popular because of the fact that it was different!  But guess what?  B&W is again VERY POPULAR to the point of actually out selling color in fine art shows and to collectors!  This should give you pause if you are concentrating in color only.  You are missing have of the scene, the most important half!

Roanoke River Lighthouse, M Monochrome

Roanoke River Lighthouse, Leica M Monochrome Camera system, B&W only!


Advanced Work With The Sony A7rii


Using the Sony A7rii for advanced photographic work….


Long Exposure In Charleston, SC

Long Exposure In Charleston, SC, 30 seconds with a 6 stop B+W ND

I was in Charleston, SC last weekend with the a7rii camera system to see how far I could push it!   I find the Sony system to be refreshingly powerful and very capable of any style of photography I desire to shoot.   The Image above of the boat house (Sunrise) was just another example of the power of this system.  I was looking for some long exposure and the water of Charleston Harbor was very smooth to start, with only 6 to 12 inch waves.  The sunrise was blocked by a tremendous super cell thunderstorm system so I just concentrated on the boathouse and smoothing out the water.   I was using the Sony FE 70-200mm F4 G OSS lens at 150mm with a 6 stop B+W ND filter attached which was giving a 30 second exposure.  I was sure that 30 seconds would give me a very smooth water (which it did).  I also desired to capture detail in the stormy clouds but keep the white water.  I metered the waters surface and placed it in Zone 7.5 (what!  You do not know the zone system?  Shame…. We will have to fix this!).  This at ISO 50 and f/16 gave me a 30 second exposure and allowed the 14 stop dynamic range of the camera to capture both the withe of the water as well as cloud details!

Granted, the Sony has a LARGE menu system but the provide you so many programmable custom buttons AND several system setup memories that you can with the turn of a control knob chance the camera functions over to the specific style of shooting you desire!  In my case, I have the M2 memory setup for long exposures, and by simply turning the command dial to M2 the camera is ready for long exposures!

Miss Lulu, Georgetown, SC

Miss Lulu, Georgetown, SC

Here is another example of the amazing capture ability of the Sony.  This is the shrimper Miss Lulu on the dock in Georgetown, SC last Monday morning.   The water of the bay was at slack tide, super high and mirror smooth.   I decided that for this image I wanted B&W but still captured it in color since a color starting image gives the best B&W conversion.   I was using the Sony/Zeiss FE 24-70mm F4 ZA OSS lens at ISO 100 at f/8 with a shutter speed of 1/320 second.  I waited till a Pelican flew into the scene from behind the boat for the capture.  The clouds were slight but still stunning but the boat and its reflection really made the image.   

As I said, During my pre-visualitlation of this image I decides upon monochrom with a flying bird.  I setup the boa further into the image space to allow for a bird to fly into the scene and balancing the overall image with the boat centered with the trees on the right.   This is not a simple snap  shot, a lot of thought went into its setup!

Shrimp Boats are one of my favorite subjects and each and every time I happen by them they always present something new and different!

Van Dyke Brown Paper Experiments…


Fixing Paper Problems For Van Dyke Brown Printing


Van Dyke Brown, Dinghys, Rising Stonehenge Paper

Van Dyke Brown, Dinghys, Rising Stonehenge Paper

VDB, Revere Platinum Paper & Spots

VDB, Revere Platinum Paper & Spots

In my recent printing of the 1840 Van Dyke Brown prints, I have experienced a lot of dark spots on my prints.  I ordered several types of papers to try to see if it was a paper problem… I have been using Revere Platinum paper which is easy to coat (provided you use Tween 20 in the emulsion) and gives great tonality but seems to ALWAYS have dark spots all through the print!

Look closely at the image to the right. You will notice dark spots (look above the light) that go completely through the paper!  This has been driving me nuts and nothing that I did to try and fix the issue ever helped.

I ordered several new papers plus tried several others that I had on hand:

  • Arches Platine (on hand) I have issues coating this paper even with Tween added to the mixture.  It tends to sit on the surface with no absorption into the fibers which causes it to wash off instantly in in the first water bath in long stringy tendrils of emulsion.  Very little is left on the paper so it has a light chalky appearance.  This paper just does not work for me in Van Dyke Brown.  I keep hearing online about how much other Van Dyke Brown printers like this paper but I just do not see it…
  • Cot 320 (on hand) This paper is a little better than the Arches paper in that it holds the emulsion a little better but is still washes off the surface in the 1st water bath!  It is usable for Van Dyke Brown printing though…  It has been recently suggested to me that I soak this paper in a 10% citric acid bath, wash it and dry it in order to get better surface adhesion and a higher Dmax.  I will try this in a week or two.
  • Heavy Kozo 90 gsm (on hand) Bostick & Sullivan states that this paper will work great with Van Dyke Brown.  The paper is made from 50% kozo and 50% abaca. Kozo is the inner bark of mulberry tree seedlings, producing a naturally white paper fiber which is very strong and long lasting. The paper looks very promising and fun to work with especially the ultra thin version that I chose to NOT work  with due to it being extremely thin and the requirement of special tools to handle it.  I have seen videos of artists using it which is why I decided to purchase a few sheets to experiment with.  But I have not had time to work with it yet.  So look for a post specific to this wonderous paper in the future!
  • Revere Platinum (on hand).  This paper coats wonderfully with the addition of Tween and the emulsion does NOT wash off in the first water bath!  It gives wonderful deep tones and color.  The only (MAJOR ISSUE) problem with it is that it gets white and brown spots all over the paper that goes completely through the paper from front to back.  These spots can totally ruin the print…  I have tried everything that I can think of to fix this issue as I really like the paper but I am at a total loss.
  • Rising Stonehenge (new)  This paper coats great with Tween and does not wash off.  There are no spots and the adjustment curve matches the one for Revere!  It is a thinner paper and seems easy to damage during coating.  It takes less emulsion to coat the same size as the other papers.  I did find that the emulsion migrates from the coated areas to the white around the edges.  I have no idea as to why but I think that if I lower the number of drops that I use for coating that it might take care of the problem.  It generates a fantastic deep brown warm tone across the image and I love the final prints on it. This paper is readily available on Amazon as well as many other locations.
  • Lana Aquarelle (new) All that I can say about this paper is WOW!  It coats and prints the Van Dyke Brown images with amazing density and tone.  It coats easily with Tween and is a heavy paper with not spotting or migration issues.  This is going to be my main paper as long as I can get it.  So far the only place that I have found it is at Bostic & Sullivan. The curves for the Revere paper work perfectly with the Lana!


Lana Aquarelle Paper Notes

Lets first talk about the Lana Aquarelle paper.  This paper is simply amazing!  It coats very well with both the brush and a glass rod as long as you add a little Tween at 25%

For a 8×12 print:

  • Using a glass coating rod for a 8×12 print it takes 36 drops of VDB and 2 drops of Tween 25%.
  • Using a Synthetic Sable brush it takes 72 doors of VDB and 2 drops of Tween 25%.

Once coated, I let it AIR DRY for 30 min then expose in a 12 bulb UV box in a vacuum frame for 2 to 4 min depending on the paper and negative.  Usually the base exposure time is 3 min.

Van Dyke Brown, Berry Mill, Lana Aquarelle Paper

Van Dyke Brown, Berry Mill, Lana Aquarelle Paper brush coated

As I said the results from this paper is a nice warm print with great density in the black areas and the edges.

I coated four pieces of paper yesterday, two with a glass coating rod and two with a synthetic Sable brush.  Both methods worked very well and gave nice even coatings. The image above was a applied with the Sable brush  and the one below was coated with a glass rod.

Van Dyke Brown, Lana Aquarelle Paper Glass coated

Van Dyke Brown, Lana Aquarelle Paper Glass coated

Notice in the image above if the lone dinghy  that there are NO spots at all.  The paper was clean on the front and back and gave a nice density in the dark areas!  This paper is very heavy and after coating it will want to curl a little but will flatten in about 5 min. Let it dry for the full 30 min in the air and do not use a hair drier.


Rising Stonehenge Paper

For a 8×12 print:

  • Using a glass coating rod for a 8×12 print it takes 26 drops of VDB and 2 drops of Tween 25%.
  • Using a Synthetic Sable brush it takes 65 doors of VDB and 2 drops of Tween 25%.


Rising Stonehenge Paper is another good paper for the Van Dyke Brown process.  It is a MUCH lighter weight paper than the Lana paper but it really does not cost any less!  You can find it on Amazon which means free shipping.  The shipping charges from B&S are going to kill me, with the average cost for paper being around $20 per order!  This is what makes Amazon so great, but they just don’t carry all of the papers that I like to keep on hand…

Van Dyke Brown, The Old Truck, Rising Stonehenge Paper

Van Dyke Brown, The Old Truck, Rising Stonehenge Paper

So far, my work with Rising Stonehenge has been very good.  It coats evenly and the emulsion soaks into the paper fibers nicely. The print is very dense and nice dark areas.   The paper is quite thin and I discovered that the surface is easily damaged during coating.  Since the surface requires much less VDB emulsion I will reduce it the next time I coat (I used 36 drops of VDB and 2 drops of Tween for this test coating) and the surface damage will likely go away due to the glass rod not going across the paper surface  more than 4 times ( for 36 drops the coating rod required 8 trips across the paper surface) thus reducing working the papers surface too much and causing damage.  

One small problem with the paper that I discovered was that the emulsion has a tendency to migrate from the coated areas to the uncoated areas giving a grey shadow around the image.  If you look closely you can see actual small spots of it surrounding the coating.  This is really no big deal but I am unsure as to why this is happening.  

I will continue to use this paper because it generates VERY WARM BROWN in the print and I just love the look of it!

Now, it has been suggested that I soak or pre coat the paper with an acid bath of 10% citric acid for a 1 or 2 min, then wash the paper and allow it to dry before coating.  I am told that this will vastly increase the papers Dmax!  I am going to test this next time I print!

 The image at the top of this post was also printed on Rising Stonehenge paper!

 Bergger Cot 320 Paper

 The Cot 320 paper is a very nice, smooth paper.  I love the look and feel of it.  BUT, for Van Dyke Brown it has a problem in that it will not readily absorb the VDB emulsion into the paper fibers.  Even with Tween added to the emulsion, it is not enough.  What happens is that in the first water bath after exposure the majority of the emulsion washes off in thick tendrils of brown goo.  Unlike the Arches paper, enough is left on the paper to still make for a good (not great) image.  

Van Dyke Brown, Das Boots, Cot 320 Paper

Van Dyke Brown, Das Boots, Cot 320 Paper

There is enough promise from this paper that I am going to experiment further with this paper by washing the paper with an acidic solution of citric acid and distilled water, brushing it on and letting it soak in for a few seconds then washing the paper again with distilled water.  Once it dries and I will flatten it in a low temp heat press and coat the VDB on it.  I think that this will break down the surface coatings enough for it to accept the emulsion better and increase the papers Dmax.

Van Dyke Brown, Stormy Sky, Cot 320 Paper

Van Dyke Brown, Stormy Sky, Cot 320 Paper

I will report on this more in the future.  

OK that is all for this post. I am not going to report on the Arches and Revere papers as I have discussed them in the previous two posts.

I hope that you got something out of the info here!  Let me know…


One Image, One Paragraph…


My favorite image from my visit to Georgetown today…

Stormy Seas… Calm Dock…

Stormy Seas... Calm Dock...

Stormy Seas… Calm Dock…

I had to sit in the Georgetown gallery today. On my way there I stopped at Stormy Seas, my favorite shrimp boat in the area.  I had the Leica M Monochrom with me and the Tri-Elmar 16-18-21 mm lens on it as well as the FRANKEN-VIEWER which enables me to compose the image with ultra-wide lenses on the Monochrom. Did I mention that the Leica M Monochrome is a B&W ONLY camera system? The sky had this amazing gradient across it going from dark gray to bright silvery light on the horizon and the water that you could slide across… Oh My, the water was so perfectly smooth and mirror-like that I stood there stunned with camera in hand just hypnotized at the magic and taking it all in.  But alas, I only had a minute to spare so I took 3 differently composed images at -1ev, f/11 and 1/1500s.  This is the result: a simple, well balanced image, so full of tonality that it is dripping from the bottom all over my feet….

Enjoy while I clean my shoes…

More Leica M Monochrome Magic!


Creating World Class B&W Images With Leica Monochrome

Bodie Island Light, M Monochrome

Bodie Island Light, M Monochrome

In my continuing love affair with the Leica M Monochrome camera system I have learned more each day towards creating amazing etherial B&W art…  Keep in mind that I have been shooting B&W film (35mm, 6×7 and 4×5) for several decades and know and understand the process very well. But using the Monochrome is such an easy progression that it seams as though the camera is leading me down this path on its own. Yes there is some small post processing to be done using Nik Filters Silver EFX and once in a while I will add some Viveza as well, but for the most part it is almost perfect out of the camera as long as you get the exposure correct in the shooting!

Leica Tri-Elmar 16 - 18 - 21 mm Lens

Leica Tri-Elmar 16 – 18 – 21 mm Lens

In the image below of the shrimper Stormy Seas, I used the Leica Tri-Elmar set in 16mm.  There is no image distortion from such a wide angle and it is sharp with good depth of field.  When using this lens on the Monochrome you are forced to use the frankenstein viewfinder that you purchase with the lens but that is a small price to pay for such a useful lens.  I also have a Voigtlander Hellar 12mm lens in the camera bag and it works very well on the Monochrome and uses an external 12mm viewfinder, but it does distort the image slightly due it its wideness but you can correct for that in Photoshop.  The thing about the Tri-Elmar is that it replaced 3 separate lenses that were stolen with one small lens!

Stormy Seas Shrimper, M Monochrome with Tri-Elmar at 16mm

Stormy Seas Shrimper, M Monochrome with Tri-Elmar at 16mm


Using a fast lens like the 50mm Summilux ASPH for the image below of the Roanoke River Lighthouse allows you to hand hold on dark or stormy days and still get crisp images that jump out at you! For this image I also had a yellow filter attached to bring out the structure of the clouds.  This is one of the HUGE pluses of the Monochrome in that it reacts to the standard B&W filters the same way as film does!

Roanoke River Lighthouse, M Monochrome

Roanoke River Lighthouse, M Monochrom

But as always my main use for the camera is long exposures which is where my true love lives!  Being able to take ocean shots and smooth out the waves is exciting beyond words and the Monochrome does a great job of it with its 4 min bulb limit.  Look at the image below of the (another version) Roanoke Marshes Light House.  I was there when the light was on and each time it circled  it created another slightly offset star effect.  It allows me to create images full of wonder and depth!

Roanoke Marshes Lighthouse with operating Light, 16 second exposure, M Monochrome

Roanoke Marshes Lighthouse with operating Light, 16 second exposure, M Monochrome

The implied stillness of the water with the graduated reflections create an image full of mood and depth.  This is one of my favorite images of this Light House and the fact that during the 16 second exposure the light revolved around 3 times to generate 3 slightly offset star patterns just add more mood to it.  This particular shot was done with a B+W 103 3 stop ND filter to allow the longer shutter speed at f/8 for sharpness with the 50mm Summilux ASPH lens!

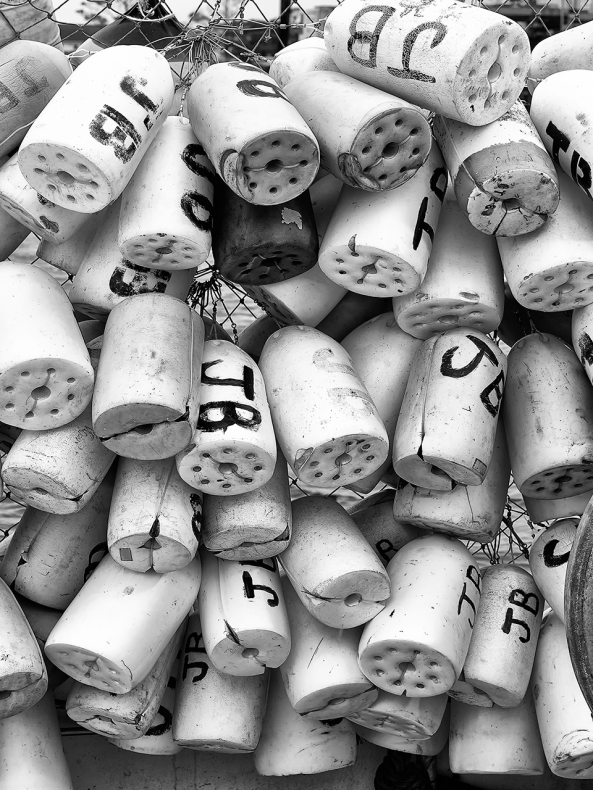
Now let me share a detail shot of a fishing boat just up the island from the Light House.  It is simple yet tells a complex story of the boat and job.  

Fishing Float, M Monochrome

Fishing Float, M Monochrome

I love the textures of the image and the sharpness. The texture on the surface of the individual floats are great and perhaps would have been better served by a closer shot. It was taken with the Macro Elmar 90mm lens (a great lens to invest in) and was done on the tripod!

Mushroom, Macro, M Monochrome with Macro Elmar 90mm plus macro adapter

Mushroom, Macro, M Monochrome with Macro Elmar 90mm plus macro adapter

Really Right Stuff TF-01 and Ball Head

Really Right Stuff TF-01 and Ball Head

Continuing with the 90mm Macro Elmar I give you a closeup image taken just as I left the Outer Banks.  This mushroom is only about 2 inches tall and I had to lay down under a log to get it.  Yes a tripod was used but it was the Really Right Stuff table pod which is an amazing tool to have in your kit for just this sort of work  Look at the textures on the bottom and stalk of the mushroom.  This 90mm lens is the only 90 that I will ever buy for my Leica cameras!

Really Right Stuff TF-01

Really Right Stuff TF-01

I hope that you enjoyed this last dedicated post on the Leica M Monochrome camera.  I will have many more images to share from it in the future but I think that you are likely getting tired of dedicated posts!

Thanks for taking the time to view these!!

Going to the Dark Side: 830nm Infrared and the Fuji X100s


830nm Infrared Conversion on the Fuji X100s


Oak Reflections, 830nm

Image 1:  Oak Reflections, 830nm


Infrared photography with digital camera systems have been around for several years now and a lot of photographers have embraced this different spectrum of photography.  Infrared is wildly popular in photography and fine art galleries now and my workshops are full of lots of talented photographers who desire to learn or expand their infrared skills.

Pawleys Marsh, 830nm X100s

Pawleys Marsh, 830nm X100s

The typical starting point for most infrared shooters is 720nm (standard) or 590nm (Goldie) IR conversions. We have all seen the amazing color images that these two conversions can generate. As previously discussed, we always process not only in Faux Color, but for B&W also. The B&W images are usually more accepted among the arts community though.

Pawleys Marsh, 720nm

Image 3:  Pawleys Marsh, 720nm


But did you know that with each increase in the IR Nano Meter band (the frequency goes down as the number goes up) that the contrast levels go up in B&W as well? This increase in the NM band starts to generate the most stunning, contrasty, ethereal images that have to be seen to be believed! The higher you go in the NM range also increases the white “glow” around the leaves and grass and the blue sky takes on a deep black. This effect is named the “Wood Effect” after doctor Robert Wood who discovered it 1910. What happens is that the leaves get a bloom or glow of white around them that generate that wonderful ethereal feel in the image. Take a look at image 1 which was taken at 830nm. Do you see the dark black where the blue sky is? Look at the leaves on the trees and how they take on the pure bright whites! Now compare that to 720nm image above in Image 2. The most striking difference is the gray sky rather than black, plus the leaves are grayer rather than white.

Shrimp Boat at 830nm

Image 3: Shrimp Boat at 830nm


I would like to suggest that if you shoot in IR or are interested in doing so then you should consider a deep contrast IR conversion beyond 800nm. There are a lot of benefits to be found in that spectrum. This new spectrum sees ONLY in B&W, which will force you to visualize your scene in B&W.


The benefits to a Deep B&W IR conversion are:

  • Extremely sharp images.
  • Wood Effect bloom on plant leaves.
  • Dark moody skies.
  • Only works in B&W
  • Post processing is easy and quick using Nik Viveza and Silver EFX for texturing and contrasts. Photoshop CC, Elements or Lightroom, they all work for Deep B&W IR!
  • White Balance is easy.


Mabry Mill, 830nm

Image 4:  Mabry Mill, 830nm

There are several ways to have a camera converted to deep B&W above 800nm.

  1. The easiest is to simply take ANY digital and have it converted by removing the internal UV/IR blocking filter and replacing it with a 800nm, 830nm or a 850nm internal filter. With this type of conversion you can use any digital camera type or style because only the sensor will see the infrared light and you will either see the scene via the optical path or via a live view from the sensor. Typically, this type of conversion should cost around $300 to $350 thru any of the normal conversion companies.
  2. If you are shooting a Full Spectrum or Dual Spectrum conversion then you can purchase and attach a B+W 093 830nm filter to your camera lens! This filter blocks ALL visible light so you MUST have a camera with a live view only to use this otherwise you will never be able to see thru the optical path to focus and compose. The Full Spectrum camera is one that has had the internal UV/IR blocking filter removed and replaced with clear glass and the Dual Spectrum conversion is where the internal UV/IR blocking filter is removed and replaced with a strong UV filter.
Rock Run Mill, 830nm

Image 5:  Rock Run Mill, 830nm


With either the full or dual conversions you can shoot every of the following light spectrums:

  • Ultra Violet                                               Full Spectrum *
  • UG1 UV & IR                                            Full Spectrum *
  • 047b In Camera Faux Color                  Full Spectrum *
  • 530nm Faux Color                                  Full & Dual Spectrum
  • 590nm Super Color                                Full & Dual Spectrum
  • 630nm Pinkie Faux Color                     Full & Dual Spectrum
  • 665nm Enhanced Color                        Full & Dual Spectrum
  • 720nm Standard                                    Full & Dual Spectrum *
  • 800nm B&W                                          Full & Dual Spectrum *
  • 830nm Deep B&W                                Full & Dual Spectrum *
  • Normal Visible Color                            Full & Dual Spectrum

* Requires Live View capable camera


Now, Normal Visible Color simply means that your camera can take normal color images as it did from the factory! This means that you have a multi purpose camera that can take anything.

The only issue is that if you have a Full Spectrum conversion you need to stack a B+W 486 reflective IR/UV blocking filter on your lens with a LDP CC1 absorption filter to get back to good normal color.

For the Dual Spectrum conversion you only need to put the B+W 486 reflective IR/UV filter on your lens and it is back to normal color!

Disadvantages to the Full or Dual Spectrum Camera Conversion:

  • More expensive to convert.
  • External filters for each of our lens sizes.
  • Color filters (530 – 665nm) are not expensive but the B+W 093, B+W 486 and the LDP CC1 filters are VERY expensive.
  • Your camera MUST have a live view mode to focus and compose.


Charlotte Marie, 830nm X100s

Image 6:  Charlotte Marie, 830nm X100s

 I have several cameras converted to above 800nm and several full spectrum and a new dual spectrum converted Fuji X100s. The images that I am getting from the Fuji with a B+W 093 830nm filter are the sharpest and most stunning deep IR images that I have ever produced! But that doesn’t mean that you need to go out and purchase that one. Any camera with live view will work great with the 830nm spectrum. Keep in mind though, that the more modern your camera is the higher the usable ISO will be!

You can contact Mark at his web site at http://www.MarkHilliardAtelier-blog.com for information on his Color & IR workshops, which he teaches with Jamie Davidson, and for his IR Post Processing DVD Tutorials!

Fuga City, 830nm, Georgetown, SC

Fuga City, 830nm, Georgetown, SC


Leica M240 Digital..


Oh, No… Another Camera System…

Leica M240 24 mpx Digital

Leica M240 24 mpx Digital

Well, in a wild turn of events I have picked up some new camera equipment… This is a really no surprise as it is a sickness or rather addiction!   But onward and upward!  

I do have to tell you that I am REALLY excited over acquiring these new systems though.   And unfortunately, one thing has let to another and thus a long journey has also been started into the realm of film again!

But first let me highlight the “What”!

As you can see in the top image, the newest body is the new Leica M240 24 full frame 24 mega pixel body.  It also has a true “live view” which allows use of all sorts of other lenses like the Leica R series that you would NOT normally be able to focus.  This means everything from long telephotos to true macro (subject of the next post!). After a few months of use I can tell you that this is the BEST digital system that I have ever used!  Along with it I also picked up several lenses.

Leica 50mm Summalux ASPH f/1.4

Leica 50mm Summalux ASPH f/1.4

First, the main lens is the Leica M 50mm f/1.4 Summalux ASPH lens in silver.  This is a HEAVY lens.  If attacked by a bear I could use it to beat him half to death.  The lens itself has turned into my main lens that I use 60% of the time. It has a built in leans hood and takes 46mm filters.  The Bokah that this lens can generate is amazing beyond description. It is extremely smooth and easy to use and generates images that are truly amazing!

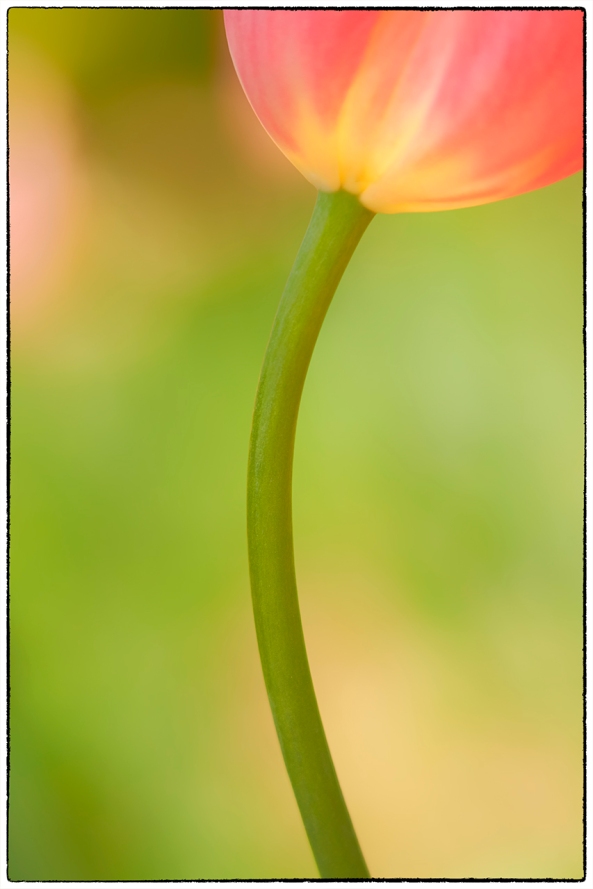
Tulip at f/1.4, Leica 50mm Summalux ASPH

Tulip at f/1.4, Leica M240 w/ Leica 50mm Summalux ASPH


Leica 28mm Elmarit ASPH

Leica 28mm Elmarit ASPH

The next lens is the Leica M mount 28mm f/2.8 Elmarit ASPH.  This is a TINY light lens that takes 39mm filters.  These smaller filters sized considerably cut the cost of purchasing top of the line B+W filters.  Since the M240 camera is a full frame sensor the 28mm really is 28mm! The lens is sharp beyond words and quick to focus.  I am really please with this lens and use it for landscapes and lightning photography when mounted on my Fuji X-T1 camera.

The example image for this lens below is a texture overlay.  The main image was an Infrared image taken by placing a R72 (720nm) infrared filter on the lens giving a white IR image of a palm leaf, then doing a texture overlay of colored flowers.


M240-1916-Palm Overlay-2014 in both 720nm Infrared and Color

M240-1916-Palm Overlay-2014 in both 720nm Infrared and Color


Leica Macro-Elmar-M 90 mm f/4

Leica Macro-Elmar-M 90 mm f/4

The next lens is the Leica Macro-Elmar-M 90 mm f/4 and its macro adapter with split image view.  This is a very unique lens in that it collapses for storage.  By itself it is a great 90mm lens and has proven useful for mid range subjects as well as for Infrared work with the addition of a R72 IR filter.  When you add its macro adapter (extension tube coupled to a viewfinder modifier) it will then give you macro capabilities down to a 1:3 image ratio!  Below is an example of a macro image shot with this lens last week at Moore Farms in Lake City .

Leica Macro-Elmar-M 90 mm f/4

Leica Macro-Elmar-M 90 mm f/4

Now, I already had my two Voigtlander M mount lenses that I was using with the Fuji systems, but they are M mount!

Voigtlander 75mm f/1.8

Voigtlander 75mm f/1.8

First is the Voigtlander Heliar 75mm f/1.8 Lens.  This is an amazing lens that is very fast at f/1.8. The focus is smooth and long and it works very well with M mount extension tubes for true macro work (1:1 image ratio).  I do have 3 of the 10mm extension tubes for it as well as a Canon 500D closeup lens.  For my really small stuff this is my goto lens.  It is a little long but has a very nice clam on lens hood.  While it is NOT a Leica lens it is very close in terms of quality and ease and the f/1.8 aperture gives lovely bokah!

Here then is an example of a 1:1 life-size macro shot with it!

Green Dots...

Green Dots…

Voigtlander 12mm Ultra Wide Hellar

Voigtlander 12mm Ultra Wide Hellar

The last lens that I am going to talk about here is the Voigtlander Ultra Wide-Heliar 12mm f/5.6 Aspherical M Mount lens.  Another heavy all metal lens with remarkable focus and DOF.  Since it is so wide you can almost have a DOF from right in front of the lens out to infinity!  Plus 12mm is really 12mm on the camera!  Given that the camera is both full frame and has a live view you can see the power of using this lens and the ease of composition and focus!

In the example image below please notice the extreme range of the depth of field!

Stormy Seas, down low and dirty... Voigtlander 12mm

Stormy Seas, down low and dirty… Voigtlander 12mm


As you can see, all of the system components are extremely high quality and easy to use giving stunning results.  I like to create Long Exposure and Infrared images as well so I thought that I would share some of them with you below.  

M240-BW 59s16ND PI Pier-0148-2014

Pier, Leica M240 60 second exposure

M240 w/ R72 IR Filter

M240 w/ R72 IR Filter

Leica M240 w/ 28mm Elmarit,

Leica M240 w/ 28mm Elmarit

6 Shot HDR, Leica M240

6 Shot HDR, Leica M240

Blue Hour in B&W, Leica M240, 60 second exposure

Blue Hour in B&W, Leica M240, 60 second exposure

M240-1109-60 s PI LE-2014

Low Tide, Leica M240, 45 second exposure


I hope that you enjoyed this post.  I will have several more shortly in the future highlighting more of this system as well as some new FILM work!! 

Stay Tuned!


Fuji X100s: Oh Yea…


You know the feeling, and usually need tissues to clean up afterwords!

A little background is in order…

Fuji X100s

Fuji X100s

Fuji X, what can you say except “Yes Please!”.  I am a LONG time X shooter.  I started out several years ago with the Fuji X100 and loved every moment of it.  I likened shooting with it to going home to Mama…  If you know what I mean then you understand.   I did decide that I really desired to have a camera with interchangeable lenses and when the Fuji X Pro 1 came out I jumped on it and all of the FX lenses that have since arrived plus several CV lenses as well.   The X Pro 1 has become may main goto camera system.  I Then purchased the X-E1 due to its electronic shutter release, thus its ability to connect to my lightning trigger and water drop computer system!  The X-E1 only lives for such things…  When I get it out to play with lightning it is like coming home to a doggy after a long day! I then decided to get another X Pro 1 and have it converted to 720nm Infrared.  This system (my 16th IR conversion) is the BEST IR camera that I have ever used and that is a big statement!

Passion Flower Macro, Fuji X100s hand held in bright sunlight.

Passion Flower Macro, Fuji X100s hand held in bright sunlight.

So, along comes the X100s, and I look it over and think on it for months.  I though that gee, what a neat system to add to my bag.   Finally I decided to get one but let me tell you that they are HARD TO FIND!  I found on at a little online camera store in Oregon and had them ship it to me last month.  I am very glad I made  this decision!  To say that the X100S is a world class camera is really short selling its capability!   I find that I carry it EVERYWHERE I go now.  I still use the X Pro 1 for most of my work but the X100s really gives stunning results and the new XTran 2 sensor is amazing.  I love the split image manual focus system and wish the other Fuji cameras offered it as well.

Adams Mill Wheel, Lafayette, IN, Fuji X100s

Adams Mill Wheel, Lafayette, IN, Fuji X100s

The X100s works very well in macro mode and the sharpness, colors and texture are simply breathtaking!  You could not ask more of a walk around camera than the Fuji delivers.  Even without image stabilization the camera is flawless due to its ability to shoot cleanly at high ISOs!

Abstract, Glass Block Floral, Fuji X100s

Abstract, Glass Block Floral, Fuji X100s

I am going to share a few of the images generated so far with this incredible camera and you be the judge!

The Dingy, Fuji X100s

The Dingy, Fuji X100s

Adams Mill, Lafayette IN, Fuji X100s

Adams Mill, Lafayette IN, Fuji X100s

McHargue Mill, Fuji X100s

McHargue Mill, Fuji X100s

Old Truck, Fuji X100s

Old Truck, Fuji X100s

A Face in the trees, Fuji X100s, you have to figure this one out!

A Face in the trees, Fuji X100s, you have to figure this one out!

Ok thats it for today!  What do you think?

Fuji 55-200 mm on a 720nm IR converted X Pro 1


Finally, a LONG X Lens for the Fuji Family!

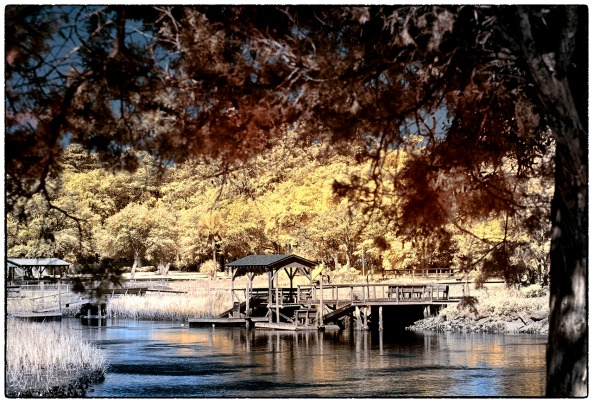
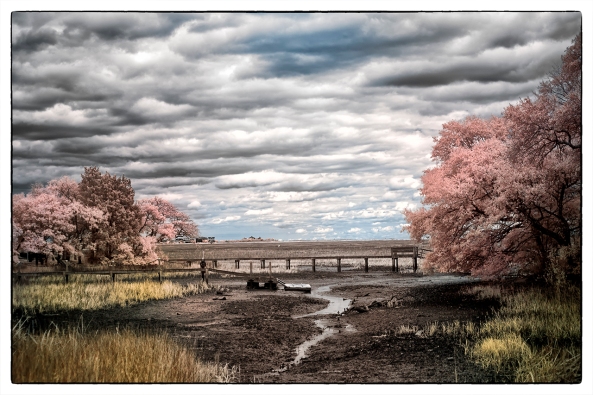
Pawleys Marsh, Fuji X Pro 1 720nm IR conversion w/ the new 55-200mm lens.

Pawleys Marsh, Fuji X Pro 1 720nm IR conversion w/ the new 55-200mm lens.

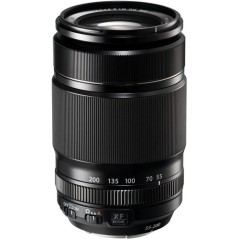
Fuji X 55-200mm

Fuji X 55-200mm

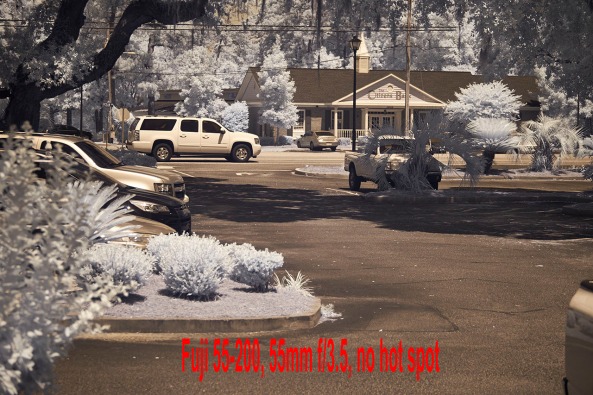
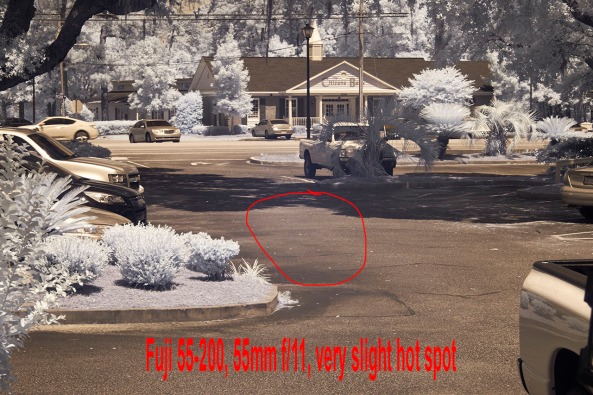
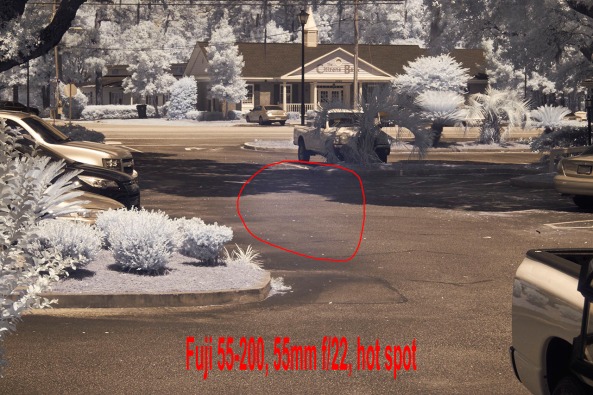
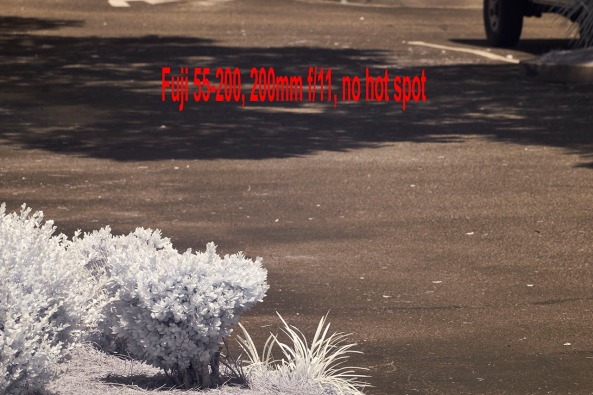
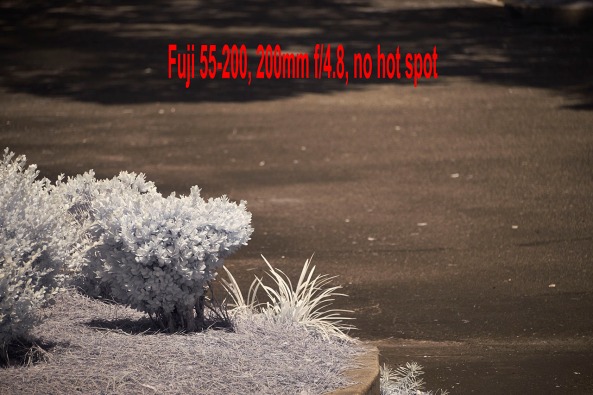
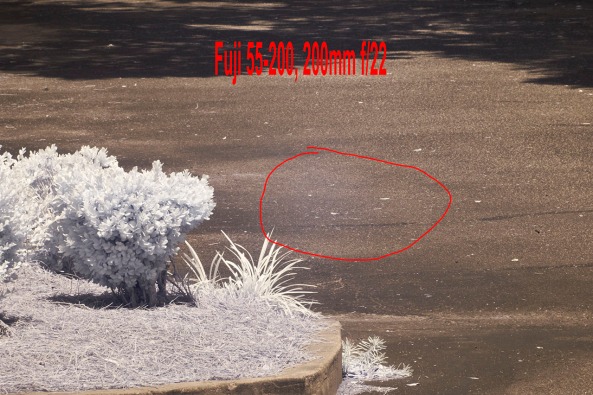
Yes, the new Fuji 55-200mm lens arrived for my fuji camera systems!  I am currently shooting with a color X-E1, a color X Pro 1 and a IR converted (720nm) X Pro 1.   I know how well the 55-200 works on the color bodies but what I really needed to know how did it work with the IR system!  Would it give hot spots as so many of the Fuji lenses do?  This post is the report of my findings.  The final verdict is that it works very well and as long as you do not go higher than f/16 there are no hot spots to worry about at any zoom range! To me this is a really big deal.  

So far only the 14mm and 35mm Fuji lenses are usable in infrared. So the addition of another lens really helps.  

I am going to give you some examples of how this lens actually does at both the wide and long ends of the zoom range wide open and closed down so that you can get a feel of the usable Infrared range that you can use.  Next week I will do a posting using the lens for color work only.

Pawleys Marsh, Fuji X Pro 1 720nm IR conversion w/ the new 55-200mm lens.

Pawleys Marsh, Fuji X Pro 1 720nm IR conversion w/ the new 55-200mm lens.

OK, let’s take a look at the good and bad of the 55-200 in IR, the Wide end:

55-200mm @ 55mm, f/23.5 No hot spot

55-200mm @ 55mm, f/23.5 No hot spot

55-200mm @ 55mm, f/11  Small hot spot

55-200mm @ 55mm, f/11 Small hot spot

55-200mm @ 55mm, f/22 Bad hot spot

55-200mm @ 55mm, f/22 Bad hot spot

As you can see as you get to f/11 we start to develop a small hot spot, but nothing that cannot be fixed.  Above f/11 the lens becomes unusable at the wide end.


Now, let’s take a look at the long end of the zoom range:


55-200mm @ 200mm, f/11 Bad hot spot, NO HOT SPOT

55-200mm @ 200mm, f/11 Bad hot spot, NO HOT SPOT

55-200mm @ 200mm, f/4.8 Bad hot spot, NO HOT SPOT

55-200mm @ 200mm, f/4.8 Bad hot spot, NO HOT SPOT

55-200mm @ 200mm, f/22 Bad hot spot, SMALL HOT SPOT

55-200mm @ 200mm, f/22 Bad hot spot, SMALL HOT SPOT

The difference at the long end of the zoom is amazing and is usable over the entire range of the aperture!  This is great news for us IR shooters.

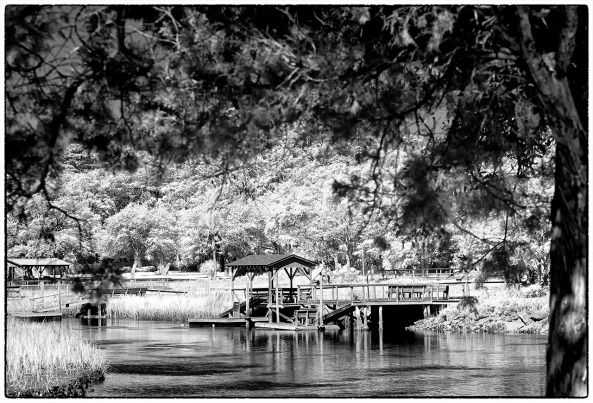
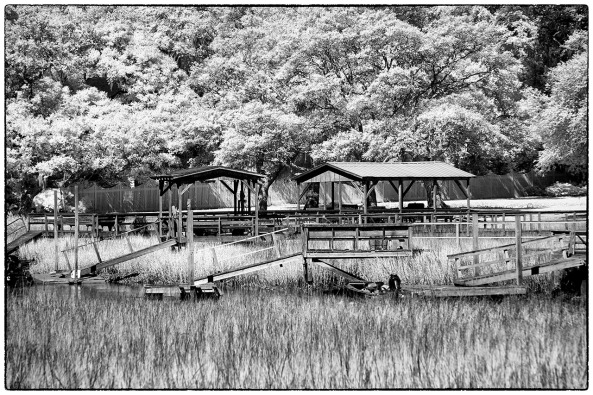
Pawleys Island Marsh, 200mm B&W Post Processing

Pawleys Island Marsh, 200mm B&W Post Processing


There is starting to be a large number of IR photographers out there who are using converted Fuji X Pro 1 camera systems.  There are currently 2 conversion companies out there who can do the conversion.  I HIGHLY recommend the X Pro 1 as an Infrared platform and with the addition of the 55-200mm lens to our shooting arsenal we are way ahead of the game!


Moody Images in Infrared & Color! Fuji X Pro 1 and X-E1


Grabbing your viewers by the throat and not letting go…

A dark and stormy night

A dark and stormy night, Fuji X Pro 1 w/ 14mm fuji lens at 720nm Infrared.

Images that are dark and moody tend to grab our attention.  It is as though there is something hidden and dark that demands our attention.  We stare at them and analyze the image for a deeper hidden meaning.  This creates emotional impact that allows our viewers to share what we felt as we created the images!

Look for dark, stormy skies, moody clouds, dark trees or water.  Work in Infrared and you will find that you have a much better chance to capture these kinds of images more often than when working in color.  It is still possible to do so in color but you have to work harder at it!

Paradise Island Light, Nassau

Paradise Island Light, Nassau


As you can see in the image above, it is moody and draws the viewer into the scene, but it does not have that “dark and stormy” look and feel!  As I stated before, it is much easier to capture these types of image when working in Infrared!

A dark and stormy night

A dark and stormy night

Work in both Faux Color and B&W.  You never really know what you are going to get unless you take the time to post process both ways.  You should even look seriously at the properly white balanced raw image right out of the camera!  Sometime you can get a really stunning image there.

Lady Katheran

Lady Katheran, 720nm Infrared, Fuji X Pro 1 with Fuji 14mm lens.

Here is the same image processed in B&W.

Lady Katheran

Lady Katheran


The workflow to getting great images in post processing is to ALWAYS process in the 3 main ways:

  • RAW:  Check how the images looks right out of the camera.  In 720nm and 590nm you can get some stunning images with beautiful bronze skies!
  • Faux Color:  If your camera captures any color data at all (720nm and lower) then you should ALWAYS take the time to process in this mode.
  • B&W: You just done know what you are going to get unless you try!


Try adding a lens vignette to your images to darken the corners.  This will give more mood!

Here are some examples of RAW and B&W post processing!

McClellanville Shrimper

McClellanville Shrimper, RAW right out of the camera!


McClellanville Shrimper

McClellanville Shrimper, B&W


As you can see both versions give stunning results.  The most important thing for you to remember is that to get the best results from all of your images it is necessary to take the time to post process in all three modes.  Do not short change yourself by cutting corners.  Take the time to give each image your best try!  


You will be rewarded for you work!


Fuji X Pro 1 – 720nm Infrared Faux Color and B&W Post Processing


A Simple Tutorial on Infrared Post Processing…

Murrells Inlet Marsh, X Pro 1 720nm IR Faux Color

Murrells Inlet Marsh, X Pro 1 720nm IR Faux Color

The Fuji X Pro 1 has turned out to be one of the best Infrared camera systems that I have ever used… period!  The only good Fuji lenses for Infrared have proved to be the 35mm f/1.4, the 18mm f/2 and the new 14mm.  The Viogtlander 75mm f/1.8 has also proved to be a STUNNING lens also!  So, the camera has proven its infrared capability, now it is time to discuss in detail the recipe for post processing!  It is all quite simple but there are a few requirements that you must understand in order to follow my workflow with understanding.

Needed:

  • Photoshop CS5 or CS6
  • Nik Filters, Viveza, Define Silver EFX Pro plugins for Photoshop, NOT LIGHTROOM.  (You can now purchase the entire library of Nik filters for $149)
  • Kromography False Color Action which can be downloaded here from the right menu bar under the box menu.  You can simply  click on it to download to your computer then drag it to photoshop to install.
  • A converted Infrared camera system capable of generating enough color data to make Faux Color images.  This means 720nm, 665nm, 630nm and 590nm conversions.
  • The ability and desire to experiment!

As you move your RAW (shoot only RAW for IR because of the ability to shift the white balance easily) onto your computer you should automatically tell yourself that you are going to process each selected image in Faux color and B&W.  Sometimes you will notice that the un processed image looks great also (wonderful bronze tones) and decide to do a version like this as well!

Lets talk about the RAW conversion process a little bit.  Photoshops ACR built in RAW converter will NOT apply the white balance correctly and your images will appear deep red.  For this reason I use Capture One version 7 from Phase One.  It is simply the BEST RAW converter that I have ever used.  You can download a trial version and decide for yourself if what I am telling you is true!

My Initial Editing Steps:

  1. Move images from my camera to my computer with an intelligent download tool that renames them with a meaningful name and create an intelligent directory tree for my RAW Library.  For this I have tested dozens of tools and found that Ingestimatic is the best and lowest cost one out there! You can find them here.
  2. Visually edit the RAW files by deleting the images that are simply no good.  Do not clutter up your computer with these useless files.
  3. Batch process my RAW conversion choices and adjust the exposure, contrast and angles.  Capture One will allow this and place the converted image files into a storage directory for later editing.
  4. Within Photoshop, open  each converted image one at a time for post processing
  5. Run Nik Define 2.0 in its default mode on the image for noise reduction, Save.
  6. Run Nik Viveza and without using any selection points increase the structure around 10% and the contrast about 5%, Save.
  7. Having installed the channel swap action that you downloaded here, run it on your image.  The last thing it will do is to open a Hue/Saturation window with the Master channel selected.  Simply select the CYAN channel  and vary the HUE a little bit to bring the sky to a normal blue rather than a blue/green.  Then select the RED channel and adjust the saturation up to a value you like, and repeat with the YELLOW and MAGENTA channels.  When you are happy with the results click on DONE to move on.  REMEMBER:  This is to only get the colors of the FAUX COLOR IR image into the ball park!  The real adjustment will happen next.
  8. Run Nik Viveza again.  Here is where you will use your control points to slightly adjust the colors and contrasts of various image elements to bring out a stunning, etherial work of art!  LOOK closely at your image, decide what you wish to adjust (Hue, saturation, contrasts and de-saturation). MORE ON THIS LATER!
  9. Run Nik Define one more time.
  10. Flatten the image, crop to taste, correct any imperfections (healing tool and content aware fill).
  11. Save the image with a meaningful name in a planned and thought out master image library.
  12. With the finished Faux Color image still open in Photoshop, now run Nik Silver EFX Pro to do your B&W conversion.  There are several built in recipes in this filter that can be used as a starting point.  My favorites are:
  • High Structure Harsh
  • High Structure Smooth
  • Full Dynamic Range Harsh
  • Full Dynamic Range Smooth
  • Fine Art Process
  • Wet Rocks (once in a while)

Save your image again with a NEW file name that reflects the difference in your master image library tree!

Murrells Inlet Salt Marsh, X Pro 1 720nm IR

Murrells Inlet Salt Marsh, X Pro 1 720nm IR

Remember:  Process ALL IMAGES as both Faux Color and B&W.  You really do not know what you are going to get till you do so.

All of this really is VERY SIMPLE and once you have done it a few times it will become second nature to you.  Soon you will be a post processing Infrared God or Goddess!  Congratulations

No, let’s take a look at the image below.  Notice the areas that I have circled as places where I desire to change the colors, contrasts and saturations (both plus and minus). Also consider that this is a 720nm converted camera and as such has a very limited color range (light pinks and warm tones and blues).

Annotated Faux Color, X Pro 1 720nm IR

Annotated Faux Color, X Pro 1 720nm IR

It is in this area and others like them (similar color values that are the same) that we are going to place control points on and change these values!  If you notice that the areas around them also change a little you can place what we call anchor points which are simply control points with no adjustments to bring those areas back to where you wanted them!

You will find this ENTIRE process from the initial loading into photoshop to finish will just take 4 or 5 minutes or less as you become more practiced!

Here are a few more images for you to consider that were taken on the 720nm Fuji X Pro 1 camera system:

Stormy Seas Faux Color, X Pro 1 720nm IR

Stormy Seas Faux Color, X Pro 1 720nm IR

Stormy Seas B&W, X Pro 1 720nm IR

Stormy Seas B&W, X Pro 1 720nm IR

Sometimes Faux Color images simply do not work, then you still have the great B&W ones to work with!

SC School Bus Boat, X Pro 1 720nm IR

SC School Bus Boat, X Pro 1 720nm IR

SC School Bus Boat, X Pro 1 720nm IR

SC School Bus Boat, X Pro 1 720nm IR

Was this information helpful?  Please let me know one way or the other!

Wabi/Sabi: Exploring decay in man made objects


All things Old are Beautiful again..

This morning at 9:30 at Georgetown, SC. I decided to get out my cameras and shoot some Shrimp Boat images before I had to open a Co-Op gallery that I am a partial owner of.  The Shrimp  Boats are a subject that are very dear to me and I visit them every chance that I have.

They are for the most part all falling into decay.  The market for local salt water shrimp is almost not enough to support the boats.  With the import of fresh water farm shrimp the local fisherman are being forced out of business and the result is the condition of the boat and companies… A very sad state of affairs.

The Boat Graveyard and the 3 Wheel Houses...

The Boat Graveyard and the 3 Wheel Houses…

The image above illustrates the wabi-sabi concept:  There is beauty in decay  It sounds very counter to the way we think as artists, but with a little thought I think that you will be able to agree with the concept.

Wabi-Sabi

The Japanese concept of Wabi-Sabi, as described in Brainpickings, “connotes a way of living that finds beauty in imperfection and accepts the natural cycle of growth and decay.”

Characteristics of the wabi-sabi aesthetic include asymmetry, asperity (roughness or irregularity), simplicity, economy, austerity, modesty, intimacy and appreciation of the ingenuous integrity of natural objects and processes.
From an engineering or design point of view, “wabi” may be interpreted as the imperfect quality of any object, due to inevitable limitations in design and construction/manufacture especially with respect to unpredictable or changing usage conditions; then “sabi” could be interpreted as the aspect of imperfect reliability, or limited mortality of any object, hence the etymological connection with the Japanese word sabi, to rust.[citation needed]The Japanese kanji characters:


(sabi, meaning rust)

and


(sabi, as above)

are different, as are their applied meanings, yet the original word (pre-kanji, yamato-kotoba) is believed to be one and the same.
“Wabi-sabi is the most conspicuous and characteristic feature of traditional Japanese beauty and it occupies roughly the same position in the Japanese pantheon of aesthetic values as do the Greek ideals of beauty and perfection in the West.”  “if an object or expression can bring about, within us, a sense of serene melancholy and a spiritual longing, then that object could be said to be wabi-sabi.” “[Wabi-sabi] nurtures all that is authentic by acknowledging three simple realities: nothing lasts, nothing is finished, and nothing is perfect.”
The words wabi and sabi do not translate easily. Wabi originally referred to the loneliness of living in nature, remote from society; sabi meant “chill”, “lean” or “withered”. Around the 14th century these meanings began to change, taking on more positive connotations.[1] Wabi now connotes rustic simplicity, freshness or quietness, and can be applied to both natural and human-made objects, or understated elegance. It can also refer to quirks and anomalies arising from the process of construction, which add uniqueness and elegance to the object. Sabi is beauty or serenity that comes with age, when the life of the object and its impermanence are evidenced in its patina and wear, or in any visible repairs.

For me and what I consider to be “Fine Art Photography”, the concept of Wabi-Sabi fits like a glove in regards to the shrimp fleets.  I watch them over the span of time, capturing them again and again.  The one thing that stands out above all is the fact that they like everything else will fall into decay… both physically and financially, but faster.

The 3 Wheel Houses in B&W. Stepping back into an older time of photography, fitting don't you think?

The 3 Wheel Houses in B&W. Stepping back into an older time of photography, fitting don’t you think?

I am going to dedicate a photography project to this concept.  I would think that it will take me several years to finish or perhaps unto my death which in a strange twist of logic fits into the project/concept quite well.

So I hope that you enjoy these images and that you intellectually chew on the concept of Wabi-Sabi and to how it will fit into your own artistic visions….

Normally, detailed closeups would be better suited for wabi/sabi studies, but look at these following 2 images and notice how the rust and corrosion feed into the concept.  Do you see the detail in the flat areas of the boat and how it is rolling and pitted?  These imperfections take on an artistic perfection on their own!

Stormy Seas, Georgetown, SC.

Stormy Seas, Georgetown, SC.

B&W, stepping back into an "older" time and place.

B&W, stepping back into an “older” time and place.

The Wheel House Door

The Wheel House Door

The Working Boat, 630nm Infrared

The Working Boat, 630nm Infrared

The Battered Bow...

The Battered Bow…

I hope that you enjoyed the image and the concept…

Important Difference Between Film & Digital


What NOT to expect from Digital!

Fuji X-E1 with its 18-55mm lens

Fuji X-E1 with its 18-55mm lens

Recently I had a series of conversations here with a reader who wanted to pick up a Fuji X-E1 camera and have it deliver Velvia results out of the camera.  This conversation did not start well, but moved into meaningful dialog very fast.  I thought that I would share my thoughts as I gave them to him with you as it is important to understand what a digital camera can really deliver…

As a new convert to digital from film you need to understand one MAJOR difference between the two. Images generated from film are/were dependent upon the film emulsion, exposure, chemistry and glass quality/coatings for colors, saturation and white temperature which in combination gave each film its own distinctive look.

Now, along comes digital, where the only real move into the film Look/Feel is with a built in simulation or the proper selection of White Balance and the filters/coatings on the sensor plus the lens glass and its coatings. Some digitals give a more saturated look, some less. Some pump up the reds to the point of problems.

The Fuji’s typically give a more saturated image with a slight bluish feel. But, knowing photographers with experience who understand these issues and the capability of shooting in RAW understand that ALL of the films/sensor character is really defined in post processing! Looking for a Velvia look and feel out of the camera is foolishness and very short sited. You take your pictures, making sure that the WB is correct for the scene and day, you shoot in RAW, you get your exposure correct  then when you get home you do your color/saturation/tint adjustments in the RAW conversion. Then in Photoshop you do your real work where you can move your image into the film looks as you like with simple adjustments like, saturation, levels, color shifts and so on. With the addition of the NIK filter set you then get total control over these adjustments in an easy and fast way.

If you are looking for Fuji (or any camera) to give you a film look right out of the camera then you should just quit now before you have a nervous break down.

My Fuji’s are an incredible tool. But they are just tools, the creative work happens on the computer in post processing. I have used dozens of cameras from simple point and shoots, micro 4/3s, fuji X systems, Canon’s, Leica’s, Nikons and many many others including lots of film systems including (and still in use) a very nice 4×5. NONE of the digitals will give an accurate film simulation, period. Don’t look to  them for that or simply stay with film.

Go out and try different cameras yourself. When with friends try a memory card in their camera. Take the images home and work them over on the computer. Make your own decision and move forward.

My own decision path was simple…

  1. I dumped ALL of my canon system including top pro line bodies and $30,000 in L glass due to medical problems where I lost 80% use of both arms and hands. The DSLR’s are simply too heavy for me to use now!  What was I to do?
  2. I experimented with ALL of the various Micro 4/3 systems. Kept a GH2 as an Infrared system and the OMD as a high speed replacement for my Canon 1DSMK3 and lenses in order to chase birds and other wildlife.
  3. I tried and decided against the Leica system because of lack of longer lenses and lens expense. I could easily spend another $30,000 on the needed lenses and still not have the range I desired.
  4. I Tried the Fuji X100, Cool, nice small camera with great images, but no interchangeable lenses, bummer
  5. I found out that Fuji came out with the X Pro 1, rushed out and got one with EVERY Fuji lens plus 3 Voightlander M mount lenses for the Leica. Fell in love with the camera/lenses and the images generated. But it had no electronic shutter release so it would not work with my lightning trigger and water drop system. Bummer
  6. I found out that Fuji introduced the X-E1 with this functionality built in. Purchased it and have been happy ever since. The Fuji E-X1 is an amazing system for landscapes, long exposures (REALLY GOOD), water drops and lightning photography. Does it look like velvia when that is enabled? Not really, a little close BUT WHO CARES!!!! I can make it look like ANY FILM TYPE in post processing! It creates amazing low noise images at high ISO’s but I rarely use high ISO’s. It is light, easy to use and has GREAT lenses. I love the Leica and Voightlander lenses when used with the Fuji M to X adapter with its corrections built in!

You can read about ALL of these things here on the blog. You can ask questions on the various forums on the net but they are generally filled with camera lover/haters/bashers rather than people who are trying to learn and improve with their equipment (even though they are there but due to the noise of the others are just un-heard!).

Good luck in your search. Please keep in touch and let me know how it goes as you progress!

OK, you get one Fuji X System  image!

Stormy Seas at the dock.  Voigtlander Heliar Ultra Wide-Angle 12mm f/5.6 Lens. Notice the focus from about 3 inches to infinity.

Stormy Seas at the dock. Voigtlander Heliar Ultra Wide-Angle 12mm f/5.6 Lens. Notice the focus from about 3 inches to infinity.

A day in Georgetown with the Fuji X-E1


Travel and the Fuji X Series, a match made in Heaven!

1 camera, 3 lenses and a good filter system and we are good to go!

Voigtlander Heliar 75mm f/1.8 Lens

Voigtlander Heliar 75mm f/1.8

I spent last Sunday in Georgetown, SC.  I had a gallery change out in a gallery that I am a member of (Co-Op).  The change out only took about an hour so I decided to take the rest of the day to scout new locations and just shoot!

There are several places there that I love to visit.  As you drive North on Front Street out of the Down Town area you start passing several side streets on the right.  Each of these leads to a marina with several Shrimp Boats (and in 1 case many!).  I like walking around the docks and working each group of boats then moving in closer and doing detail images. These vessels are not long to be with us so if you have the chance to visit and photograph them you should youmake it a priority to do so!

The 3 Shrimpers!

The 3 Shrimpers!

The choice between Color and B&W is a tough one for most photographers.  For me, I like B&W much better but I will porcess both for each and every image that I take.  So I will have the choice as to what I eventually use readily on hand!

Sun in the rigging...

Sun in the rigging…

I do not normally shoot intentional lens flair but for this image I composed the image with it in mind! This generated such a perfect series of light beams that they were visible in front of the boats cabin door! Again, the choice between Color and B&W was a no brainer for me!

The 3 Bows...

The 3 Bows…

Voigtlander Heliar Ultra Wide-Angle 12mm f/5.6 Lens

Voigtlander Heliar Ultra Wide-Angle 12mm f/5.6 Lens

In the end I will still offer you a Color Shrimp Boat selection.  These boats are old, and full of color!  Rust, bright paints, bottom paint, lines and life rings can make for a bright and eye catching display if you present it properly with a composition that is pleasing.

At the very end of Front Street you will find several parks along the edge of Winyah Bay with pilings in the fore ground which make idle compositions for long exposures.  Plus there is a boat launch that you should walk out on and look north across a long line of pilings!

Lee Seven5 Filter System

Lee Seven5 Filter System

What fun I had!  I found some really great Shrimp Boat compositions and did some long exposures with the Fuji and the Voigtlander Heliar 75mm f/1.8 Lens with the new Lee Seven 5 filter system! Consider, that the Lee system is a bulky but light system (look at the image to the left), when you add in the camera and lens the entire combination can become bulky and heavy making it difficult to use.  I also used the Voigtlander Ultra Wide-Heliar 12mm f/5.6 Aspherical and the Fuji M to X adapter for several of these Shrimp  Boat images.

This is the main reason that I switched to the Fuji X system (aside from the fact that it generates stunning images!

Ok, as the day go away from me I went further North to the parks looking at long exposure locations for sunset.  After looking at all of the locations there I decided to set up at the boat launch and setup looking to the North across the pilings there.  The sun was setting fast and I setup using the 75mm f/1.8  and the Lee Seven 5 system with a solid 3 stop ND and a soft Graduated ND to darken the sky. The result was this 90 second exposure:

Boat Launch Pilings, Deep Twilight

Boat Launch Pilings, Deep Twilight, 90 second exposure

With the sun totally gone and deep into twilight, I simply turned the camera 90 degrees to the right and looked at the industrial complex across the bay with great columns of smoke spewing into the sky!  I removed the 3 stop solid ND and kept the soft Graduated ND in place to further darken the sky. So the resulting image was a 240 second exposure and full of color, smooth water and blowing smoke:

240 second exposure, deep twilight.

240 second exposure, deep twilight.

Do you see how a light weight high quality camera/lens system like the Fuji works to our benefit when traveling and needing the ability to shoot in all conditions?  With the X-E1 system there is no limit to my shooting styles including Lightning, Water Drops and Long Exposures.

Please let me know what you think!

Death by neglect….


Lila Lee, in the boat grave yard…

There is something about Shrimpers… I cannot get enough of them and find myself visiting them again and again.  I love the dilapidated nature of them and even though they are in such rough condition they seem to venture out into the deep time after time.  Perhaps they are a reflection of the men who sail them, rough hewn, salty men, eking out a living from the sea.  Regardless, they are things of photographic beauty and deserve to be documented for history. You see, they are vanishing from sight.  Shrimp seems to mainly come for fresh water farm ponds in the lower americas and soon these beautiful boats will be a thing of the past.

The Japanese concept of Wabi-Sabi:  “connotes a way of living that finds beauty in imperfection and accepts the natural cycle of growth and decay. Characteristics of the wabi-sabi aesthetic include asymmetry, asperity (roughness or irregularity), simplicity, economy, austerity, modesty, intimacy and appreciation of the ingenuous integrity of natural objects and processes.

Thus begins my exploration of Sabi

You had better get out and enjoy them while you are able too..

Here captured in Black and White, is a detail shot of the shrimper Lila Lee.  She is resting in the boat grave yard in Georgetown, SC. The older shrimpers seem to be abandoned along the shore here in Georteown till they sink.  We have some sitting on the bottom growing trees and weeds from their decks.

This image was captured on the Fuji X-E1  with a MC Soligor 70-300mm C/D manual focus macro lens, another relic of the past…

Lila Lee

Lila Lee