Creating Etherial Long Exposures With Breakthrough Photography’s X4 ND Filters


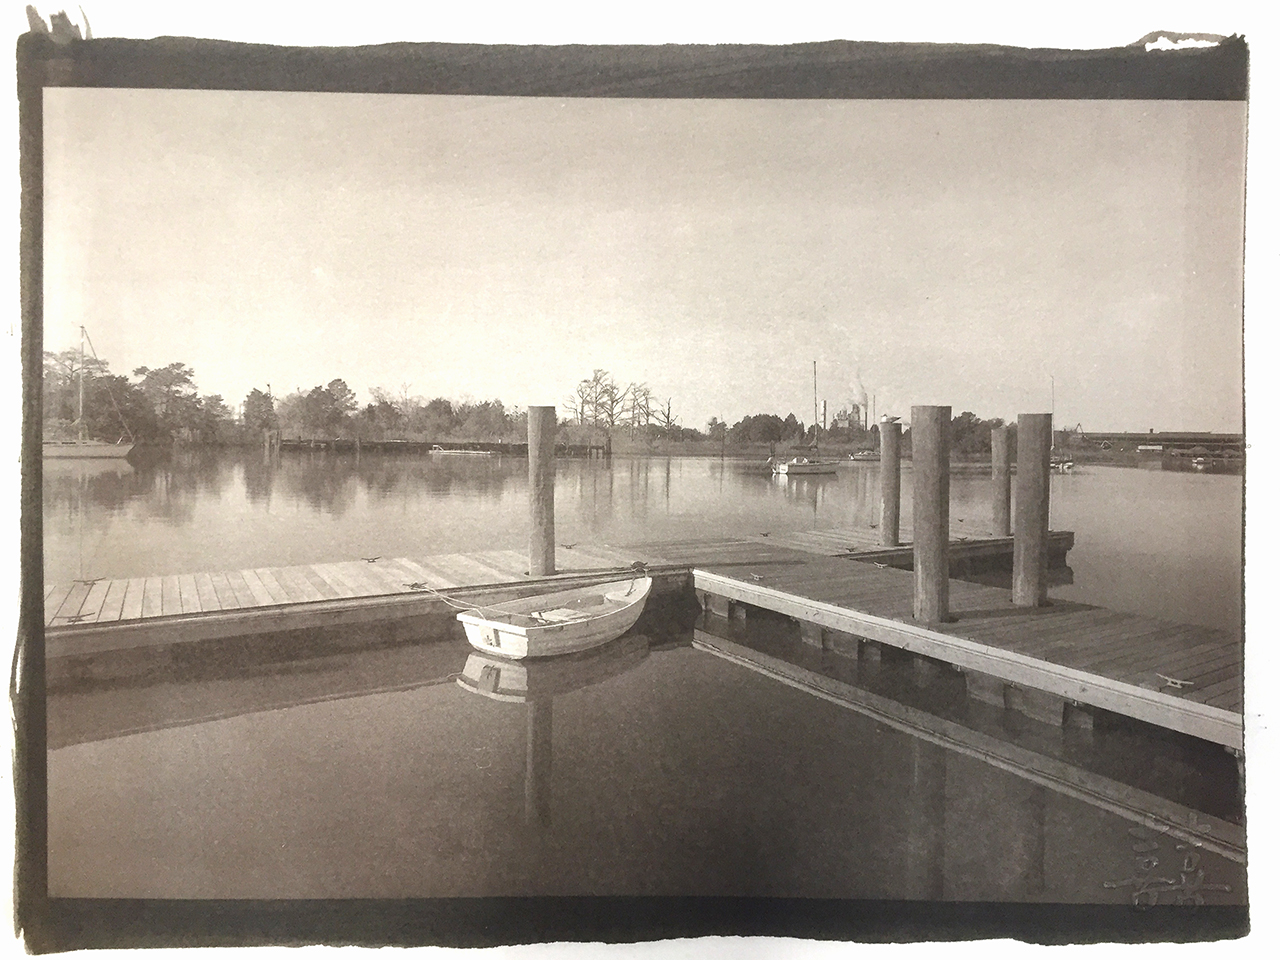
The  Peace Of The Creative…

Slowing down creates peace on multiple levels. 

For you as the photographer and for those who view your work, this has never been more true!

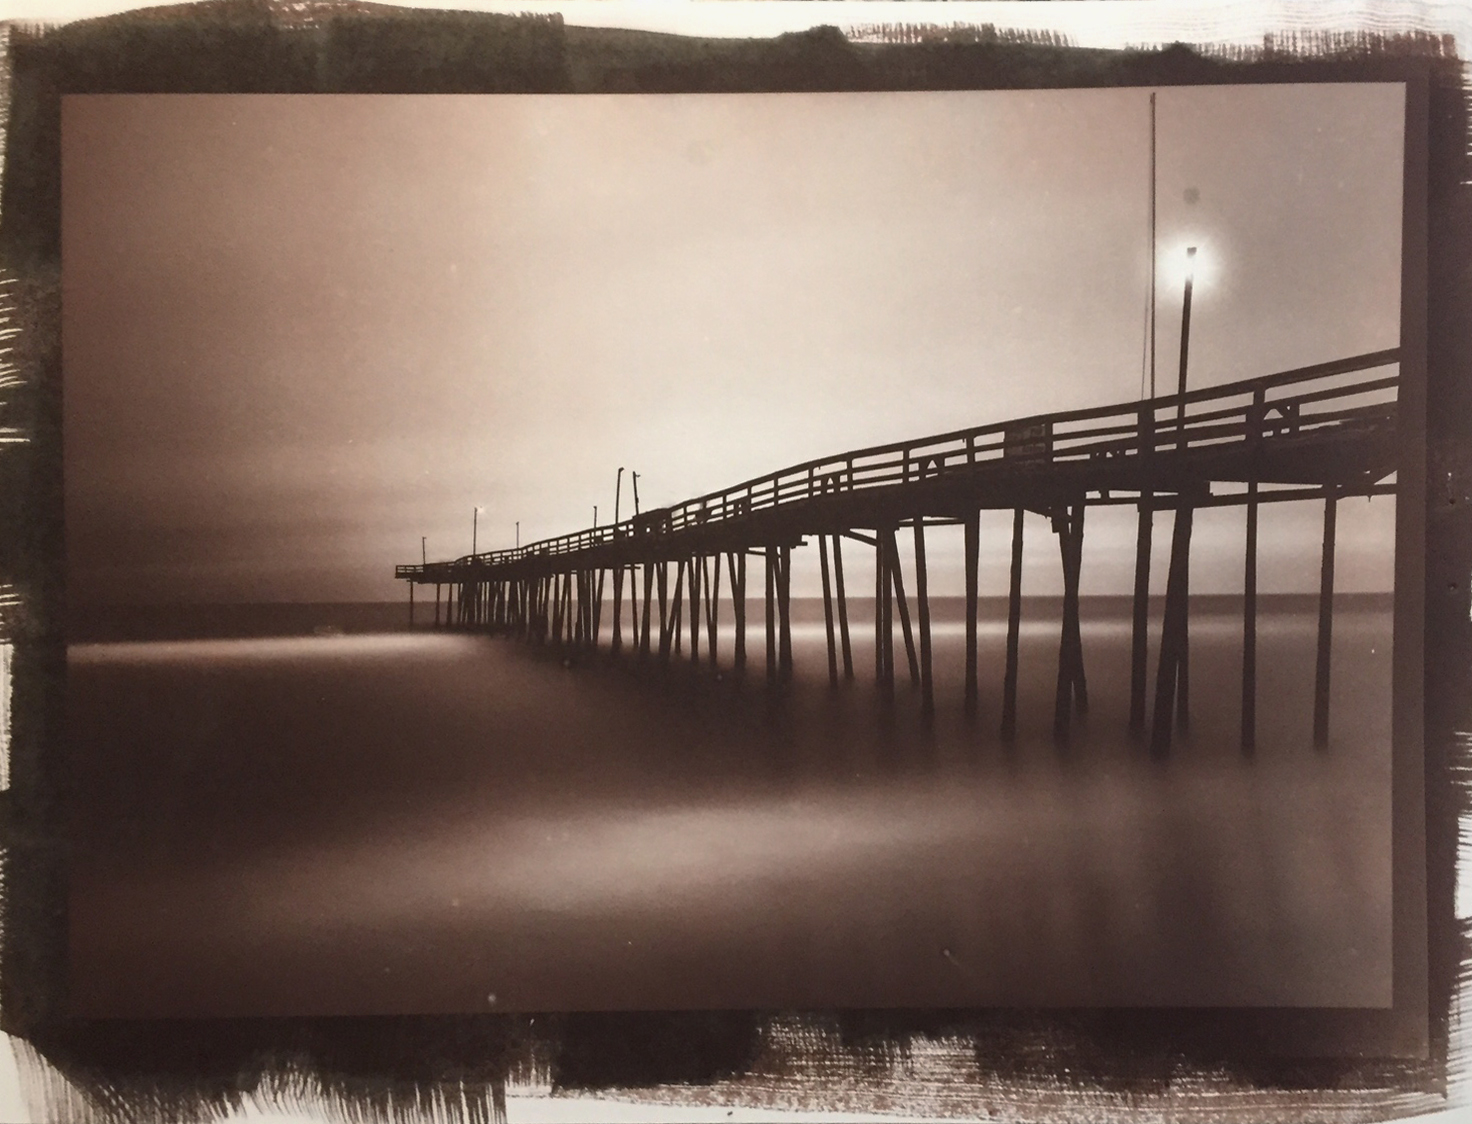
Roanoke Marshes Light. Fuji GFX 50R for 20 seconds with a Breakthrough X4 6 stop ND and the X4 2 stop soft graduated ND

I am going to do a slightly different type of post this time. 

We will discuss the art of Long Exposures a bit but we will focus more on the technical aspects of using ND filters to correct for different types of lighting as well as talk about good ND filter systems verses not so good, and why it is always best to invest your money in good filters!

DefinitionLong Exposure – To create an image in camera with the shutter open for longer than a few seconds in order to smooth out movement over timeThis can be softening the  flow of water over a waterfall, flattening of waves in lakes and oceans or tearing clouds moving across the sky.

Setup:  For camera setup you want a long shutter speed (for me usually from 20 seconds to 60 min), mid range aperture (f/16)  and the base ISO that your camera provides.  You do NOT want to switch on the L ISO in your camera. While it  forces the ISO lower it costs you in reduced dynamic range! You should also verify that your camera has Long Exposure Noise Reduction turned on.  This is a royal pain due to doubling of exposure time and forcing you to wait twice as long for a shot but it removes sensor generated noise as well as sensor hot spots.

Note:  I have added a video to the bottom.  It discusses everything and more that we are talking about in this post but it is quite long!


The top image was taken at the always inspiring Roanoke Marshes Lighthouse across the sound from Nags Head Island in NC. As one of my favorite locations for sunrises over the lighthouse it is also a most worthy location for daytime long exposures! These are usually very easy to create due to the small waves in the sound! This image was done on a Fuji GFX 50R medium format digital with a 32-64mm GF lens, 6 stops of ND (Breakthrough X4 magnetic) and a X4 2 stop soft graduated ND on the sky to balance the difference between the sky and water. The exposure was 20 seconds an hour after sunrise and in the rain.

But by what criteria did I choose the solid ND and the soft edge graduated ND?  This is where a little technical knowledge will really help you in creation of amazing long exposures.

First, there are a few points to consider when thinking about using ND filters:

  • ND filters are simply sunglasses that you put in front of your lens to limit the amount of light that reaches the camera.
  • There are 2 basic styles of ND, Full and Graduated.  Full covers and darkens light passing through the  entire lens, Graduated cover and darken only part of the light passing through the lens with the ability to rotate the edge angle of the start line and moving the line up or down in the scene.
  • In the full family there are several values and styles.Breakthrough Magnetic lens mount with the rotating dial on the back to rotate the filter
    • Screw on:  they simply screw onto the end of your lens
    • Magnetic:  these are a new (2018) system from Breakthrough Photography.  They require you to buy a special magnetic mount bracket for the filter threads on your lens.  The adapter has a rotating ring that allows the filters to be actually turned (for use with polarizers) and costs about $20. Currently, Breakthrough is re-designing both the magnetic filters and the magnetic lens adapters to allow for stacked magnetic filters.  This should be completed by summer 2019 and they will replace the older style magnetic filters and adapters. It is important to tell you that when you use the magnetic filter system alone or with the square system there is NO vignetting.
    • Breakthrough Square holder that attaches to the magnetic adapter
    • Square:  these use a square holder and in the case of the Breakthrough this holder will attach directly to the magnetic holder allowing use of and stacking of both systems at once. The square holder will hold 3 to 5 filters depending upon how you initially set it up. This is good for difficult lighting situations where you might need two different graduated filters at the same time.  This style  tends to suffer from light leaks around the edges of the square solid ND filters unless you carefully assure  that they are installed exactly right and only in the holder slot closest to the lens.
  • In the graduated family there are several types:Breakthrough Photography X4 soft Graduated 100mm filter system
    • Hard edge graduated:  where the dark area of the graduated filter is a sharp line.  This is for use on subjects which have a harsh division between the foreground and background . An example would be shooting on the ocean where the horizon is a sharp line between the horizon and the sky.  This is where you would choose a hard edge graduated ND.  These filters usually come in 1, 2 and 3 stop values where they start light and graduate to the dark.
    • Breakthrough reverse grad
    • Soft edge graduated: where the dark edge of the graduated filter starts very soft and  light and darkens as it moves up the filter.  This is for use in areas that you need to balance the foreground from the background but there is no clearly defined edge in the scene.  This is what I used in the image above to darken the sky so there was detail there and still enable the water foreground to be bright and almost a platinum look and feel.  These filters usually come in 1, 2 and 3 stop values where they start light and graduate to the dark.
    • REVERSE graduated:  this is a special graduated ND where it starts DARK and graduates up to lighter values.  If you desire to shoot sunrise/sunset this is a MUST have filter because as the sun approaches the horizon you get a very bright line of colors there that will either be blown out or if exposed correctly cause the rest of the image to be way too dark!  These filters usually come in 1, 2 and 3 stop values where they start dark and graduate to the light.
Breakthrough Photography Magnetic filter system.

So for the Roanoke Marshes Light above, I chose a Breakthrough magnetic X4 (newest technology) 6 stop solid nd to darken the entire image allowing for the 20 second exposure with the camera set to the lowest native ISO value (100),  an aperture of f/16 and a shutter speed of 20 seconds.  the initial results of this exposure was pleasing water in the foreground but the sky was also too light with little to no detail.  So I left the 6 stop magnetic filter on the lens and clipped on the 100mm square filter adapter onto the end of the magnetic adapter and installed a X4 soft edge 2 stop SOFT graduated ND filter.  While watching thru the viewfinder I adjusted the graduated ND up and down making sure that the soft edge came down to the horizon or a little above darkening the sky to allow for more detail there yet allowing the soft white water in the foreground!  It was as simple as that!  The entire process after the first shot took about 30 seconds to setup on the camera lens then shoot!


So let’s talk about sunrise/sunset images when the sun is close to the horizon.  We have all been out at sunrise, do you remember the very bright band of intense color that it right at the horizon as the sun approaches?   This is why the reverse grad ND filter was created, to keep the bright colors from destroying the overall exposure!  Here is an example image, amazingly at the same spot!

Roanoke Marshes Light, 3 seconds with the Breakthrough reverse grad placed on the horizon
Breakthrough X4 reverse grad.  See how you might place the dark area on the bright line at the horizon?

Do you see how bright the light is at the horizon?  The ONLY WAY I was able to capture this image was to use the reverse grad ND placing the dark section right on the bright band of light. Because the overall exposure was only 3 seconds no other ND filters were required.  Should I have desired a longer exposure to further soften the water’s surface I would have dropped in the 3 or 6 stop X4 magnetic filter into the adapter already on the camera!

Let’s take a short side trip here and discuss the actual filters.  By now you all have seen that I am a strong user and promoter of the Breakthrough Photography X4 line of magnetic and graduated filters.  There is a reason for that:

  • All dark solid ND filters suffer from some sort of light leaks around the slide in filter holder.  The magnetic mounted X4 Breakthrough filter line has solved this problem.
  • The X4 Breakthrough filters have ZERO COLOR CAST!  This is a really big deal.  I have been a big user of B+W and Lee filters over the years and still have them on hand.  Unfortunately, both of those both have strong color casts that force me deeper into post processing to attempt to correct these color casts.  I had always thought that this was simply the cost of doing long exposure!  Well NO MORE!   I am so pleased to report that those problems are not the case with Breakthrough, ALL BREAKTHROUGH filters!  Cost wise they all cost about the same when you get up into the same quality levels (B+W, Lee, SinghRay and Breakthrough).  So for me it was an easy choice, I have totally converted over to the Breakthrough X4 line of filters. I currently am using the magnetic and square system from them.
  • There is ZERO vignetting with the magnetic system on ANY of my lenses.  I currently and using 72mm, 77mm and 82mm lenses and mounting both the magnetic system and the 100mm system together!
  • Breakthrough filters come with a 25 year guarantee and their customer service is crazy good.  They are currently (Feb 2019) working on an updated magnetic system where the filters can be stacked in the holder!


So my advice is this.  Cameras come and go, it is your glass (lenses and filters) where your quality lays.  Invest in the best you can.  You will never go wrong with the Breakthrough system!  (gee I wish they would pay me…)

Ok, back to images.  After sunrise is done and before sunset is anywhere near we can still create AMAZING long exposures!  There only 2 problems that we must overcome!

  1. Slowing down the shutter speed to give the long exposure.  During normal daylight we will likely be using a 10 or 15 stop solid magnetic X4 ND as long as the sky and the foreground are near the same exposure value.
  2. Should the sky be brighter than the foreground we will also use a X4 soft edge graduated ND filter to balance the foreground and sky.
Pawleys Island Pier in dense fog. The foreground and sky are close to the same brightness so I only needed a 15 stop X4 magnetic filter

Here is an example of a scene with little difference between the sky and the foreground. The waves were HUGE this day so I used a X4 14 stop magnetic filter so smooth them down (490 seconds) and give the feel I desired.  The fog in the sky took care of itself and I walked away with a balanced ethereal image that I just loved creating! Another example of this is shown in the image below.  This again was a super foggy day so the need for detail in the fog was unnecessary so the oly ND needed was again the X4 15 stop magnetic filter!

Nags Head Pier in super dense fog.  X4 15 stop solid magnetic filter for 10 min


Ok, let’s take a look at a problem image where the sky has detail that you can see but when you only use a solid nd the sky is totally blown out!  What you simply need is a X4 Soft Grad filter to balance the sky and water to give you a bit of detail in the sky!

Duck, NC boardwalk and Tdock (broken) with a X4 6 stop magnetic filter plus a X4 2 stop soft grad ND on the sky down to the horizon.

These last two images show a extreme case of no balance between the water and the sky and more nd was needed on the sky to correct the imbalance.


P

Pier, Outer Banks, 12 min exposure, 15 stop X4 magnetic filter and a 3 stop X4 soft graduated filter down to the horizon.  The sun was up to the right and lighting the bottom side of the clouds.

Ok, one last thing… I had a live group hangout last night with some of my online students and we discussed everything in this post but with more info and thoughts on choosing the correct ND filters for a number of scenes.   Here is the link:

https://youtu.be/_qFkUJZzXmw

I know that this has been a long post but it was necessary to show the technical side of creating pleasing long exposures.    Next time I will discuss how to meter for long exposures.

As always please let me know what you think!


Learn the art of long exposure at our Georgia Coast Photo Workshop!


Georgia Coast Photo Workshop

March 7 – 10, 2019

Boneyard on Jekyll Island at sunrise

I LOVE working with long exposures…

There is so much peace in the long exposure process. At the scene, behind the camera and the results after processing simply takes my breath away. It does not matter what you decide to shoot with, Color, B&W, IR or Film because It simply does not matter, It all works. The processes of working with LE is that as we slow down the shutter of the camera we too are forced to slow down our mental process and be drawn into the scene! This works for boneyard shots at the beach, moving clouds over a building or simple rocks in the surf, It is an amazing journey in one single shot!

THE AMAZING IS POSSIBLE!

That is the thing about coastal Georgia. there are so many amazing photographic opportunities. Aside from the biggies, You all know how I love working in film and wabi/sabi, but creating long exposures is the one single photographic technique for me that always brings me peace…

This is your chance to learn the process, from artistic vision, choosing the correct filters and camera settings to post processing! Come along and learn all of these and more with Jamie and I. You will not be disappointed.

What exactly is needed in terms of equipment?

There are some equipment requirements for long exposures and as you find your self drawn into the process you will likely expand your catalog of gear, especially filters!

  • Good steady tripod.
  • Remote shutter release (wireless allows you to move around while working)
  • Fresh full battery.
  • Camera that allows a T or B mode
  • Low ISO capability
  • A basic set of screw on solid ND filters.  These will work during the day time when the sky and foreground are the same brightness level.  For times around sunrise/sunset you will need to add  2 basic graduated filters as well. ND filters are like sunglasses for your camera that come in different densities (darkness values).

My solid set includes: 

  1. 3 Stop X4 solid magnetic Breakthrough
  2. 6 Stop X4 solid magnetic Breakthrough
  3. 15 Stop X4 solid magnetic Breakthrough
  4. Polarizer X4 filter magnetic Breakthrough
  5. Night Sky X4 filter magnetic Breakthrough


My square (75mm and 100mm) set includes:

  1. 10 Stop 100mm X4 solid Breakthrough 2.5 Stop 100mm  soft edge graduated Lee
  2. 3 Stop 100mm X4 Reverse graduated Breakthrough
  3. 2 Stop 100mm X4 Soft Graduated Breakthrough

There are many makers of ND filters, I have always gone with B+W  and Lee but the Breakthrough  are much higher quality with a much higher cost. Because I have recently added a Fuji Medium Format digital system I am building a set of the Breakthrough filters in both solid and graduated using both their new magnetic system and the 100mm square filters for the graduated.

To start, you do NOT need all of these and the basic set will allow you to get started but you will run into trouble as the sun approaches the horizon on sunrise/sunset.

Learning how to use all of these filters is not difficult but you will be miles ahead of everyone if you consider a workshop that covers all of it PLUS the art of post processing your long exposures after capture.  The Georgia Coast is a great place to do just this.  We will be out all day learning behind the camera as Jamie and I wander around with you helping along the way, sharing our secrets for in camera, as well as the art of post processing in evening classes at the hotel!  This is a great workshop to learn the technique of long exposure but not limited to that!  We will spend time at a lighthouse, a old broken down building, piers, beaches and of course AMAZING SHRIMP BOATS!

Another view of the boneyard after sunrise!

You can download a PDF info link here:

https://app.box.com/s/qcw6ekysxgbe8tm8hb1l7a6nfytinly0

Using B&W To Grab Your Viewers By The Throat…


Yes, deep moody B&W can capture and hold your attention!

Pawleys Island Marsh, North Causeway

I am always curious as to what people like and dislike about my images and make a point of posting them online to see what people think and how they respond.  Sometimes the result of this practice really surprises me.  The funny thing is that most of my personal favorites in B&W are not well received by the public!  Yet those that I consider not as good get better reviews…

It does not matter what camera I choose to create with, Medium Format FIlm (Mamiya 645 AFDii) or digital (Fuji GFX 50r medium format), the output results are difficult to tell apart. I love working in film, its process from end to end defines art to me.  But I also love working in medium format digital as well.  It is a much shortened and simpler  process and only takes a fraction of the time when compared to film.  I think most of you will be hard pressed to pick the film/digital images that I am going to place in this post! So the source of the images make little difference to me.

Approaching Storm at Pawleys Island

Have you ever considered what it is about B&W photography that you are attracted to?  What about it grabs you?   For me, it is simple, the removal of color strips the scene to it soul allowing you to really become one with it.  It removes the confusion and gives a pure view of the scene!

Consider the image of the approaching storm above.  The clarity of the image draws me into the scene, the sharpness captures my interest and holds it.   The dark moody tones make me feel like I am still standing right there!

Pawleys Island Beach Crossover in the fog.

I am not saying color work is bad, rather that I personally enjoy working in monochrome and enjoying the finished images processed in B&W much more that color work.   I suppose that is why working in film is so addicting to me, everything about the process from working behind the camera, film processing, scanning and printing I find very enjoyable.  But with the introduction of the Fuji GFX 50R camera system I am equally thrilled!  You can shoot in both color and B&W on the fuji system. The real difference is that you can set it up with film emulation profiles in camera and generate and output true B&W RAW images!  I find that I like using the Acros/red profile in camera because it matches my film work with actual Acros film!   This gives me another entire workflow that matches my B&W film work 1:1! The fog image above in a good example of the ethereal nature that you can achieve when working in B&W.

Charlee Marie

The image above if Charlee Marie highlights this relationship between working with medium format Acros film and the medium format Fuji GFX 50r camera system.   The amazing tonality of the boat and sky capture my attention and will not let it go.  The subtle tonality of the wheel house is flawless.  Overall this is one of my favorite images produced by the 50R, capturing the heart and soul of the shrimp boat in a non cluttered fashion usually associated with them on the easy to use medium format digital 50R!  This particular image is one of my favorites from the 50R that has not been well received by the public, yet I cannot let it go…

Port Royal Shrimpers

The Port Royal Shrimpers is an example of everything coming together for a powerful image; Good Light, Clouds, Boats and reflective water plus being there!  Of all the images captured with the 50R this one has the highest number of likes and comments online.  Yes it is a powerful moody image but I am not sure if I personally like it more than the image above!

Daddys Girls, medium format Acros film

OK, on last image of Daddys Girls was taken last week on Acros Film on my 645 AFDII  using a deep red contrast filter so the sky is a little darker.  To me this is a powerful image and different from the digital work above it due to the deep red filter.  Yet all other aspects of the image match equally to the work generated on the 50R system.   

To me, this illustrates how well the film and digital systems can work together.  There are times when working in film is just not possible or practical during travel where the 50R would work much better and easier.

I am happy that each camera system can complement each other so closely!  It will make my life much easier and allow me to concentrate on creating art rather than on how I capture it!


As always please let me know what you think, I value your input!


The ART of creating MOOD


What Makes Ethereal Moody Images?

Kathy Dean, medium format film

This post is going to be a bit different from my otherwise technical (Geeky) posts of the past.  I am going to share my philosophy of creating MOOD in my art.

I spend a LOT of time studying the fine art photography of the past masters (Ansel and others) and current photographers.  I visit galleries, web sites like 500px scouring  for examples of the creative process that generates images that speak to me.   This takes up a lot of my time but I feel that it is a worthwhile investment to further my understanding of what makes great art that reaches out and grabs my attention!  I do NOT do this in order to copy others, (that is not my way) rather it is to understand what about an image makes it reach out and tweek my artistic desire!  You would think that after 55 years of personal photography that this would not be necessary, but if you think about it you will realize that life is learning and we never stop that process.  Sometimes it is re-learning forgotten lessons, other times it is about learning new lessons.  We all change and our tastes also change as we age, so to me this is a natural progression in our path in artistic endeavor.

I personally tend to work mostly in B&W Film, but do not limit myself to it.  I create as well in color both digitally and on film too, but my real passion is B&W. Here we are going to discuss only B&W and all of my examples are created on various 6×4.5 medium format camera systems because working with flim and the process of film motivates and enhances my creative process.  I am going to leave out the technical details of the images because I want you to really study the images without considering the technical aspects of the creative process.

Let us consider the image above of Kathy Dean, a shrimp boat in Port Royal, SC.    What about this image gives you pause, making you want to really study it?   Sit back and consider the mood of the image and what you are drawn to as you study it.  For me, it is the dark moody sky and reflections contrasted against the bright whites of the boats.  My eyes continuously circle around these details and re-settle on the boats again and again.  The dark sky and water create a moody ethereal frame that traps our attention on the boats themselves yet provides a scene free of the distractions of color

If we were standing there today with camera and tripod wouldn’t we be thinking that we could have a much better image with fluffy clouds?  Let me suggest that if indeed there were clouds the day I created this image that they too would have been a distraction from the mood of the image. 

I will honestly tell you that as I stood before this scene that it was my primary thought that this could be an amazing moody image provided that I set it up as a longer exposure to smooth the water and darken the sky and reflections.   In other words, I studied the scene, pondering what it was that drew me to it and how to use the camera (my tool) to create my vision! 

These are my secrets to successful fine art photography:

Stop, Look and Think about the scene:

  • Why are you attracted to it?
  • How do you compose for a simple yet powerful image free of distractions?
  • How to super charge the image with mood?
  • How to use the camera to create this vision?

Lindale Denim Mill, a study of extreme dynamic range in a single image…

Let’s take a look at another image, this one digital (yet another tool), and the camera on hand when visiting the inside of the Lindale denim mill in Georgia.  This is one of those  location that  will NEVER fail to deliver scenes full of wabi/sabi goodness full of amazing mood providing you approach it with the right motivation and mental tools!

Lindale Denim Dye Tank

I spent 7 hours here over the course of 2 days.  It was a power parade of mood that swamped my senses and at every single turn. I was continually stunned at what lay before me as I moved through the factory!  What more motivation could a fine art photography artist desire?  I slowed down, WAY DOWN and studied each and every hint of mood before me. 

For this scene, (Blue dye tank) I studied the dark moody ceiling and walls behind the pillars, the deep tank with its grungy details, but I particularly paid attention to the play of light coming through the windows and highlighting the entire scene!   I realized that in order to capture this scene with mood that I would need to control the sunlight and keep the dark areas from loosing detail.   I setup the camera to control both and average the entire composition.   This happened quite fast (remember 55 years of experience) and it only took ONE SINGLE EXPOSURE

To me, this scene has amazing flow that draws me in thru the lighted windows, walking around the exterior of the room and moving down the ladder.  My attention never leaves the room.  It has a wonderful dark mood and speaks to me of days long gone.   

What more can a photographer ask for in such a creation?

My path in creating this image:

  • I walked around the entire room several times, studying the elements that the scene contained.
  • I constantly asked myself;  “Mark, why do you like this?”  and “What do you actually like?”  I answered; “The dark mood broken into segments by the light coming thru the window and the LADDER!”
  • Can the camera I had capture the overall mood and range before me?  “YES!”
  • What is the best vantage? “Closer to the ladder!”
  • How best can I control the contrast and range of this image? “Multiple spot meter readings to shift the scenes entire dynamic range into that of the camera!”

After this it was just a simple matter of setting the the composition, exposure and capturing the image!


Ok one last example…  Daddy’s Girls…


Daddy’s Girls, medium format film

This is one of those scenes that I visit time and time again.  It is only a few hours from home down in Bluffton, SC (a location where my oldest son lives).  There is only one single boat at this commercial dock and processing plant.  There is a boat launch and pier close to the left, but  for for this shot I wanted a more head on view.  I got my son to take me out on his boat so that I could get this angle on a terribly stormy day. Dark and Stormy it was.  Heavy rain and wind, but these were the components that were in my vision so I suffered through it to get this image.  I took several shots of the scene (waves, no tripod and a moving boat) so I invested an entire roll of 16 images knowing that a lot of them would be blurry and out of focus.   Good thing too, I only got this one single sharp image but it was so worth the effort!

Do you see what I am getting at?  I KNEW what I wanted with this image, I knew what tool (camera) I wanted to use so I returned dozens of times here, re-evaluating again and again till I got what my vision demanded!   I have been here a hundred times over the past 4 years and was NEVER satisfied with the scene!

What my vision demanded:

  • Moody, Stormy Sky.
  • Bright light on the boat.
  • Cloud detail.
  • No other boats to clutter the scene at the launch.
  • Medium Format Film only.
  • No workmen on the boat.

So it took years of returning again and again until I got the scene that matched my vision!  But to me it was well worth it!  Will I stop returning?  Heavens no, you NEVER know what nature will provide you with so keep returning!

As always, I hope that you enjoyed this post!   Please consider leaving feedback and comments!


Controlling your Dynamic Range in B&W Film photography


Stormy Seas in a approaching storm!

Stormy Seas a the dock… 6×12 medium format Tmax 100 film

Dayi 6×12 showing the ground glass and shade and my custom dark cloth attached.

This Super Pano was taken on my Dayi 6×12 medium format view camera. Lens is a Rodenstock 90mm f/6.8 Super Grangdagon N and while it is a bit slow it is VERY sharp and quite beautiful!  This is a very different style of camera and will take 5 images per roll of 120 film. 


Dayi 6×12 Grand Glass Back

This is an amazing combination of a ground glass focus and calibrated distance focus system.


Dayi 6×12 with the Rodinstock 90mm f/8.6 installed showing the alternative, calibrated focusing system

Shrimp boats are one of several subjects that I will drive hundreds of miles away to photograph! I am very lucky to live so close to a lot of them locally! Because of the continuing loss of our shrimp fleets here I am both driven and inspired to document them every chance I have. You have to admit that they are very beautiful when done in B&W and what better way to document them if not film?

This was a very difficult shot to achieve! To get it I had to overcome the super bright sun coming over my shoulder highting the boat and buildings to the point that they were totally burned out. The storm in the background was dark and foreboding…
The lesson here is to learn and realize that you can control all aspects of your image’s exposure along with taming the dynamic range of the scene through use of thoughtful developing and scanning.
I used a Sekonic 758 to get these results by using  a combination of exposure averaging  with 6  one degree spot metered measurements, saving each reading in the meters memory then telling the meter to give me the zone 5 average which then became my base exposure.  The 758  then showed me the the exposure with a chart of any data over or under exposed thus out of the film’s dynamic range.
Knowing this, I then used a technique where you can either compress the the dynamic range of the image into a smaller space thus allowing the film to compensate for a wider dynamic range that it was designed for!  This is called +/-1N developing. You can change developing time down to compress the dynamic range of the image by squeezing the image down from the whites towards the blacks which compresses the highlights  into range!   The opposite is also true by going +N.   But for this image the -1N was enough.   I then then used another creative process during the wet mount film scanning by expanding the dynamic range to fit into the wider print profile by  +1 to the highlights in Viewscan to put them where I desired for a powerful and moody print.  There are a lot of books out there that will teach this technique, but my favorite is Creative Exposure Control by Les Meehan which will teach you the development side of the process.   The scanning side is easily done in Viewscan and there is a good book on that on Amazon. 
I will also expand upon this in future posts as well!

Rodenstock 90mm f/6.9 Grandagon N, while a slow lens it is super sharp and beautiful!

The wet mount scanning technique will be taught in a future post here along with a video on Youtube!  But to do it you will need an Epson 700, 750, 800 or 850 scanner as those are the only ones that the wet mount kit will fit!

 
Data: Dayi 6×12 – f32 .4s – Roll 4 F3- Avg Metering 6 measurements – Yellow Filter – Stormy Seas- Tmax 100 – Perceptol 1:1 at -1n  – 2018

As always please let me know what you think!

The Accidental Photograph!


Sometimes even the best of us get surprised!


The Carson Elizabeth

Fuji GF670 Medium Format

Fuji GF670

Now, here is one image that I REALLY like! This is a 6×7 negative from my Fuji GF670, a folding rangefinder camera with a really bright rangefinder and a fixed 80mm Voigtlander lens shot on Rollei IR400 film and processed yesterday in Xtol stock and wet mount scanned today… 

Sounds normal right?   Well this was a VERY OLD roll of film, and has been sitting in my shop for over a year marked “Stand Develop” ( a special developing process where you use Rodinal 1:100 in the tank for an hour with no agitation that works on all B&W films of different ISO values) because I forgot what ISO I shot it at!  I actually got tired of seeing it in my to do can in the fridge and yesterday threw it onto a 2 film reel with a roll of  Ilford FP4+ film and set up my Filmomat for the FP4! The FP4+ turned out as expected,  but the IR400  was a complete surprise.   

Carson Elizabeth, Shrimper in Georgetown, SC on 120 film

There was only one good image from the IR400 but OMG was it ever good! Just looking at it gives me the hot sweats!! As I looked at the processed roll of IR400 I realize that I had changed ISO mid roll and that is why I marked it stand. The other images on the IR400 were not worthy of scanning  but this single image still made it a  big win for me!

Oh, for the curious, my FIlmomat is a computerized film developing machine that is the tabletop sized and will do 35mm, 120, 4×5 and 5×7 films.  For the 120 it will do 2 rolls at a time.    Here is a video that shows it in action…


Data: GF670 with 80mm lens and Rollei IR400 with no filter processed as FP4+ yesterday and wet mount scanned today.

Goodness, I had forgotten how difficult the film is to handle with its very thin film base!

For those of you who are interested in the fine art of FILM PHOTOGRAPHY AND SELF PROCESSING, join me on my new G+ page HERE and learn and share!

Willy and the Pelican


A Lesson On Life!


WIlly and the Pelican.. Southport, NC

 
I discovered Willy (his first name is Wet) at Fishy Fishy on the marsh front in Southport while Jamie Konarski Davidson and I were there last weekend and kindly asked the pelican flying overhead to land on Willy. He said that Willy was to small and his landing there would make Willy rock and ruin my shot so he landed on the larger boat then struck a pose for me. A really considerate bird that Pelican was! The scene was busy yet pleasing to me so I sat and talked to the Pelican (they are so chatty) for a bit while I shot the roll of film!
 
When I was done and started to leave the pelican squawked in his deep male pelican dialect “ what about compensation for pulling this scene together for you?” So i asked the fish monger behind me for a pelican sized payment and gave it to my birdie friend who promptly grabbed it and flew away without a word! I lowered my head in disappointment knowing that I should not have been hurt as all of the creatures live and die in the entitlement mentality! Oh well…

So… Here is Willy and the Pelican!

Willy and the Pelican

This was done with my Mamiya 645AFDii and a 45mm lens using FP4+ film processed in Xtol stock in my Filmomat processor,  then wet mount scanned. Full data is below:
 
BTW, WIlly says he is looking forward to seeing all of you who are coming to the workshop there at the end of September!
 
645 AFD2 – 45mm – Roll 93 Fr 7 – 1_60 f11 – Orange Filter – Willy and the Pelican- FP4 125 – Xtol Stock – Filmomat – D-CI 55- – Scan Exp Lock – Wet Mount – 2018-08-25

The Amazing (and affordable) Dayi 6×12 Medium Format System!


BIGGER is BETTER!


This is the Causeway to the Litchfield Inn in Pawleys Island.
100TMX processed in Xtol 1:1. Yellow filter, f/22 at 1 second metered on the white roof on the distant boat house where the water seems to end an placing that in zone 7 to 4 seconds then to 6 seconds for reciprocity..


Well… Yes, I have a NEW medium format camera system! Not new used, but NEW NEW!

It is the Dayi 6×12 and is custom made in China for each order.  It is very affordable, the camera, lens cone (adjusted for you lens ahead of time) film back, focus screen and shade, viewfinder and a Arco swiss mounting foot!  All in all this ran me around $1000 and took 2 months from payment to delivery.  There are several companies selling them but I chose ecbuyonline2008 on Ebay, contacted them and then dealt directly with them for a nice discount. They provided a direct email at ecbuyonline@foxmail.com.

Dayi 6×12 showing the ground glass and shade and my custom dark cloth attatched.

Ok, the camera itself is very well balanced and easy to use.  As with most types of cameras of this design it uses a lens cone cut specifically for the focal length of the lens used.  If you use a different length lens as a 2nd then you will need another cone designed for it as well.

Dayi 6×12 showing the film back and ground glass

The focus is controlled by a CALIBRATED helical mount that gives very fine control of the focus.  Because it is calibrated, you can just dial in the distance and forget the ground glass.  Me?  Not so much.  My eyes are not calibrated very good.  Now, a cheap laser rangefinder would be just the thing.  Fire it, dial in the distance and shoot!  I use the ground glass as my focus operation.  I have a custom made dark cloth that fits the glass frame and works very well.  I have a nice 8x loupe that I use to make up for my old eyes!


There are calibration screws around the outside edge of the lens cone and you can see the small hole for one at the end of the video above.  These allow you to set the infinity point and place the lens in the correct position.  You can find a tutorial HERE for this process.

Lenses that will work on this camera can be found HERE.

The camera is a bit heavy and not suited to handheld work, but it can be done.  It is a VERY well designed and built camera system and has ZERO light leaks.

When the camera first arrived, the film holder was scratching the surface of the film emulsion.

Here is the issue, a spring next to a roller that is too high in the film plane with rough edges! It is the bright silver line under the roller.  See how it is bent up in the center?  It actually touched the film.

The complete assembly

I took it apart and realized that a spring was adjusted too high on the film holder back and touching the film.  It was a simple adjustment to fix this but I still sent an email about it and a few days later this video arrived showing how they said to fix the issue which is exactly what I had found!

This goes to prove that they are responsive to customer complaints, problems or suggestions!  That is a big plus in my book!

The system is simply a joy to use.  It is bright in the corners (of course that is lens dependent) and the focus is spot on!  I have put about 10 rolls of film thru it so far including some Ektar 100 (which I have not processed yet but have the chemistry). Now that the scratching issue is fixed I see a great future for the camera in my kit.

The folks at the company in Hong Kong are easy to work with and very responsive  over email.   I highly recommend them.  They have MANY other cameras for sale also including a larger 6×17 version of this one.

Stormy Seas, Dayi 6×12, not the best composition but a good example of the quality from the camera!


I hope you enjoyed this short post on the new pano camera system.  There will be more following!

Finding Myself In The Old Ways…


It seems that I am addicted to film…

Miss Lue & A Hungry Egret

I still shoot with digital (A7RII) and love the look and capability of it, but FILM is what I go to every time I go out shooting… It is Terrible and exciting at the same time! It is so bad that I am looking for another freezer to store my excess film stock!

This is (again) Stormy Seas in Georgetown, SC

This is (again) Stormy Seas in Georgetown, SC (perhaps the most photographed boat in the Low Country). I have hundreds of images of it but I am pulled to photograph her in B&W film each and every time I am in Georgetown. There is something about her lines and textures that inspire me to document her life, and I have for years. Yes I will visit ANY shrimp boat (or grist mill for that matter) and each and every time I visit I see something different and unique… Yep addicted!

DATA:

The image was taken about 5 days ago on a 6×9 Fuji GW 690 II using medium format Fuji Acros 100 film and a red filter, developed in Perceptol 1:1 and Wet Mount scanned on a Epson 850 pro. The 6×9 format will give me 8 images per roll and I will usually scan 2 or 3 per roll, but I am very critical and selective because the wet scan process takes about 3/4 hour per scan!

The top image is near Stormy Seas in Georgetown, about 2 blocks away at another commercial dock and seafood house.  I have shot this a hundred times on both digital and film, but never have I captured such a pleasing image  as this.  It is to me a more enriching image full of mood, contrasts and tells a story.  I pleases me to no end the tell the story on an old FILM camera of an old boat and failing lifestyle just as the shrimp boat is in the background and the Egret in the foreground telling a different yet the same story!

There is also the consideration that is tied to the process of working in film.  It is slower and much more deliberate, a truer work of love in that you control every single step of the process…

  • Film choice (Kodak Tmax 100, Tmax 400, Fuji Acros 100 or Rollei IR400)
  • Camera and lens choice (Medium or Large Format)
  • Considering the composition and lines.  
  • Getting the exposure dead on (how many of you do that in digital?)
  • Adjusting for contrast and detail in shadows or highlights.
  • Film development and processing for highlights or shadows (another complete immersion of self discovery)
  • Drying (yep at lest 24 hours in a dust free drying cabinet)
  • Choosing the best image for exposure, sharpness, composition, contrasts, lines, dust & hair and so on..)
  • Wet scanning (at least a 1/2 to 3/4 hour project per shot)
  • Cleaning up on the computer by removing dust and hair and adding a bit of contrast)

All in all, the top image took about a week to complete from end to end!  I simply love the process, being immersed in it and becoming one in the creative process.   Yes it is slow but when I am done it is a total representation of MY PERSONAL VISION!

Film is making a HUGE come back in the world of photography!  So much so that you will be shocked when you visit Ebay and look at the prices of old film cameras and systems!   All of the major film makers in the world are increasing their production of films and even Kodak is bringing back discontinued film products!   New film companies like New55, Impossible Project, and FILM FERRANIA have opened up and are making emulsions!

Developing has never been easier, there are many mail order labs out there but you can process your own film in your kitchen with very little effort and investment!  You will need:

  • Dark Tent or changing bag to move your film to a daylight tank.
  • Daylight tank (I reccomend a Stainless Steel tank with steel developing reels by Hewes)
  • Distilled Water
  • Developer ( I recommend Perceptol by Ilford)
  • Stop Bath
  • Fixer
  • Wash
  • Water Rinse
  • Distilled water rinse with wetting agent
  • Clips to dry your film in your bathroom shower
  • A flat bed scanner like Epson 500, 600, 700, 800 or 850)

Total you are looking at about $120 for everything accept the scanner!   There are great videos on Youtube that will take you thru every step in the process!

Tybee Island Light, Kodak Tmax 100 FIlm on a Fuji GW 690 II camera.

The image above of the Tybee Island Lighthouse was taken last month on Kodak Tmax 100 rated at 50 ISO  on the 6×9 format medium format Fuji System.  It was hot and the area full of tourists, even up on the top of the lighthouse itself!  Still the act of creating this image was both fun and fulfilling and I walked away with exactly what I envisioned as I stood there looking at the scene!

I especially love shooting with Medium Format cameras.  They are easier to travel with and the negatives are large enough to give amazing prints.  I do have 3 4×5 large format cameras also that are great fun to you but as you can imagine, they are difficult to travel with.  Once in a great while I will shoot with a 35mm camera, usually smaller rangefinder that were sold in the 60’s and 70’s!

Medium Format:

  • Fuji GF 670 (this is my travel camera in 6×7 format with a 85mm lens that folds up into a thin light camera)
  • Fuji GW 690II (this is a 6×9 format camera with a 90mm lens and a bit larger and better built than the GF camera)
  • Fuji GW 690 III (a newer version of the 690II)

Large Format:

  • Shen Hao 4×5 Cherry Field Camera with 5 lenses and film adapters for also using 120 film.
  • Polaroid 900 converted to 4×5 with a 150mm Fujinon lens.  Think of 4×5 travel camera!
  • Polaroid 110B converted to 4×5 with a 90mm Schneider Angulon lens, again travel!

So, while film does indeed require much more effort over digital, the results simply cannot be compared.   These medium format negatives have a native resolution to create a 71×53 inch print without upsizing it at all!  The amount of detail is simply stunning and more importantly (at least t me) is the fact that the process become a Zen like activity in creation!

I hope that you enjoyed this post but more importantly to me at least that you considered my words on the creative process and taking complete control of it!


Using M mount glass on the Sony A7rii camera


The AMAZING just got better….

Stormy Seas with the Voigtlander 12mm Ultra Wide Heliar M Mount Lens and the Techart Auto Focus Leica to Sony adapter

Stormy Seas with the Voigtlander 12mm Ultra Wide Heliar M Mount Lens and the Techart Auto Focus Leica to Sony adapter

Look closely at the image above.  It was taken with a Voigtlander M mount 12mm Ultra Wide Heliar lens and the Techart M to FE AUTOFOCUS adapter on a Sony A7rii camera. The cleat on the bottom right is about 6 inches from the front of the lens!  The color rendering is amazing and there is very little distortion that is normally found with an ultra wide lens!   I can hear you asking how I accomplished this!

I recently picked up the Techart M to FE Sony mount adapter for my Leica and Voigtlander lenses.  It has been my desire to use them on the Sony A7rii, A6300 and A6500 cameras.

The Techart auto focus adapter is amazing. I actually moves the lens in and out to get a sharp focus.  It has several rules that you must follow to use it and as long as you do it will provide great service.  It is quite fast!

  • Use a center focus point on the camera
  • Set your camera aperture to f/2 and leave. It there
  • Set the real aperture directly on the lens.  
  • Don’t try to focus with the lens set to f/22, keep it around f/8 or f/11
  • The Exif data will shot f/2 but the exposure meter will correctly meter the subject.
  • Don’t try to use a heavy lens on the adapter unless you support it.

12mm Voigtlander M lens with the Techart autofocus M to FE adapter

12mm Voigtlander M lens with the Techart autofocus M to FE adapter

Here is a link to a short video demonstration of the Techart M to FE adapter on my Sony A7rii:


B&W work with this lens as well as my other Voigtlander and Leica M mount lenses are just as sharp weather in color or monochrome!

Stormy Seas with the Voigtlander 12mm Ultra Wide Heliar M Mount Lens and the Techart Auto Focus Leica to Sony adapter

Stormy Seas with the Voigtlander 12mm Ultra Wide Heliar M Mount Lens and the Techart Auto Focus Leica to Sony adapter

I also have and use a Metabones M to FE adapter which gives the same results but with manual focus only.   Sometimes manual focus is necessary depending upon your subject but reguardless of focus type both adapters and all of my M lenses work wonderfully on the A7rii camera system!

Stormy Seas with the Voigtlander 12mm Ultra Wide Heliar M Mount Lens and the Techart Auto Focus Leica to Sony adapter

Stormy Seas with the Voigtlander 12mm Ultra Wide Heliar M Mount Lens and the Techart Auto Focus Leica to Sony adapter

If you have a selection of M lenses then the cost of a M to FE adapter is well worth the money.  But I am VERY impressed with the new autofocus adapter!


Please let me know what you think!


B&W Camera Systems: Functionality/Creative Power/Affordability/Film/Digital ??


Getting your BEST B&W image!

Outer Banks Pier, Monochrom Camera System

Outer Banks Pier, Monochrom Camera System

I wish to share some images and thoughts from the Leica M Monochrom B&W ONLY camera system. I know that it is NOT FILM and a very expensive camera system, but it comes as close as you can get in a wonderfully usable B&W only system!  

Most people will take a color image then  convert  it to B&W in post processing but it will never be the same as actually shooting in B&W with a digital or film system!  Yes you can get close but you loose the amazing gradations and tonality that is part and parcel to world class B&W images.

Dugger Creek Falls, Linville, NC M Monochrom

Duggers Creek Falls, Linville, NC M Monochrom

The Pier on the top, is in the Outer Banks and is a 4 min exposure using a Leica Elmerit 28mm lens and the creek below is is in the New River Gorge in West Virginia. It is Dunloupe Creek and a 8 second exposure using the AMAZING 50mm Summilux lens. As you can see, the graduations and clarity are simply amazing. The water takes on a distinct Platinum tonality!

Why am I showing you these? Well at the end of the post I will give you a link for 2 videos where a Fuji X100T and a Leica M are compared for street photography and for a discussion on the Leica M B&W. The videos are  quite entertaining and shows why sometimes a more expensive camera can be worth the money…

Sometimes!

Dunloupe Creek, New River Gorge WV, M Monochrome

Dunloupe Creek, New River Gorge WV, M Monochrome


It can be very hard balancing the desire between camera systems and affordability, but sometimes, with SPECIAL cameras the money takes a back seat. I own 3 Leica camera systems, and 1 of them I could have done without (Leica M240), another is an amazing film system (Leica M7) and then there is the M Monochrom. The Monochrom is scary amazing with crazy good B&W output to even consider shooting color then converting. I have NEVER considered the money spent on it to be wasted! In fact, I am considering selling/trading the M 240 but will keep the Monochrom and M7 film body along with most of my Leica and Voigtlander glass.

Glade Creek Grist Mill, Babcock State Park, WV, M Monochrome

Glade Creek Grist Mill, Babcock State Park, WV, M Monochrome

For me shooting in B&W is a soul centering event. I take it very seriously and slow. When you consider how working in Monochrome strips away the confusion of color leaving the soul of the image then you can understand why I am looking for the very best way to capture the best possible image.  

  • Shooting in color then converting to B&W works but is a compromise and will only give you a compromise image.
  • Shooting in film generates a purest form of B&W image and by far is the best way to do it but requires extensive time for setup, capture, development, wet scanning then printing! One roll of 120 film in the 6×7 format will generate 10 images.  Processing takes about 45 min then it has to go into a film dryer overnight.  Lastly, comes wet mount scanning which can take 1/2 hour per exposure.  Now, I do not scan every image, I choose the very best images from the roll (usually 3 or 4) and only scan those.  All in all there is about 8 hours of work involved with that single roll!  It is a slow process to be sure but very fulfilling and leaves me with a great sense of inner peace. 
  • Now, along came the M Monochrom camera from Leica, a full frame 19 mega pixel sensor with NO COLOR FILTERS over the image wells. This means that there is no anti-aliasing filter, and no brayer array.   So effectively you get a 19 x 3 megapixel image (no brayer layer means every pixel well generate a true monochrome data value different from its neighbors!)  which is crisp and has film like gradations  that are difficult to differentiate from a film negative!
Roanoke Marsh Light, Outer Banks, M Monochrom

Roanoke Marsh Light, Outer Banks, M Monochrom

Aside from doing all of this in film (which I still work in all of the time) the M Monochrome (or its sisters) is the ONLY GAME IN TOWN! Hence, the cost of the system takes on new meaning since it is such a specialized digital system!

Sometimes I will put the film away and take out the Monochrom system.  It is not quite the same as film in the overall process but it certainly is when the finished products are compared!

This is something to consider…

Here are the video links:


My Thoughts on the Art of travel photography…


Or… What I Did On My Summer Vacation!

Warning, LONG post…

Canyon Lands Pano, Sony A7rii with the 24-240 and polarizer

Canyon Lands Pano, Sony A7rii with the 24-240 and polarizer


Devils Tower

Devils Tower

Travel Photography… Say it, let it roll off your tongue, think about it!  I bet that the first thing that comes to mind are images from National Geographic, fine, super saturated color photographs that could take you anywhere in the world by simply looking at them!  You know the kind, they enabled you over the years to travel vicarisly around the world just with the magazine and its images!  

But is that what travel photography really is? 


What is the intent of travel photography  to document a place or a trip?  Is it designed to tell a story on an individual level or to the masses?

A6300-3886- S1_500-Whodos Bryce-2016 1 copy

Well for me, it is a combination of the two.  Most importantly, the images are to refresh the memories of the trip.  But there is a real market out there for well done travel photography whether in print publications, web, advertising or fine art prints.  It can be quite profitable if you work at it and can step back and look at your own images in terms of the above markets.  Even the housing deceration market has room for this type of photography provided that you can simplify your work to show colors and contrasts over locations.

Jordan, My 7 year old photographer grandson

Jordan, My 7 year old photographer grandson

For this trip, and pretty much all the time when I am shooting digital, I exclusively use the Sony 42 mpix A7rii camera system and the new Sony A6300 for high speed work with Sony G lenses or Sony Zeiss lenses. They are very well suited to this type of photography and give you enough (42 mix)  resolution to get amazing images yet still have room to crop!

The drive for this post was a recent  two week trip out West with my wife and 7 year old grandson Jordan who I am teaching film photography and darkroom processing to (photographically, I had grand plans for him this trip).  Given time I plan on turning him into a photographic GOD for something fun while making sure he is a Rocket Scientist!

We flew into Rapid City, SD and picked up a one way rental car and our first night in a long string of hotels.

Devils Tower

Devils Tower

Our Itinerary:

  • Prairie Dog

    Prairie Dog

    Day 1. Rapid City layover and rest.

  • Day 2. Pick up rental car and drive to Mt. Rushmore in the morning and then the Devils Tower in the afternoon. Continue on 1/2 way to Codie, WY.
  • Day 3. Famous Hot Springs of Thermopolis, Wyoming then an afternoon visit and guided tour to the most successful dinosaur dig on our continent.
  • Day 4. Codie WY for several stops including the famous old west town and the Codie Rodio.
  • Day 5-7. Yellowstone for 3 days in a park lodge.
  • Day 8. Leave Yellowstone, drive thru and stop along the way in the Tetons finishing in Jackson WY.
  • Day 9. Drive just north of Salt Lake City in the town of Herbor for a 3 hour train ride around the valley.
  • Day 10-12. Drive to Moab for 3 nights and visit Arches and Canyonlands National Parks with extra boat and jeep rides thru the park as well as Dead Horse Point State Park.
  • Day 13. Early morning drive to Bryce National park for 2 days of Bryce National Par
  • Day 14. Drive to Salt Lake for flight home on day 15.

Drugstore of the West, Cody, WY

Drugstore of the West, Cody, WY

So as you can see there was a well thought out family plan for travel and location visits!  But, I also had a plan, my photographic plan!

So lets talk first about my TRAVEL photographic equipment plan.  I wanted to travel light (yea right).  No backpack, rather a small rolling camera case that would fit into the over head of a small commuter plane so that I would not have to check it.  I would not have room for a film camera… Dang!

So here is what I brought along:

  1. Sony A7rii camera body
  2. Sony a6300 camera body for Jordan
  3. Sony 24-240mm one lens does it all for Jordan
  4. Sony 24-70 Zeiss f/4
  5. Sony 70-200 G f/4
  6. Tamron 150-600 for those exotic animals I expected to see
  7. And yes… A Olympus XA 35mm film camera (but it is the worlds smallest rangefinder) with 6 rolls of Tmax 100
  8. Filters, ND for long water falls and polarizers for all of the rest in 67mm and 72mm.
  9. Batteries an chargers (both cameras used the same)

This was a good plan (or so I thought) until our very first stop at Mt. Rushmore where Jordan informed me that the 24-240 was too long and heavy.  Oh well, I took that and gave him the 24-70.

RULE ONE:   No camera plan survives first contact with a 7 year old!

Ok, so at least the part of the photographic plan of me being able to NOT check my camera equipment worked! (I did put all of my insulin and supplies in the camera case just to prove my need to have the case with me but did not need it).

RULE TWO: A super  zoom really works best when you have to carry lots of glass around while traveling.  See Rule One, Jordan did me a favor here!

Yes, I know that one would not normally trade a light 24-70 Sony/Zeiss f/4 lens for a 24-240 f/3.5-5.6 Sony super zoom but I have to be honest, I was VERY impressed with the super zoom!  It was not really that much heaver but it was longer. I NEVER put on the 24-70 after that.

Things to look for on a cross country western trip:

  1. Wildlife
  2. Landscapes & Vistas
  3. Unique rock formations
  4. Waterfalls
  5. Wild colors
  6. Unique photographic visions

Trip Highlights!

Yellowstone

Old Faithfull

Old Faithful

Querimony: To Questionably Moan & Complain!

I expected great things of Yellowstone and that showed in the number of days there as well as staying in the park.  Yellowstone is HUGE, so much so that you have to allow for HOURS of driving time from location to location.  The roads are all good, 2 lanes with adequate pull offs.  BUT having said that there are rules of behavior in pulling off and rules for how you treat the wildlife.   I cannot tell you how many people (especially foreign visitors) who would jump out of the car (still in the road) and run off into the fields right up to the wildlife.  To say that this is bad behavior is an understatement.  It for one, keeps others from being able to photograph the wildlife and two puts the peoples lives in grave danger that approach the wildlife!  Yet this happened almost every time wildlife was near the road.  The park rangers had simply given up on trying to educate people who would not listen. They spend most of their time dealing with the MANY dreadful traffic accidents that happened every day.  The traffic jams were terrible whenever an animal was near.  Sometimes this was due to the animal being on the road but most of the time it was because people parked right in the middle of the road who left their cars. 

Buffalo on the Yellowstone

Buffalo on the Yellowstone river in the early morning mist

I am going to share a few of my favorite images from Yellowstone with you.   It is a good cross section of what you can expect to see while visiting!


Blue Pool, Prismatic Spring Yellowstone

Blue Pool, Prismatic Spring Upper Yellowstone


Prismatic Spring Yellowstone

Prismatic Spring upper Yellowstone


Yellowstone Antelope

Yellowstone Antelope, North Entrance


Teal Pool, Upper Yellowstone

Teal Pool, Upper Yellowstone

And last….


Lower Yellowstone Falls Detail

Lower Yellowstone Falls Detail 1 second  Exposure with 10 stops of ND

I would travel again to Yellowstone but in the spring or fall in order to see more of the wildlife there.  I realize that in the heat of August even the animals would move to higher locations in order to reduce the heat.  The only wildlife I really saw in abundance on this trip were Buffalo, Elk and Antelope.  

Moab, Arches & Canyonlands National Parks

Delicate Arch

Delicate Arch

The Moab area offered some of the most amazing locations of our trip.  I had thought that nothing could beat Yellowstone, but Moab came very close.   

Sandstone Arch, Arches

Sandstone Arch, Arches

There are 3 offerings here, the Arches National Park, Canyonlands National Park and the Dead Horse Point State Park.  ALL three are must see locations.  For me Arches was the best, but honestly, we spent time exploring all three in detail (well sort walk detail).  We also paid extra for a boat trip on the Colorado River thru Canyonlands for a low view and a back country jeep tour to see area and arches not available to the general public in Arches!  If you get here I advise that you do both side trips.

Courthouse Rock, Arches

Courthouse Rock, Arches


Whale Tail Arch, Backcountry Tour

Whale Tail Arch, Backcountry Tour


Windows Arch on the Back Country Tour, Arches

Windows Arch on the Back Country Tour, Arches


Dead Horse Point

Dead Horse Point. Look at the lower left corner 1/3 up to see the dead horse outline.


Canyon Lands, Isle in the sky

Canyon Lands, Isle in the sky


General Utah


High Desart Train Pano

High Desart Train Pano

So…. I had this vision stuck in my head of a parked line of freight train box cars parked in the high desert with a mesa behind them.  I found myself looking to the sides of the car as we traveled endless miles through Wyoming and Utah.  Finally my wife asked me what I was looking for and when I told her she made a point to help me look and stop me when we came upon them.  I know that out West there are ultra long stretched of road.  Most are 4 lanes with lots of traffic.  If you see that special scene make sure that you safely stop so as not to irritate the 7 year old in the back seat, pull safely off to the side of the road as you watch for the perfect compositional setup and get out and shoot it!  DO IT!  

Because

RULE THREE:   There are NO GO BACKS!  If you see a subject or scene on the side of the road immediately stop and shoot it!

Bryce National Park

Whodos in Bryce Canyon

Whodos in Bryce Canyon

To say that Bryce National Park is anything less that amazing is an understatement.  It was right up there with Arches and Yellowstone in amazing views, colors and the wow factor!  This is the location that I would choose to visit again to try some different styles of photography.  The colors of the Hodoos are simply amazing and full of wild colors and contrasts.  

Natural Bridge Bryce

Natural Bridge Bryce

RULE FOUR:   Revisit those scenes and compositions as many times a possible!

While in Arches, my 7 year old grandson decided that he had enough nature and vistas after driving Arches all day long.  I took them (at my wife insistence) back to the hotel and went back out to Arches and drove it again in different light conditions and the 2nd time there were clouds in the sky.  This made for much better images that I would not have gotten if I did not go back out again!

Final thoughts on what makes travel photography great!

Now as you have seen here, I presented this trip as a travel log.  Attempting to document the many wonders of the high plains in the west. For images that have the possibility of selling you need to:

  • Pay more attention to your editing, scene selection and composition.  
  • You must re-visit local scenes several times in order to get the best light and clouds.  
  • You MUST shoot with your best equipment in order to produce high resolution images for future publication.
  • In your post processing you must choose only your best images and throw the non used images out.
  • Be your WORST critique and select only what you would consider to be world class images.  Case in point, the image above of the Court House Rocks in Arches.  Yes it is a nice image but the lack of clouds in the sky reduce its impact to the point of it being a weak image!

Hood Valley, Bryce Canyon, Sunset overview.

Hood Valley, Bryce Canyon, Sunset overview.

This type of travel photography is more difficult that personal travel images traditionally done by the millions of photographers who roam the country.   These types of images are still travel photography but basically serve to show and remember your great trips!  They will include more family member in the scenes, less care about the total compositional elements because those are simply not as important to the memory of the trip and locations! They are just as important, but will not generally generate income from sales and publication. 

Colophon:  Very Important Lessons Learned:

  1. NEVER, and I do mean NEVER plan a 14 day photographic trip with a 7 year old and expect him to be excited beyond the first week.   I would have been better off leaving the A6300 and 24-70 f/4 at home thus lightening my load and giving him MY camera when he desired to take a photograph!
  2. Make SURE that you explain to the said 7 year old that “NO!  There are places that not only will there be no TV but also no internet!  (I was able to get around this most of the time with my iPhone as a hot spot for his iPad!)
  3. Build in several fun days (as viewed by a 7 year old) that includes things like movies, water parks and so on!  This is a small price to pay for 7 year old mental health and will refresh his young mind and keep it open for those wonderful scenes you travel to!
  4. How can you get those great travel shots when your walking is limited?  As a cranky 63 year old man, make sure that you plan photographic stops THAT YOU CAN DRIVE TO!  We (actually my thoughtful wife) did this ahead of time thus insuring my mental health and happiness at the stops we made!
  5. Take the time to occasionally stop at nice restaurants  that actually serve wine and beer (this will assist with the mental healty of said wife!)  Happy marriages are NOT built and fast food places in a rush!
  6. If you desire to shoot medium format film, you damn well better plan on space for the camera and film!  Regrets upon your return will leave a sour taste in your mouth!
  7. Be flexible, very flexible.  This will leave you happy in the hotel at night!
  8. Take your pain drugs! (See #7)
  9. If you see a photo subject on the side of the road STOP!  There are no go backs! (see RULE THREE about this very thing and really your wife know this and will support your urges to stop in the middle of nowhere!
  10. Wildlife… What wildlife?  How did I miss all the great shots of wolves, coyotes, and bears?  I was in Yellowstone for heavens sake!  The lesson here is to make sure you check the season for high animal activity.  I have listened to my photographer Son talk about so much wildlife in Yellowstone that it was not safe to drive!   I guess he should have mentioned when he was there!  Oh well.  I AM happy with what I actually did see (Buffalo, Antelopes, Elk and Prairie Dogs)
  11. Stop at EVERY overlook in every park.  You will be happier having done so (and vicariously so will your wife).  You will hate yourself when you return home only to have a photographer friend tell you that the one overlook you skipped was the only one you should have stopped at!
  12. If you find a scene that is magical for you revisit at a different time of day.  This is VERY IMPORTANT and promote photographic health for those who have heeded these magic words.
  13. Would I do it all over again with a 7 year old?  YOU BET!!  But I would plan differently.  If I take any of my grandkids I need to remember that it is their vacation as well.  This means that you build in days doing fun stuff for their age also!

Please let me know what you think of this long post!  I welcome all feedback.


Bryce Canyon

Bryce Canyon in camera pano

Testing The Sony A6300


Smaller, Faster and able to leap over tall buildings!

Yes, you are correct, I shoot with the Sony A7rii 42 mega pixel full frame mirrorless camera!  What you cry am I doing with the A6300 which is only 24 mega pixel and an APS-C sensor?  Well friends, the answer to that is simple, well perhaps not…   I envision the A6300 as a 720nm Infrared camera.  

Pawleys Island Marsh, Sony A6300 with the Sony/Zeiss 24-70 f/4 and a polarizer. B&W conversion

Pawleys Island Marsh, Sony A6300 with the Sony/Zeiss 24-70 f/4 and a polarizer. B&W conversion Look at the detail in the gate and grass.  This has a 3 dimensional effect! 

But it has several very interesting and powerful functions that have engaged my curiosity.  Those are:

  • 11 fps shooting speed.
  • Faster and more accurate focus than the A7rii
  • More focus and metering points.
  • Half the weight of the A7rii
  • Much brighter and accurate focus peaking system.
  • Ability to work macro at 1:1 with live view and not have an over pixelated display.
  • The ability to turn my 600mm lens into a 900mm lens!
Sony A6300 Front View

Sony A6300 Front View

The 4 test images I took today were shot hand held at 1/250s and in RAW with Zone Focusing.  I also had the LIVE VEIW DISPLAY: Setting Effect: ON.  This enabled the camera to simulate the exposure effects during composition to give me an idea of what I am actually seeing. 

The A6300 is a TINY camera system.  It is so light (even with a L Bracket installed) that I had to be very careful when carrying it around.  I worried over dropping it and not knowing!

Sony A6300 Back View

Sony A6300 Back View

The camera does NOT have a built in Stabilizing system, rather it relies on the fact that most Sony lenses have that built in.   I has 3 custom WB memories for those of you who are considering the camera for Infrared and it also has 2 custom setup memories that I have found to be very helpful with my A7rii camera!

I found the camera very easy to use and control.  I setup all of the custom functions and buttons to make my life easier when shooting it.   

As I said, this camera was meant to be converted by http://www.kolarivision.com into a 720nm infrared system and it may actually meet that end, but I really like the ability of the APS system to give me 900mm from a 600mm lens!


Pawleys Island Marsh, Sony A6300 with the Sony/Zeiss 24-70 f/4 and a polarizer.

Pawleys Island Marsh, Sony A6300 with the Sony/Zeiss 24-70 f/4 and a polarizer.

Here is the color version (with polarizer) of the image above.  The colors are nicely saturated and the overall image is sharp and offers enough detail and sharpness to draw the viewer into the image!

Pawleys Island Marsh, Sony A6300 with the Sony/Zeiss 24-70 f/4 and a polarizer.

Pawleys Island Marsh, Sony A6300 with the Sony/Zeiss 24-70 f/4 and a polarizer.

Here is another view of the salt marsh.  I have to say that the camera with the 24-70 Zeiss lens is easy to hold and control.  The camera control buttons are easy to reach and control without using them by accident.

Pawleys Island Marsh, Sony A6300 with the Sony/Zeiss 24-70 f/4 and a polarizer. B&W conversion.

Pawleys Island Marsh, Sony A6300 with the Sony/Zeiss 24-70 f/4 and a polarizer. B&W conversion.

Lastly, a B&W conversion of the same image.  

I am really excited with the functionality of this little system.  I am pleased with the results and will use it for a few months as a color system for my long lens. Ultimately it will be converted to IR but for now I will play with it.  

There are several issues with its firmware (same as when the A7rii came out).  Overheating during hight speed continuous shots is the big one but Sony assures me that a fix is in work as it was when the A7rii camera came out!

I will be experimenting with the system for a few months and see what it can offer me in terms of images and use.  Later this week it is going to the beach for some ultra long exposures to see if it has any body light leaks!

What do your think?


Learning to work the scene!


Have a plan to work different compositions with in your scene!

Stormy Seas Side Shot

Stormy Seas Side Shot  Sony A7rii with the Sony/Zeiss 24-70 f/4 lens and polarizer.

You know how it is when you walk up to a scene and notice it for the very first time?  Usually we are amazed at what we have discovered!  We setup take the image and walk away congratulating   ourselves as to the amazing luck at finding such a perfect subject!

But wait!  You have all heard that you should work a scene, right?  Just look at all of the cool parts that make up the whole.  I am also sure that you have heard the phrase, “WORK THE SCENE”!  Well that actually means what it says.  Start wide and work in and around getting closer and more details!   When you are as close as you can stand, then work your way back out again!

This is powerful advice…

This is also the secret of all those world class images you see posted or published around the world.  Do you actually think that the professional photographer working and Nat Geo only took the one image?  Really???  They are just like the rest of us, a 30% keep rate and a 90% garbage rate!

So, knowing that it only make sense to take the time to work the scene.  Looking at the top image you see that I could the shrimp boat Stormy Seas with a long liner Charlotte Marie under the strong clouds of tropical storm Bonnie.  The scene is full of mood, color and contrasts.  I was specifically looking to work the shrimper so I did not pay any attention the the long liner.   Here they are a dime a dozen but there are likely a lot of detail shots there also…

Stormy Seas

Stormy Seas, from the bow, Sony A7rii with the Sony/Zeiss 24-70 f/4 lens and polarizer.

So as you can see, I have now walked around to the dock the shrimper is on and take a bow shot composing to keep the other boats, docks and other muck out of the image.  I still set it up to get the great storm clouds.  A much better shot than the first, no?

Stormy Seas

Stormy Seas, closer but  from the bow, Sony A7rii with the Sony/Zeiss 24-70 f/4 lens and polarizer.

Next I move further in, closer to the bow, looking at the painted boat name and the great structure and contrasts hidden the the hull of the boat.  As I stand here I think to myself that having the anchor cut off is a bit distracting but then decide that it adds a hint, or suggesting more out of scene that adds a bit is mystery to the image.  Again, in post, I have added a bit of mood to the clouds also!

Stormy Seas Side Detail

Stormy Seas Side Detail, Sony A7rii with the Sony/Zeiss 24-70 f/4 lens and polarizer.

Now I am walking down the boats side, paying attention to the colors and patterns around the wheel house.  There is a lot here and the images continue to improve. Having the walkway moving up and away from me give a sense of infinity and curiosity as to what is at the bow above!

Stormy Seas Life Ring

Stormy Seas Life Ring, Sony A7rii with the Sony/Zeiss 24-70 f/4 lens and polarizer.

Moving further back towards the boat’s stern (back for you folks who live in Idaho!) I come upon the life ring with assorted fishing accessories hanging from it.  This scene is the most promising so far.  Look at the textures in the wall of the wheel house, the deep rich red tones and the crisp writing of the boats name!  It gives me shivers overtime I look at it!

Stormy Seas Line

Stormy Seas Line, Sony A7rii with the Sony/Zeiss 24-70 f/4 lens and polarizer.

But wait!  Just below the life ring hanging on the gunnels of the boat is a coil of heavily textured rope.  The rusty bold and chipped and rotting rail add so much texture, mood and stories that I am drawn to create an image just of this one detail!

This is exactly what will happen if you take the time to explore your scene totally working inwards getting more and more details as you go!  If the scene is worthy of taking, it demands that you explore it in great depth and detail.  Give it the time to do a good job and document all of it’s glory!

Stormy Seas, side detail, B&W

Stormy Seas, side detail, B&W, Sony A7rii with the Sony/Zeiss 24-70 f/4 lens and polarizer.

Do not forget to work in B&W as well, each and every image you take might have magic wonder hidden within its detail if you look at in in monochrome!  Look closely at the image above.  The hull has MUCH MORE DETAIL in its structure than the one in color did yet they are the same exposure!  The clouds have more depth.   Monochrome images discard the distractions caused by color… But that is the subject for another post….

Remember, this has NOTHING to do with the type of scene you shoot, nature, landscape or shrimpers, it is all the same!

What do you think?


Out And About With Film….


Wandering the shrimp fleets of Georgetown with my Voigtlander Bessa III 120 film camera….

Voigtlander Bessa IIIw 120mm camera system

Voigtlander Bessa IIIw 120mm camera system

Yep, early this morning I grabbed the bag with my wide angle 120mm camera system and headed out to Georgetown where I was going to spend a bit of time with the shrimp fleets and some film….  I chose the Voigtlander Bessa IIIw system.  It has a 55mm lens on it which at 6x6mm equates to around 35mm and at 6x7mm to 30mm.  This is pretty wide and allowed me to capture several very wide angle shots of various shrimp boats around the water front.

One of the other things that I do when shooting film is to keep a accurate written record of the exposure data for each and every frame.  This assists in keeping my process the same once I get the proper exposure, contrast and desired grain for each of the film types I use.

I enjoy this camera system very much.  It has a lot going for it specifically its 6x7mm negative size which makes for some pretty big scanned files when all is said and done.  I also like the fact that it is a rangefinder which pretty much defines my youth and what I had learned to use when very young!  It is not too heavy, has a leaf shutter which is totally silent and goes up the 1/500 second for exposures. This could be a little faster but I can work with it.  A 120 roll of B&W film gives me 10 exposures at 6×7 which is the format I like the most. 

Rodinal One Shot

Rodinal One Shot

I normally use stand film processing with Rodinal at 1:100 ratio with water, a water bath then the 1 hour processing and normal fixing and a wash, but for these rolls I am going to use Ilford Perceptol ultra fine grain developer in hope of a sharper  image with greater contrast.  So, we will see next week how this new combination works for my finished film!

Stand processing is not dependent upon chemistry temperature, ISO or even Film type!  You put the film in its can, give it a 5 min water wash, then pour the developer in, gently agitating for 1 min then letting it sit for another 60 min!, Water Stop, since and done!     But there are trade offs with Stand processing, namely Bromide Drag which is shown as the slightly darker vertical streaks in the image below.  These come from the developer chemistry being exhausted.

Voigtlander Bessa IIIw with Rollei IR400 120

Voigtlander Bessa IIIw with Rollei IR400 120

Jordan and his film camera

Jordan and his film camera

So with the Perceptual chemistry (6 min develop time) I will not see Bromide Drag and it is supposed to give sharper smaller grain and higher contrast.   So instead of a 1 hour develop time we are looking at 6 min now, sharper negatives with higher contrast!  We will see….

I will hold of processing these images till the first weekend in May so that my 7 year old grand son come come with me to the studio and process his own 35mm film at the same time!  Yes, I am teaching him how to photograph and process film! You gotta start them young so that they catch the film bug!

Cooking the film!

Cooking the film!

Come on back in a few weeks to see the results of todays outing!


Advanced Work With The Sony A7rii


Using the Sony A7rii for advanced photographic work….


Long Exposure In Charleston, SC

Long Exposure In Charleston, SC, 30 seconds with a 6 stop B+W ND

I was in Charleston, SC last weekend with the a7rii camera system to see how far I could push it!   I find the Sony system to be refreshingly powerful and very capable of any style of photography I desire to shoot.   The Image above of the boat house (Sunrise) was just another example of the power of this system.  I was looking for some long exposure and the water of Charleston Harbor was very smooth to start, with only 6 to 12 inch waves.  The sunrise was blocked by a tremendous super cell thunderstorm system so I just concentrated on the boathouse and smoothing out the water.   I was using the Sony FE 70-200mm F4 G OSS lens at 150mm with a 6 stop B+W ND filter attached which was giving a 30 second exposure.  I was sure that 30 seconds would give me a very smooth water (which it did).  I also desired to capture detail in the stormy clouds but keep the white water.  I metered the waters surface and placed it in Zone 7.5 (what!  You do not know the zone system?  Shame…. We will have to fix this!).  This at ISO 50 and f/16 gave me a 30 second exposure and allowed the 14 stop dynamic range of the camera to capture both the withe of the water as well as cloud details!

Granted, the Sony has a LARGE menu system but the provide you so many programmable custom buttons AND several system setup memories that you can with the turn of a control knob chance the camera functions over to the specific style of shooting you desire!  In my case, I have the M2 memory setup for long exposures, and by simply turning the command dial to M2 the camera is ready for long exposures!

Miss Lulu, Georgetown, SC

Miss Lulu, Georgetown, SC

Here is another example of the amazing capture ability of the Sony.  This is the shrimper Miss Lulu on the dock in Georgetown, SC last Monday morning.   The water of the bay was at slack tide, super high and mirror smooth.   I decided that for this image I wanted B&W but still captured it in color since a color starting image gives the best B&W conversion.   I was using the Sony/Zeiss FE 24-70mm F4 ZA OSS lens at ISO 100 at f/8 with a shutter speed of 1/320 second.  I waited till a Pelican flew into the scene from behind the boat for the capture.  The clouds were slight but still stunning but the boat and its reflection really made the image.   

As I said, During my pre-visualitlation of this image I decides upon monochrom with a flying bird.  I setup the boa further into the image space to allow for a bird to fly into the scene and balancing the overall image with the boat centered with the trees on the right.   This is not a simple snap  shot, a lot of thought went into its setup!

Shrimp Boats are one of my favorite subjects and each and every time I happen by them they always present something new and different!

The Purity Of B&W


Going Home To Momma…

Don’t you have the feeling sometimes of not reaching that creative high so that when you return home you are almost like an empty husk?

Well me too, and sometimes I really need to stretch my artistic legs.  Going out with a Color Camera will just not get the job done and leaves me feeling empty.  Working in Film is a lot better and scratches an itch that I just cannot reach otherwise… But when I am really feeling creatively down and mentally cramped I usually turn to my Leica M Monochrom system.

Duggars Creek Falls, Boone, NC.  Leica M Monochrome

Duggars Creek Falls, Boone, NC. Leica M Monochrome

Working directly in B&W is a soul expanding exercise that will re-inflate my creative side quickly and effectively.  I am the type of photographer who can actually think and see in B&W. Actually generating those images in the field with a capable B&W rangefinder system really is like going home to Momma.  It leaves me with that ohhhh feeling, or is it OHHHHH… Yep, that is the feeling that I am talking about!

First, I LOVE shooting with a rangefinder camera system.   ALL of my cameras are rangefinders except for one little Fuji XT1 that sits in my camera bag rarely used unless I take it out for lightning shots.  I just love the feeling of using a rangefinder!  I am not kidding about the feeling of going home to momma!  They take me back to my early days of photography when a rangefinder was all that I had and used.  They were and still are a nitch camera system.  You generally will not find someone out shooting birds in flight images with one, but that is OK  with me because after 50 years of shooting, I am soooo TIRED OF BIRDS (well except for hummingbirds but I can do those just fine with a rangefinder).

Outer Banks Fishing Pier, 250 second Exposure Leica M Monochrom

Outer Banks Fishing Pier, 250 second Exposure Leica M Monochrom

So what makes me smile about the M Monochrom?  The ease of use, the CRISP release of the shutter, the incredible functionality of the camera and its wide dynamic range!  I love the way it feels in my hands and responds to my control!  I even love the sound of it. It is almost sensual in nature!  Now, couple that with the amazing images that a pure B&W 18 mega pixel sensor with NO Brayer filter and no anti-aliasing filter can create you will be left breathless with the results.  

So for this simple and short post about achieving emotional nirvana, I will keep it to just 2 images that make me feel good. Now that I am creatively re-inspired I can go out again with my color camera (rangefinder of course) and while looking at my scenes in B&W create color images again!

Thank you for stopping by for a visit to the blog…

Using Fumed Alumina To Fix Paper Issues in Van Dyke Brown


An Easy & Cost Effective Way To Fix Paper Issues!

Stormy Seas, Van Dyke Brown, Lana Paper, Fumed Alumina Brush Coated, Gold Toned

Stormy Seas, Van Dyke Brown, Lana Paper, Fumed Alumina Brush Coated, Gold Toned, 720nm Infrared

Testing Fumed Alumina…

Van Dyke Brown emulsion is basically on the acidic side of things chemically and as a result of this I have been forced to wash most of my papers with a acid bath. This caused a increase in my process by 2 days. So I am testing Fumed Alumina which is acidic unlike Fumed Silica which is neutral. I decided to go with the Alumina test first and will do a followup post down the line with the Fumed Silica.

Bent Tree, Van Dyke Brown, Lana Paper, Fumed Alumina Brush Coated, Gold Toned

Bent Tree, Van Dyke Brown, Lana Paper, Fumed Alumina Brush Coated, Gold Toned, IR400 120 Film

Initial results were quite pleasing with both Revere Platinum and Lana Aquarelle papers. I got a MAJOR increase in Dmax with both the Lana and Revere papers, but upon completion of my final wash the Revere was VERY EASY to damage with finger smudges until it dried. The Revere had a tendency for the Alumina to easily rub off the Alumina while wet whereas the Lana was strongly attached.

Anderson Mill, Van Dyke Brown, Lana Paper, Fumed Alumina Brush Coated, Gold Toned

Anderson Mill, Van Dyke Brown, Lana Paper, Fumed Alumina Brush Coated, Gold Toned, Leica M Monochrom

The Alumina did fix ALL of the spotting issues that I had when using the Revere Platinum paper but the fact that it will rub off when wet causes some concern but it is easily overcome with careful handling.

Magnolia, Van Dyke Brown, Lana Paper, Fumed Alumina Brush Coated, Gold Toned

Magnolia, Van Dyke Brown, Lana Paper, Fumed Alumina Brush Coated, Gold Toned

The Process:

  1. Dry roll on the Fumed Alumina in 2 directions and rap the paper edge on the table to remove the excess.  Make sure that you use a good mask to filter out this dust as it might irritate your lungs.  DO NOT OVER COAT or you will get streaks when you coat the emulsion.  The rolling step only takes about 30 seconds! You will need to put about 1 TSP of the Alumina into a small paint tray then pre load a small (3″) HARD foam roller with it.
  2. Coat as normal after you roll on the Alumina. You will need about 12 extra drops of VDB emulsion due to it absorbing more. My basic quantity of VDB emulsion for a 8×12 sheet of paper coated with Alumina is 48 Drops of emulsion and 2 drops of Tween 20 at 25% (you will need to dilute the Tween from 50%) solution.  For this post I brushed on the emulsion.  In the past I would normally use a glass rod for coating but the Alumina creates a very rough surface and I was afraid of damaging the paper.
  3. Dry and Expose. Here you will find that the addition of the Alumina will DECREASE your exposure about 1.5 stops!
  4. 1st water bath with distilled water and a pinch of citric acid, 2 min.  This bath will remove any extra ferric ammonium citrate which will cause a yellow paper stain. This bath will darken the print.  Do not worry as the FIX will balance contrasts and bring out the highlights!
  5. Fresh water bath to remove citric acid. 2 min. If you are Gold Toning, this step is VERY important as any Citric Acid will destroy the toner bath!  
  6.  Gold toning bath 2 to 5 min to taste.  The toning process requires CONSTANT AGITATION! After 2 or 3 prints toned add 5ml/print of Gold Chloride to bring the bath back up to strength. This  toning bath will further darken the print.  Do not worry as the FIX will balance contrasts and bring out the highlights!
  7. Fix for 2 min with Sodium Thiosulfate for 2 min. 30g/L. I do not believe that any further time will help the process.
  8. Final moving fresh water bath for 30 min.
  9. Air dry,  I spread out old towels on a table top and place the print on it for about 10 min to absorb most of the water thru the back of the print.  I will then hang the prints to dry by a corner.  
  10. Use a  heat press to flatten your prints at 170deg for 20 seconds. The heat press step is to make the paper flat again.
  11. Hand rub in SOFT custom wax coating for protection then heat to force the wax to be absorbed into the paper fiber with a hair drier (more about this in a future post).
Dinghy, Van Dyke Brown, Lana Paper, Fumed Alumina Brush Coated, Gold Toned

Dinghy, Van Dyke Brown, Lana Paper, Fumed Alumina Brush Coated, Gold Toned, Leica M Monochrom

All in all this was a VERY easy fix to the acid washing step  and only added about 30 seconds to roll on the Alumina. The Fumed Alumina can be purchased at Bostick & Sullivan for $15/500g which will do about 100 sheets of 8×12 paper.

2 Dinghys, Van Dyke Brown, Lana Paper, Fumed Alumina Brush Coated, Gold Toned

2 Dinghys, Van Dyke Brown, Lana Paper, Fumed Alumina Brush Coated, Gold Toned, Leica M Monochrom

The increase in Dmax with the Fumed Alumina is amazing and the resulting images are stunning.

Please let me know what you think of this post and with suggestions for future posts!

Van Dyke Brown Paper Experiments…


Fixing Paper Problems For Van Dyke Brown Printing


Van Dyke Brown, Dinghys, Rising Stonehenge Paper

Van Dyke Brown, Dinghys, Rising Stonehenge Paper

VDB, Revere Platinum Paper & Spots

VDB, Revere Platinum Paper & Spots

In my recent printing of the 1840 Van Dyke Brown prints, I have experienced a lot of dark spots on my prints.  I ordered several types of papers to try to see if it was a paper problem… I have been using Revere Platinum paper which is easy to coat (provided you use Tween 20 in the emulsion) and gives great tonality but seems to ALWAYS have dark spots all through the print!

Look closely at the image to the right. You will notice dark spots (look above the light) that go completely through the paper!  This has been driving me nuts and nothing that I did to try and fix the issue ever helped.

I ordered several new papers plus tried several others that I had on hand:

  • Arches Platine (on hand) I have issues coating this paper even with Tween added to the mixture.  It tends to sit on the surface with no absorption into the fibers which causes it to wash off instantly in in the first water bath in long stringy tendrils of emulsion.  Very little is left on the paper so it has a light chalky appearance.  This paper just does not work for me in Van Dyke Brown.  I keep hearing online about how much other Van Dyke Brown printers like this paper but I just do not see it…
  • Cot 320 (on hand) This paper is a little better than the Arches paper in that it holds the emulsion a little better but is still washes off the surface in the 1st water bath!  It is usable for Van Dyke Brown printing though…  It has been recently suggested to me that I soak this paper in a 10% citric acid bath, wash it and dry it in order to get better surface adhesion and a higher Dmax.  I will try this in a week or two.
  • Heavy Kozo 90 gsm (on hand) Bostick & Sullivan states that this paper will work great with Van Dyke Brown.  The paper is made from 50% kozo and 50% abaca. Kozo is the inner bark of mulberry tree seedlings, producing a naturally white paper fiber which is very strong and long lasting. The paper looks very promising and fun to work with especially the ultra thin version that I chose to NOT work  with due to it being extremely thin and the requirement of special tools to handle it.  I have seen videos of artists using it which is why I decided to purchase a few sheets to experiment with.  But I have not had time to work with it yet.  So look for a post specific to this wonderous paper in the future!
  • Revere Platinum (on hand).  This paper coats wonderfully with the addition of Tween and the emulsion does NOT wash off in the first water bath!  It gives wonderful deep tones and color.  The only (MAJOR ISSUE) problem with it is that it gets white and brown spots all over the paper that goes completely through the paper from front to back.  These spots can totally ruin the print…  I have tried everything that I can think of to fix this issue as I really like the paper but I am at a total loss.
  • Rising Stonehenge (new)  This paper coats great with Tween and does not wash off.  There are no spots and the adjustment curve matches the one for Revere!  It is a thinner paper and seems easy to damage during coating.  It takes less emulsion to coat the same size as the other papers.  I did find that the emulsion migrates from the coated areas to the white around the edges.  I have no idea as to why but I think that if I lower the number of drops that I use for coating that it might take care of the problem.  It generates a fantastic deep brown warm tone across the image and I love the final prints on it. This paper is readily available on Amazon as well as many other locations.
  • Lana Aquarelle (new) All that I can say about this paper is WOW!  It coats and prints the Van Dyke Brown images with amazing density and tone.  It coats easily with Tween and is a heavy paper with not spotting or migration issues.  This is going to be my main paper as long as I can get it.  So far the only place that I have found it is at Bostic & Sullivan. The curves for the Revere paper work perfectly with the Lana!


Lana Aquarelle Paper Notes

Lets first talk about the Lana Aquarelle paper.  This paper is simply amazing!  It coats very well with both the brush and a glass rod as long as you add a little Tween at 25%

For a 8×12 print:

  • Using a glass coating rod for a 8×12 print it takes 36 drops of VDB and 2 drops of Tween 25%.
  • Using a Synthetic Sable brush it takes 72 doors of VDB and 2 drops of Tween 25%.

Once coated, I let it AIR DRY for 30 min then expose in a 12 bulb UV box in a vacuum frame for 2 to 4 min depending on the paper and negative.  Usually the base exposure time is 3 min.

Van Dyke Brown, Berry Mill, Lana Aquarelle Paper

Van Dyke Brown, Berry Mill, Lana Aquarelle Paper brush coated

As I said the results from this paper is a nice warm print with great density in the black areas and the edges.

I coated four pieces of paper yesterday, two with a glass coating rod and two with a synthetic Sable brush.  Both methods worked very well and gave nice even coatings. The image above was a applied with the Sable brush  and the one below was coated with a glass rod.

Van Dyke Brown, Lana Aquarelle Paper Glass coated

Van Dyke Brown, Lana Aquarelle Paper Glass coated

Notice in the image above if the lone dinghy  that there are NO spots at all.  The paper was clean on the front and back and gave a nice density in the dark areas!  This paper is very heavy and after coating it will want to curl a little but will flatten in about 5 min. Let it dry for the full 30 min in the air and do not use a hair drier.


Rising Stonehenge Paper

For a 8×12 print:

  • Using a glass coating rod for a 8×12 print it takes 26 drops of VDB and 2 drops of Tween 25%.
  • Using a Synthetic Sable brush it takes 65 doors of VDB and 2 drops of Tween 25%.


Rising Stonehenge Paper is another good paper for the Van Dyke Brown process.  It is a MUCH lighter weight paper than the Lana paper but it really does not cost any less!  You can find it on Amazon which means free shipping.  The shipping charges from B&S are going to kill me, with the average cost for paper being around $20 per order!  This is what makes Amazon so great, but they just don’t carry all of the papers that I like to keep on hand…

Van Dyke Brown, The Old Truck, Rising Stonehenge Paper

Van Dyke Brown, The Old Truck, Rising Stonehenge Paper

So far, my work with Rising Stonehenge has been very good.  It coats evenly and the emulsion soaks into the paper fibers nicely. The print is very dense and nice dark areas.   The paper is quite thin and I discovered that the surface is easily damaged during coating.  Since the surface requires much less VDB emulsion I will reduce it the next time I coat (I used 36 drops of VDB and 2 drops of Tween for this test coating) and the surface damage will likely go away due to the glass rod not going across the paper surface  more than 4 times ( for 36 drops the coating rod required 8 trips across the paper surface) thus reducing working the papers surface too much and causing damage.  

One small problem with the paper that I discovered was that the emulsion has a tendency to migrate from the coated areas to the uncoated areas giving a grey shadow around the image.  If you look closely you can see actual small spots of it surrounding the coating.  This is really no big deal but I am unsure as to why this is happening.  

I will continue to use this paper because it generates VERY WARM BROWN in the print and I just love the look of it!

Now, it has been suggested that I soak or pre coat the paper with an acid bath of 10% citric acid for a 1 or 2 min, then wash the paper and allow it to dry before coating.  I am told that this will vastly increase the papers Dmax!  I am going to test this next time I print!

 The image at the top of this post was also printed on Rising Stonehenge paper!

 Bergger Cot 320 Paper

 The Cot 320 paper is a very nice, smooth paper.  I love the look and feel of it.  BUT, for Van Dyke Brown it has a problem in that it will not readily absorb the VDB emulsion into the paper fibers.  Even with Tween added to the emulsion, it is not enough.  What happens is that in the first water bath after exposure the majority of the emulsion washes off in thick tendrils of brown goo.  Unlike the Arches paper, enough is left on the paper to still make for a good (not great) image.  

Van Dyke Brown, Das Boots, Cot 320 Paper

Van Dyke Brown, Das Boots, Cot 320 Paper

There is enough promise from this paper that I am going to experiment further with this paper by washing the paper with an acidic solution of citric acid and distilled water, brushing it on and letting it soak in for a few seconds then washing the paper again with distilled water.  Once it dries and I will flatten it in a low temp heat press and coat the VDB on it.  I think that this will break down the surface coatings enough for it to accept the emulsion better and increase the papers Dmax.

Van Dyke Brown, Stormy Sky, Cot 320 Paper

Van Dyke Brown, Stormy Sky, Cot 320 Paper

I will report on this more in the future.  

OK that is all for this post. I am not going to report on the Arches and Revere papers as I have discussed them in the previous two posts.

I hope that you got something out of the info here!  Let me know…


Continued Work In Van Dyke Brown Alternative Print Process!


Perfection in Brown


Glade Creek Mill, Van Dyke Brown, Revere Platinum Paper exposed for 5 Min

Glade Creek Mill, Van Dyke Brown, Revere Platinum Paper exposed for 5 Min


Oak Reflections in Infrared, Van Dyke Brown, Revere Platinum Paper, 3 Min Exposure

Oak Reflections in Infrared, Van Dyke Brown, Revere Platinum Paper, 3 Min Exposure

After another 2 weeks working on the negative density, I have finally gotten to the point of good negatives, not great yet but I will get there.  I have to master the use of UV blocking color in the negative for them to be perfect and that is a project for the future. To date though I have reached perfection using normal B&W negatives.  

My CORRECTED Digital Negative for the Van Dyke Process

My CORRECTED Digital Negative for the Van Dyke Process

Here is the corrected negative that I used in the image of the Oak trees above.  It is much dense and has been corrected for the mid tones as printed in the Van Dyke Brown Process!  It has much greater contrast and required only a 3 min exposure in my UV unit. 

One thing that you have to remember when making your UV exposures is to place the ink side of your negative down on the paper surface.  If you reverse this the picture will be backwards, but more importantly, the UV light will burn the ink surface and ruin both the negative and the print.

B&W Negative for Van Dyke Brown Print exposure calculated for 3 Min.

B&W Negative for Van Dyke Brown Print exposure calculated for 3 Min.

Compare it to the negative on the right.  This negative was used in the previous post here where the image printed much darker and with less mid tone data.  Take a close look at the difference between the two negatives, the first has much brighter areas for increased black contrast and more detail in the trees. The difference is amazing and was easily achieved by the process discussed below…

Here is a small copy of the print generated by the 2nd negative from the previous post.  Notice how much darker it is and that there is no detail in the mid tones of the image!  It only took me a short while to create the Gradient Map from the process that I learned in Peter Mrhar’s book below.

Van Dyke Brown Print, Over Exposed by 2 stops due to the uncorrected negative

Van Dyke Brown Print, Over Exposed by 2 stops due to the uncorrected negative

Easy Digital Negatives is another remarkable book by Peter Mrhar

Easy Digital Negatives is another remarkable book by Peter Mrhar

Easy Digital Negatives is another remarkable book by Peter Mrhar that I use in the creation of my negatives.  It enables you to easily create Gradient Maps to adjust the mid tone values of your negative tailored to the alternative process that you are printing with!  I highly recommend this text over all of the others!

There are several good books on Digital Negatives out there but As I said the is the easiest that I have read and used plus the results of using a Gradient Map over a Custom Curve.  I suggest that you purchase several texts and try them in your workflow to see what works best for you!

I hope that you enjoyed this short post on the Van Dyke Brown Process.  You can look for more about it in the future!