All things are fair in Love and War…
and we need every advantage we can get as photographers in long exposure!

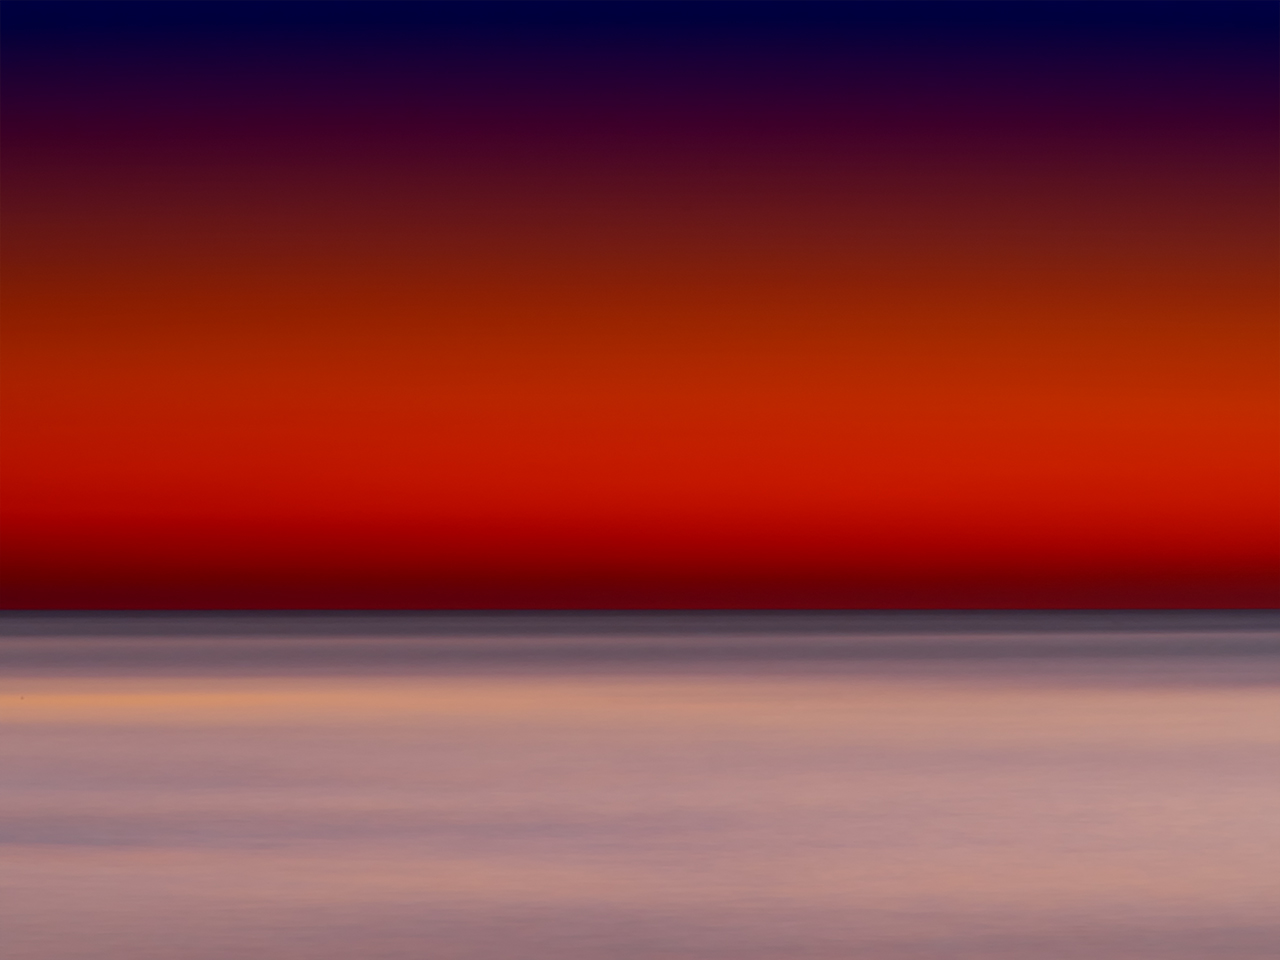
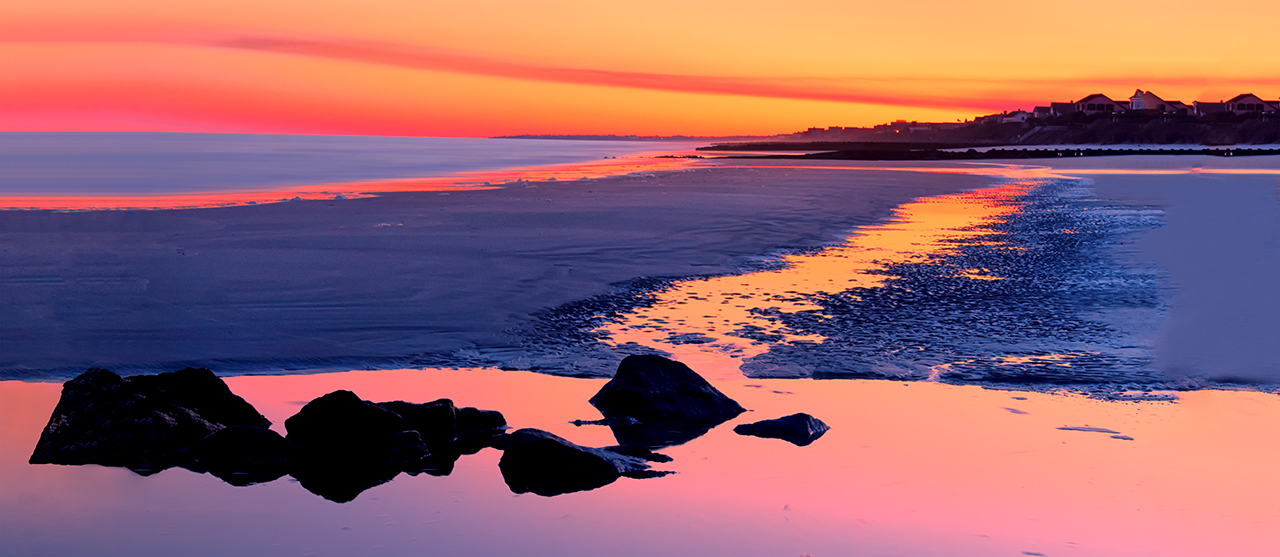
Long Exposure Twilight Abstract with a 3 stop graduated soft ND filter to darken the sky.
The long exposure game, is one of compromises: fighting too little light, balancing the moon and its reflections, cameras and lenses, camera meter or external meter! Long exposures are one of the more difficult photographic styles and one that takes experience and patience to master. As such, the photographer needs every helpful trick that they can gather into their bag of tricks in order to generate, stunning etherial images!
Equipment tailored to Long Exposures that I like and use:
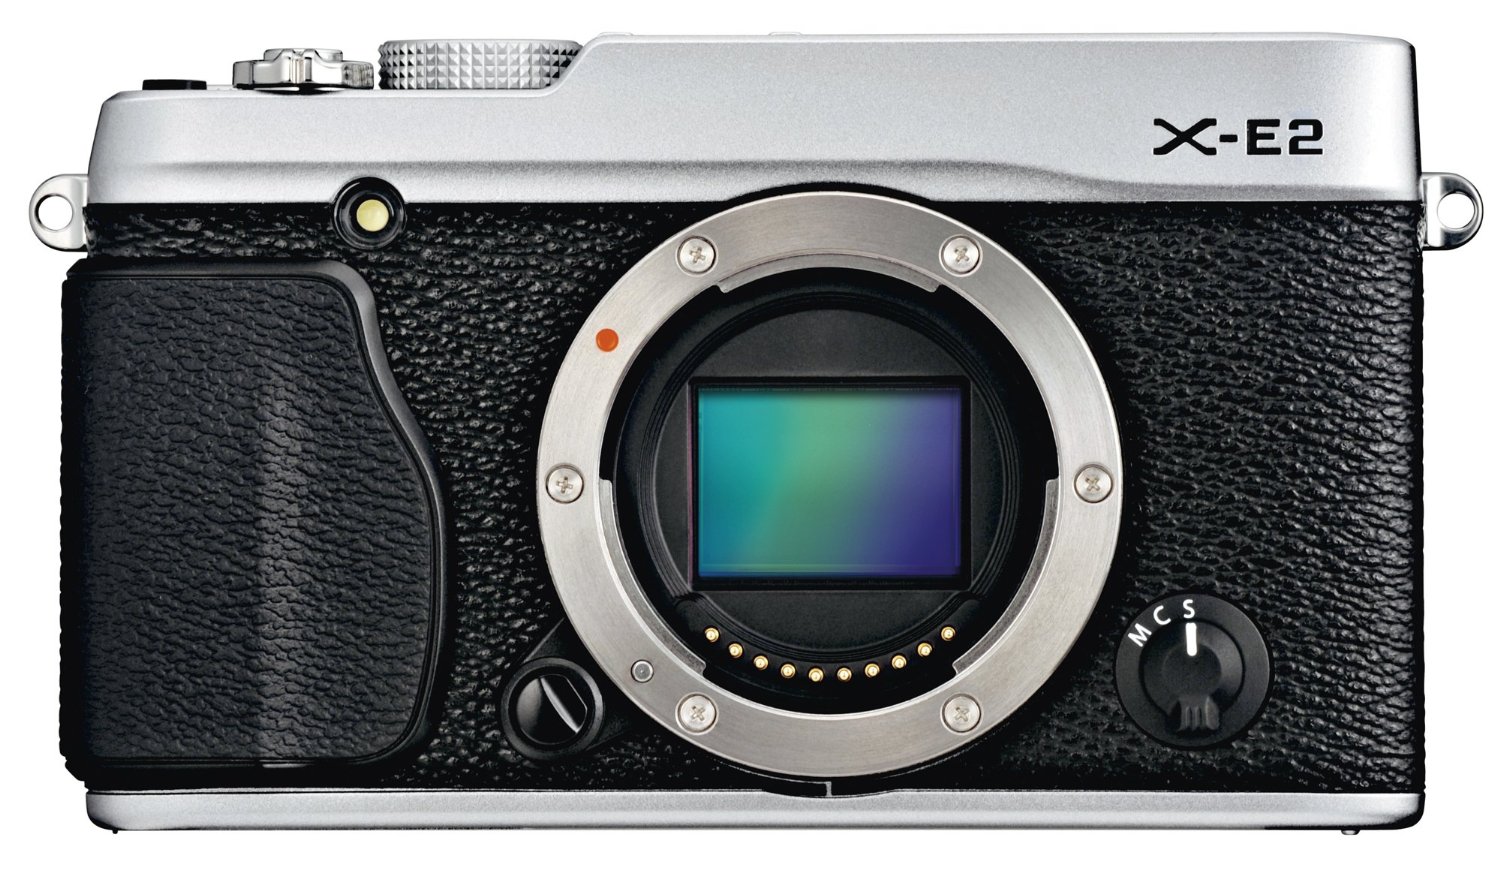
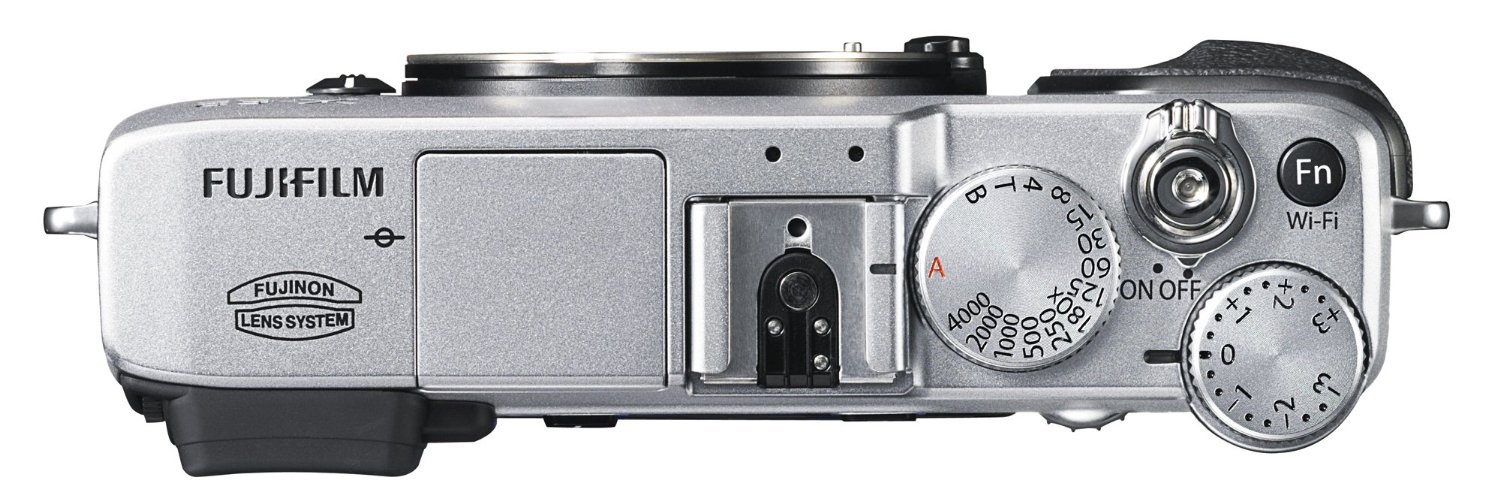
- Fuji X-E1 Camera. Provides both electronic and mechanical remote shutter releasees, Bulb mode with back panel displayed timer, ultra clean low noise long exposure images!
- Olympus OMD with the Panasonic 14-140mm lens. Great built in long exposure modes like the Live View Bulb mode where the camera will display an updating image on the LCD panel as the exposure continues to be made. This gives you a very clear indication of the exposure as it is happening and is like watching a Polaroid develop! The ISO noise performance is not as good as the Fuji but is indeed acceptable. I use both camera systems but like the Fuji better!
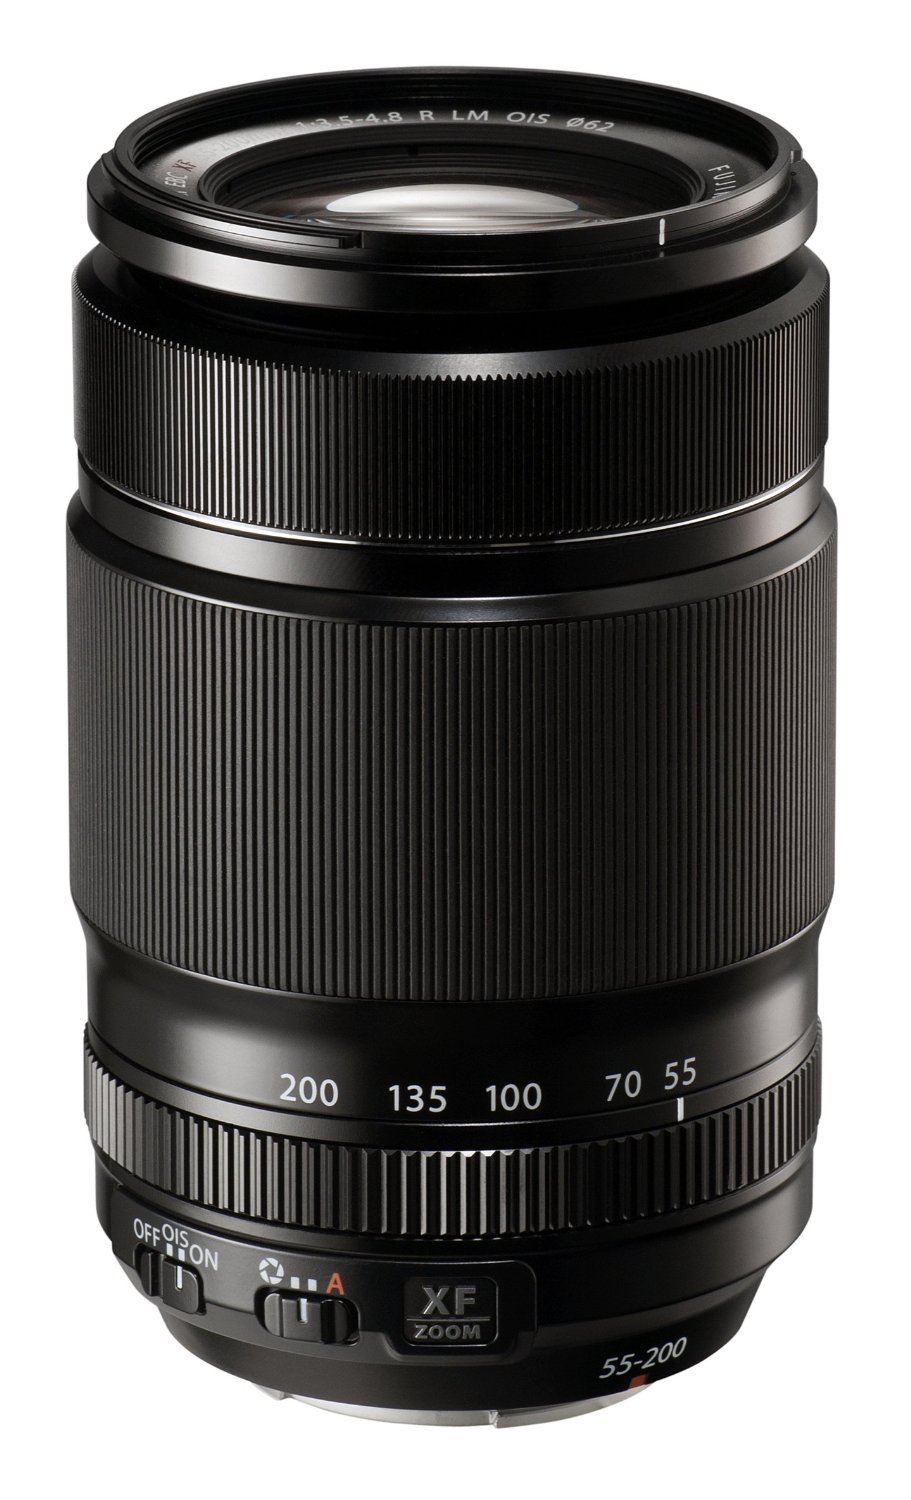
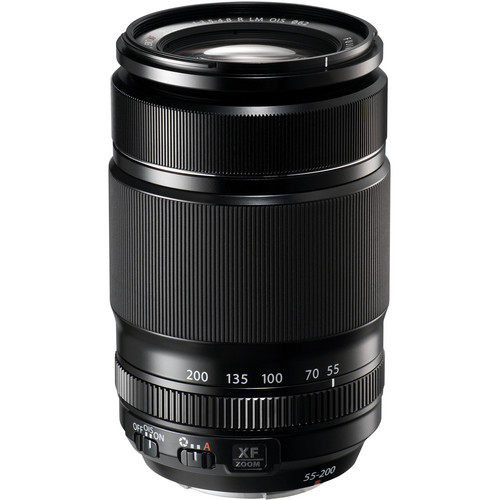
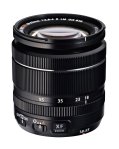
- Fuji XF 18-55mm zoom lens. Sharp images with good range of wide angle to standard lengths! 58mm filter size. ZERO lens flair.
- Voigtlander Heliar 75mm f/1.8 Lens. Coupled with the Fuji M to X adapter provides an easy to focus sharp image with a 52mm filter with a f/1.8 to f/16 aperture.
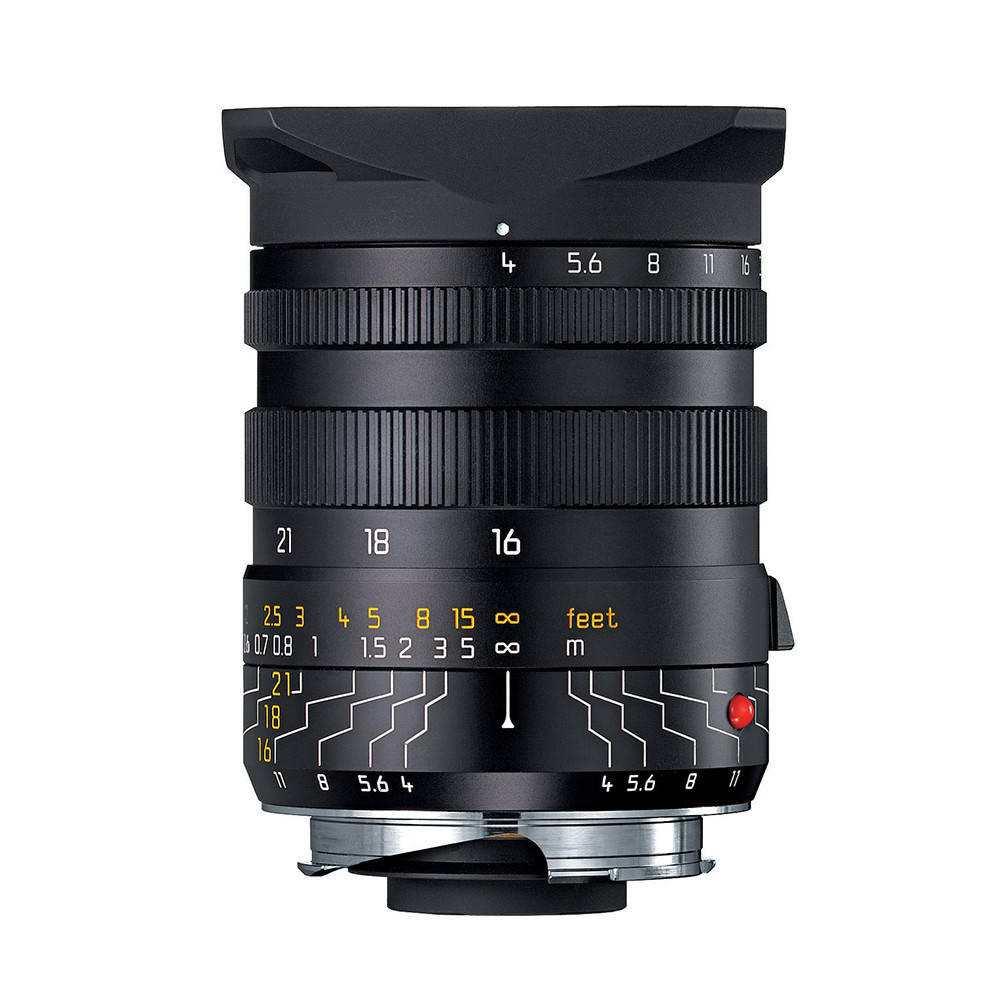
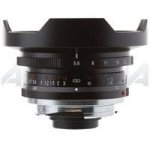
- Voigtlander Ultra Wide-Heliar 12mm f/5.6 Aspherical M Mount Lens. Ultra wide super sharp and a depth of field that just goes on forever! This lens takes a 67mm filter and can only take advantage of screw on filters due to its built lens hood.
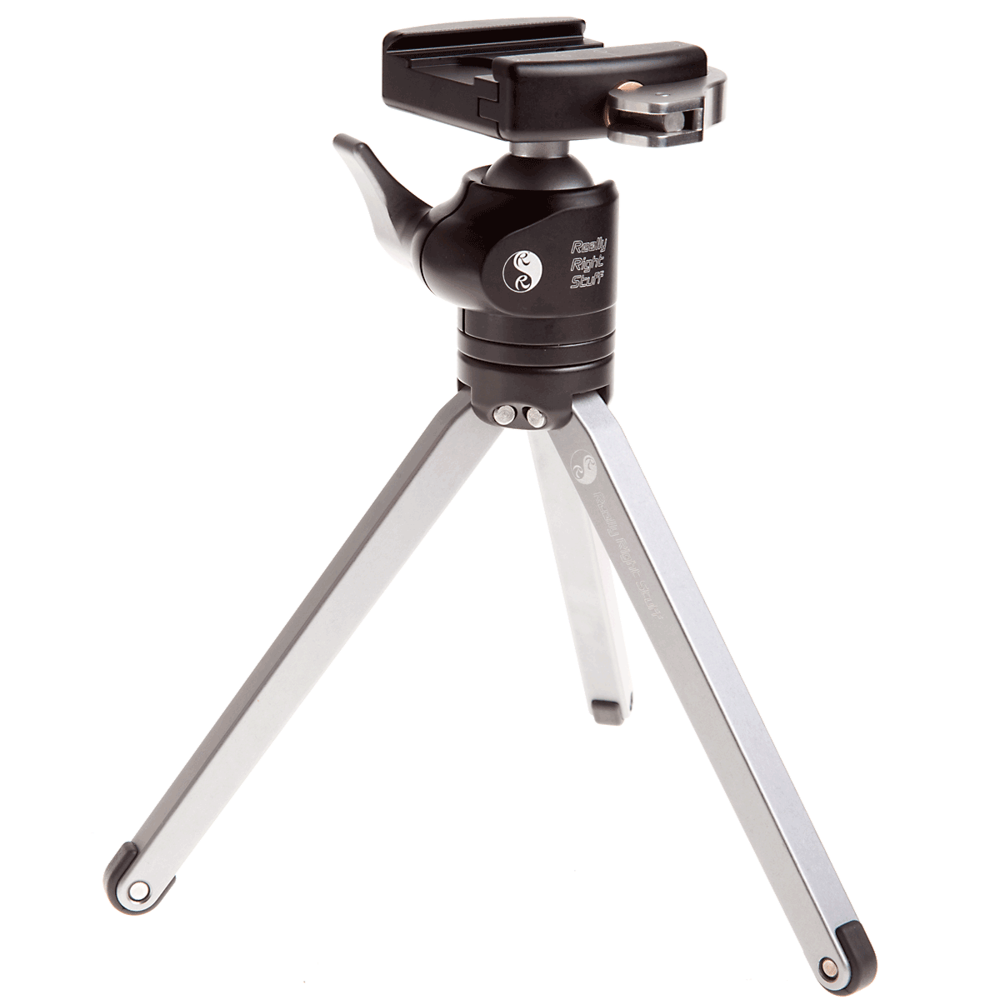
- Gitzo & Feisol Carbon Fibre Tripods with Really Right Stuff BH55 Ball head. This is a light weight combination gives solid steady support with ZERO camera creep from the ball head!
- B+W ND filters, 3, 6 & 10 Stop. These filters use Schott glass and are the best ND filters out there. I much prefer fixed ND filters to variable because I KNOW what the filter factor always is for exposure settings and lack of guess work.
- Lee Seven 5 Micro Filter System. Simply stated, the Lee series of rectangular ND filters is the best in the world. The Seven 5 system was designed for small camera systems like the range finder styled Fuji X-E1 camera system. This provides the ability to use a set ND in the 2, 3 and 10 stop range in conjunction with a graduated ND filter in Hard or Soft edges from 1, 2 & 3 stop ranges to darken the sky for further control! While expensive (what isn’t?) this system gives the photographer the best opportunity to capture PERFECT long exposures in any situation!
- Sekonic L758DR Light Meter. This is my main tool aside from the camera, for long exposures! It is a 1 degree spot meter that can be calibrated to your camera and gives PERFECT exposures while accounting for what ever ND filter you have installed. It gives you a choice of where you meter in the scene and then using the ZONE SYSTEM allows you to shift your exposure up or down in order to give you the image you envision! For me, this is my MUST HAVE MAIN TOOL for exposure control. It goes way beyond the capability of your in camera metering system.
Must Have Thought Processes to Master Long Exposure Photography
- You must MASTER the physics of exposure! But relax, this can be accomplished in about 1/2 hour then a few outing to experiment with your new knowledge set!
- You must MASTER the ZONE SYSTEM of exposure control. This is simply a different way at looking at exposure where you divide what the camera can see and record into 10 distinct zones from black to white with each zone assigned to a specific stop that can be adjusted with either shutter speed or aperture. This will make your in head exposure calculations easy and automatic. When you couple this with the fact that ALL metering systems force the measurement area into the 18% gray area (ZONE 5) then you can see how easy it is to force the camera exposure to give you the envisioned image the first time! There are several books and videos on Amazon that will be good to read. Here is a nice book on the overall zone system, and here is one dealing with it for digital systems.
- The ability do look at a scene before you ever pick up a camera and envision what you want to capture and how you want it to look! Remember, the camera is a tool, you master your tool and make it create your envisioned image!
- The drive to suffer through long hours in the dark and cold just to capture 3 or 4 images! Know this, the exposure, say 15 minutes is only 1/2 the time needed by the camera to save the image onto your memory card. The camera will run a noise reduction cycle the same length as the exposure before you can move onto the next exposure. So if you take a 15 minute shot your camera will be tied up for 30 minutes! This then, is why you need to get the exposure dead on each and every time! You only can get so many shots when it takes 1/2 hour for each 15 minute shot.
- The ability to post process (I use Photoshop CS6 and the Nik Software filter set) in both Color and B&W.

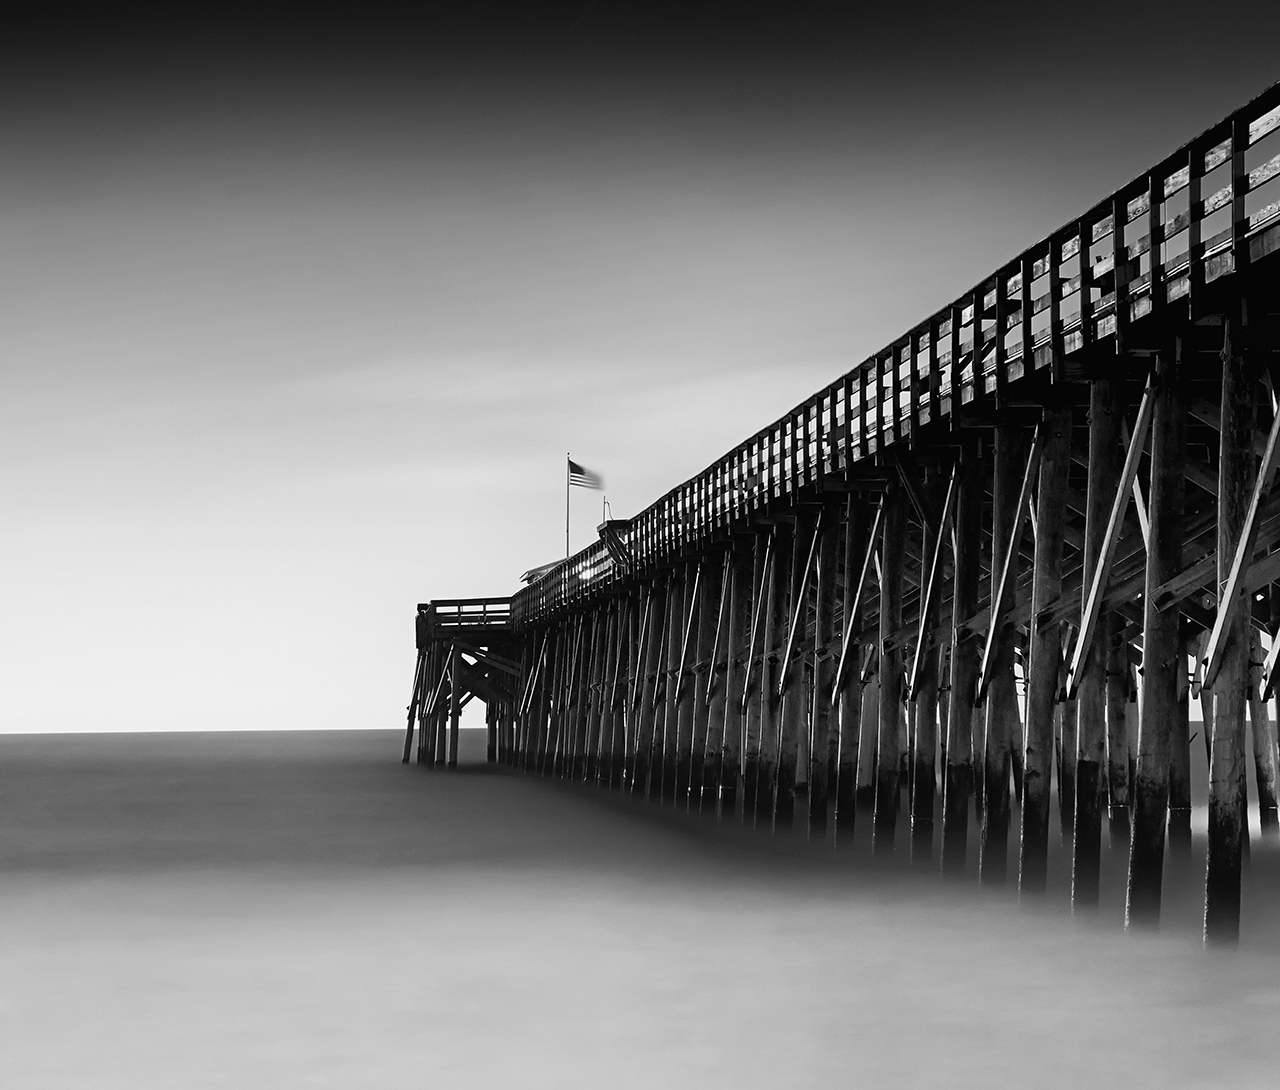
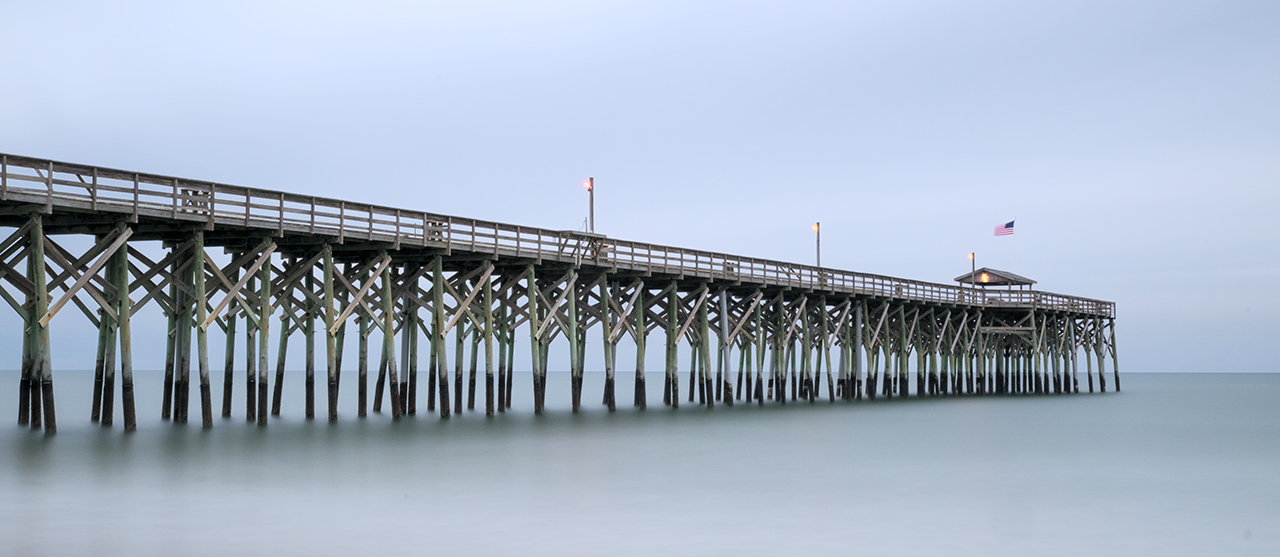
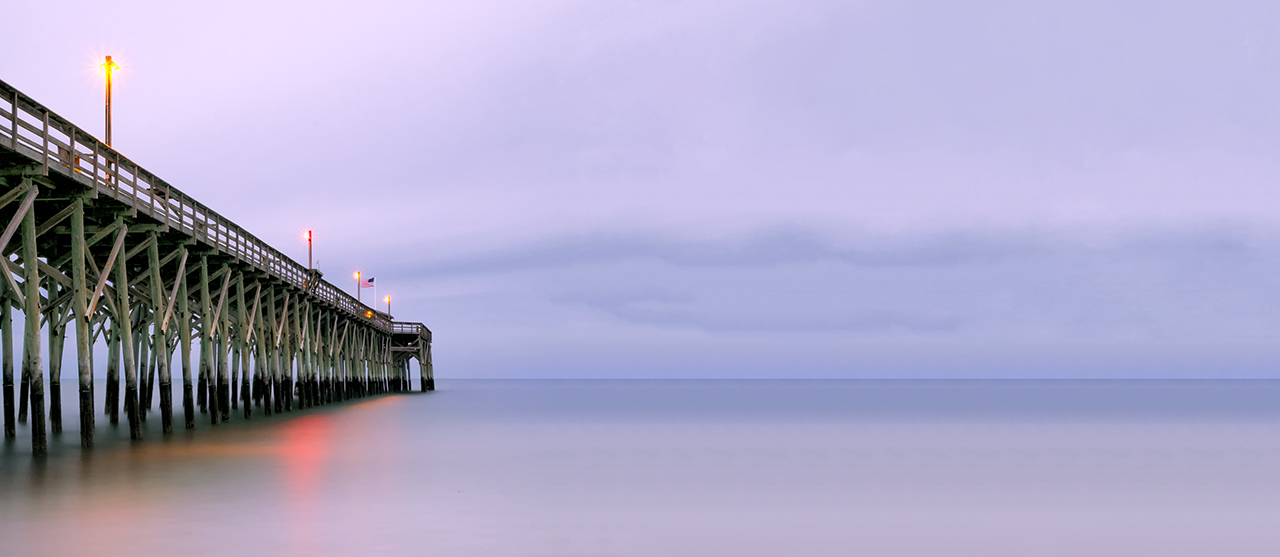
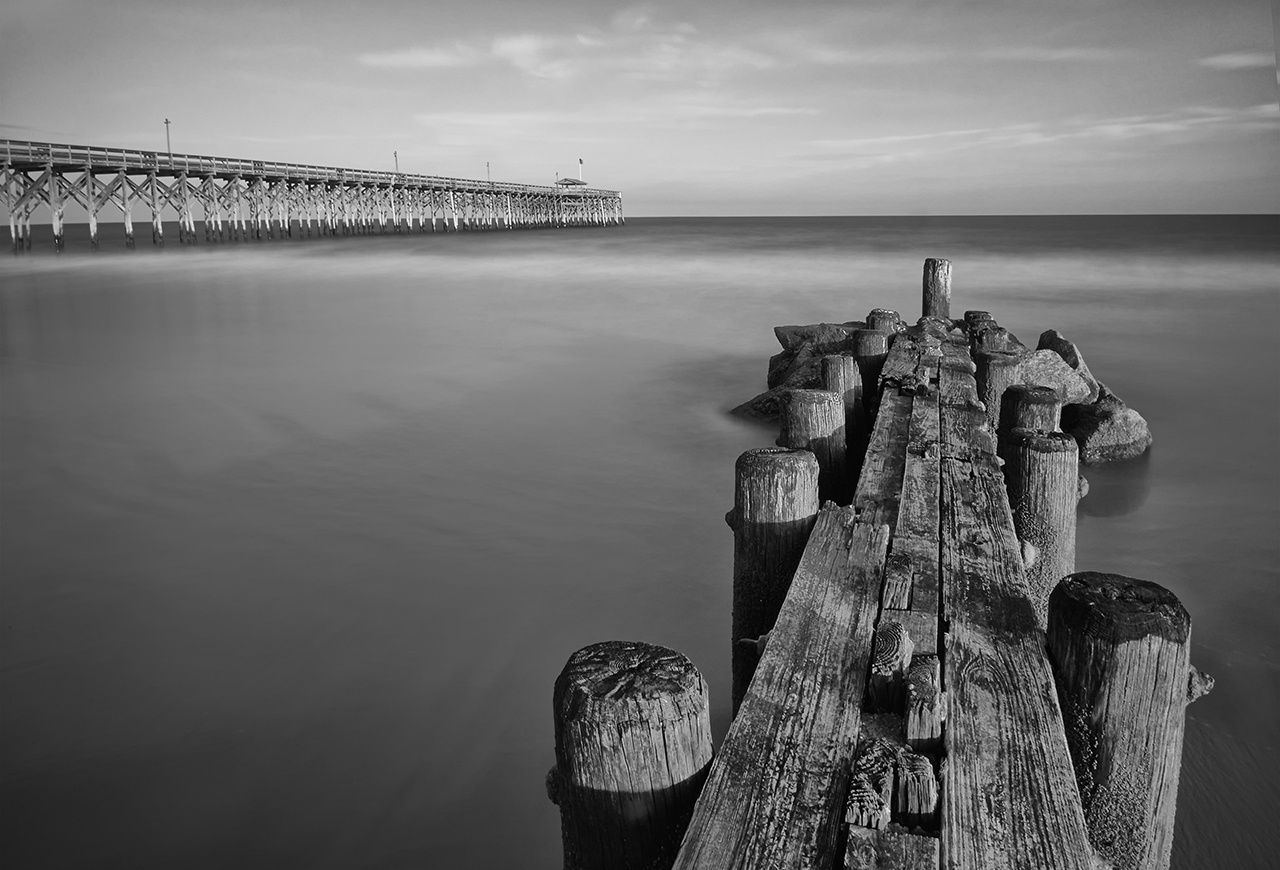
The Pawleys Island Pier, Fuji X-E1 with the 18-55mm lens, 3 stop Lee Graduated ND for the sky and a 3 stop ND overall.
So let’s put all of this together in a process or recipe (if you will) that will lead us to success in the Long Exposure game (NOT Star Trails which is a slightly different game!
My favorite time to setup and start taking my long exposures is from 1/2 hour before sunset to about 2 hours after (depending upon the moon).
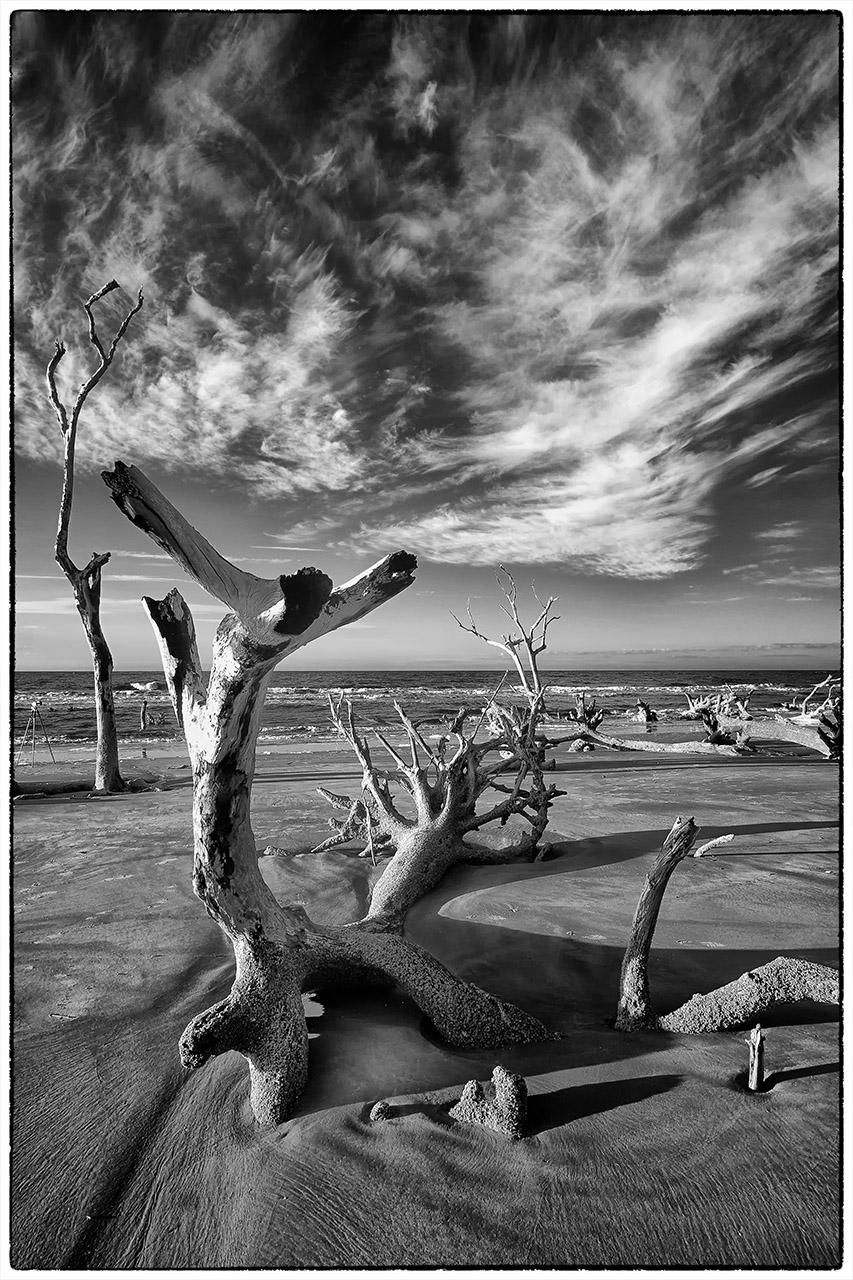
I will usually go to the beach and look for something in the foreground like some rocks, groin, dead trees, pilings or a pier.

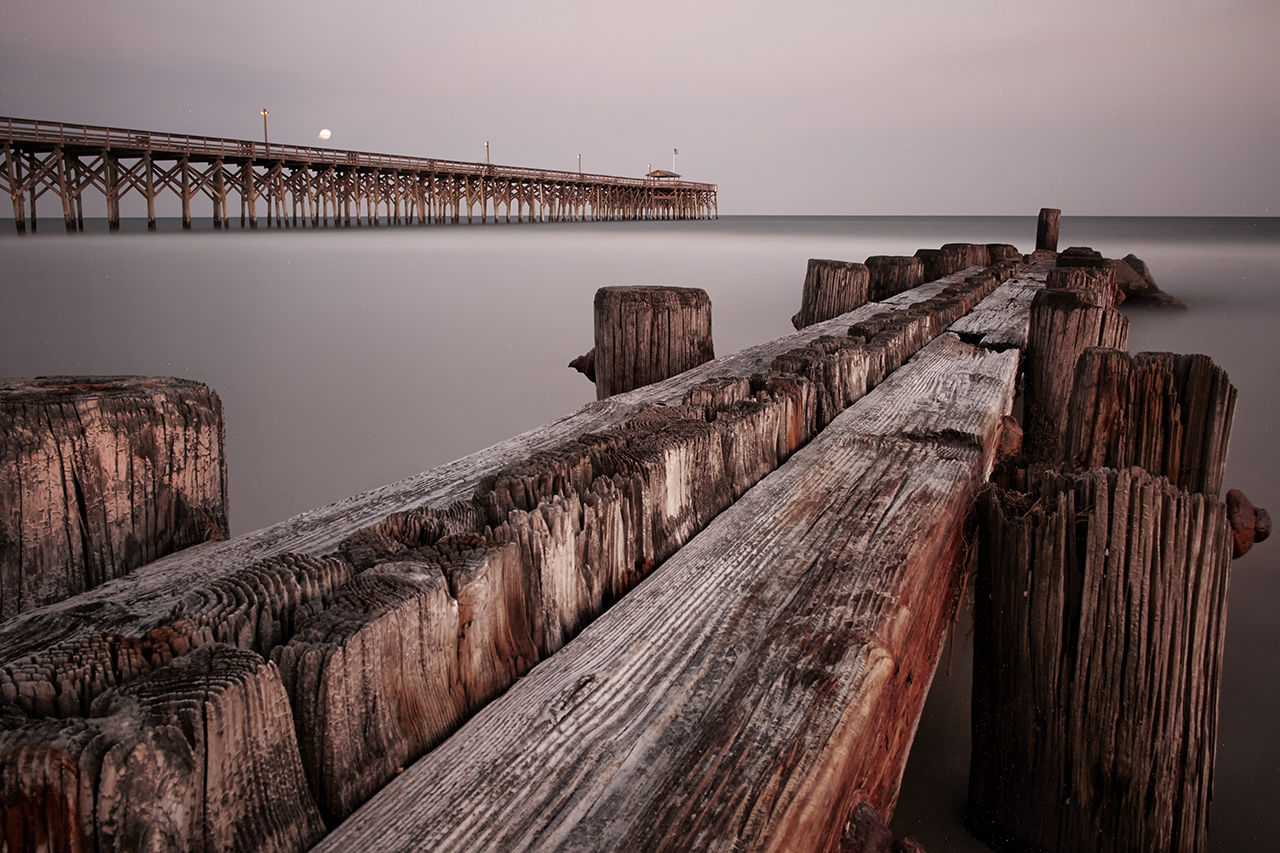
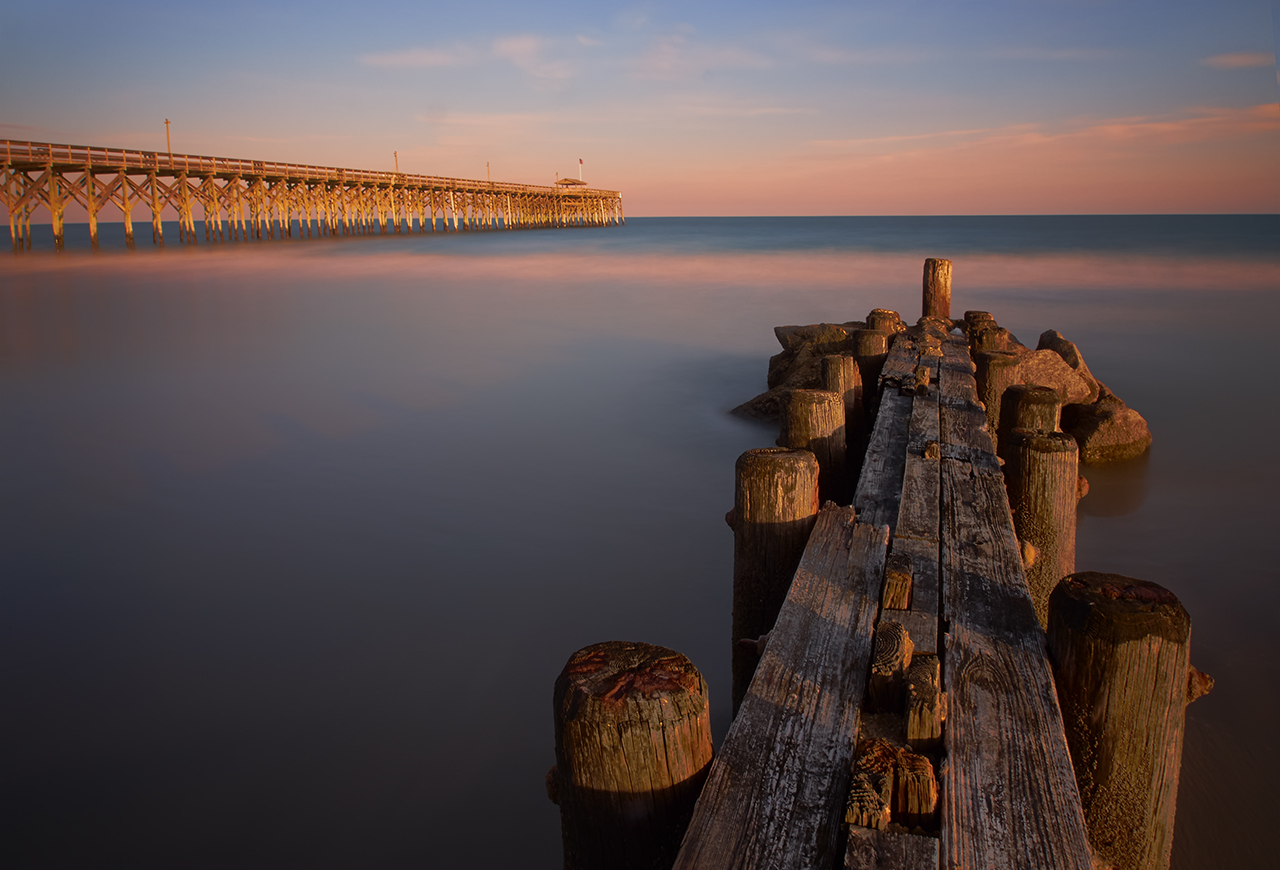
680 second exposure, Pawleys Island Pier and Groin. Fuji X-E1, at the end of twilight going into full darkness
The ocean state only make a difference in that if the waves are large then you will need a much longer exposure to flatten them out. So many of the long exposures you see with bands of dark and light in the ocean are caused by your exposure being too short to totally flatten the surface. A single band of white in the foreground is caused by the surf crashing down onto the sand and that can also be overcome by extending your exposure past 10 minutes!
- 1/2 hour prior to sunset: For this time period you will need a 6 to 10 stop ND filter (depending upon the light in the sky) to darken the scene enough to slow the water and clouds down. By adding a graduated ND filter to cover the sky you can further even the scene and give a moody sky especially if there are colds!

1/2 hour before Sunset, Fuji X-E1 250 seconds with 10 stop ND, extremely cloudy!
- Sunset/Sunrise: keeping the same filters in place you are now getting exposures in the 6 minute range. The water is very smooth and milky. Start show up in the sky and leave curved trails. Sky colors explode and you will get your best color saturation.

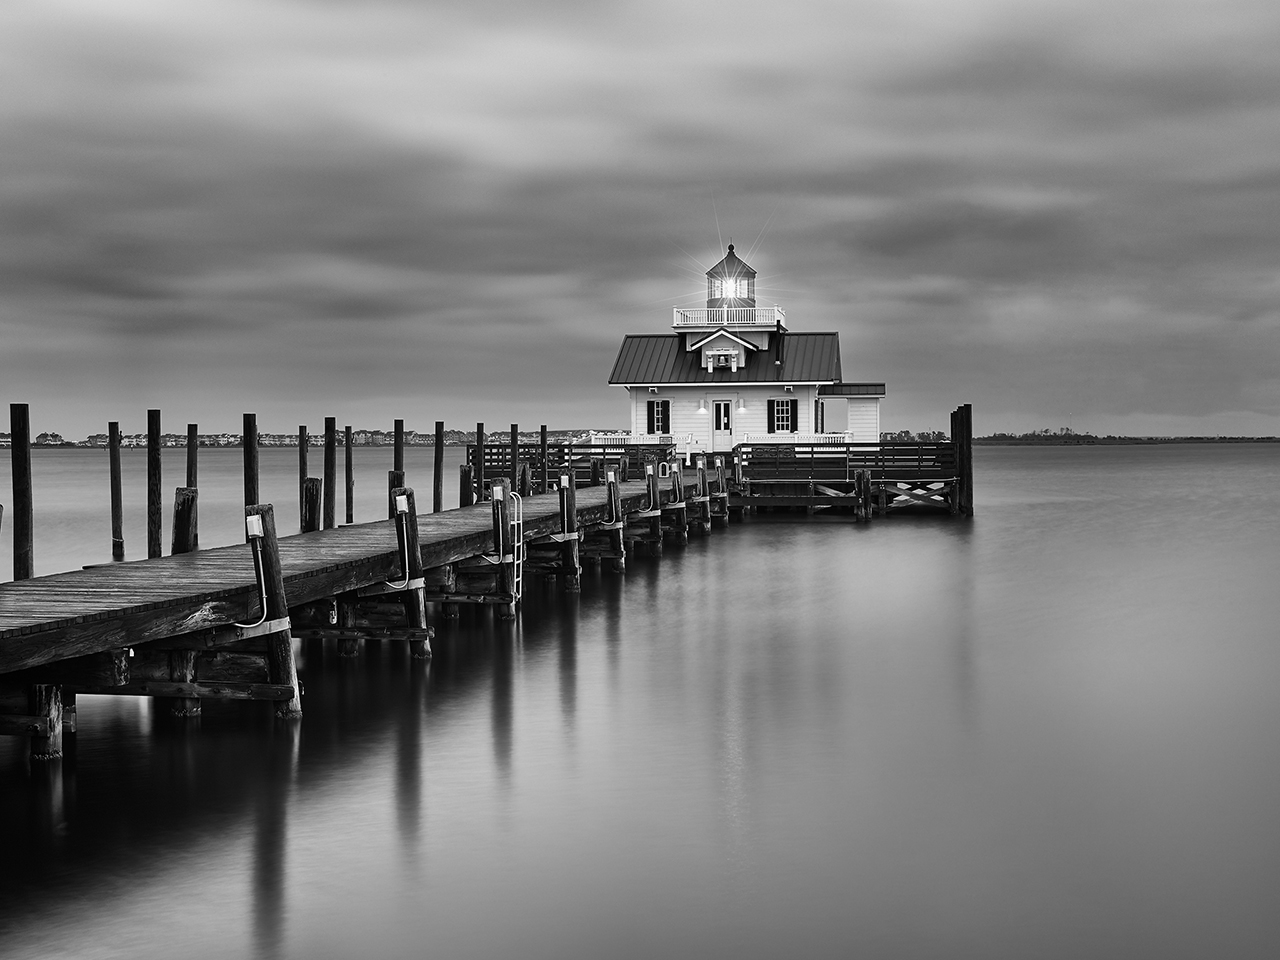
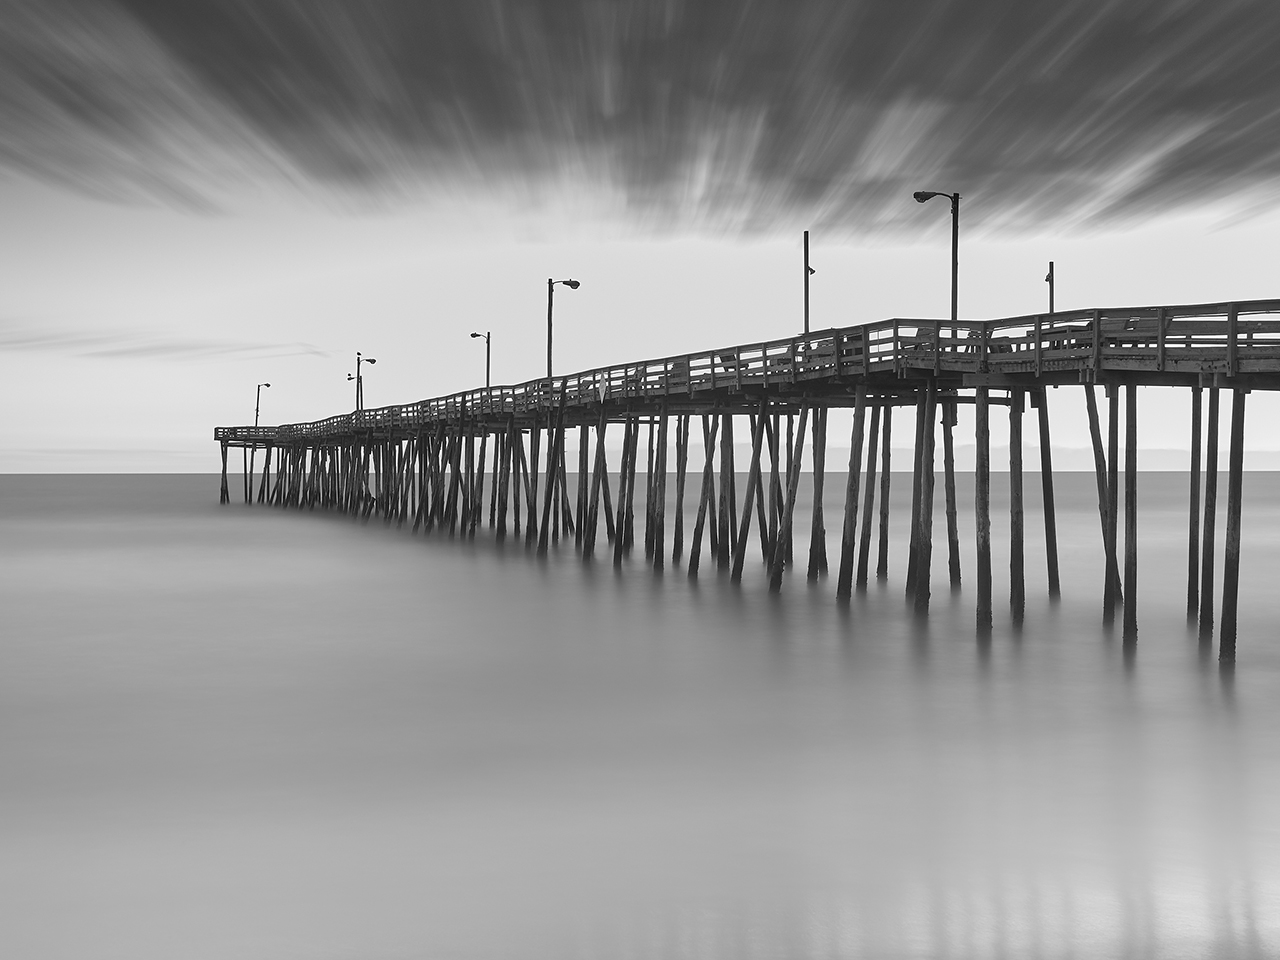
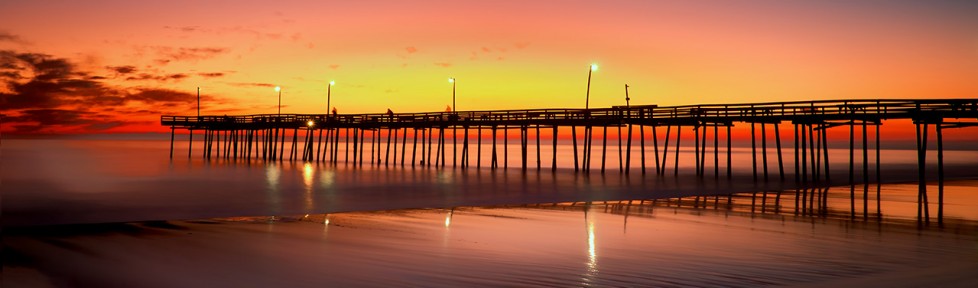
Sunrise, Outer Banks Fishing Pier, Fuji X-Pro 156 seconds, 3 stop ND.
- Twilight: The sun is down, and the sky is turning dark blue. The stars are bright. It is time to remove the fixed ND filter but perhaps leave on the graduated ND for the sky. Your exposure times should drop down into the 1 to 3 minute range providing the moon is not full. At this point a full moon will provide way too much light and turn the sky white. A 1/4 moon will give nice even lighting and a much better image.

The 2-fer, The pier & groin, Pawleys Island Twilight
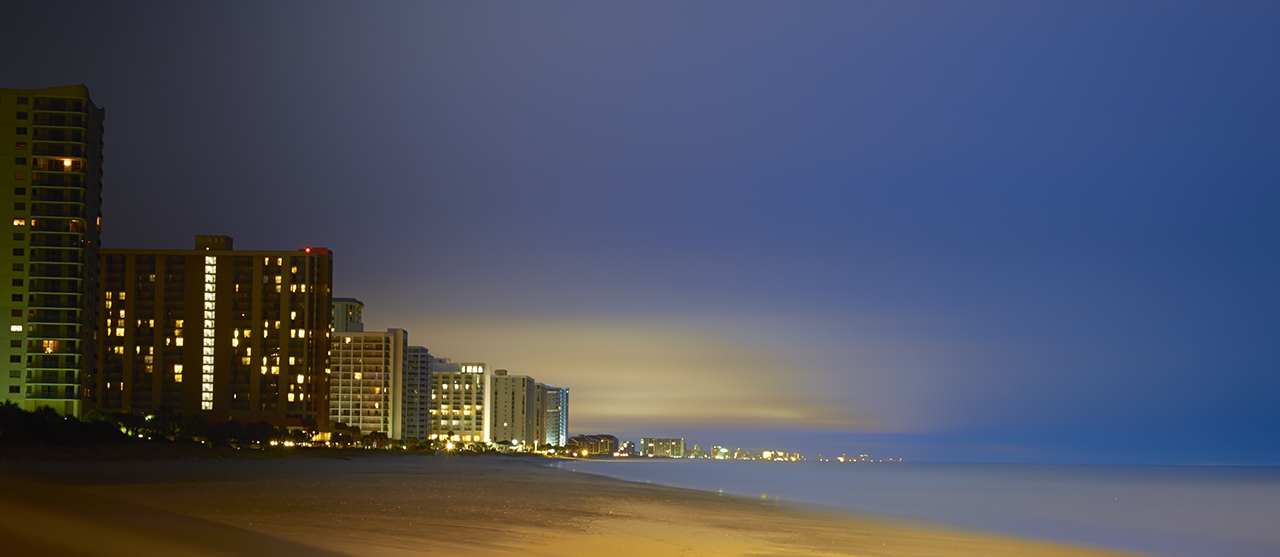
- The DARK: Ok, there is no light in the sky other than the moon, stars and pollution. Sometimes though, the light pollution from buildings and towns can add a dramatic component to your images like the one shown below! This is the time now when you are looking at exposure times from 4 to 20 minutes depending upon the light conditions. I will now remove all filters unless there is a very bright moon.

Full Dark! Fuji X-E1 with a 3 stop Lee graduated ND filter covering the sky to the horizon. 125 seconds at f/11. Light pollution from the hotels and pier behind me.
Of all of the times in the list above I like the Sunset and Twilight times for my best images!
Metering:
Metering of all the aspects of long exposures is your most difficult hurdle. The in camera meters when set to spot, are indeed capable, but they are not totally accurate and more importantly, they are large spots, in the 5 degree range rather than the 1 degree of the hand held meters. Yes you can use them but be prepared to have to adjust your exposure for a second shot… And this is WHILE the ambient light is rapidly changing as the sun continues to set!
Time for a talk on exposure..
We have the 3 basic exposure settings to work with, ISO (which should be set on your cameras lowest or native setting), APERTURE, which for a sharp image with proper DOF should be set for f/8 to f/16 and Shutter speed which should be set at least at 30 seconds and around 2 minutes for good smoothing of the ocean surface and clouds. You will lock the ISO and APERTURE while looking for a good shutter value to be generated by the metering system. So as you can see, you can set the camera in Aperture Priority mode to shoot here. I find though that I like full manual mode better.
Here is what you can expect for various shutter speeds:
- 30 seconds, start to have good smoothing of the waves with some of the bigger waves still showing above the water surface. Alternating dark and light bands in the waters surface.
- 60 seconds, a more profound smoothing in the waters surface, more even lighting and coloring, still with some bands…
- 120 seconds, total smoothing of the water, no banding and great even coloring of the water.
- 480 seconds and up, totally smooth water, even color and shading, almost a glass like surface of with milk. Very pleasing and soothing…
Keeping the Depth Of Field (DOF) in mind, you can see that the shutter speeds are the key to your images.
Now, how best to determine your exposure?
Time for the meat of this post, metering…
As discussed earlier, the internal meter of digital camera systems is not the best meter out there. In the spot mode they provide a very large spot (5 degrees) when what we really need is a 1 degree spot. The smaller spot gives us a more accurate and isolated reading which can be vital in determining the overall exposure. If you use this in conjunction with the ZONE system developed by Ansel Adams then we have a really powerful system. Lets take a look.

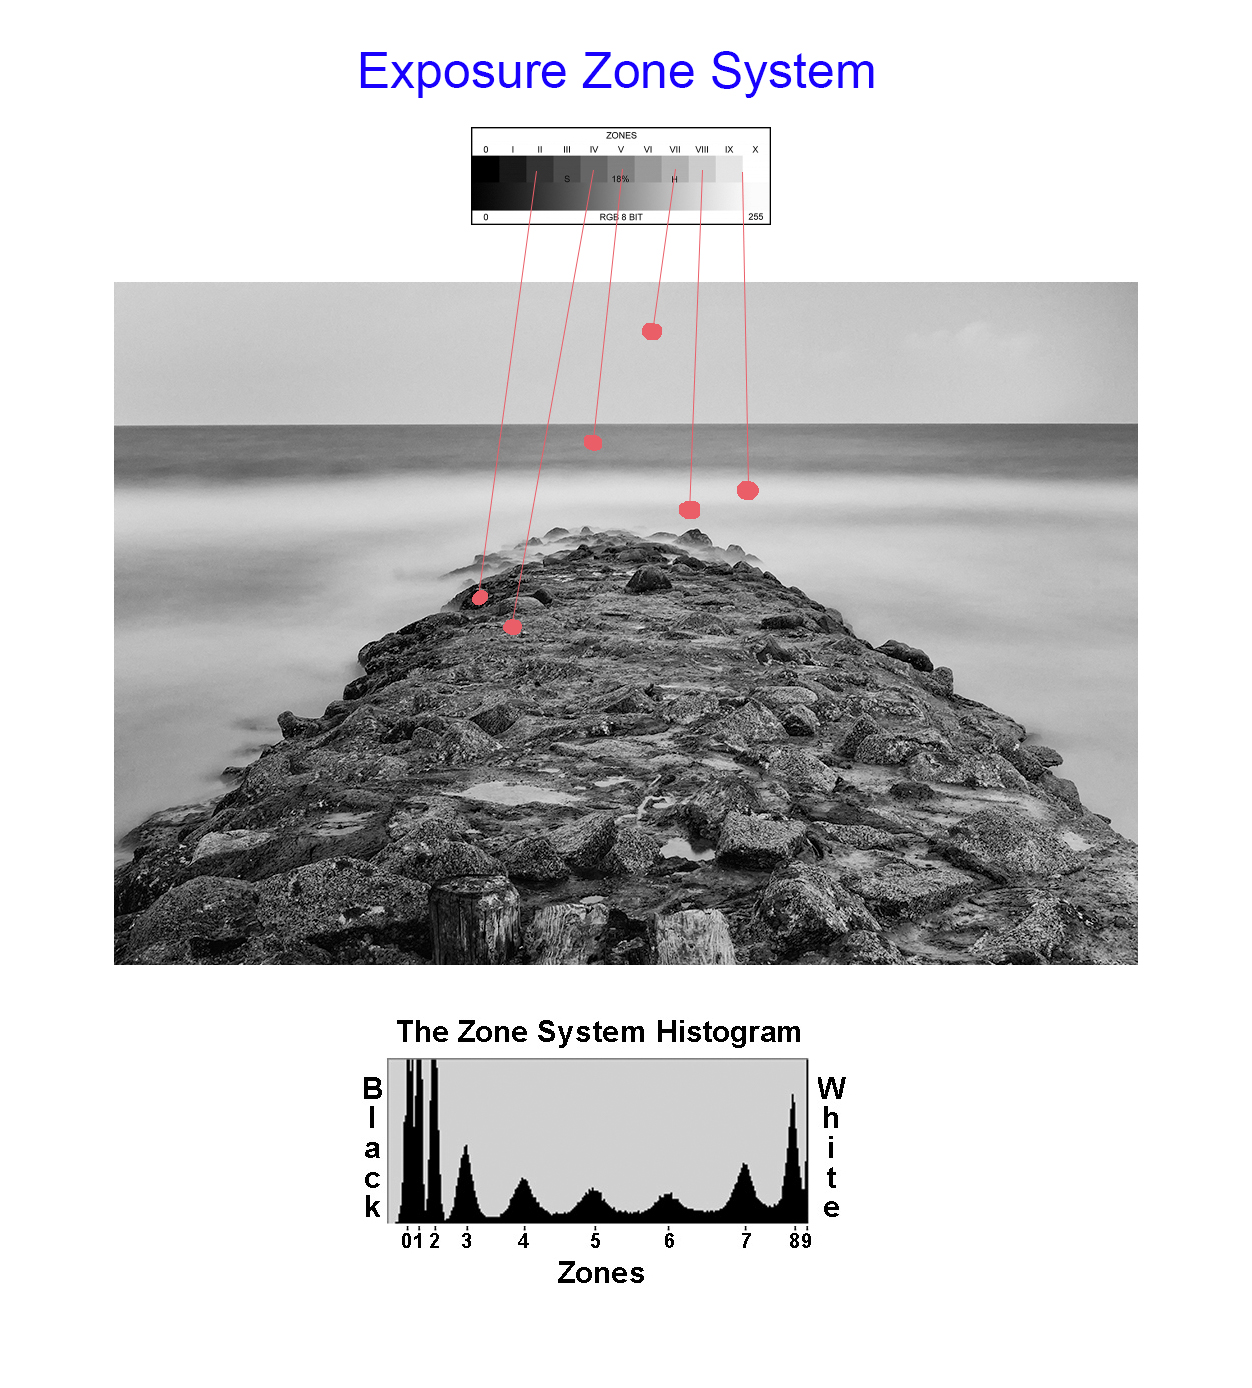
Zones
The ZONE system is very simple. It divided your total exposure into 10 equal parts or zones. Each zone is a specific “stop” and the center (zone 5) where where ALL METERS place the exposure of anything it sees!
As you can see from the chart on the left of the zones, they start at black for zone 0 and move to white at zone 10. Zone 5 being the 18% gray is what the meter sees and will adjust the exposure of the spot metered to be there in the 18% gray! This explains why so many photographers snow images come out as gray! Knowing that the meter will automatically place the measured spot into the gray area it is a simple matter for the photographer to mentally move the zone up or down in adjustment in order to place the metered spot into the desired zone!
It is easy to understand and implement!

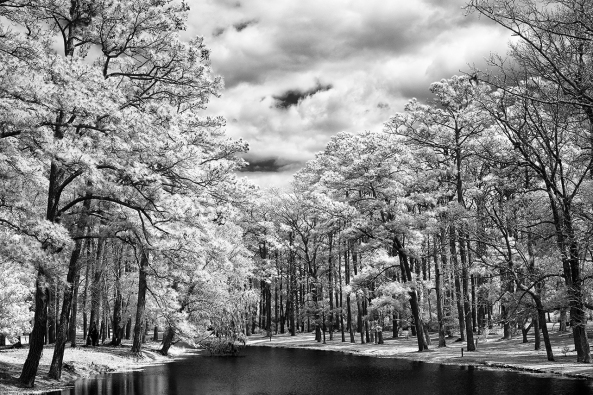
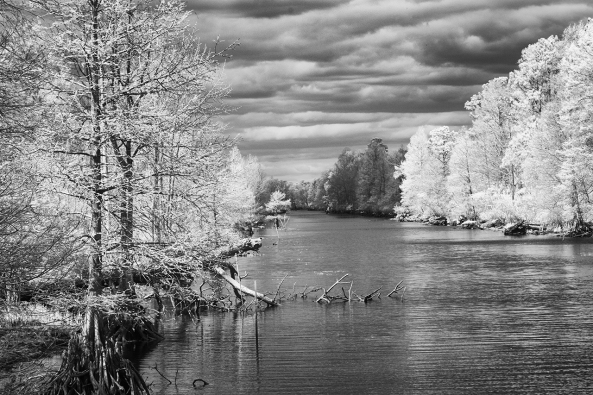
Looking at Zones
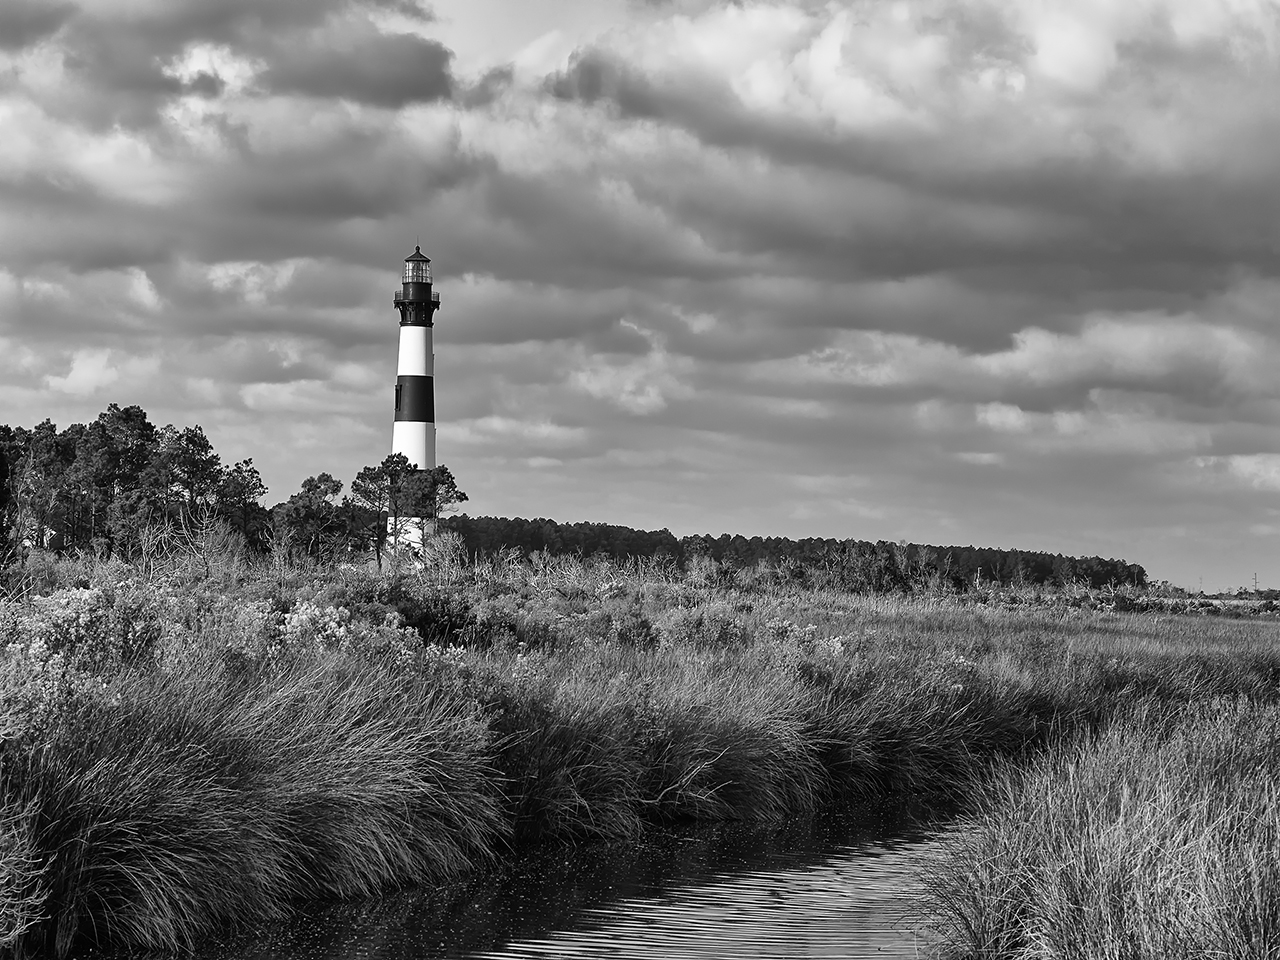
- So, let’s take a look at a sample image, not as a photograph but what we would see with our eyes. If you were to look at the top meter spot in the sky you would see that it falls into zone 7! But if we were to meter on this spot, the meter/camera would move it to zone 5 which would be just too dark for the overall picture. The fix is to take the meter reading then mentally move it into zone 7 by adding 2 stops of exposure. Here is what the meter system suggested for this measurement: Spot reading on the overcast sky at f/8, ISO 200 gives a shutter speed of 15 seconds, but we KNOW that it is in zone 5. We simply add 2 stops to place it into zone 7 by increasing exposure to 60 seconds, or 2 stops. The sky now brightens into zone 7.
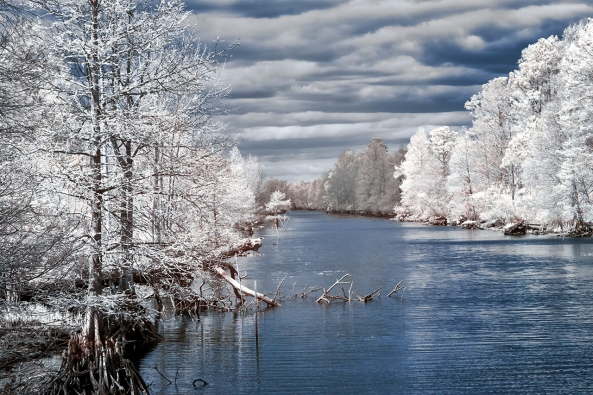
- Lets do another and meter on the horizon water. The spot meter reads this as f/8, ISO 200 and the shutter speed of 60 seconds which it sees in zone 5 and since it is actually in zone 5 we can just go with the suggested exposure!
See? Easy to do.
So, hopefully the camera meter has a small enough spot to read these small areas and give you an accurate exposure suggestion. But, what happens when you add a 3, 6 or 10 stop ND filter into the mix? Well 3 stops will not affect the meter, but 6 and 10 will destroy any accuracy and your exposures will be all over the place. We just cannot have that happens so this is where a hand held spot meter comes into play!
There are 3 things that you must keep in mind when you are thinking about hand held meters.
- They are more accurate than camera meters
- They have a true 1 degree spot
- They allow you to tell them of any ND filters installed on the camera and automatically compensate for them!
I suggest 2 meters from Sekonic for you to consider, the L508 and L758DR.
- The 508 has an adjustable spot from 1 to 5 degrees and allows you to account for an installed ND filter . It is no longer produced but readily available for around $300.00.
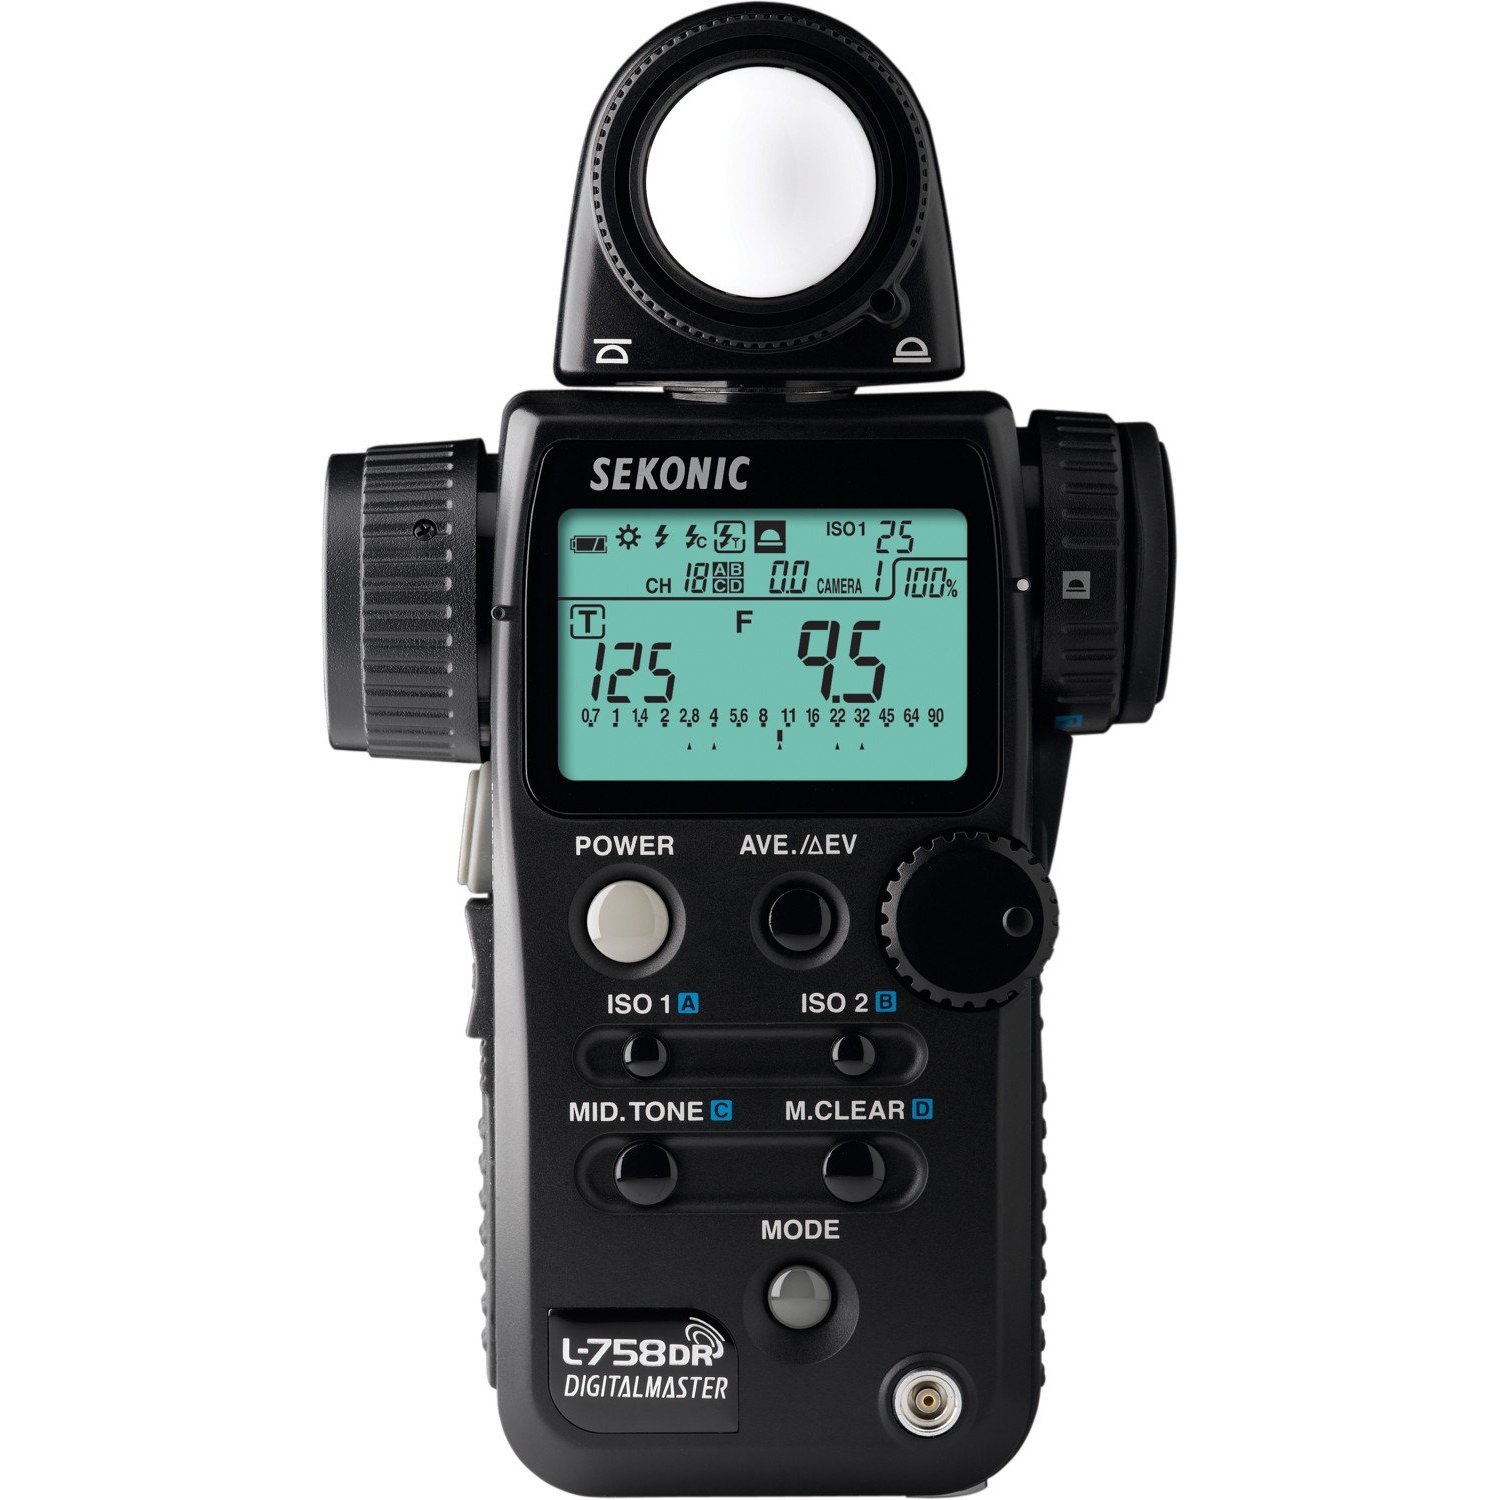
- The L758DR has a fixed 1 degree spot, allows for filter compensation up to 10 stops and can be calibrated to your camera. It also has a viewfinder display and much greater functionality than the 508. It can be found for about $650.oo.

Sekonic L758DR Spot Meter
Here is the L758DR which is what I am using and will show in the following examples. The meter has 2 modes of measuring light, the lumasphere and the spot which is simply an eye piece that you look thru and shows a target you place on the area of the scene you wish to measure!
How to use the Sekonic L758DR Spot Meter:
- You need to use the custom functions on the meter to set WHOLE stops for the shutter speed. This will simplify you life in a major way!
- Set the meter MODE to SPOT with the APERTURE selected which enables you to lock in a specific Aperture. This will have the F surrounded by a BOX. Then when you take a measurement, the Shutter Speed will be displayed for Zone 5.
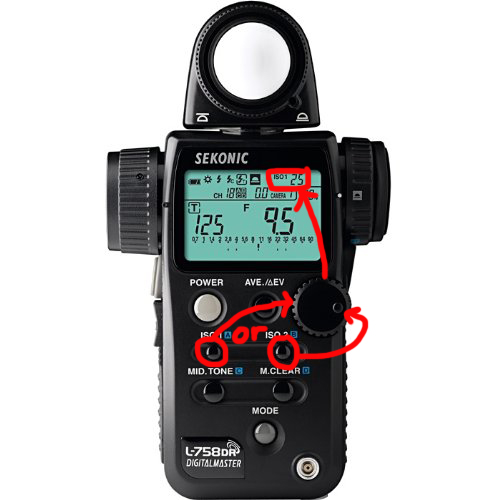
- You need to set your natural ISO into the meter. Press and hold the ISO 1 button and simply turn the round dial to select that ISO you desire to work in!
- Decide on which ND filter (if any) you are going to use for this shot! Then hold down BOTH the ISO 1 and ISO 1 buttons while turning the round dial to select between +/- 0 to 9.9 stops.
- Then you just press the measure button under the spot viewfinder to measure your selected area of the scene and adjust the Zone up or down as in the zone examples above! It is that simple!
Set Mode to SPOT
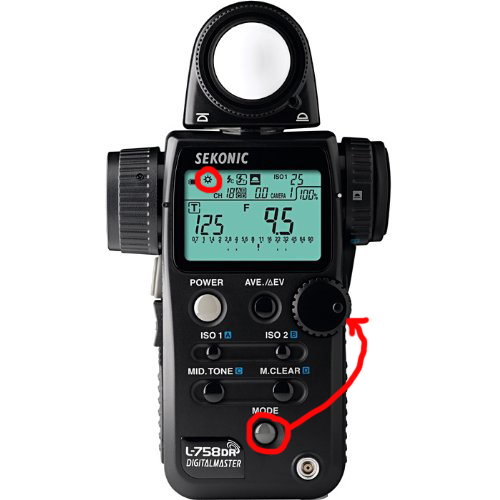
Set SPOT Mode
Setting the ISO
ISO Set
Setting the Filter compensation
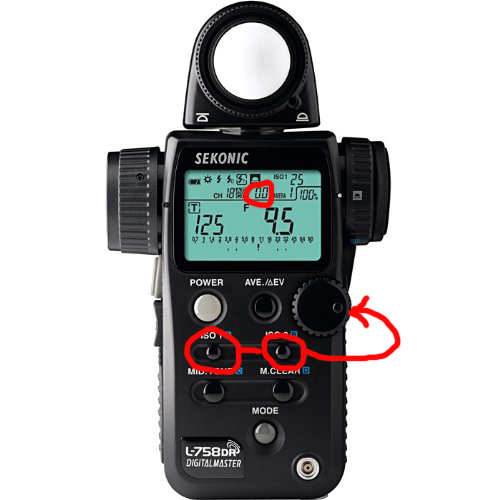
Filter Compensation
Taking the Measurement
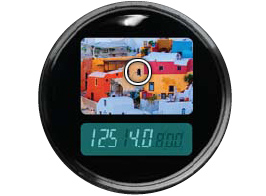
Meter Viewfinder showing the target and measured values. The meter button is just below this.
That is all of the necessary steps to use this meter. It really is very easy! There are several videos on the Sekonic web site as well as on Utube.
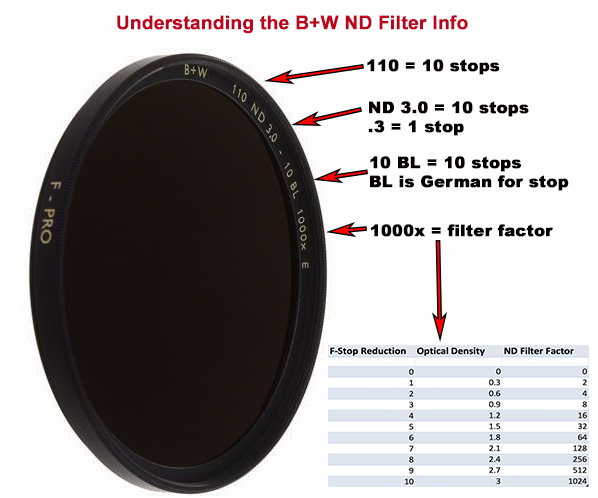
Understanding ND Filters:
The B+W, well most others as well can be tough to understand! Here is a break down of all of the filters and how to read the codes!

B+W ND INFO
Knowing how to read the filters is important but understanding how to use them even more so. Lucky for us in long exposures we are interested in the shutter speed. If we get a shutter speed of 1/15 second with no ND installed we know that it is simply too fast to slow the water down! So we realize that a ND filter is needed.
Standard ND Filters effect on a 1/15 second shutter speed with a fixed ISO and Aperture:
- No filter 1/15 second
- 1 Stop 1/8 second
- 2 Stops 1/4 second
- 3 Stops 1/2 second
- 6 stops 4 seconds
- 1o Stops 1 minute
These are the standard ND filters from B+W, other companies offer the same and other values. Lee offers in the Seven 5 system, 1, 2, 3 and 10 stop values as well.
So now, you take your meter reading and look at the suggested shutter speed, install a ND filter and then tell the meter which one chosen and it will give you the corrected shutter speed. Remember, all camera meters will fail at 6 stops on!
Graduated ND Filters:

Lee Hard Graduated ND

Lee Soft Graduated ND
These are filters from Lee (some round ones from B+W but they divide directly in the center) that come in 1, 2 and 3 stops. They are either a hard transition between dark and clear or a soft transition covering a larger area of the filter. I use these filters to darken part of the image, usually the sky. If you have a firmly visible seperation between the sky and water at the horizon, you can use a hard graduated filter. Otherwise you will use the soft which is the normally used choice. Take a look at the images here of both and you can see their usefulness.
Deciding on which value to choose, 1, 2 or 3 stops is simple. You simply use your meter to spot read the sky and then again the ocean. Look at the difference between the shutter speeds given with a fixed Aperture and ISO. The difference will tell you how much graduated ND you need to use.
These filters are also handy for other landscapes as well. How often are we plagued with waterfalls or landscapes where the sky is just too bright? Apply the same metering difference to those images as well for a vastly improved result.
Last minute considerations as you venture out to practice your Long Exposures!
- Keep your lens clean, salt spray can and will sneak up on you and spit all over your glass!
- Push your tripod legs slightly into the sand for increased stability.
- Keep aware of the surf! Do not let it over take your tripod. it will cause your camera to drop a little lower and ruin a shot.
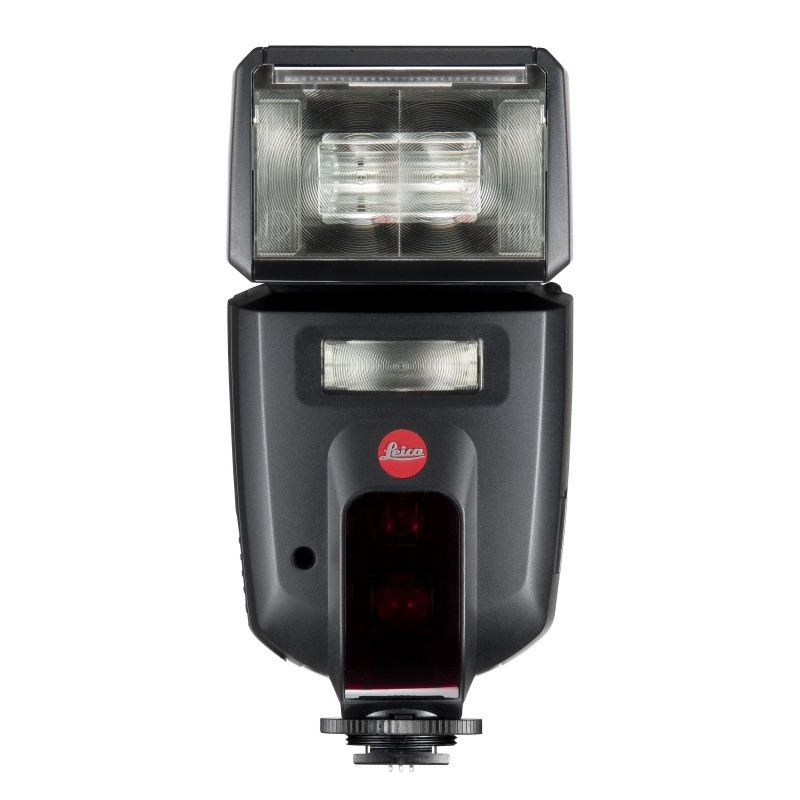
- Keep the Horizon STRAIGHT!! If you have an in camera level use it! If not, purchase and attach an external level onto your flash hot shoe and use it!
- Use your in camera long exposure noise reduction setting in the custom settings! This will not only reduce noise in camera (yes photoshop can do this) but it will remove all sensor hot pixels and dark pixels which photoshop will NOT DO! I understand that your exposure time will double due to this but isn’t the final image quality worth the extra wait?
- Take a light weight chair.
- Have a light to see the camera setups or a ultra bright light to lighten a subject for focus! I like a lighted hat for this and a Sure Fire LED 500 Lumen light to reach out and light a subject for focus (not to mention light painting!)
- Gloves?
- Warm Coat?

480 second exposure, Fuji X-E1 Late Twilight! Metering of the cloud base just above the horizon then moved to Zone 7!
OK all done, I hope that you both enjoyed and learned from this post! Please let me know.