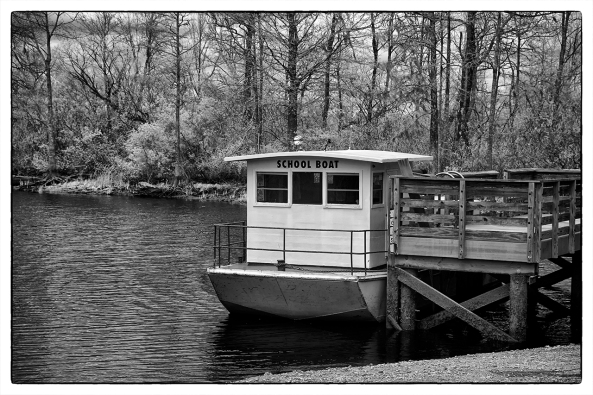
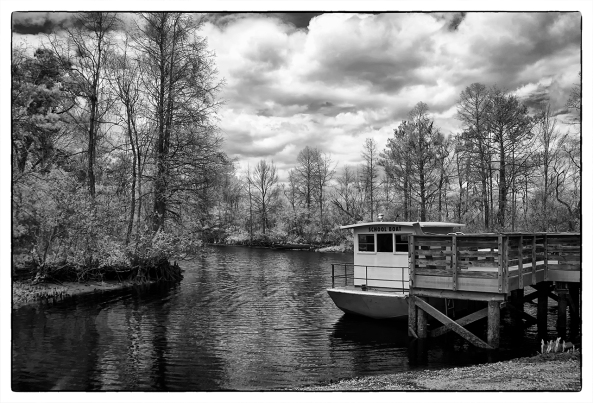
Using B&W To Grab Your Viewers By The Throat…


Yes, deep moody B&W can capture and hold your attention!

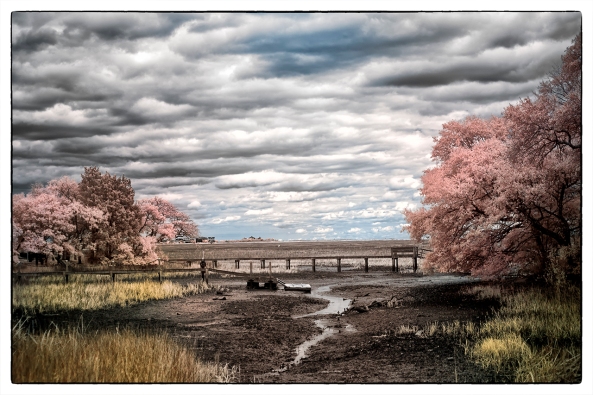
Pawleys Island Marsh, North Causeway

I am always curious as to what people like and dislike about my images and make a point of posting them online to see what people think and how they respond.  Sometimes the result of this practice really surprises me.  The funny thing is that most of my personal favorites in B&W are not well received by the public!  Yet those that I consider not as good get better reviews…

It does not matter what camera I choose to create with, Medium Format FIlm (Mamiya 645 AFDii) or digital (Fuji GFX 50r medium format), the output results are difficult to tell apart. I love working in film, its process from end to end defines art to me.  But I also love working in medium format digital as well.  It is a much shortened and simpler  process and only takes a fraction of the time when compared to film.  I think most of you will be hard pressed to pick the film/digital images that I am going to place in this post! So the source of the images make little difference to me.

Approaching Storm at Pawleys Island

Have you ever considered what it is about B&W photography that you are attracted to?  What about it grabs you?   For me, it is simple, the removal of color strips the scene to it soul allowing you to really become one with it.  It removes the confusion and gives a pure view of the scene!

Consider the image of the approaching storm above.  The clarity of the image draws me into the scene, the sharpness captures my interest and holds it.   The dark moody tones make me feel like I am still standing right there!

Pawleys Island Beach Crossover in the fog.

I am not saying color work is bad, rather that I personally enjoy working in monochrome and enjoying the finished images processed in B&W much more that color work.   I suppose that is why working in film is so addicting to me, everything about the process from working behind the camera, film processing, scanning and printing I find very enjoyable.  But with the introduction of the Fuji GFX 50R camera system I am equally thrilled!  You can shoot in both color and B&W on the fuji system. The real difference is that you can set it up with film emulation profiles in camera and generate and output true B&W RAW images!  I find that I like using the Acros/red profile in camera because it matches my film work with actual Acros film!   This gives me another entire workflow that matches my B&W film work 1:1! The fog image above in a good example of the ethereal nature that you can achieve when working in B&W.

Charlee Marie

The image above if Charlee Marie highlights this relationship between working with medium format Acros film and the medium format Fuji GFX 50r camera system.   The amazing tonality of the boat and sky capture my attention and will not let it go.  The subtle tonality of the wheel house is flawless.  Overall this is one of my favorite images produced by the 50R, capturing the heart and soul of the shrimp boat in a non cluttered fashion usually associated with them on the easy to use medium format digital 50R!  This particular image is one of my favorites from the 50R that has not been well received by the public, yet I cannot let it go…

Port Royal Shrimpers

The Port Royal Shrimpers is an example of everything coming together for a powerful image; Good Light, Clouds, Boats and reflective water plus being there!  Of all the images captured with the 50R this one has the highest number of likes and comments online.  Yes it is a powerful moody image but I am not sure if I personally like it more than the image above!

Daddys Girls, medium format Acros film

OK, on last image of Daddys Girls was taken last week on Acros Film on my 645 AFDII  using a deep red contrast filter so the sky is a little darker.  To me this is a powerful image and different from the digital work above it due to the deep red filter.  Yet all other aspects of the image match equally to the work generated on the 50R system.   

To me, this illustrates how well the film and digital systems can work together.  There are times when working in film is just not possible or practical during travel where the 50R would work much better and easier.

I am happy that each camera system can complement each other so closely!  It will make my life much easier and allow me to concentrate on creating art rather than on how I capture it!


As always please let me know what you think, I value your input!


The ART of creating MOOD


What Makes Ethereal Moody Images?

Kathy Dean, medium format film

This post is going to be a bit different from my otherwise technical (Geeky) posts of the past.  I am going to share my philosophy of creating MOOD in my art.

I spend a LOT of time studying the fine art photography of the past masters (Ansel and others) and current photographers.  I visit galleries, web sites like 500px scouring  for examples of the creative process that generates images that speak to me.   This takes up a lot of my time but I feel that it is a worthwhile investment to further my understanding of what makes great art that reaches out and grabs my attention!  I do NOT do this in order to copy others, (that is not my way) rather it is to understand what about an image makes it reach out and tweek my artistic desire!  You would think that after 55 years of personal photography that this would not be necessary, but if you think about it you will realize that life is learning and we never stop that process.  Sometimes it is re-learning forgotten lessons, other times it is about learning new lessons.  We all change and our tastes also change as we age, so to me this is a natural progression in our path in artistic endeavor.

I personally tend to work mostly in B&W Film, but do not limit myself to it.  I create as well in color both digitally and on film too, but my real passion is B&W. Here we are going to discuss only B&W and all of my examples are created on various 6×4.5 medium format camera systems because working with flim and the process of film motivates and enhances my creative process.  I am going to leave out the technical details of the images because I want you to really study the images without considering the technical aspects of the creative process.

Let us consider the image above of Kathy Dean, a shrimp boat in Port Royal, SC.    What about this image gives you pause, making you want to really study it?   Sit back and consider the mood of the image and what you are drawn to as you study it.  For me, it is the dark moody sky and reflections contrasted against the bright whites of the boats.  My eyes continuously circle around these details and re-settle on the boats again and again.  The dark sky and water create a moody ethereal frame that traps our attention on the boats themselves yet provides a scene free of the distractions of color

If we were standing there today with camera and tripod wouldn’t we be thinking that we could have a much better image with fluffy clouds?  Let me suggest that if indeed there were clouds the day I created this image that they too would have been a distraction from the mood of the image. 

I will honestly tell you that as I stood before this scene that it was my primary thought that this could be an amazing moody image provided that I set it up as a longer exposure to smooth the water and darken the sky and reflections.   In other words, I studied the scene, pondering what it was that drew me to it and how to use the camera (my tool) to create my vision! 

These are my secrets to successful fine art photography:

Stop, Look and Think about the scene:

  • Why are you attracted to it?
  • How do you compose for a simple yet powerful image free of distractions?
  • How to super charge the image with mood?
  • How to use the camera to create this vision?

Lindale Denim Mill, a study of extreme dynamic range in a single image…

Let’s take a look at another image, this one digital (yet another tool), and the camera on hand when visiting the inside of the Lindale denim mill in Georgia.  This is one of those  location that  will NEVER fail to deliver scenes full of wabi/sabi goodness full of amazing mood providing you approach it with the right motivation and mental tools!

Lindale Denim Dye Tank

I spent 7 hours here over the course of 2 days.  It was a power parade of mood that swamped my senses and at every single turn. I was continually stunned at what lay before me as I moved through the factory!  What more motivation could a fine art photography artist desire?  I slowed down, WAY DOWN and studied each and every hint of mood before me. 

For this scene, (Blue dye tank) I studied the dark moody ceiling and walls behind the pillars, the deep tank with its grungy details, but I particularly paid attention to the play of light coming through the windows and highlighting the entire scene!   I realized that in order to capture this scene with mood that I would need to control the sunlight and keep the dark areas from loosing detail.   I setup the camera to control both and average the entire composition.   This happened quite fast (remember 55 years of experience) and it only took ONE SINGLE EXPOSURE

To me, this scene has amazing flow that draws me in thru the lighted windows, walking around the exterior of the room and moving down the ladder.  My attention never leaves the room.  It has a wonderful dark mood and speaks to me of days long gone.   

What more can a photographer ask for in such a creation?

My path in creating this image:

  • I walked around the entire room several times, studying the elements that the scene contained.
  • I constantly asked myself;  “Mark, why do you like this?”  and “What do you actually like?”  I answered; “The dark mood broken into segments by the light coming thru the window and the LADDER!”
  • Can the camera I had capture the overall mood and range before me?  “YES!”
  • What is the best vantage? “Closer to the ladder!”
  • How best can I control the contrast and range of this image? “Multiple spot meter readings to shift the scenes entire dynamic range into that of the camera!”

After this it was just a simple matter of setting the the composition, exposure and capturing the image!


Ok one last example…  Daddy’s Girls…


Daddy’s Girls, medium format film

This is one of those scenes that I visit time and time again.  It is only a few hours from home down in Bluffton, SC (a location where my oldest son lives).  There is only one single boat at this commercial dock and processing plant.  There is a boat launch and pier close to the left, but  for for this shot I wanted a more head on view.  I got my son to take me out on his boat so that I could get this angle on a terribly stormy day. Dark and Stormy it was.  Heavy rain and wind, but these were the components that were in my vision so I suffered through it to get this image.  I took several shots of the scene (waves, no tripod and a moving boat) so I invested an entire roll of 16 images knowing that a lot of them would be blurry and out of focus.   Good thing too, I only got this one single sharp image but it was so worth the effort!

Do you see what I am getting at?  I KNEW what I wanted with this image, I knew what tool (camera) I wanted to use so I returned dozens of times here, re-evaluating again and again till I got what my vision demanded!   I have been here a hundred times over the past 4 years and was NEVER satisfied with the scene!

What my vision demanded:

  • Moody, Stormy Sky.
  • Bright light on the boat.
  • Cloud detail.
  • No other boats to clutter the scene at the launch.
  • Medium Format Film only.
  • No workmen on the boat.

So it took years of returning again and again until I got the scene that matched my vision!  But to me it was well worth it!  Will I stop returning?  Heavens no, you NEVER know what nature will provide you with so keep returning!

As always, I hope that you enjoyed this post!   Please consider leaving feedback and comments!


Controlling your Dynamic Range in B&W Film photography


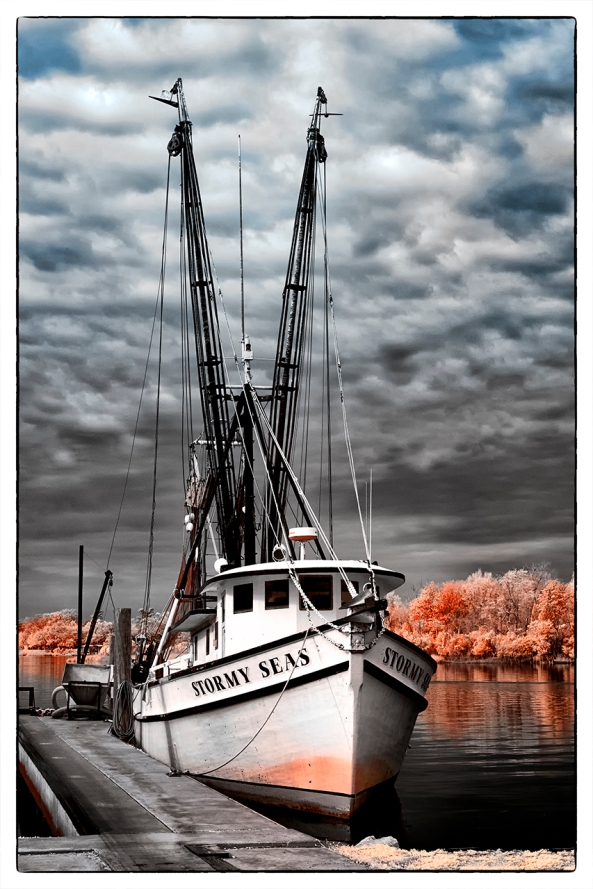
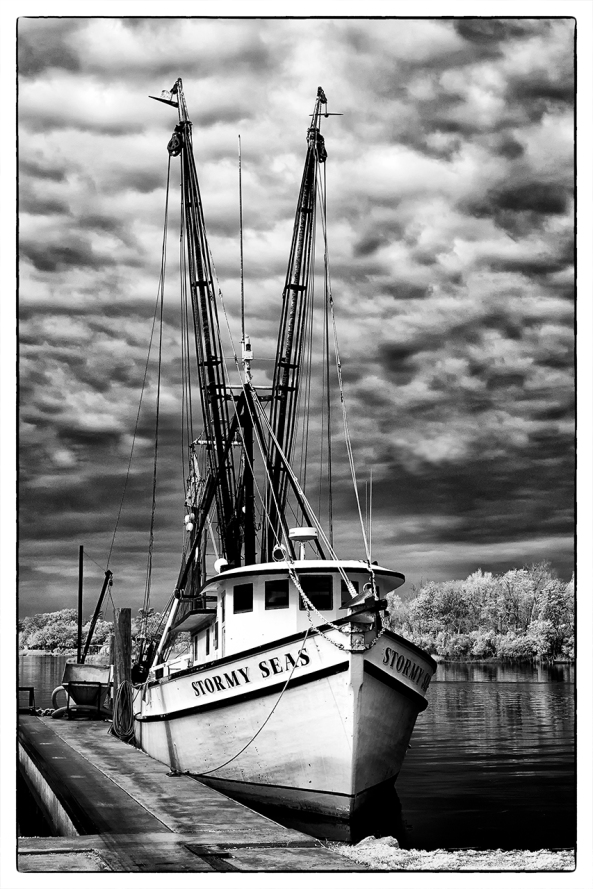
Stormy Seas in a approaching storm!

Stormy Seas a the dock… 6×12 medium format Tmax 100 film

Dayi 6×12 showing the ground glass and shade and my custom dark cloth attached.

This Super Pano was taken on my Dayi 6×12 medium format view camera. Lens is a Rodenstock 90mm f/6.8 Super Grangdagon N and while it is a bit slow it is VERY sharp and quite beautiful!  This is a very different style of camera and will take 5 images per roll of 120 film. 


Dayi 6×12 Grand Glass Back

This is an amazing combination of a ground glass focus and calibrated distance focus system.


Dayi 6×12 with the Rodinstock 90mm f/8.6 installed showing the alternative, calibrated focusing system

Shrimp boats are one of several subjects that I will drive hundreds of miles away to photograph! I am very lucky to live so close to a lot of them locally! Because of the continuing loss of our shrimp fleets here I am both driven and inspired to document them every chance I have. You have to admit that they are very beautiful when done in B&W and what better way to document them if not film?

This was a very difficult shot to achieve! To get it I had to overcome the super bright sun coming over my shoulder highting the boat and buildings to the point that they were totally burned out. The storm in the background was dark and foreboding…
The lesson here is to learn and realize that you can control all aspects of your image’s exposure along with taming the dynamic range of the scene through use of thoughtful developing and scanning.
I used a Sekonic 758 to get these results by using  a combination of exposure averaging  with 6  one degree spot metered measurements, saving each reading in the meters memory then telling the meter to give me the zone 5 average which then became my base exposure.  The 758  then showed me the the exposure with a chart of any data over or under exposed thus out of the film’s dynamic range.
Knowing this, I then used a technique where you can either compress the the dynamic range of the image into a smaller space thus allowing the film to compensate for a wider dynamic range that it was designed for!  This is called +/-1N developing. You can change developing time down to compress the dynamic range of the image by squeezing the image down from the whites towards the blacks which compresses the highlights  into range!   The opposite is also true by going +N.   But for this image the -1N was enough.   I then then used another creative process during the wet mount film scanning by expanding the dynamic range to fit into the wider print profile by  +1 to the highlights in Viewscan to put them where I desired for a powerful and moody print.  There are a lot of books out there that will teach this technique, but my favorite is Creative Exposure Control by Les Meehan which will teach you the development side of the process.   The scanning side is easily done in Viewscan and there is a good book on that on Amazon. 
I will also expand upon this in future posts as well!

Rodenstock 90mm f/6.9 Grandagon N, while a slow lens it is super sharp and beautiful!

The wet mount scanning technique will be taught in a future post here along with a video on Youtube!  But to do it you will need an Epson 700, 750, 800 or 850 scanner as those are the only ones that the wet mount kit will fit!

 
Data: Dayi 6×12 – f32 .4s – Roll 4 F3- Avg Metering 6 measurements – Yellow Filter – Stormy Seas- Tmax 100 – Perceptol 1:1 at -1n  – 2018

As always please let me know what you think!

The Accidental Photograph!


Sometimes even the best of us get surprised!


The Carson Elizabeth

Fuji GF670 Medium Format

Fuji GF670

Now, here is one image that I REALLY like! This is a 6×7 negative from my Fuji GF670, a folding rangefinder camera with a really bright rangefinder and a fixed 80mm Voigtlander lens shot on Rollei IR400 film and processed yesterday in Xtol stock and wet mount scanned today… 

Sounds normal right?   Well this was a VERY OLD roll of film, and has been sitting in my shop for over a year marked “Stand Develop” ( a special developing process where you use Rodinal 1:100 in the tank for an hour with no agitation that works on all B&W films of different ISO values) because I forgot what ISO I shot it at!  I actually got tired of seeing it in my to do can in the fridge and yesterday threw it onto a 2 film reel with a roll of  Ilford FP4+ film and set up my Filmomat for the FP4! The FP4+ turned out as expected,  but the IR400  was a complete surprise.   

Carson Elizabeth, Shrimper in Georgetown, SC on 120 film

There was only one good image from the IR400 but OMG was it ever good! Just looking at it gives me the hot sweats!! As I looked at the processed roll of IR400 I realize that I had changed ISO mid roll and that is why I marked it stand. The other images on the IR400 were not worthy of scanning  but this single image still made it a  big win for me!

Oh, for the curious, my FIlmomat is a computerized film developing machine that is the tabletop sized and will do 35mm, 120, 4×5 and 5×7 films.  For the 120 it will do 2 rolls at a time.    Here is a video that shows it in action…


Data: GF670 with 80mm lens and Rollei IR400 with no filter processed as FP4+ yesterday and wet mount scanned today.

Goodness, I had forgotten how difficult the film is to handle with its very thin film base!

For those of you who are interested in the fine art of FILM PHOTOGRAPHY AND SELF PROCESSING, join me on my new G+ page HERE and learn and share!

Testing the new Fuji GA645zi Medium Format Camera


A Light Weight 120 Autofocus Travel Camera with a Zoom Lens!

Fuji GA645zi

Fuji GA645zi

Well…. I have been waiting to test out my new Fuji GA645zi camera for about a week now but due to family issues I have been unable to do so.
I finally made it out to visit the shrimp boats just west of Tybee Island and the light house there! The sky was very plain with no clouds but I really needed to test this camera out. I put on a yellow filter to slightly darken the sky and used Fuji Acros 100 film.
 
This is the shrimper Agnes Marie.
Shrimp Boat Agnes Marie

Shrimp Boat Agnes Marie

Data:
Fuji GA645zi – Acros 100 – f19 1-30 Plus 1 EV, Yellow Filter 9-18-17 – Wet Mount scanned – Agnes Marie – 2017-10-27. Processed in Xtol 1:1.
Fuji GA645zi

Fuji GA645zi

Please note that along the bottom of the frame ALL of the exposure data is recorded!  This is a feature that I really like.

 
The auto focus system is very robust, fast and dead on! It is not as loud as people claimed and I really enjoyed using it! I had an issue with my first roll in that it did not clear the take up reel and bulged out fogging most of the roll. Bad me, I used the one that came with the camera, so I then used the reel that the Acros came on and all is well there now. 
 
I know that the sky is plain but I am still happy with the results!
 
I am looking at this camera as a small light 120 travel camera. I know that the 6×4.5 negative is smaller than my 6x7and 6×9 systems but it still gives a large enough negative for sizable prints.  An other nice feature is that the camera has a 7 position zoom quasi zoom lens which again makes it attractive for travel!   
I only had time to wet mount scan 1 image today but I put 4 rolls of film thru it so there will be more on the way including the Tybee Lighthouse!
 

Finding Myself In The Old Ways…


It seems that I am addicted to film…

Miss Lue & A Hungry Egret

I still shoot with digital (A7RII) and love the look and capability of it, but FILM is what I go to every time I go out shooting… It is Terrible and exciting at the same time! It is so bad that I am looking for another freezer to store my excess film stock!

This is (again) Stormy Seas in Georgetown, SC

This is (again) Stormy Seas in Georgetown, SC (perhaps the most photographed boat in the Low Country). I have hundreds of images of it but I am pulled to photograph her in B&W film each and every time I am in Georgetown. There is something about her lines and textures that inspire me to document her life, and I have for years. Yes I will visit ANY shrimp boat (or grist mill for that matter) and each and every time I visit I see something different and unique… Yep addicted!

DATA:

The image was taken about 5 days ago on a 6×9 Fuji GW 690 II using medium format Fuji Acros 100 film and a red filter, developed in Perceptol 1:1 and Wet Mount scanned on a Epson 850 pro. The 6×9 format will give me 8 images per roll and I will usually scan 2 or 3 per roll, but I am very critical and selective because the wet scan process takes about 3/4 hour per scan!

The top image is near Stormy Seas in Georgetown, about 2 blocks away at another commercial dock and seafood house.  I have shot this a hundred times on both digital and film, but never have I captured such a pleasing image  as this.  It is to me a more enriching image full of mood, contrasts and tells a story.  I pleases me to no end the tell the story on an old FILM camera of an old boat and failing lifestyle just as the shrimp boat is in the background and the Egret in the foreground telling a different yet the same story!

There is also the consideration that is tied to the process of working in film.  It is slower and much more deliberate, a truer work of love in that you control every single step of the process…

  • Film choice (Kodak Tmax 100, Tmax 400, Fuji Acros 100 or Rollei IR400)
  • Camera and lens choice (Medium or Large Format)
  • Considering the composition and lines.  
  • Getting the exposure dead on (how many of you do that in digital?)
  • Adjusting for contrast and detail in shadows or highlights.
  • Film development and processing for highlights or shadows (another complete immersion of self discovery)
  • Drying (yep at lest 24 hours in a dust free drying cabinet)
  • Choosing the best image for exposure, sharpness, composition, contrasts, lines, dust & hair and so on..)
  • Wet scanning (at least a 1/2 to 3/4 hour project per shot)
  • Cleaning up on the computer by removing dust and hair and adding a bit of contrast)

All in all, the top image took about a week to complete from end to end!  I simply love the process, being immersed in it and becoming one in the creative process.   Yes it is slow but when I am done it is a total representation of MY PERSONAL VISION!

Film is making a HUGE come back in the world of photography!  So much so that you will be shocked when you visit Ebay and look at the prices of old film cameras and systems!   All of the major film makers in the world are increasing their production of films and even Kodak is bringing back discontinued film products!   New film companies like New55, Impossible Project, and FILM FERRANIA have opened up and are making emulsions!

Developing has never been easier, there are many mail order labs out there but you can process your own film in your kitchen with very little effort and investment!  You will need:

  • Dark Tent or changing bag to move your film to a daylight tank.
  • Daylight tank (I reccomend a Stainless Steel tank with steel developing reels by Hewes)
  • Distilled Water
  • Developer ( I recommend Perceptol by Ilford)
  • Stop Bath
  • Fixer
  • Wash
  • Water Rinse
  • Distilled water rinse with wetting agent
  • Clips to dry your film in your bathroom shower
  • A flat bed scanner like Epson 500, 600, 700, 800 or 850)

Total you are looking at about $120 for everything accept the scanner!   There are great videos on Youtube that will take you thru every step in the process!

Tybee Island Light, Kodak Tmax 100 FIlm on a Fuji GW 690 II camera.

The image above of the Tybee Island Lighthouse was taken last month on Kodak Tmax 100 rated at 50 ISO  on the 6×9 format medium format Fuji System.  It was hot and the area full of tourists, even up on the top of the lighthouse itself!  Still the act of creating this image was both fun and fulfilling and I walked away with exactly what I envisioned as I stood there looking at the scene!

I especially love shooting with Medium Format cameras.  They are easier to travel with and the negatives are large enough to give amazing prints.  I do have 3 4×5 large format cameras also that are great fun to you but as you can imagine, they are difficult to travel with.  Once in a great while I will shoot with a 35mm camera, usually smaller rangefinder that were sold in the 60’s and 70’s!

Medium Format:

  • Fuji GF 670 (this is my travel camera in 6×7 format with a 85mm lens that folds up into a thin light camera)
  • Fuji GW 690II (this is a 6×9 format camera with a 90mm lens and a bit larger and better built than the GF camera)
  • Fuji GW 690 III (a newer version of the 690II)

Large Format:

  • Shen Hao 4×5 Cherry Field Camera with 5 lenses and film adapters for also using 120 film.
  • Polaroid 900 converted to 4×5 with a 150mm Fujinon lens.  Think of 4×5 travel camera!
  • Polaroid 110B converted to 4×5 with a 90mm Schneider Angulon lens, again travel!

So, while film does indeed require much more effort over digital, the results simply cannot be compared.   These medium format negatives have a native resolution to create a 71×53 inch print without upsizing it at all!  The amount of detail is simply stunning and more importantly (at least t me) is the fact that the process become a Zen like activity in creation!

I hope that you enjoyed this post but more importantly to me at least that you considered my words on the creative process and taking complete control of it!


Using M mount glass on the Sony A7rii camera


The AMAZING just got better….

Stormy Seas with the Voigtlander 12mm Ultra Wide Heliar M Mount Lens and the Techart Auto Focus Leica to Sony adapter

Stormy Seas with the Voigtlander 12mm Ultra Wide Heliar M Mount Lens and the Techart Auto Focus Leica to Sony adapter

Look closely at the image above.  It was taken with a Voigtlander M mount 12mm Ultra Wide Heliar lens and the Techart M to FE AUTOFOCUS adapter on a Sony A7rii camera. The cleat on the bottom right is about 6 inches from the front of the lens!  The color rendering is amazing and there is very little distortion that is normally found with an ultra wide lens!   I can hear you asking how I accomplished this!

I recently picked up the Techart M to FE Sony mount adapter for my Leica and Voigtlander lenses.  It has been my desire to use them on the Sony A7rii, A6300 and A6500 cameras.

The Techart auto focus adapter is amazing. I actually moves the lens in and out to get a sharp focus.  It has several rules that you must follow to use it and as long as you do it will provide great service.  It is quite fast!

  • Use a center focus point on the camera
  • Set your camera aperture to f/2 and leave. It there
  • Set the real aperture directly on the lens.  
  • Don’t try to focus with the lens set to f/22, keep it around f/8 or f/11
  • The Exif data will shot f/2 but the exposure meter will correctly meter the subject.
  • Don’t try to use a heavy lens on the adapter unless you support it.

12mm Voigtlander M lens with the Techart autofocus M to FE adapter

12mm Voigtlander M lens with the Techart autofocus M to FE adapter

Here is a link to a short video demonstration of the Techart M to FE adapter on my Sony A7rii:


B&W work with this lens as well as my other Voigtlander and Leica M mount lenses are just as sharp weather in color or monochrome!

Stormy Seas with the Voigtlander 12mm Ultra Wide Heliar M Mount Lens and the Techart Auto Focus Leica to Sony adapter

Stormy Seas with the Voigtlander 12mm Ultra Wide Heliar M Mount Lens and the Techart Auto Focus Leica to Sony adapter

I also have and use a Metabones M to FE adapter which gives the same results but with manual focus only.   Sometimes manual focus is necessary depending upon your subject but reguardless of focus type both adapters and all of my M lenses work wonderfully on the A7rii camera system!

Stormy Seas with the Voigtlander 12mm Ultra Wide Heliar M Mount Lens and the Techart Auto Focus Leica to Sony adapter

Stormy Seas with the Voigtlander 12mm Ultra Wide Heliar M Mount Lens and the Techart Auto Focus Leica to Sony adapter

If you have a selection of M lenses then the cost of a M to FE adapter is well worth the money.  But I am VERY impressed with the new autofocus adapter!


Please let me know what you think!


Learning To See The SOUL Of Your Image: Black & White


Removing The DISTRACTION of COLOR!

Do you enjoy the purity of a finely crafted B&W image?  


Look closely at the image below of the neither regions of the Folley Beach Pier.  This was taken with a B&W only DEEP CONTRAST Infrared camera converted by KolariVision.com with their new AR coating.  Look at the detail and depth captured here.  Do you think that if the sand was actually in color that you would even notice the pier going off into the distance past the initial structure? This is what the power and purity of B&W gives to us!

Fuji X100s 850nm Deep Contrast B&W Infrared: Under The Folley Beach Pier

Fuji X100s 850nm Deep Contrast B&W Infrared by KolariVision.com with their new AR coating: Under The Folley Beach Pier

I love working in B&W,  so that I would only create them if the market would support such endeavor.   There is something about a well crafted monochrome image, having the distraction of color removed leaves you with the soul of the image.  

I find that it is so powerful for me that I look at EVERY scene I approach with B&W in mind.  Yes, I can visualize in B&W.  So can you!  It only takes a little practice… OK, a LOT of practice really, but it is well worth the investment in time and energy!

I am so into fine art B&W that I even have a Leica Monochrom digital camera that is dedicated to it in that it only takes B&W images!   Not to mention digital B&W infrared cameras!  

But DON’T forget film…. Which really is a post for another day.

The baby blue is a Olympus 35RC rangefinder  that I had rebuilt, cleaned and given a nice new set of baby blue clothes!  The second is a Polaroid 900 that my daughter found at a garage sale and sent to me.  I kept it in a display case for a year or 2 then sent it off to  WWW.Alpenhause.com where Steven Icanberry took it apart, cleaned, re-gasket, replaced the lens with a Fujicon 150mm lens and added a 4×5 film back.  He also calibrated the internal rangefinder to the new 150mm lens and gave it an adult blue suite!  It is a dream camera come true! 


My Custom Olympus 35 RC Film Camera, one of dozens of film systems I shoot.

My Custom Antique Olympus 35 RC Film Camera, one of dozens of film systems I shoot.

Polaroid 900 converted to 4x5 with a Fujicon 150mm lens.

Polaroid 900 converted to 4×5 with a Fujicon 150mm lens converted by Steven Icanberry

I shoot 35mm, 120mm and 4×5 film systems.  Usually, I will expose about a dozen rolls a week in 120, Develop, Dry and Scan then treat them as I would a digital image except for the fact that I will never be starting with a color image!

Rollei IR400 Film - M7 28mm Elmarit - Rodinal 1-50

Rollei IR400 Film – M7 28mm Elmarit – Rodinal 1-50 processing, scanned and printed

I mainly  shoot with my Sony A7rii camera and a selection of 4 lenses in my normal day to day work.   I shoot in COLOR but always process both color and B&W in post processing.   I can just hear you say “why not just shoot in B&W in camera?”   Well the easy answer is while you can do so, you will get much better B&W images by shooting in color then post processing to get the best possible color image, THEN convert to B&W.  I use The NIK filter Silver EFX Pro for my B&W conversions, and by feeding it a finished color image it will have enough data to generate a wonderful B&W image!

Here is an example of just what I mean:

Sony A7rii w/ Sony/Zeiss 24-70 f/4 lens.

Sony A7rii w/ Sony/Zeiss 24-70 f/4 lens.  Daddy’s Girls, Bluffton, SC

First an image of Daddys Girls, a shrimp boat out of Bluffton, SC.   The image is a great one, full of colors and textures with an interesting sky!  I feel that in color this makes a wonderful image and think that there is a market out there for it.  I spent the time with the image during post processing to bring out the colors, textures and contrasts to make the image pleasing.

Sony A7rii w/ Sony/Zeiss 24-70 f/4 lens.

Sony A7rii w/ Sony/Zeiss 24-70 f/4 lens. Daddy’s Girls, Bluffton, SC

Then, and ONLY THEN I ran the image through Nik’s Silver EFX Pro B&W converter.   I Chose a deeply sepia tinted output with a slightly scratched texture and a minor border.  This to me is a pure image with which you can witness and feel the soul of the scene!

Sony A7rii w/ Sony/Zeiss 24-70 f/4 lens.

Sony A7rii w/ Sony/Zeiss 24-70 f/4 lens.  Stormy Seas, Head On with the clouds of tropical storm Colin.

Another example from the Sony that I took and post processed today is this image of the shrimper Stormy Seas, likely the MOST PHOTOGRAPHED shrimp boat in South Carolina, IN COLOR.  

Again, I shot in COLOR in order to have as much data as possible for the B&W conversion. Again I found myself in a sepia mood and processed it as the examples above!  As you can see, it has a totally different look, feel and emotional impact from its color version above!

Sony A7rii w/ Sony/Zeiss 24-70 f/4 lens.

Sony A7rii w/ Sony/Zeiss 24-70 f/4 lens. Stormy Seas, Head On with the clouds of tropical storm Colin.

B&W images can be really powerful in their emotional impact.   There was a time when B&W was all you could have, then color became popular because of the fact that it was different!  But guess what?  B&W is again VERY POPULAR to the point of actually out selling color in fine art shows and to collectors!  This should give you pause if you are concentrating in color only.  You are missing have of the scene, the most important half!

Roanoke River Lighthouse, M Monochrome

Roanoke River Lighthouse, Leica M Monochrome Camera system, B&W only!


Learning to work the scene!


Have a plan to work different compositions with in your scene!

Stormy Seas Side Shot

Stormy Seas Side Shot  Sony A7rii with the Sony/Zeiss 24-70 f/4 lens and polarizer.

You know how it is when you walk up to a scene and notice it for the very first time?  Usually we are amazed at what we have discovered!  We setup take the image and walk away congratulating   ourselves as to the amazing luck at finding such a perfect subject!

But wait!  You have all heard that you should work a scene, right?  Just look at all of the cool parts that make up the whole.  I am also sure that you have heard the phrase, “WORK THE SCENE”!  Well that actually means what it says.  Start wide and work in and around getting closer and more details!   When you are as close as you can stand, then work your way back out again!

This is powerful advice…

This is also the secret of all those world class images you see posted or published around the world.  Do you actually think that the professional photographer working and Nat Geo only took the one image?  Really???  They are just like the rest of us, a 30% keep rate and a 90% garbage rate!

So, knowing that it only make sense to take the time to work the scene.  Looking at the top image you see that I could the shrimp boat Stormy Seas with a long liner Charlotte Marie under the strong clouds of tropical storm Bonnie.  The scene is full of mood, color and contrasts.  I was specifically looking to work the shrimper so I did not pay any attention the the long liner.   Here they are a dime a dozen but there are likely a lot of detail shots there also…

Stormy Seas

Stormy Seas, from the bow, Sony A7rii with the Sony/Zeiss 24-70 f/4 lens and polarizer.

So as you can see, I have now walked around to the dock the shrimper is on and take a bow shot composing to keep the other boats, docks and other muck out of the image.  I still set it up to get the great storm clouds.  A much better shot than the first, no?

Stormy Seas

Stormy Seas, closer but  from the bow, Sony A7rii with the Sony/Zeiss 24-70 f/4 lens and polarizer.

Next I move further in, closer to the bow, looking at the painted boat name and the great structure and contrasts hidden the the hull of the boat.  As I stand here I think to myself that having the anchor cut off is a bit distracting but then decide that it adds a hint, or suggesting more out of scene that adds a bit is mystery to the image.  Again, in post, I have added a bit of mood to the clouds also!

Stormy Seas Side Detail

Stormy Seas Side Detail, Sony A7rii with the Sony/Zeiss 24-70 f/4 lens and polarizer.

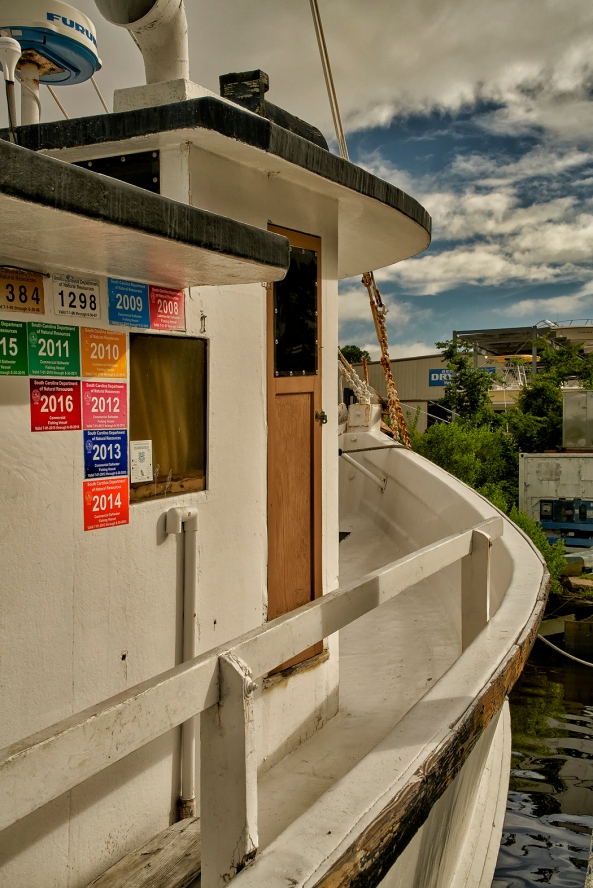
Now I am walking down the boats side, paying attention to the colors and patterns around the wheel house.  There is a lot here and the images continue to improve. Having the walkway moving up and away from me give a sense of infinity and curiosity as to what is at the bow above!

Stormy Seas Life Ring

Stormy Seas Life Ring, Sony A7rii with the Sony/Zeiss 24-70 f/4 lens and polarizer.

Moving further back towards the boat’s stern (back for you folks who live in Idaho!) I come upon the life ring with assorted fishing accessories hanging from it.  This scene is the most promising so far.  Look at the textures in the wall of the wheel house, the deep rich red tones and the crisp writing of the boats name!  It gives me shivers overtime I look at it!

Stormy Seas Line

Stormy Seas Line, Sony A7rii with the Sony/Zeiss 24-70 f/4 lens and polarizer.

But wait!  Just below the life ring hanging on the gunnels of the boat is a coil of heavily textured rope.  The rusty bold and chipped and rotting rail add so much texture, mood and stories that I am drawn to create an image just of this one detail!

This is exactly what will happen if you take the time to explore your scene totally working inwards getting more and more details as you go!  If the scene is worthy of taking, it demands that you explore it in great depth and detail.  Give it the time to do a good job and document all of it’s glory!

Stormy Seas, side detail, B&W

Stormy Seas, side detail, B&W, Sony A7rii with the Sony/Zeiss 24-70 f/4 lens and polarizer.

Do not forget to work in B&W as well, each and every image you take might have magic wonder hidden within its detail if you look at in in monochrome!  Look closely at the image above.  The hull has MUCH MORE DETAIL in its structure than the one in color did yet they are the same exposure!  The clouds have more depth.   Monochrome images discard the distractions caused by color… But that is the subject for another post….

Remember, this has NOTHING to do with the type of scene you shoot, nature, landscape or shrimpers, it is all the same!

What do you think?


Out And About With Film….


Wandering the shrimp fleets of Georgetown with my Voigtlander Bessa III 120 film camera….

Voigtlander Bessa IIIw 120mm camera system

Voigtlander Bessa IIIw 120mm camera system

Yep, early this morning I grabbed the bag with my wide angle 120mm camera system and headed out to Georgetown where I was going to spend a bit of time with the shrimp fleets and some film….  I chose the Voigtlander Bessa IIIw system.  It has a 55mm lens on it which at 6x6mm equates to around 35mm and at 6x7mm to 30mm.  This is pretty wide and allowed me to capture several very wide angle shots of various shrimp boats around the water front.

One of the other things that I do when shooting film is to keep a accurate written record of the exposure data for each and every frame.  This assists in keeping my process the same once I get the proper exposure, contrast and desired grain for each of the film types I use.

I enjoy this camera system very much.  It has a lot going for it specifically its 6x7mm negative size which makes for some pretty big scanned files when all is said and done.  I also like the fact that it is a rangefinder which pretty much defines my youth and what I had learned to use when very young!  It is not too heavy, has a leaf shutter which is totally silent and goes up the 1/500 second for exposures. This could be a little faster but I can work with it.  A 120 roll of B&W film gives me 10 exposures at 6×7 which is the format I like the most. 

Rodinal One Shot

Rodinal One Shot

I normally use stand film processing with Rodinal at 1:100 ratio with water, a water bath then the 1 hour processing and normal fixing and a wash, but for these rolls I am going to use Ilford Perceptol ultra fine grain developer in hope of a sharper  image with greater contrast.  So, we will see next week how this new combination works for my finished film!

Stand processing is not dependent upon chemistry temperature, ISO or even Film type!  You put the film in its can, give it a 5 min water wash, then pour the developer in, gently agitating for 1 min then letting it sit for another 60 min!, Water Stop, since and done!     But there are trade offs with Stand processing, namely Bromide Drag which is shown as the slightly darker vertical streaks in the image below.  These come from the developer chemistry being exhausted.

Voigtlander Bessa IIIw with Rollei IR400 120

Voigtlander Bessa IIIw with Rollei IR400 120

Jordan and his film camera

Jordan and his film camera

So with the Perceptual chemistry (6 min develop time) I will not see Bromide Drag and it is supposed to give sharper smaller grain and higher contrast.   So instead of a 1 hour develop time we are looking at 6 min now, sharper negatives with higher contrast!  We will see….

I will hold of processing these images till the first weekend in May so that my 7 year old grand son come come with me to the studio and process his own 35mm film at the same time!  Yes, I am teaching him how to photograph and process film! You gotta start them young so that they catch the film bug!

Cooking the film!

Cooking the film!

Come on back in a few weeks to see the results of todays outing!


Amazing New AR Coated IR Filters from KolariVision.com


Kolari Vision introduces a NEW Anti Reflective IR coating for their conversion filters!

Fuji X100s, 850nm Kolari AR conversion - Under Foley Pier

Fuji X100s, 850nm Kolari AR conversion – Under Foley Pier

I LOVE shooting IR and have a long history with it in both Film and Digital.   I have had over 25 conversions from ALL of the big conversion companies around the country!   But, once in a while I would get a camera that no mater how hard I tried, I will get a hot spot with it or the lenses I used.   You learn how to deal with this by selective use of the aperture but once in a while you would just not be able to get around the problem and loose the shot….  

Fuji X100s, 850nm Kolari AR conversion - Shrimp Boat

Fuji X100s, 850nm Kolari AR conversion – Shrimp Boat

Well about 3 weeks ago Ilija from Kolari (http://www.kolarivision.com ) sent me a note telling me about a new coating process for his conversion filters.   I have a long history with Kolari, LDP and Lifepixel but I have never heard of this till now.  Ilija offered to do a free conversion with this newl IR AR coating for me in return for evaluating it in the real shooting world! So I told him that I would send the X100s off as a test camera and that I needed it back fast in order to allow others to play with the camera also!   Off it went on Tuesday.  Imagine my surprise when I got it back in hand the following Wednesday!

Here is what Kolari says about this new AR IR coating:

  • Uncoated glass has a reflection of around 4-5% at all wavelengths, and we found that this reflection off the sensor filter was bouncing off the glass and reflecting back from the lens housing and aperture blades to cause the hotspots.  We developed this anti-reflective coating that is centered around the IR wavelengths that cause hotspots, and reduced the 5% reflection down to <0.5% (see the attached graph for reflection % by wavelength scan, and the picture of the IR filters for the visual difference of IR reflection).
Unknown

  • The coating does not reduce visible light reflections as much, and does not reduce blue reflections at all. This gives the glass we use a blue shine, since that is the only range that is fully reflected still (see picture of black filters). 
AR coating test on Visible Light

AR coating test on Visible Light

AR coating tests on BLUE light

AR coating tests on BLUE light

  • I am getting ready with a new website which I hope to launch in 1-2 weeks, so I have not put the coated version of the conversions online yet, but they will be offered on our Full spectrum, two spectrum, 590, 665, 720, 850, and Blue IR/NDVI conversions. There will be a $50 optional upgrade on all of our conversions at this point.


  • I plan on offering only the coated version eventually, but the batch runs are expensive and I cannot coat our full inventory at once. I’m not sure if you are aware, but we stock custom made custom thickness filters for all our camera/filter combinations so that each conversion gets a piece of glass that maintains the original optical distance (refractive index x physical thickness) as closely as possible, which changes for each filter material. Other companies use a few general size pieces of glass, glue them directly to each sensor, and calibrate the focus for an arbitrary lens, which reduces what they have in inventory. Our design choice means that we have around 200 unique pieces of glass in inventory for DSLR and mirrorless cameras, and another 200 for point and shoot models, so you can imagine the challenge in getting them all coated. – Ilija

Fuji X100s, 850nm Kolari AR conversion - Thru The Door

Fuji X100s, 850nm Kolari AR conversion – Thru The Door

So as you can see they are up and almost ready to start filling orders for these new filters.   

Fuji X100s, 850nm Kolari AR conversion - McClellanville Fleet

Fuji X100s, 850nm Kolari AR conversion – McClellanville Fleet

I have to tell you that with my test conversion on the Fuji X100s to AR 850nm that ALL of my hot spot issues simply went away.  This camera has always had a tendency for IR hot spots.   I have converted, tried and sold so many IR systems in the past that I have lost count.  I could not, would not sell this one as it is one of my most prized IR systems.  To say that I am pleased with the results of the Kolari IR AR Coating is the understatement of the year!

Remember, if you decide to order from Kolari, give them my name for a $15 discount!


Advanced Work With The Sony A7rii


Using the Sony A7rii for advanced photographic work….


Long Exposure In Charleston, SC

Long Exposure In Charleston, SC, 30 seconds with a 6 stop B+W ND

I was in Charleston, SC last weekend with the a7rii camera system to see how far I could push it!   I find the Sony system to be refreshingly powerful and very capable of any style of photography I desire to shoot.   The Image above of the boat house (Sunrise) was just another example of the power of this system.  I was looking for some long exposure and the water of Charleston Harbor was very smooth to start, with only 6 to 12 inch waves.  The sunrise was blocked by a tremendous super cell thunderstorm system so I just concentrated on the boathouse and smoothing out the water.   I was using the Sony FE 70-200mm F4 G OSS lens at 150mm with a 6 stop B+W ND filter attached which was giving a 30 second exposure.  I was sure that 30 seconds would give me a very smooth water (which it did).  I also desired to capture detail in the stormy clouds but keep the white water.  I metered the waters surface and placed it in Zone 7.5 (what!  You do not know the zone system?  Shame…. We will have to fix this!).  This at ISO 50 and f/16 gave me a 30 second exposure and allowed the 14 stop dynamic range of the camera to capture both the withe of the water as well as cloud details!

Granted, the Sony has a LARGE menu system but the provide you so many programmable custom buttons AND several system setup memories that you can with the turn of a control knob chance the camera functions over to the specific style of shooting you desire!  In my case, I have the M2 memory setup for long exposures, and by simply turning the command dial to M2 the camera is ready for long exposures!

Miss Lulu, Georgetown, SC

Miss Lulu, Georgetown, SC

Here is another example of the amazing capture ability of the Sony.  This is the shrimper Miss Lulu on the dock in Georgetown, SC last Monday morning.   The water of the bay was at slack tide, super high and mirror smooth.   I decided that for this image I wanted B&W but still captured it in color since a color starting image gives the best B&W conversion.   I was using the Sony/Zeiss FE 24-70mm F4 ZA OSS lens at ISO 100 at f/8 with a shutter speed of 1/320 second.  I waited till a Pelican flew into the scene from behind the boat for the capture.  The clouds were slight but still stunning but the boat and its reflection really made the image.   

As I said, During my pre-visualitlation of this image I decides upon monochrom with a flying bird.  I setup the boa further into the image space to allow for a bird to fly into the scene and balancing the overall image with the boat centered with the trees on the right.   This is not a simple snap  shot, a lot of thought went into its setup!

Shrimp Boats are one of my favorite subjects and each and every time I happen by them they always present something new and different!

More Leica M Monochrome Magic!


Creating World Class B&W Images With Leica Monochrome

Bodie Island Light, M Monochrome

Bodie Island Light, M Monochrome

In my continuing love affair with the Leica M Monochrome camera system I have learned more each day towards creating amazing etherial B&W art…  Keep in mind that I have been shooting B&W film (35mm, 6×7 and 4×5) for several decades and know and understand the process very well. But using the Monochrome is such an easy progression that it seams as though the camera is leading me down this path on its own. Yes there is some small post processing to be done using Nik Filters Silver EFX and once in a while I will add some Viveza as well, but for the most part it is almost perfect out of the camera as long as you get the exposure correct in the shooting!

Leica Tri-Elmar 16 - 18 - 21 mm Lens

Leica Tri-Elmar 16 – 18 – 21 mm Lens

In the image below of the shrimper Stormy Seas, I used the Leica Tri-Elmar set in 16mm.  There is no image distortion from such a wide angle and it is sharp with good depth of field.  When using this lens on the Monochrome you are forced to use the frankenstein viewfinder that you purchase with the lens but that is a small price to pay for such a useful lens.  I also have a Voigtlander Hellar 12mm lens in the camera bag and it works very well on the Monochrome and uses an external 12mm viewfinder, but it does distort the image slightly due it its wideness but you can correct for that in Photoshop.  The thing about the Tri-Elmar is that it replaced 3 separate lenses that were stolen with one small lens!

Stormy Seas Shrimper, M Monochrome with Tri-Elmar at 16mm

Stormy Seas Shrimper, M Monochrome with Tri-Elmar at 16mm


Using a fast lens like the 50mm Summilux ASPH for the image below of the Roanoke River Lighthouse allows you to hand hold on dark or stormy days and still get crisp images that jump out at you! For this image I also had a yellow filter attached to bring out the structure of the clouds.  This is one of the HUGE pluses of the Monochrome in that it reacts to the standard B&W filters the same way as film does!

Roanoke River Lighthouse, M Monochrome

Roanoke River Lighthouse, M Monochrom

But as always my main use for the camera is long exposures which is where my true love lives!  Being able to take ocean shots and smooth out the waves is exciting beyond words and the Monochrome does a great job of it with its 4 min bulb limit.  Look at the image below of the (another version) Roanoke Marshes Light House.  I was there when the light was on and each time it circled  it created another slightly offset star effect.  It allows me to create images full of wonder and depth!

Roanoke Marshes Lighthouse with operating Light, 16 second exposure, M Monochrome

Roanoke Marshes Lighthouse with operating Light, 16 second exposure, M Monochrome

The implied stillness of the water with the graduated reflections create an image full of mood and depth.  This is one of my favorite images of this Light House and the fact that during the 16 second exposure the light revolved around 3 times to generate 3 slightly offset star patterns just add more mood to it.  This particular shot was done with a B+W 103 3 stop ND filter to allow the longer shutter speed at f/8 for sharpness with the 50mm Summilux ASPH lens!

Now let me share a detail shot of a fishing boat just up the island from the Light House.  It is simple yet tells a complex story of the boat and job.  

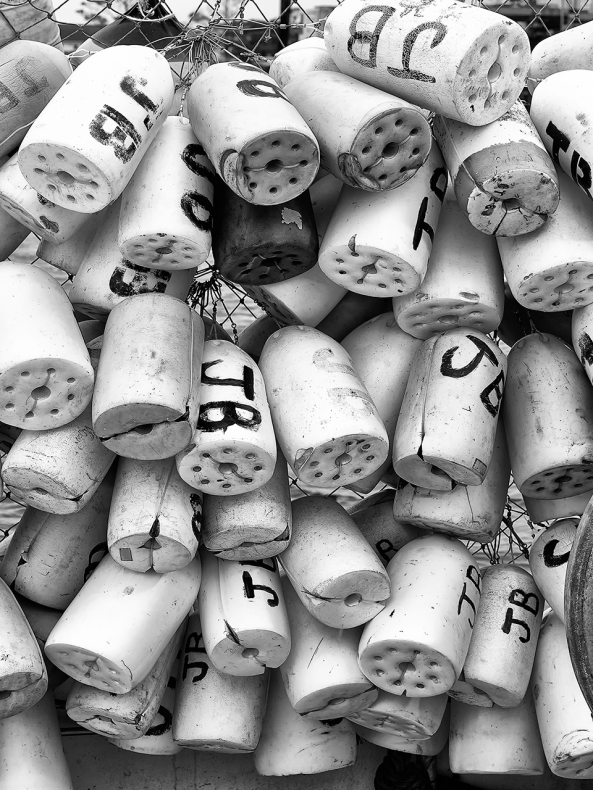
Fishing Float, M Monochrome

Fishing Float, M Monochrome

I love the textures of the image and the sharpness. The texture on the surface of the individual floats are great and perhaps would have been better served by a closer shot. It was taken with the Macro Elmar 90mm lens (a great lens to invest in) and was done on the tripod!

Mushroom, Macro, M Monochrome with Macro Elmar 90mm plus macro adapter

Mushroom, Macro, M Monochrome with Macro Elmar 90mm plus macro adapter

Really Right Stuff TF-01 and Ball Head

Really Right Stuff TF-01 and Ball Head

Continuing with the 90mm Macro Elmar I give you a closeup image taken just as I left the Outer Banks.  This mushroom is only about 2 inches tall and I had to lay down under a log to get it.  Yes a tripod was used but it was the Really Right Stuff table pod which is an amazing tool to have in your kit for just this sort of work  Look at the textures on the bottom and stalk of the mushroom.  This 90mm lens is the only 90 that I will ever buy for my Leica cameras!

Really Right Stuff TF-01

Really Right Stuff TF-01

I hope that you enjoyed this last dedicated post on the Leica M Monochrome camera.  I will have many more images to share from it in the future but I think that you are likely getting tired of dedicated posts!

Thanks for taking the time to view these!!

Going to the Dark Side: 830nm Infrared and the Fuji X100s


830nm Infrared Conversion on the Fuji X100s


Oak Reflections, 830nm

Image 1:  Oak Reflections, 830nm


Infrared photography with digital camera systems have been around for several years now and a lot of photographers have embraced this different spectrum of photography.  Infrared is wildly popular in photography and fine art galleries now and my workshops are full of lots of talented photographers who desire to learn or expand their infrared skills.

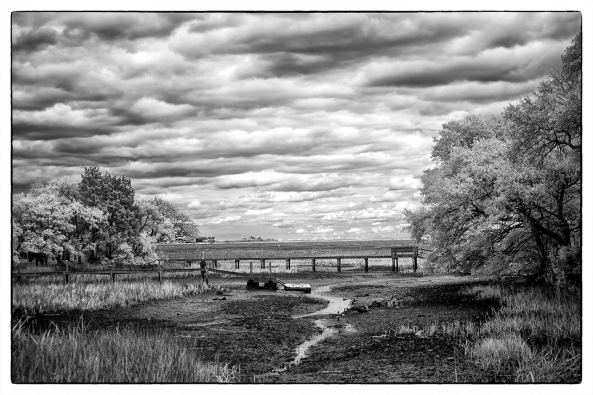
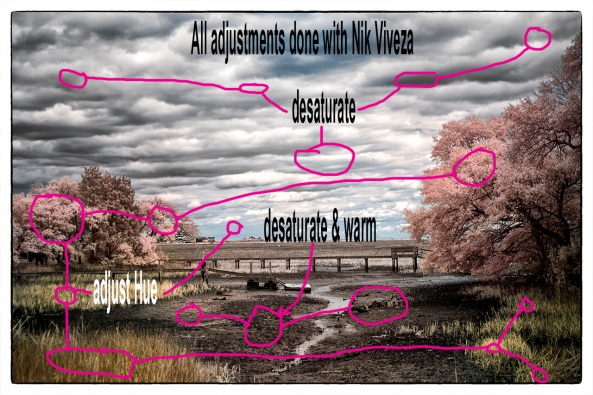
Pawleys Marsh, 830nm X100s

Pawleys Marsh, 830nm X100s

The typical starting point for most infrared shooters is 720nm (standard) or 590nm (Goldie) IR conversions. We have all seen the amazing color images that these two conversions can generate. As previously discussed, we always process not only in Faux Color, but for B&W also. The B&W images are usually more accepted among the arts community though.

Pawleys Marsh, 720nm

Image 3:  Pawleys Marsh, 720nm


But did you know that with each increase in the IR Nano Meter band (the frequency goes down as the number goes up) that the contrast levels go up in B&W as well? This increase in the NM band starts to generate the most stunning, contrasty, ethereal images that have to be seen to be believed! The higher you go in the NM range also increases the white “glow” around the leaves and grass and the blue sky takes on a deep black. This effect is named the “Wood Effect” after doctor Robert Wood who discovered it 1910. What happens is that the leaves get a bloom or glow of white around them that generate that wonderful ethereal feel in the image. Take a look at image 1 which was taken at 830nm. Do you see the dark black where the blue sky is? Look at the leaves on the trees and how they take on the pure bright whites! Now compare that to 720nm image above in Image 2. The most striking difference is the gray sky rather than black, plus the leaves are grayer rather than white.

Shrimp Boat at 830nm

Image 3: Shrimp Boat at 830nm


I would like to suggest that if you shoot in IR or are interested in doing so then you should consider a deep contrast IR conversion beyond 800nm. There are a lot of benefits to be found in that spectrum. This new spectrum sees ONLY in B&W, which will force you to visualize your scene in B&W.


The benefits to a Deep B&W IR conversion are:

  • Extremely sharp images.
  • Wood Effect bloom on plant leaves.
  • Dark moody skies.
  • Only works in B&W
  • Post processing is easy and quick using Nik Viveza and Silver EFX for texturing and contrasts. Photoshop CC, Elements or Lightroom, they all work for Deep B&W IR!
  • White Balance is easy.


Mabry Mill, 830nm

Image 4:  Mabry Mill, 830nm

There are several ways to have a camera converted to deep B&W above 800nm.

  1. The easiest is to simply take ANY digital and have it converted by removing the internal UV/IR blocking filter and replacing it with a 800nm, 830nm or a 850nm internal filter. With this type of conversion you can use any digital camera type or style because only the sensor will see the infrared light and you will either see the scene via the optical path or via a live view from the sensor. Typically, this type of conversion should cost around $300 to $350 thru any of the normal conversion companies.
  2. If you are shooting a Full Spectrum or Dual Spectrum conversion then you can purchase and attach a B+W 093 830nm filter to your camera lens! This filter blocks ALL visible light so you MUST have a camera with a live view only to use this otherwise you will never be able to see thru the optical path to focus and compose. The Full Spectrum camera is one that has had the internal UV/IR blocking filter removed and replaced with clear glass and the Dual Spectrum conversion is where the internal UV/IR blocking filter is removed and replaced with a strong UV filter.
Rock Run Mill, 830nm

Image 5:  Rock Run Mill, 830nm


With either the full or dual conversions you can shoot every of the following light spectrums:

  • Ultra Violet                                               Full Spectrum *
  • UG1 UV & IR                                            Full Spectrum *
  • 047b In Camera Faux Color                  Full Spectrum *
  • 530nm Faux Color                                  Full & Dual Spectrum
  • 590nm Super Color                                Full & Dual Spectrum
  • 630nm Pinkie Faux Color                     Full & Dual Spectrum
  • 665nm Enhanced Color                        Full & Dual Spectrum
  • 720nm Standard                                    Full & Dual Spectrum *
  • 800nm B&W                                          Full & Dual Spectrum *
  • 830nm Deep B&W                                Full & Dual Spectrum *
  • Normal Visible Color                            Full & Dual Spectrum

* Requires Live View capable camera


Now, Normal Visible Color simply means that your camera can take normal color images as it did from the factory! This means that you have a multi purpose camera that can take anything.

The only issue is that if you have a Full Spectrum conversion you need to stack a B+W 486 reflective IR/UV blocking filter on your lens with a LDP CC1 absorption filter to get back to good normal color.

For the Dual Spectrum conversion you only need to put the B+W 486 reflective IR/UV filter on your lens and it is back to normal color!

Disadvantages to the Full or Dual Spectrum Camera Conversion:

  • More expensive to convert.
  • External filters for each of our lens sizes.
  • Color filters (530 – 665nm) are not expensive but the B+W 093, B+W 486 and the LDP CC1 filters are VERY expensive.
  • Your camera MUST have a live view mode to focus and compose.


Charlotte Marie, 830nm X100s

Image 6:  Charlotte Marie, 830nm X100s

 I have several cameras converted to above 800nm and several full spectrum and a new dual spectrum converted Fuji X100s. The images that I am getting from the Fuji with a B+W 093 830nm filter are the sharpest and most stunning deep IR images that I have ever produced! But that doesn’t mean that you need to go out and purchase that one. Any camera with live view will work great with the 830nm spectrum. Keep in mind though, that the more modern your camera is the higher the usable ISO will be!

You can contact Mark at his web site at http://www.MarkHilliardAtelier-blog.com for information on his Color & IR workshops, which he teaches with Jamie Davidson, and for his IR Post Processing DVD Tutorials!

Fuga City, 830nm, Georgetown, SC

Fuga City, 830nm, Georgetown, SC


Going Home to Momma with the Leica M7…. Film Photography Returns!


Ahhh… It Feels So Good!

Rollei IR400 Film - Leica M7 50mm Lux - Rodinal 1-50

Spring in the South…  Rollei IR400 Film – Leica M7 50mm Lux – Rodinal 1-50

Oh my, I do NOT know where it came from but I got the BUG again for more film photography!  I have a cabinet here in the Gallery just full of old film cameras plus a Leica M7 film body that works with ALL OF MY M MOUNT LENSES!  (see the last post HERE for more info on the lenses).  I decided to purchase a new stock of several films:

  • Kodak Tri-X 400, Ohh
  • Eastman Double X 200, Ahh
  • Rollei IR400  400, WOW!
  • Kodak Tmax, Ho hum…
  • Ilford HP5+ 400
Rodinal One Shot

Rodinal One Shot

I picked up some stainless 2 roll developing tanks with a bunch of Hewes (don’t skimp on your reels, buy the best!) Stainless Steel 35mm Reels.  For developing I like Rodinal One Shot due to its ease of use and a life span of around 40 years.  I simply mix it one tank at a time usually at a 1:50 ratio with water using a small syringe. It allows a very wide latitude of contrast and iso control.  I have used several other developers but I keep coming back to Rodinal!

Now, I am playing with several cameras. As I said my main and BEST camera is my Leica M7.  But here is a current list of those cameras I am using:

  • Leica M7 with Leica & Voigtlander Lenses
  • Petri 7s, 1962 
  • Olympus XA
  • Olympus 35 RC 
  • Shen Hao 4×5 Field Camera (about 12 years old)
1962 Custom Petri 7s Film Body

1962 Custom Petri 7s Film Body

The Petri 7S has been in my hands since 1962 and still shoots great ( I did send it off to have the light seals replaced and a new leather covering ). The Petri has no batteries but rather a solar cell around the lens that drives a needle exposure meter that you simply place into its center notch for a good image!

All of the cameras in my list above have proven reliable  but with the Petri you get a link to the past, specifically MY past as this was my 2nd camera I owed when I was young!

The Olympus 35 RC is an amazing small rangefinder with very nice controls.  It is smaller then the Petri 7s and actually has better control functionality.  It does require a battery to run its metering system though which is a step down from the Petri 7S in my opinion.  The nice thing other than the size is the fact that EVERYTHING is displayed inside of the viewfinder.   Unlike a refurbished Petri 7S which can be found for around $100 used on Ebay, the Olympus 35 RC camera refurbished is demanding around $250!  This is a big difference in price and tells you a lot about its quality and demand! I was lucky to find one from a collectors inventory that he sent off to be totally refurbished and re-skinned for much less than $200.00!  For you film shooters out there on a budget this is the camera that I recommend if you find yourself desiring a rangefinder.

My Custom Olympus 35 RC

My Custom Olympus 35 RC

The Olympus XA was a 35mm rangefinder camera built by Olympus of Japan. It was one of the smallest rangefinder cameras ever made, together with the Contax T.

Olympus-XA

Olympus-XA

It was designed by Yoshihisa Maitani who had joined Olympus Optical Co Ltd in 1956. He was the chief camera designer and managing director of Olympus Optical Co Ltd., having developed a number of legendary cameras during his career. These included the Pen series, the OM series, the XA series, the IS series and the [mju:] series of cameras.

The original model, the XA, was sold from 1979 to 1985. The original XA features true rangefinder focusing, a fast 35mm f/2.8 lens, and aperture prioritymetering. The lens was protected by a sliding dust cover.

This is the smallest 35mm rangefinder ever made.  It will fit in the palm of my hand and will make a great system to have with me everywhere I go!

The Leica M7 uses batteries and sports a center weighted spot meter measured either off the film or off the shutter.  I find that it meters very reliable. It is the top of the heap when it comes to 35mm film cameras.  There are a lot of high end rangefinder cameras on the market but the Leica is the top.  I really excels in the area of long exposures with either a count down timer  in the viewfinder for images metered and controlled in the aperture priority mode or a count up timer for exposures done in the bulb mode.  In bulb, it will count up to 16 min then stops counting for battery conservation, but will continue exposing until you release the remote shutter release.  It will use NO battery power after the 16 min count up timer turns off until you release the shutter then it requires a pulse of electricity to close the shutter.   NO other rangefinder can say this unless you use a pure mechanical camera like a Leica M2 which has no metering system at all.

The Leica M7 is surprisingly heavy but easy to handle.  I keep reading about other high end rangefinder bodies out there but when you do the comparison of features I always come back to the M7.

My Leica M7 Film Body

My Leica M7 Film Body

All of my cameras are fun to use and reliable.  With the Leica M7 you get the world class glass but with the Petri 7S you get a link to the past, specifically MY past as this was my 2nd camera I owed when I was young!  The Olympus 35 RC is an advanced rangefinder from the 1970 era and is slick and fun to shoot. You will see examples from these cameras towards the end of this post!

______________________________________________________

I usually develop my negatives on Sundays.  I have a film drying cabinet that I use to dry the film without dust spots overnight.  I then will scan the negatives on Monday or Tuesday using a Nikon 4000 ED film scanner at 4000 dpi into the DNG format for editing and cleaning later in the week.  I usually shoot 2 or 3 rolls a week.

Rollei IR400 Film

Rollei IR400 Film

My favorite film is Rollei IR400.  This is available at the big camera stores like Digitaltruth, Freestyle and B&H.  What makes this film so special is the fact that is very much like Kodak Tri-X 400 as shot.  It has a VERY THIN film base which really makes scanning easy.  BUT the most amazing thing about this film is that it is sensitive to INFRARED!  If you place a Hoya R72 IR filter on the camera lens the film will record 720nm IR images!  There is an ISO hit due to the filter being so dark down to 12 ISO but it is worth it being able to shoot in both normal B&W and IR B&W!

Next I like the Kodak Tri-X 400 film.  It gives great contrasts and has a very wide latitude in development.  It is well known and tested and for ultra long exposures.

Eastman Double X 5222

Eastman Double X 5222

Then comes Eastman Double X Cinema film.  This is a GREAT B&W film that gives a very smooth gradation and lovely warm tonality with slightly increased contrasts.  This is motion picture film so unless you are going to buy a 400 foot reel you will need to purchase it from the store at Film Photography Project. They will sell it in either 24 exposure rolls or a 100 foot bulk loader roll.  It develops nicely in Rodinal at 1:60 for ISO 200 but there are ratios for 100 up to 800 ISO!  This film is very much worth experimenting with.

I need to say a few words about the folks at Film Photography Project.  They offer  an amazing wide selection of films and old cameras!  This includes Polaroid cameras and film also!  Their Podcast is amazing and I find that it is so good that I now have it running all day while I am working at my gallery in Pawleys Island.  Good Stuff, check them out here:  Film Photography Project.

Whatever film you decide to use you will be pleased with the results. Processing is easy to do with a VERY small investment. You will need:

  • Film Camera
  • Film
  • Chemestry:  Developer, Stop (you can use water), Fixer and water bath with a Wetting Agent.  $40 to get started
  • Film drying hanger clips $3 for a bag of 2
  • Film tank, either stainless steel or a Peterson. Peterson tank and reel is about $40
  • Film tank reels (if stainless do not skimp on these).  Hewes Steel are about $25 each
  • Dark changing bag to move the film from the canister to the developing tank.   $40
  • You will also need some way to scan your film into a digital image or pay someone to do it for you.

That is it.  It normally takes me about an hour to develop 2 rolls.  I will let them dry for several hours then cut them into strips of 6 and put them into plastic storage sheets.

For scanning, as I said above, I use a Nikon 4000ED film scanner.  As you can guess from the name it will scan at 4000 dpi and has a lot of adapters for different types of film scan feeders.  It has slide auto feeders, single slide feeders, a 6 position film rail for troublesome film and an automatic roll feeder to scan entire rolls automatically.  If you couple this with VIEWSCAN software you have an amazing scanning system that rivals those that pro labs use!

Nikon 4000 ED system

Nikon 4000 ED system

Ok, lets take a look at the results of 3 types of film in 2 cameras!

Pawleys Pier  M7 Elmarit 28  Rollei IR400 film in Rodinal at 1:50

Pawleys Pier M7 Elmarit 28 Rollei IR400 film in Rodinal at 1:50 240 second exposure
1962 Petri 7S, Eastman Double X film in Rodinal at 1:60

1962 Petri 7S, Eastman Double X film in Rodinal at 1:60

Eastman Double X Film - 1962 Petri 7S  - Rodinal 1-50

Eastman Double X Film – 1962 Petri 7S – Rodinal 1-50

1962 Petri 7S, Eastman Double X film in Rodinal at 1:60

1962 Petri 7S, Eastman Double X film in Rodinal at 1:60

1962 Petri 7S, Eastman Double X film in Rodinal at 1:60

1962 Petri 7S, Eastman Double X film in Rodinal at 1:60

1962 Petri 7S, Eastman Double X film in Rodinal at 1:60

1962 Petri 7S, Eastman Double X film in Rodinal at 1:60

Rollei IR400 Film - Leica M7 50mm Lux - Rodinal 1-50

Rollei IR400 Film – Leica M7 50mm Lux – Rodinal 1-50

Rollei IR400 Film - M7 28mm Elmarit - Rodinal 1-50

Rollei IR400 Film – M7 28mm Elmarit – Rodinal 1-50

Rollei IR400 Film - M7 50mm Lux - Rodinal 1-50 240 second exposure

Rollei IR400 Film – M7 50mm Lux – Rodinal 1-50 240 second exposure

Rollei IR400 Film with R72 IR Filter - M7 50mm Lux - Rodinal 1-50

Rollei IR400 Film with R72 IR Filter – M7 50mm Lux – Rodinal 1-50


Rollei IR400 Film - M7 50mm Lux - Rodinal 1-50

Rollei IR400 Film – M7 50mm Lux – Rodinal 1-50

I hope that you enjoyed this post and its associated images.  I have been using film since I was 9 years old.  At 13 I had my first darkroom at home.  I worked in film in my own darkroom until I was 18 when that period of my life can to an end.  42 years later I re-engaged film photography again and cannot help but ask “Why did I wait so long?”  I have been shooting digital since my career at Eastman Kodak when you could ONLY get B&W digital camera systems!  I have spent fortunes on digital and have loved every moment of it.  Film will NOT take any of that away, I still have digital and continue to use it.  But I have to be honest and admit that working in film again fills me with a sense of peace that I have not experiences in a very long time….

Please let me know what you think of this post!

Leica M240 Digital..


Oh, No… Another Camera System…

Leica M240 24 mpx Digital

Leica M240 24 mpx Digital

Well, in a wild turn of events I have picked up some new camera equipment… This is a really no surprise as it is a sickness or rather addiction!   But onward and upward!  

I do have to tell you that I am REALLY excited over acquiring these new systems though.   And unfortunately, one thing has let to another and thus a long journey has also been started into the realm of film again!

But first let me highlight the “What”!

As you can see in the top image, the newest body is the new Leica M240 24 full frame 24 mega pixel body.  It also has a true “live view” which allows use of all sorts of other lenses like the Leica R series that you would NOT normally be able to focus.  This means everything from long telephotos to true macro (subject of the next post!). After a few months of use I can tell you that this is the BEST digital system that I have ever used!  Along with it I also picked up several lenses.

Leica 50mm Summalux ASPH f/1.4

Leica 50mm Summalux ASPH f/1.4

First, the main lens is the Leica M 50mm f/1.4 Summalux ASPH lens in silver.  This is a HEAVY lens.  If attacked by a bear I could use it to beat him half to death.  The lens itself has turned into my main lens that I use 60% of the time. It has a built in leans hood and takes 46mm filters.  The Bokah that this lens can generate is amazing beyond description. It is extremely smooth and easy to use and generates images that are truly amazing!

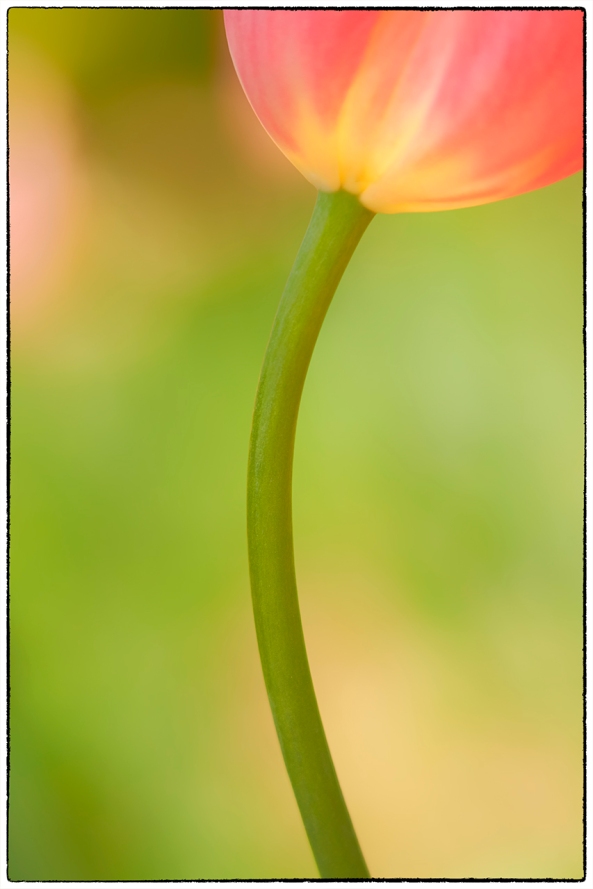
Tulip at f/1.4, Leica 50mm Summalux ASPH

Tulip at f/1.4, Leica M240 w/ Leica 50mm Summalux ASPH


Leica 28mm Elmarit ASPH

Leica 28mm Elmarit ASPH

The next lens is the Leica M mount 28mm f/2.8 Elmarit ASPH.  This is a TINY light lens that takes 39mm filters.  These smaller filters sized considerably cut the cost of purchasing top of the line B+W filters.  Since the M240 camera is a full frame sensor the 28mm really is 28mm! The lens is sharp beyond words and quick to focus.  I am really please with this lens and use it for landscapes and lightning photography when mounted on my Fuji X-T1 camera.

The example image for this lens below is a texture overlay.  The main image was an Infrared image taken by placing a R72 (720nm) infrared filter on the lens giving a white IR image of a palm leaf, then doing a texture overlay of colored flowers.


M240-1916-Palm Overlay-2014 in both 720nm Infrared and Color

M240-1916-Palm Overlay-2014 in both 720nm Infrared and Color


Leica Macro-Elmar-M 90 mm f/4

Leica Macro-Elmar-M 90 mm f/4

The next lens is the Leica Macro-Elmar-M 90 mm f/4 and its macro adapter with split image view.  This is a very unique lens in that it collapses for storage.  By itself it is a great 90mm lens and has proven useful for mid range subjects as well as for Infrared work with the addition of a R72 IR filter.  When you add its macro adapter (extension tube coupled to a viewfinder modifier) it will then give you macro capabilities down to a 1:3 image ratio!  Below is an example of a macro image shot with this lens last week at Moore Farms in Lake City .

Leica Macro-Elmar-M 90 mm f/4

Leica Macro-Elmar-M 90 mm f/4

Now, I already had my two Voigtlander M mount lenses that I was using with the Fuji systems, but they are M mount!

Voigtlander 75mm f/1.8

Voigtlander 75mm f/1.8

First is the Voigtlander Heliar 75mm f/1.8 Lens.  This is an amazing lens that is very fast at f/1.8. The focus is smooth and long and it works very well with M mount extension tubes for true macro work (1:1 image ratio).  I do have 3 of the 10mm extension tubes for it as well as a Canon 500D closeup lens.  For my really small stuff this is my goto lens.  It is a little long but has a very nice clam on lens hood.  While it is NOT a Leica lens it is very close in terms of quality and ease and the f/1.8 aperture gives lovely bokah!
Here then is an example of a 1:1 life-size macro shot with it!

Green Dots...

Green Dots…

Voigtlander 12mm Ultra Wide Hellar

Voigtlander 12mm Ultra Wide Hellar

The last lens that I am going to talk about here is the Voigtlander Ultra Wide-Heliar 12mm f/5.6 Aspherical M Mount lens.  Another heavy all metal lens with remarkable focus and DOF.  Since it is so wide you can almost have a DOF from right in front of the lens out to infinity!  Plus 12mm is really 12mm on the camera!  Given that the camera is both full frame and has a live view you can see the power of using this lens and the ease of composition and focus!

In the example image below please notice the extreme range of the depth of field!

Stormy Seas, down low and dirty... Voigtlander 12mm

Stormy Seas, down low and dirty… Voigtlander 12mm


As you can see, all of the system components are extremely high quality and easy to use giving stunning results.  I like to create Long Exposure and Infrared images as well so I thought that I would share some of them with you below.  

M240-BW 59s16ND PI Pier-0148-2014

Pier, Leica M240 60 second exposure

M240 w/ R72 IR Filter

M240 w/ R72 IR Filter

Leica M240 w/ 28mm Elmarit,

Leica M240 w/ 28mm Elmarit

6 Shot HDR, Leica M240

6 Shot HDR, Leica M240

Blue Hour in B&W, Leica M240, 60 second exposure

Blue Hour in B&W, Leica M240, 60 second exposure

M240-1109-60 s PI LE-2014

Low Tide, Leica M240, 45 second exposure


I hope that you enjoyed this post.  I will have several more shortly in the future highlighting more of this system as well as some new FILM work!! 

Stay Tuned!


Fuji X-E2 – Amazing Quality!


My Fuji  X-E2 – Just Perfect!

Shrimper Carolyn Ann, Fuji X-E2

Shrimper Carolyn Ann, Fuji X-E2

I have to tell you that I am REALLY a Fuji fan.  I have the following Fuji bodies:

  1. X-Pro 1 – Color
  2. X-Pro 1 – 720nm Infrared Conversion
  3. X-E1 – Color
  4. X100s – My walk around companion!
  5. X-E2 – Color

I also have ALL of the lenses but 2!

I moved to Fuji after a long search for a small light weight camera system after loosing 80% use of both hands and arms.  I went through ALL of the micro 4/3 systems (and even kept 2!).  I sold $40,000 in Canon bodies and L glass and have NEVER looked back!  

In the Fuji, not only have I found perfections but being a range finder styled system it is like going home to mom!

X-E2

X-E2

I have a X100s that I use for most of my walk around work, it is just so tiny and generates amazing images.  So when Fuji announced the X-E2 with the same sensor and with even more upgrades I ordered one from Amazon.  Much to my amazement it shipped a week later!  I have had it in hand now for about 2 weeks and just yesterday took it out to a local fishing port for a bit of creative work.  I love the upgrades and how fast this camera is.  It even passes the X100s in ability.  I originally purchased the X-E1 in order to take advantage of its electronic remote shutter release.  It enables me to hook it up to devices like a lightning trigger and my water drop collision system.  The X-E1 did a great job with these devices and I expect no less with the X-E2 but that is for another day.

X-E2 Top Panel

X-E2 Top Panel

Yesterday I took it out to shoot shrimp boats in North Carolina and have to tell you that the camera just blew me away.  It is such a major upgrade over the X-E1 that I cannot believe that they came from the same company!  The controls are CRISP, the knobs just snap from position to position with no play and they stay where you put them.  The larger LCD is nice but the faster EVF is a sight to behold. I dressed the camera in a RRS L bracket with grip and put on a nice soft release.  Physically except for new buttons and placement the camera is identical to the X-E1.  One MAJOR improvement is the addition of 3 stops of EV adjustment instead of the normal 2 that Fuji has provided in the past.

All in all I am really happy with this upgrade.  I will keep the X-E1 and convert it to 800nm IR in the near future.  There is no sense in letting that viable and great camera go to waste!

Little Scrapper, X-E2, RAW converted in ACR

Little Scrapper, X-E2, RAW converted in ACR

Next I put the camera into the JPG mode and shot color & B&W images in camera.  The results speak for them selves!

Shrimper Donkey X-E2

Shrimper Donkey X-E2


Shrimper Donkey, CAMERA B&W  X-E2

Shrimper Donkey, CAMERA B&W X-E2

Carolyn Ann, Color, X-E2

Carolyn Ann, Color, X-E2

Carolyn Ann, In Camera B&W X-E2

Carolyn Ann, In Camera B&W X-E2

Working Shrimper Deck, X-E2

Working Shrimper Deck, X-E2

Working Shrimper Deck In Camera B&W, X-E2

Working Shrimper Deck In Camera B&W, X-E2

This posting was never meant to be a review, rather a statement of its impact upon me with sample images!

Please let me know what you think…

Fuji X Pro 1 – 720nm Infrared Faux Color and B&W Post Processing


A Simple Tutorial on Infrared Post Processing…

Murrells Inlet Marsh, X Pro 1 720nm IR Faux Color

Murrells Inlet Marsh, X Pro 1 720nm IR Faux Color

The Fuji X Pro 1 has turned out to be one of the best Infrared camera systems that I have ever used… period!  The only good Fuji lenses for Infrared have proved to be the 35mm f/1.4, the 18mm f/2 and the new 14mm.  The Viogtlander 75mm f/1.8 has also proved to be a STUNNING lens also!  So, the camera has proven its infrared capability, now it is time to discuss in detail the recipe for post processing!  It is all quite simple but there are a few requirements that you must understand in order to follow my workflow with understanding.

Needed:

  • Photoshop CS5 or CS6
  • Nik Filters, Viveza, Define Silver EFX Pro plugins for Photoshop, NOT LIGHTROOM.  (You can now purchase the entire library of Nik filters for $149)
  • Kromography False Color Action which can be downloaded here from the right menu bar under the box menu.  You can simply  click on it to download to your computer then drag it to photoshop to install.
  • A converted Infrared camera system capable of generating enough color data to make Faux Color images.  This means 720nm, 665nm, 630nm and 590nm conversions.
  • The ability and desire to experiment!

As you move your RAW (shoot only RAW for IR because of the ability to shift the white balance easily) onto your computer you should automatically tell yourself that you are going to process each selected image in Faux color and B&W.  Sometimes you will notice that the un processed image looks great also (wonderful bronze tones) and decide to do a version like this as well!

Lets talk about the RAW conversion process a little bit.  Photoshops ACR built in RAW converter will NOT apply the white balance correctly and your images will appear deep red.  For this reason I use Capture One version 7 from Phase One.  It is simply the BEST RAW converter that I have ever used.  You can download a trial version and decide for yourself if what I am telling you is true!

My Initial Editing Steps:

  1. Move images from my camera to my computer with an intelligent download tool that renames them with a meaningful name and create an intelligent directory tree for my RAW Library.  For this I have tested dozens of tools and found that Ingestimatic is the best and lowest cost one out there! You can find them here.
  2. Visually edit the RAW files by deleting the images that are simply no good.  Do not clutter up your computer with these useless files.
  3. Batch process my RAW conversion choices and adjust the exposure, contrast and angles.  Capture One will allow this and place the converted image files into a storage directory for later editing.
  4. Within Photoshop, open  each converted image one at a time for post processing
  5. Run Nik Define 2.0 in its default mode on the image for noise reduction, Save.
  6. Run Nik Viveza and without using any selection points increase the structure around 10% and the contrast about 5%, Save.
  7. Having installed the channel swap action that you downloaded here, run it on your image.  The last thing it will do is to open a Hue/Saturation window with the Master channel selected.  Simply select the CYAN channel  and vary the HUE a little bit to bring the sky to a normal blue rather than a blue/green.  Then select the RED channel and adjust the saturation up to a value you like, and repeat with the YELLOW and MAGENTA channels.  When you are happy with the results click on DONE to move on.  REMEMBER:  This is to only get the colors of the FAUX COLOR IR image into the ball park!  The real adjustment will happen next.
  8. Run Nik Viveza again.  Here is where you will use your control points to slightly adjust the colors and contrasts of various image elements to bring out a stunning, etherial work of art!  LOOK closely at your image, decide what you wish to adjust (Hue, saturation, contrasts and de-saturation). MORE ON THIS LATER!
  9. Run Nik Define one more time.
  10. Flatten the image, crop to taste, correct any imperfections (healing tool and content aware fill).
  11. Save the image with a meaningful name in a planned and thought out master image library.
  12. With the finished Faux Color image still open in Photoshop, now run Nik Silver EFX Pro to do your B&W conversion.  There are several built in recipes in this filter that can be used as a starting point.  My favorites are:
  • High Structure Harsh
  • High Structure Smooth
  • Full Dynamic Range Harsh
  • Full Dynamic Range Smooth
  • Fine Art Process
  • Wet Rocks (once in a while)

Save your image again with a NEW file name that reflects the difference in your master image library tree!

Murrells Inlet Salt Marsh, X Pro 1 720nm IR

Murrells Inlet Salt Marsh, X Pro 1 720nm IR

Remember:  Process ALL IMAGES as both Faux Color and B&W.  You really do not know what you are going to get till you do so.

All of this really is VERY SIMPLE and once you have done it a few times it will become second nature to you.  Soon you will be a post processing Infrared God or Goddess!  Congratulations

No, let’s take a look at the image below.  Notice the areas that I have circled as places where I desire to change the colors, contrasts and saturations (both plus and minus). Also consider that this is a 720nm converted camera and as such has a very limited color range (light pinks and warm tones and blues).

Annotated Faux Color, X Pro 1 720nm IR

Annotated Faux Color, X Pro 1 720nm IR

It is in this area and others like them (similar color values that are the same) that we are going to place control points on and change these values!  If you notice that the areas around them also change a little you can place what we call anchor points which are simply control points with no adjustments to bring those areas back to where you wanted them!

You will find this ENTIRE process from the initial loading into photoshop to finish will just take 4 or 5 minutes or less as you become more practiced!

Here are a few more images for you to consider that were taken on the 720nm Fuji X Pro 1 camera system:

Stormy Seas Faux Color, X Pro 1 720nm IR

Stormy Seas Faux Color, X Pro 1 720nm IR

Stormy Seas B&W, X Pro 1 720nm IR

Stormy Seas B&W, X Pro 1 720nm IR

Sometimes Faux Color images simply do not work, then you still have the great B&W ones to work with!

SC School Bus Boat, X Pro 1 720nm IR

SC School Bus Boat, X Pro 1 720nm IR

SC School Bus Boat, X Pro 1 720nm IR

SC School Bus Boat, X Pro 1 720nm IR

Was this information helpful?  Please let me know one way or the other!

Wabi/Sabi: Exploring decay in man made objects


All things Old are Beautiful again..

This morning at 9:30 at Georgetown, SC. I decided to get out my cameras and shoot some Shrimp Boat images before I had to open a Co-Op gallery that I am a partial owner of.  The Shrimp  Boats are a subject that are very dear to me and I visit them every chance that I have.

They are for the most part all falling into decay.  The market for local salt water shrimp is almost not enough to support the boats.  With the import of fresh water farm shrimp the local fisherman are being forced out of business and the result is the condition of the boat and companies… A very sad state of affairs.

The Boat Graveyard and the 3 Wheel Houses...

The Boat Graveyard and the 3 Wheel Houses…

The image above illustrates the wabi-sabi concept:  There is beauty in decay  It sounds very counter to the way we think as artists, but with a little thought I think that you will be able to agree with the concept.

Wabi-Sabi

The Japanese concept of Wabi-Sabi, as described in Brainpickings, “connotes a way of living that finds beauty in imperfection and accepts the natural cycle of growth and decay.”

Characteristics of the wabi-sabi aesthetic include asymmetry, asperity (roughness or irregularity), simplicity, economy, austerity, modesty, intimacy and appreciation of the ingenuous integrity of natural objects and processes.
From an engineering or design point of view, “wabi” may be interpreted as the imperfect quality of any object, due to inevitable limitations in design and construction/manufacture especially with respect to unpredictable or changing usage conditions; then “sabi” could be interpreted as the aspect of imperfect reliability, or limited mortality of any object, hence the etymological connection with the Japanese word sabi, to rust.[citation needed]The Japanese kanji characters:


(sabi, meaning rust)

and


(sabi, as above)

are different, as are their applied meanings, yet the original word (pre-kanji, yamato-kotoba) is believed to be one and the same.
“Wabi-sabi is the most conspicuous and characteristic feature of traditional Japanese beauty and it occupies roughly the same position in the Japanese pantheon of aesthetic values as do the Greek ideals of beauty and perfection in the West.”  “if an object or expression can bring about, within us, a sense of serene melancholy and a spiritual longing, then that object could be said to be wabi-sabi.” “[Wabi-sabi] nurtures all that is authentic by acknowledging three simple realities: nothing lasts, nothing is finished, and nothing is perfect.”
The words wabi and sabi do not translate easily. Wabi originally referred to the loneliness of living in nature, remote from society; sabi meant “chill”, “lean” or “withered”. Around the 14th century these meanings began to change, taking on more positive connotations.[1] Wabi now connotes rustic simplicity, freshness or quietness, and can be applied to both natural and human-made objects, or understated elegance. It can also refer to quirks and anomalies arising from the process of construction, which add uniqueness and elegance to the object. Sabi is beauty or serenity that comes with age, when the life of the object and its impermanence are evidenced in its patina and wear, or in any visible repairs.

For me and what I consider to be “Fine Art Photography”, the concept of Wabi-Sabi fits like a glove in regards to the shrimp fleets.  I watch them over the span of time, capturing them again and again.  The one thing that stands out above all is the fact that they like everything else will fall into decay… both physically and financially, but faster.

The 3 Wheel Houses in B&W. Stepping back into an older time of photography, fitting don't you think?

The 3 Wheel Houses in B&W. Stepping back into an older time of photography, fitting don’t you think?

I am going to dedicate a photography project to this concept.  I would think that it will take me several years to finish or perhaps unto my death which in a strange twist of logic fits into the project/concept quite well.

So I hope that you enjoy these images and that you intellectually chew on the concept of Wabi-Sabi and to how it will fit into your own artistic visions….

Normally, detailed closeups would be better suited for wabi/sabi studies, but look at these following 2 images and notice how the rust and corrosion feed into the concept.  Do you see the detail in the flat areas of the boat and how it is rolling and pitted?  These imperfections take on an artistic perfection on their own!

Stormy Seas, Georgetown, SC.

Stormy Seas, Georgetown, SC.

B&W, stepping back into an "older" time and place.

B&W, stepping back into an “older” time and place.

The Wheel House Door

The Wheel House Door

The Working Boat, 630nm Infrared

The Working Boat, 630nm Infrared

The Battered Bow...

The Battered Bow…

I hope that you enjoyed the image and the concept…

A day in Georgetown with the Fuji X-E1


Travel and the Fuji X Series, a match made in Heaven!

1 camera, 3 lenses and a good filter system and we are good to go!

Voigtlander Heliar 75mm f/1.8 Lens

Voigtlander Heliar 75mm f/1.8

I spent last Sunday in Georgetown, SC.  I had a gallery change out in a gallery that I am a member of (Co-Op).  The change out only took about an hour so I decided to take the rest of the day to scout new locations and just shoot!

There are several places there that I love to visit.  As you drive North on Front Street out of the Down Town area you start passing several side streets on the right.  Each of these leads to a marina with several Shrimp Boats (and in 1 case many!).  I like walking around the docks and working each group of boats then moving in closer and doing detail images. These vessels are not long to be with us so if you have the chance to visit and photograph them you should youmake it a priority to do so!

The 3 Shrimpers!

The 3 Shrimpers!

The choice between Color and B&W is a tough one for most photographers.  For me, I like B&W much better but I will porcess both for each and every image that I take.  So I will have the choice as to what I eventually use readily on hand!

Sun in the rigging...

Sun in the rigging…

I do not normally shoot intentional lens flair but for this image I composed the image with it in mind! This generated such a perfect series of light beams that they were visible in front of the boats cabin door! Again, the choice between Color and B&W was a no brainer for me!

The 3 Bows...

The 3 Bows…

Voigtlander Heliar Ultra Wide-Angle 12mm f/5.6 Lens

Voigtlander Heliar Ultra Wide-Angle 12mm f/5.6 Lens

In the end I will still offer you a Color Shrimp Boat selection.  These boats are old, and full of color!  Rust, bright paints, bottom paint, lines and life rings can make for a bright and eye catching display if you present it properly with a composition that is pleasing.

At the very end of Front Street you will find several parks along the edge of Winyah Bay with pilings in the fore ground which make idle compositions for long exposures.  Plus there is a boat launch that you should walk out on and look north across a long line of pilings!

Lee Seven5 Filter System

Lee Seven5 Filter System

What fun I had!  I found some really great Shrimp Boat compositions and did some long exposures with the Fuji and the Voigtlander Heliar 75mm f/1.8 Lens with the new Lee Seven 5 filter system! Consider, that the Lee system is a bulky but light system (look at the image to the left), when you add in the camera and lens the entire combination can become bulky and heavy making it difficult to use.  I also used the Voigtlander Ultra Wide-Heliar 12mm f/5.6 Aspherical and the Fuji M to X adapter for several of these Shrimp  Boat images.

This is the main reason that I switched to the Fuji X system (aside from the fact that it generates stunning images!

Ok, as the day go away from me I went further North to the parks looking at long exposure locations for sunset.  After looking at all of the locations there I decided to set up at the boat launch and setup looking to the North across the pilings there.  The sun was setting fast and I setup using the 75mm f/1.8  and the Lee Seven 5 system with a solid 3 stop ND and a soft Graduated ND to darken the sky. The result was this 90 second exposure:

Boat Launch Pilings, Deep Twilight

Boat Launch Pilings, Deep Twilight, 90 second exposure

With the sun totally gone and deep into twilight, I simply turned the camera 90 degrees to the right and looked at the industrial complex across the bay with great columns of smoke spewing into the sky!  I removed the 3 stop solid ND and kept the soft Graduated ND in place to further darken the sky. So the resulting image was a 240 second exposure and full of color, smooth water and blowing smoke:

240 second exposure, deep twilight.

240 second exposure, deep twilight.

Do you see how a light weight high quality camera/lens system like the Fuji works to our benefit when traveling and needing the ability to shoot in all conditions?  With the X-E1 system there is no limit to my shooting styles including Lightning, Water Drops and Long Exposures.

Please let me know what you think!