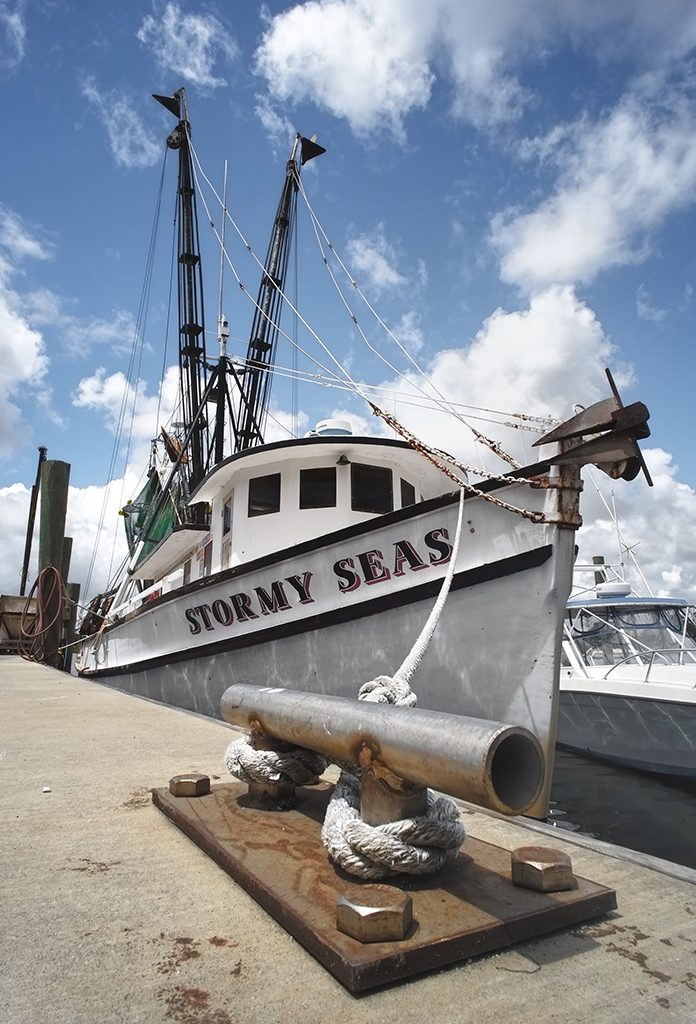
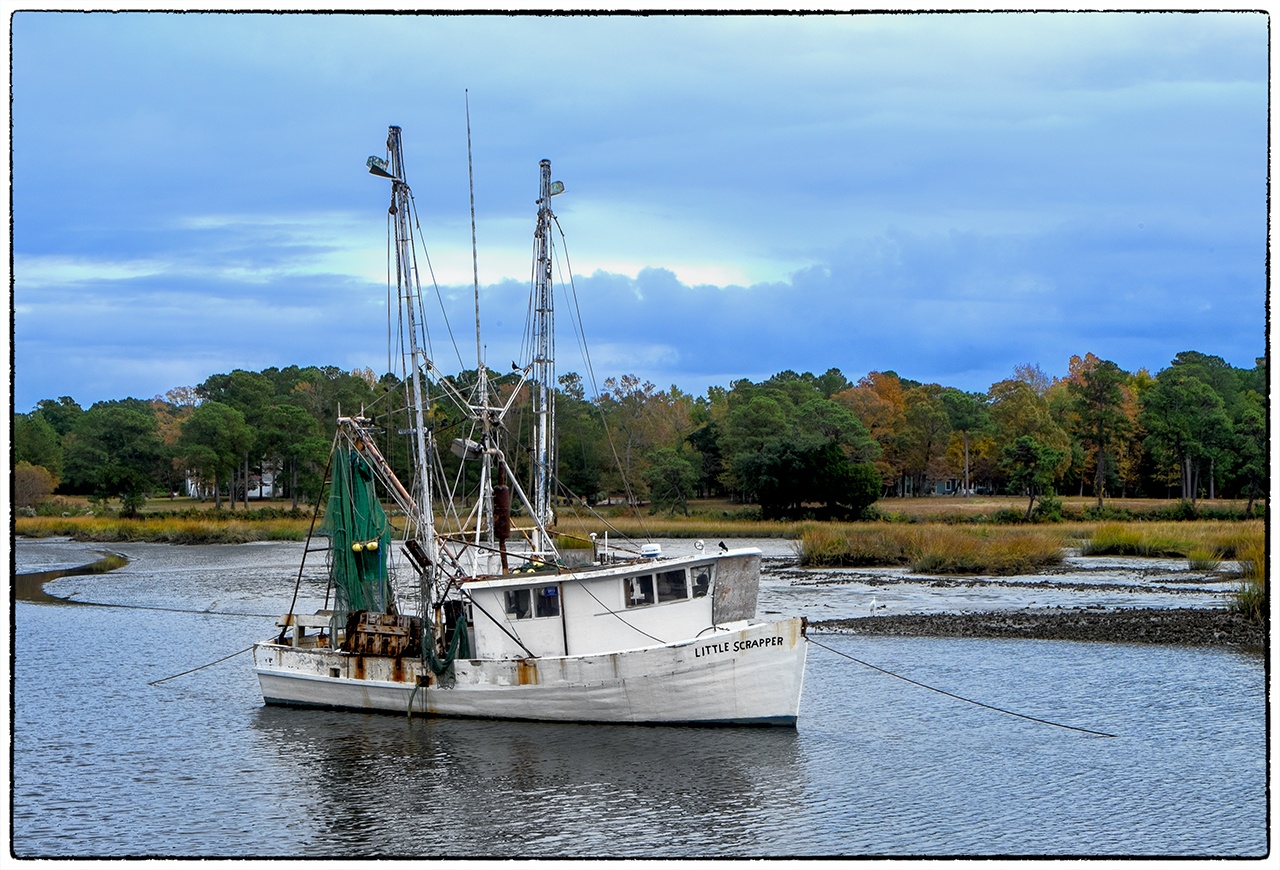
Ahhh… It Feels So Good!

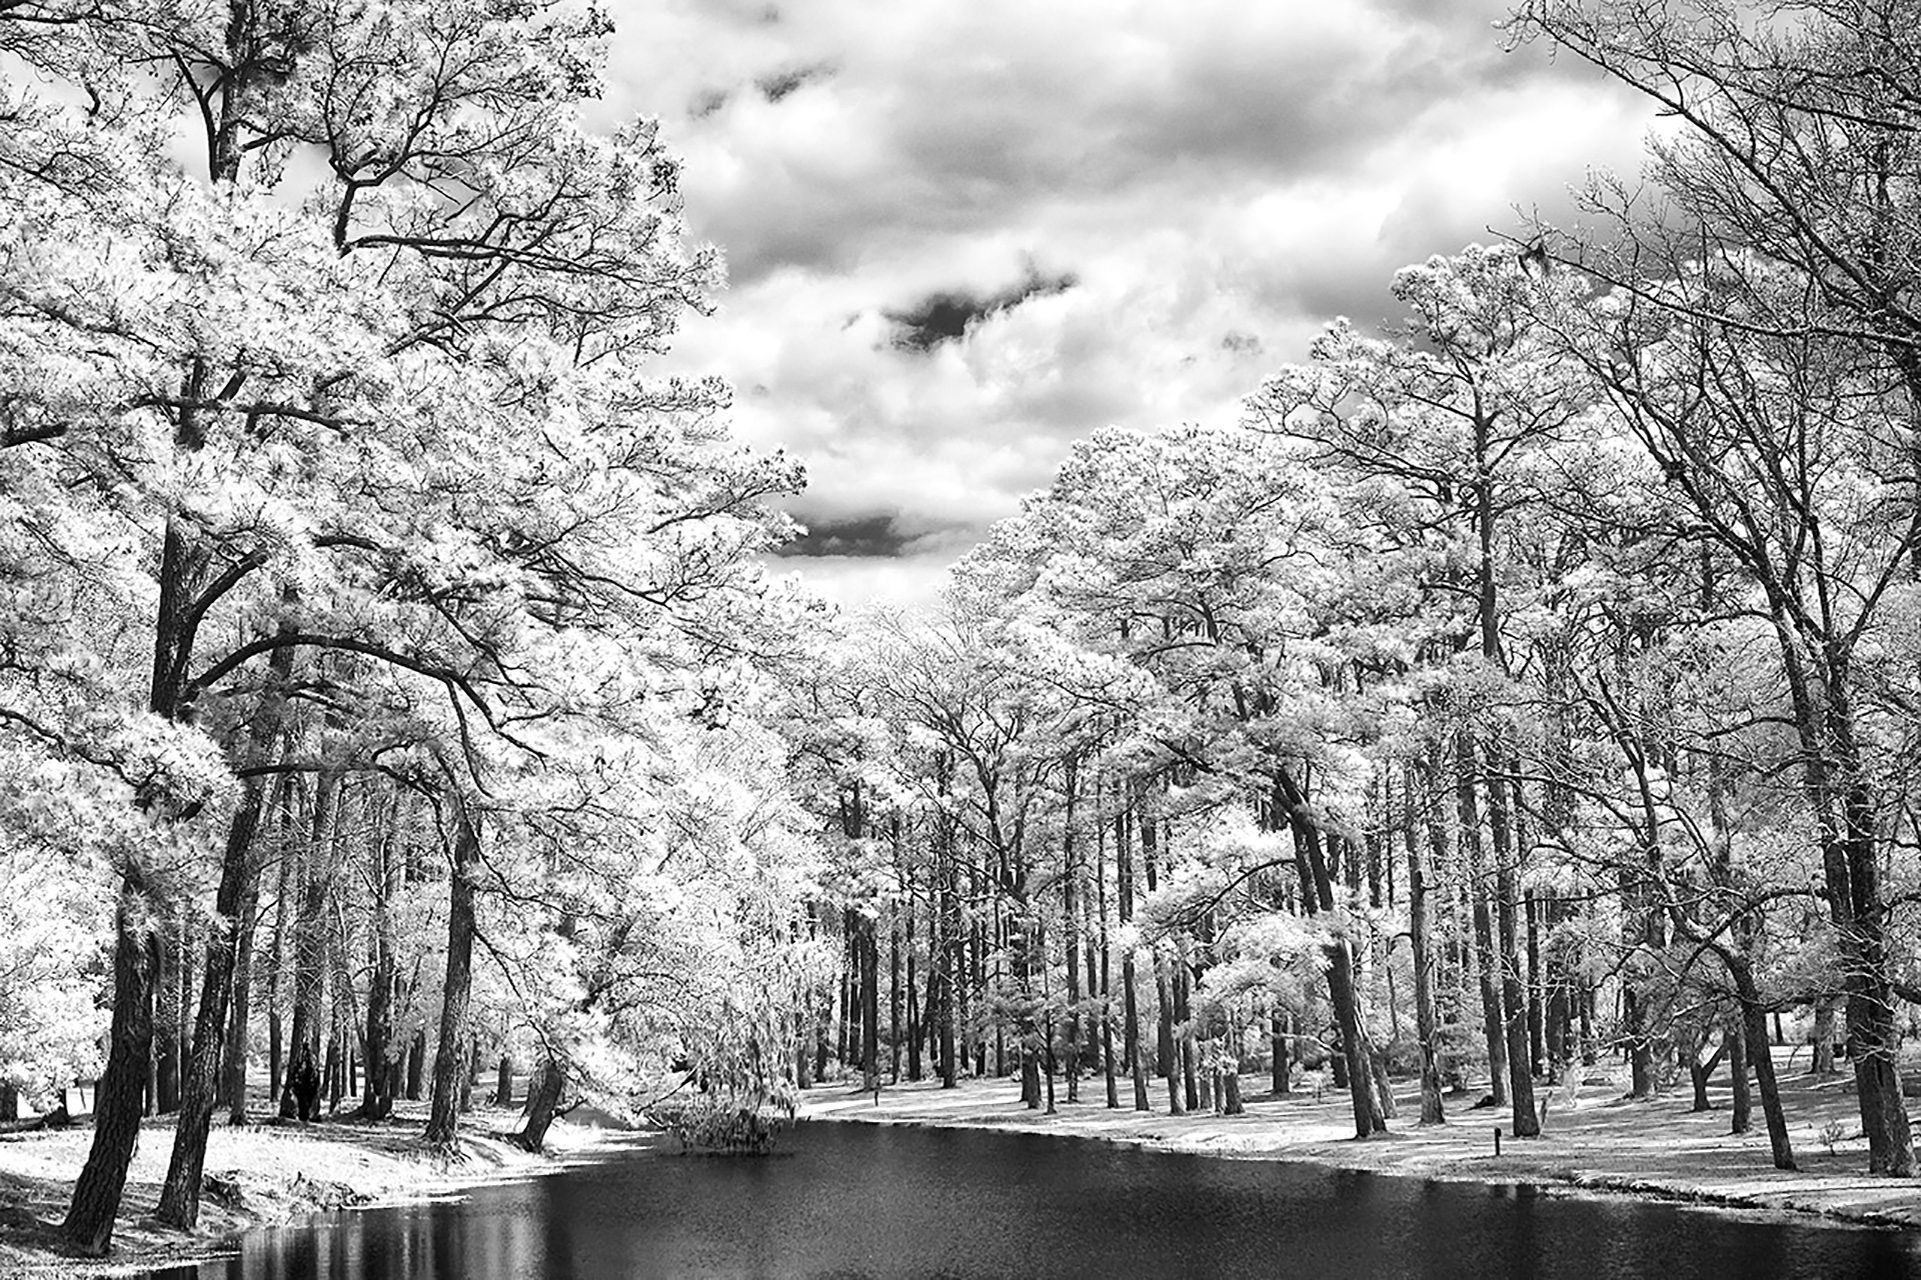
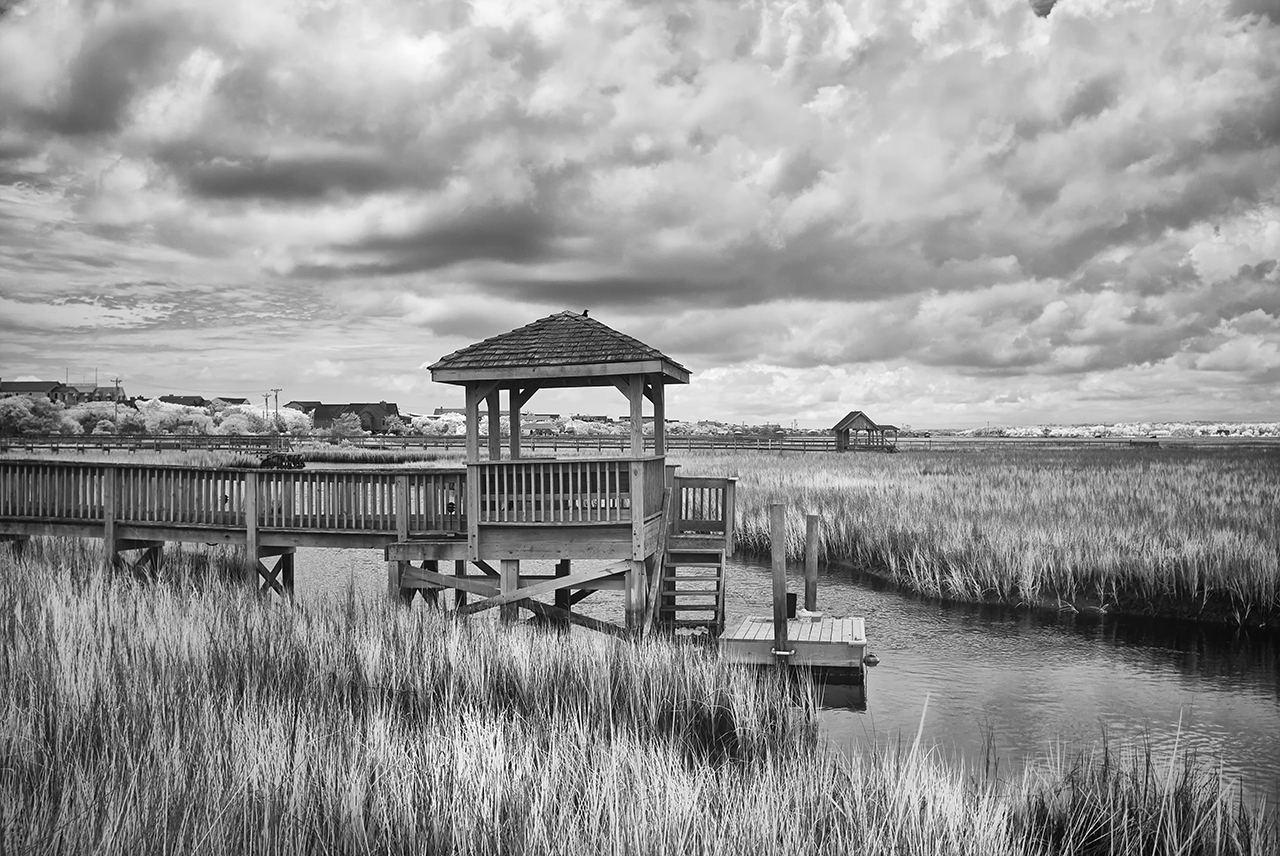
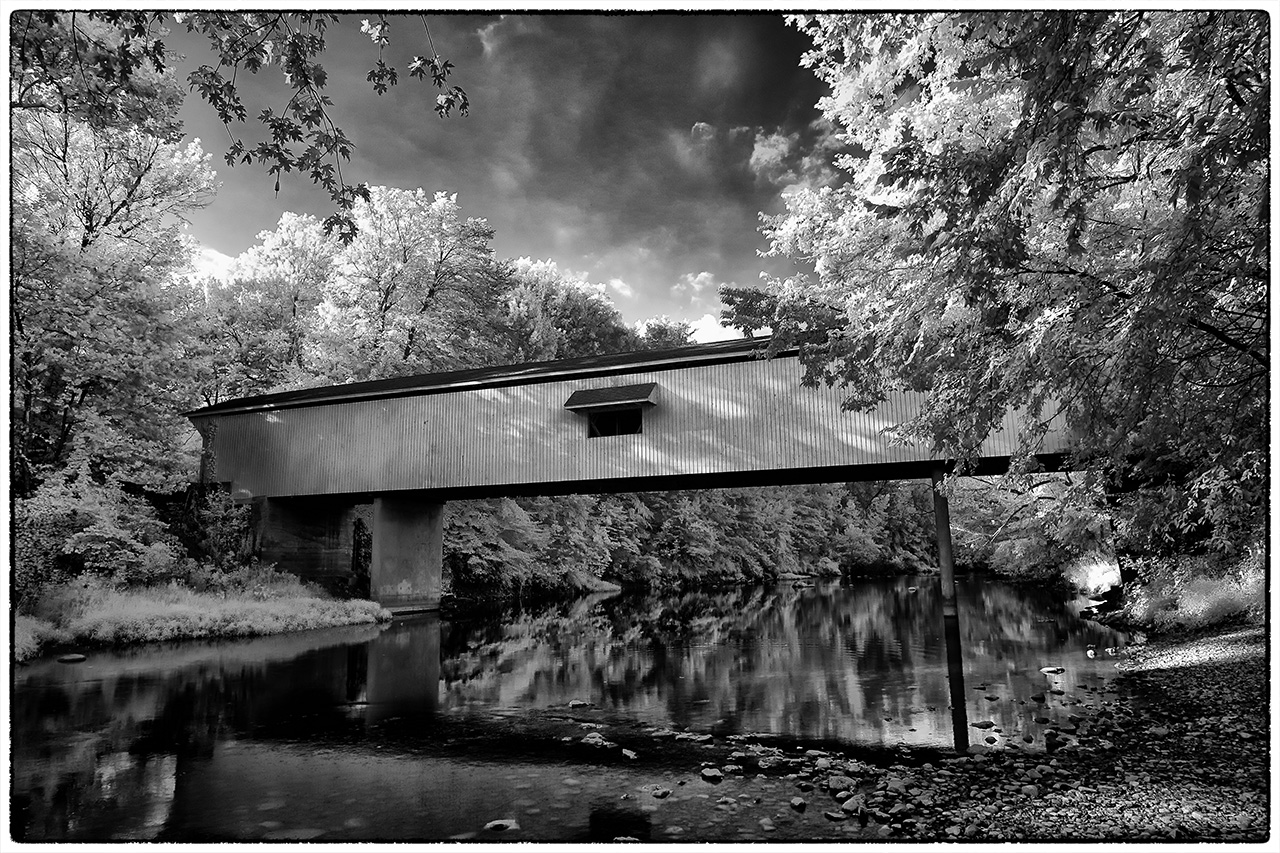
Spring in the South… Rollei IR400 Film – Leica M7 50mm Lux – Rodinal 1-50
Oh my, I do NOT know where it came from but I got the BUG again for more film photography! I have a cabinet here in the Gallery just full of old film cameras plus a Leica M7 film body that works with ALL OF MY M MOUNT LENSES! (see the last post HERE for more info on the lenses). I decided to purchase a new stock of several films:
- Kodak Tri-X 400, Ohh
- Eastman Double X 200, Ahh
- Rollei IR400 400, WOW!
- Kodak Tmax, Ho hum…
- Ilford HP5+ 400

Rodinal One Shot
I picked up some stainless 2 roll developing tanks with a bunch of Hewes (don’t skimp on your reels, buy the best!) Stainless Steel 35mm Reels. For developing I like Rodinal One Shot due to its ease of use and a life span of around 40 years. I simply mix it one tank at a time usually at a 1:50 ratio with water using a small syringe. It allows a very wide latitude of contrast and iso control. I have used several other developers but I keep coming back to Rodinal!
Now, I am playing with several cameras. As I said my main and BEST camera is my Leica M7. But here is a current list of those cameras I am using:
- Leica M7 with Leica & Voigtlander Lenses
- Petri 7s, 1962
- Olympus XA
- Olympus 35 RC
- Shen Hao 4×5 Field Camera (about 12 years old)

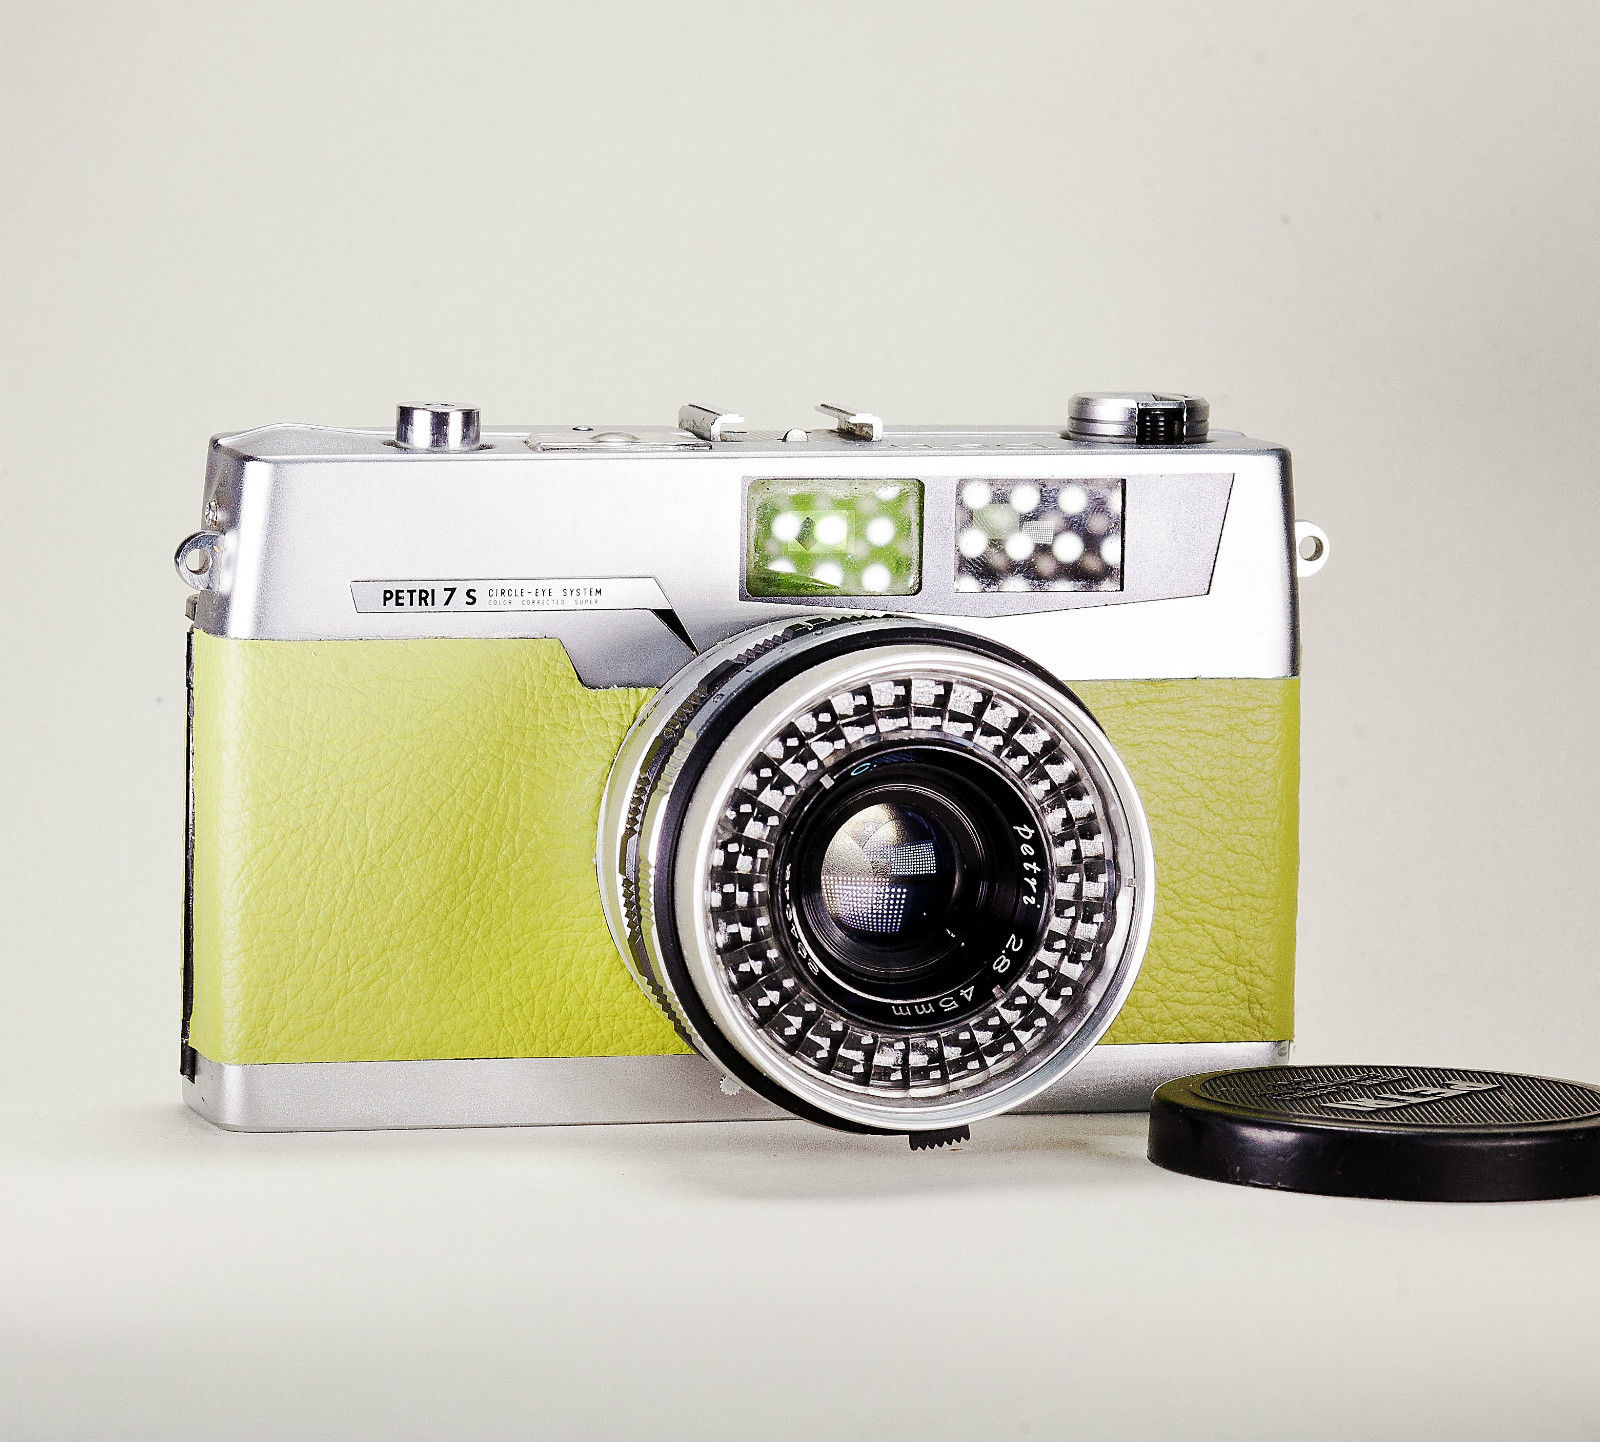
1962 Custom Petri 7s Film Body
The Petri 7S has been in my hands since 1962 and still shoots great ( I did send it off to have the light seals replaced and a new leather covering ). The Petri has no batteries but rather a solar cell around the lens that drives a needle exposure meter that you simply place into its center notch for a good image!
All of the cameras in my list above have proven reliable but with the Petri you get a link to the past, specifically MY past as this was my 2nd camera I owed when I was young!
The Olympus 35 RC is an amazing small rangefinder with very nice controls. It is smaller then the Petri 7s and actually has better control functionality. It does require a battery to run its metering system though which is a step down from the Petri 7S in my opinion. The nice thing other than the size is the fact that EVERYTHING is displayed inside of the viewfinder. Unlike a refurbished Petri 7S which can be found for around $100 used on Ebay, the Olympus 35 RC camera refurbished is demanding around $250! This is a big difference in price and tells you a lot about its quality and demand! I was lucky to find one from a collectors inventory that he sent off to be totally refurbished and re-skinned for much less than $200.00! For you film shooters out there on a budget this is the camera that I recommend if you find yourself desiring a rangefinder.

My Custom Olympus 35 RC
The Olympus XA was a 35mm rangefinder camera built by Olympus of Japan. It was one of the smallest rangefinder cameras ever made, together with the Contax T.

Olympus-XA
It was designed by Yoshihisa Maitani who had joined Olympus Optical Co Ltd in 1956. He was the chief camera designer and managing director of Olympus Optical Co Ltd., having developed a number of legendary cameras during his career. These included the Pen series, the OM series, the XA series, the IS series and the [mju:] series of cameras.
The original model, the XA, was sold from 1979 to 1985. The original XA features true rangefinder focusing, a fast 35mm f/2.8 lens, and aperture prioritymetering. The lens was protected by a sliding dust cover.
This is the smallest 35mm rangefinder ever made. It will fit in the palm of my hand and will make a great system to have with me everywhere I go!
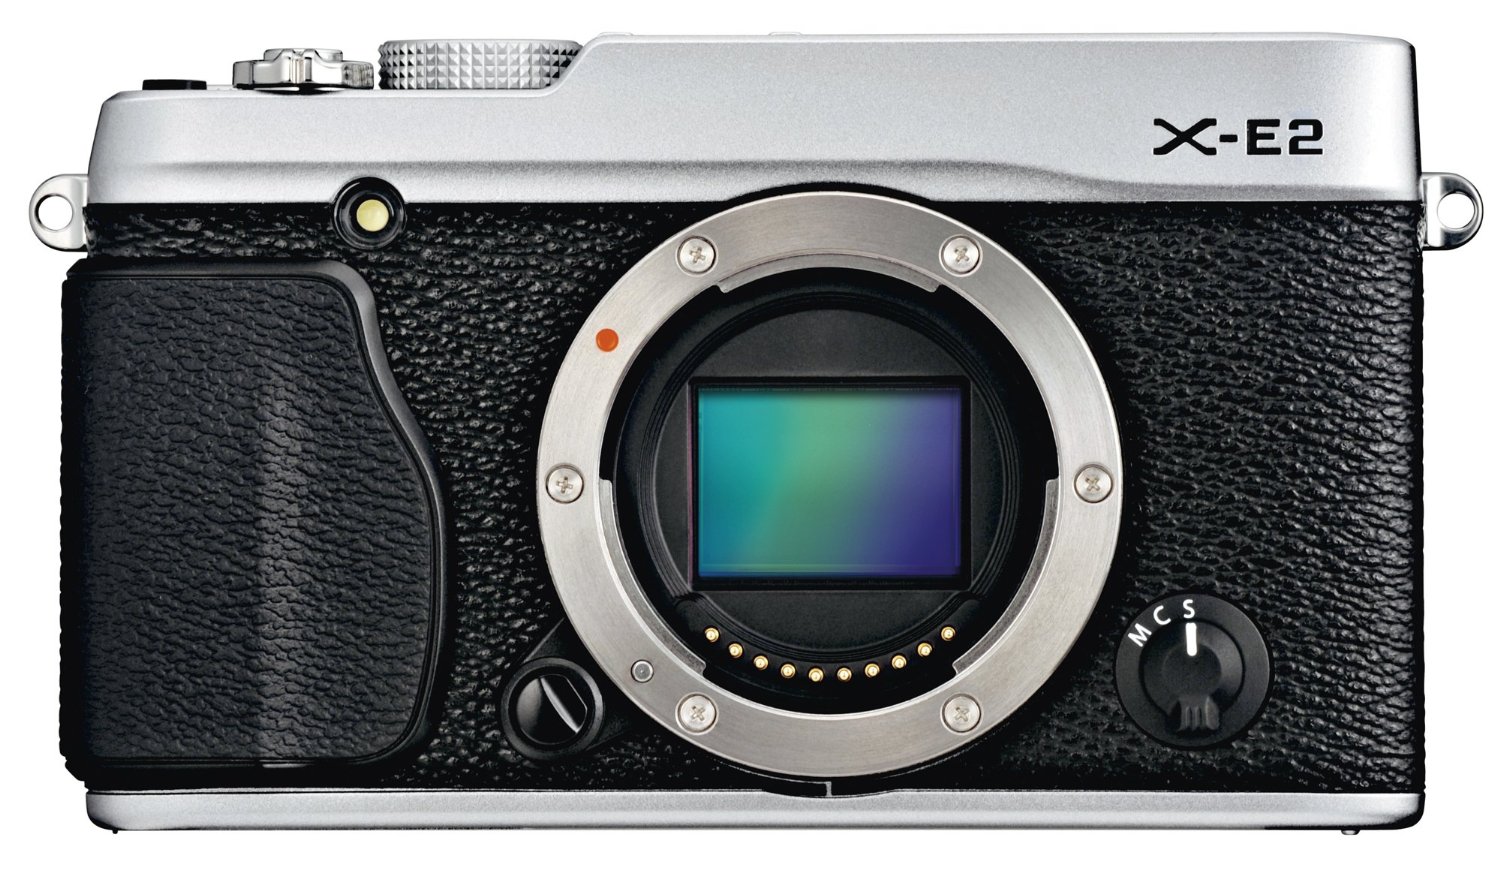
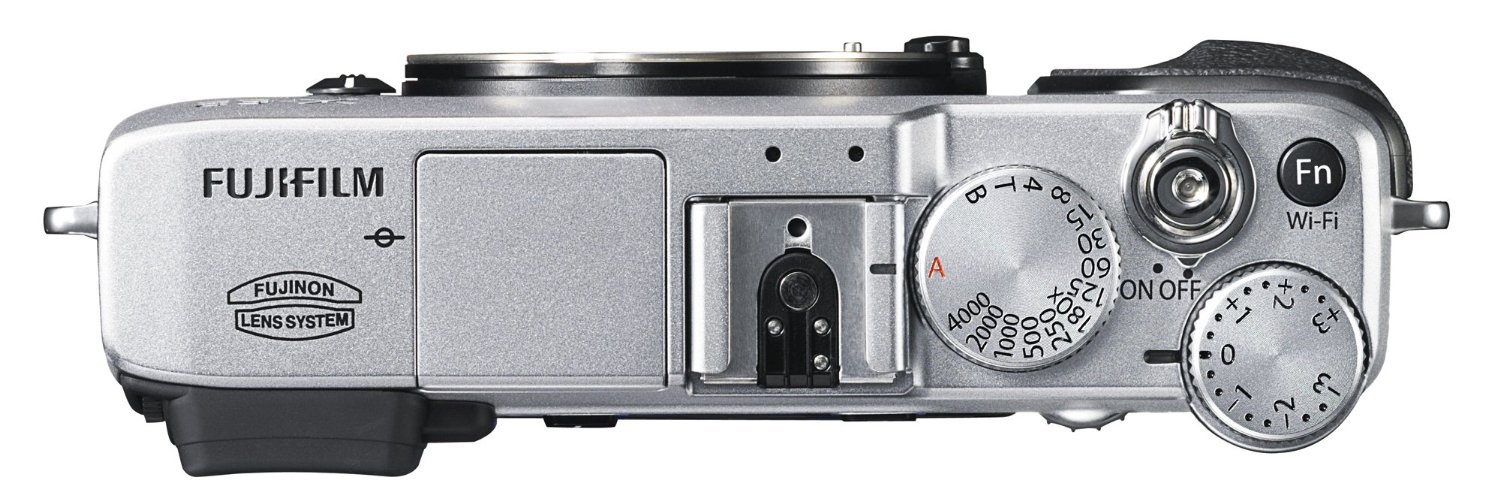
The Leica M7 uses batteries and sports a center weighted spot meter measured either off the film or off the shutter. I find that it meters very reliable. It is the top of the heap when it comes to 35mm film cameras. There are a lot of high end rangefinder cameras on the market but the Leica is the top. I really excels in the area of long exposures with either a count down timer in the viewfinder for images metered and controlled in the aperture priority mode or a count up timer for exposures done in the bulb mode. In bulb, it will count up to 16 min then stops counting for battery conservation, but will continue exposing until you release the remote shutter release. It will use NO battery power after the 16 min count up timer turns off until you release the shutter then it requires a pulse of electricity to close the shutter. NO other rangefinder can say this unless you use a pure mechanical camera like a Leica M2 which has no metering system at all.
The Leica M7 is surprisingly heavy but easy to handle. I keep reading about other high end rangefinder bodies out there but when you do the comparison of features I always come back to the M7.
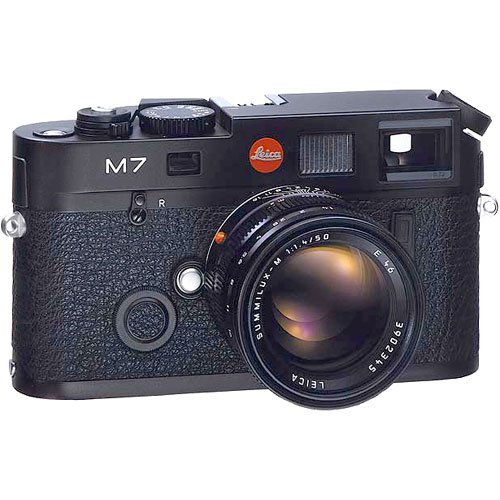
My Leica M7 Film Body
All of my cameras are fun to use and reliable. With the Leica M7 you get the world class glass but with the Petri 7S you get a link to the past, specifically MY past as this was my 2nd camera I owed when I was young! The Olympus 35 RC is an advanced rangefinder from the 1970 era and is slick and fun to shoot. You will see examples from these cameras towards the end of this post!
______________________________________________________
I usually develop my negatives on Sundays. I have a film drying cabinet that I use to dry the film without dust spots overnight. I then will scan the negatives on Monday or Tuesday using a Nikon 4000 ED film scanner at 4000 dpi into the DNG format for editing and cleaning later in the week. I usually shoot 2 or 3 rolls a week.

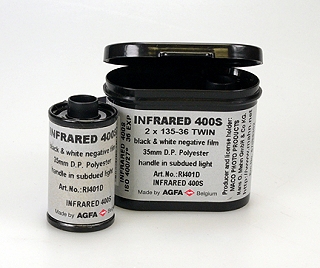
Rollei IR400 Film
My favorite film is Rollei IR400. This is available at the big camera stores like Digitaltruth, Freestyle and B&H. What makes this film so special is the fact that is very much like Kodak Tri-X 400 as shot. It has a VERY THIN film base which really makes scanning easy. BUT the most amazing thing about this film is that it is sensitive to INFRARED! If you place a Hoya R72 IR filter on the camera lens the film will record 720nm IR images! There is an ISO hit due to the filter being so dark down to 12 ISO but it is worth it being able to shoot in both normal B&W and IR B&W!
Next I like the Kodak Tri-X 400 film. It gives great contrasts and has a very wide latitude in development. It is well known and tested and for ultra long exposures.

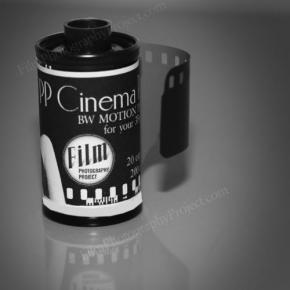
Eastman Double X 5222
Then comes Eastman Double X Cinema film. This is a GREAT B&W film that gives a very smooth gradation and lovely warm tonality with slightly increased contrasts. This is motion picture film so unless you are going to buy a 400 foot reel you will need to purchase it from the store at Film Photography Project. They will sell it in either 24 exposure rolls or a 100 foot bulk loader roll. It develops nicely in Rodinal at 1:60 for ISO 200 but there are ratios for 100 up to 800 ISO! This film is very much worth experimenting with.
I need to say a few words about the folks at Film Photography Project. They offer an amazing wide selection of films and old cameras! This includes Polaroid cameras and film also! Their Podcast is amazing and I find that it is so good that I now have it running all day while I am working at my gallery in Pawleys Island. Good Stuff, check them out here: Film Photography Project.
Whatever film you decide to use you will be pleased with the results. Processing is easy to do with a VERY small investment. You will need:
- Film Camera
- Film
- Chemestry: Developer, Stop (you can use water), Fixer and water bath with a Wetting Agent. $40 to get started
- Film drying hanger clips $3 for a bag of 2
- Film tank, either stainless steel or a Peterson. Peterson tank and reel is about $40
- Film tank reels (if stainless do not skimp on these). Hewes Steel are about $25 each
- Dark changing bag to move the film from the canister to the developing tank. $40
- You will also need some way to scan your film into a digital image or pay someone to do it for you.
That is it. It normally takes me about an hour to develop 2 rolls. I will let them dry for several hours then cut them into strips of 6 and put them into plastic storage sheets.
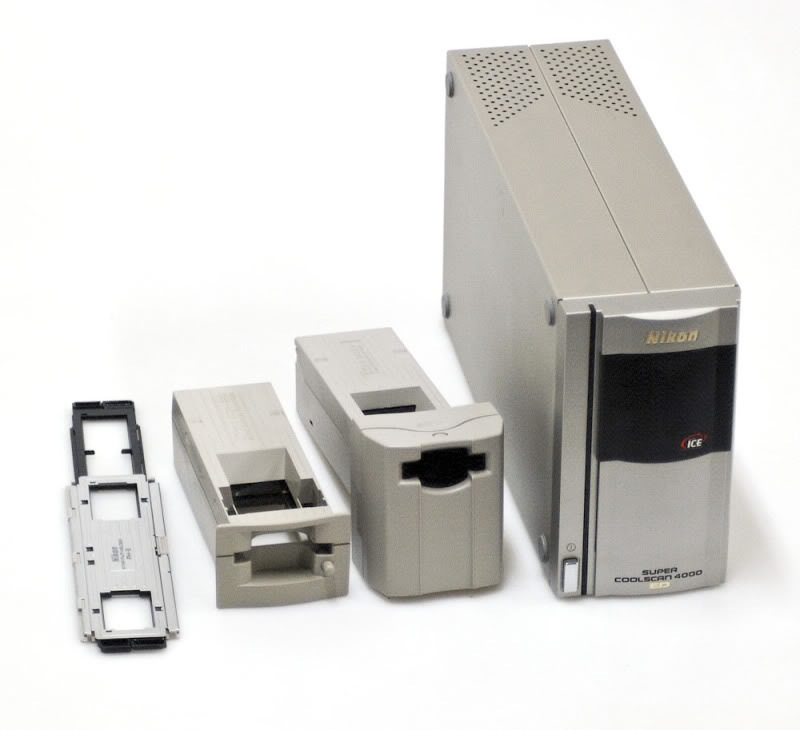
For scanning, as I said above, I use a Nikon 4000ED film scanner. As you can guess from the name it will scan at 4000 dpi and has a lot of adapters for different types of film scan feeders. It has slide auto feeders, single slide feeders, a 6 position film rail for troublesome film and an automatic roll feeder to scan entire rolls automatically. If you couple this with VIEWSCAN software you have an amazing scanning system that rivals those that pro labs use!

Nikon 4000 ED system
Ok, lets take a look at the results of 3 types of film in 2 cameras!

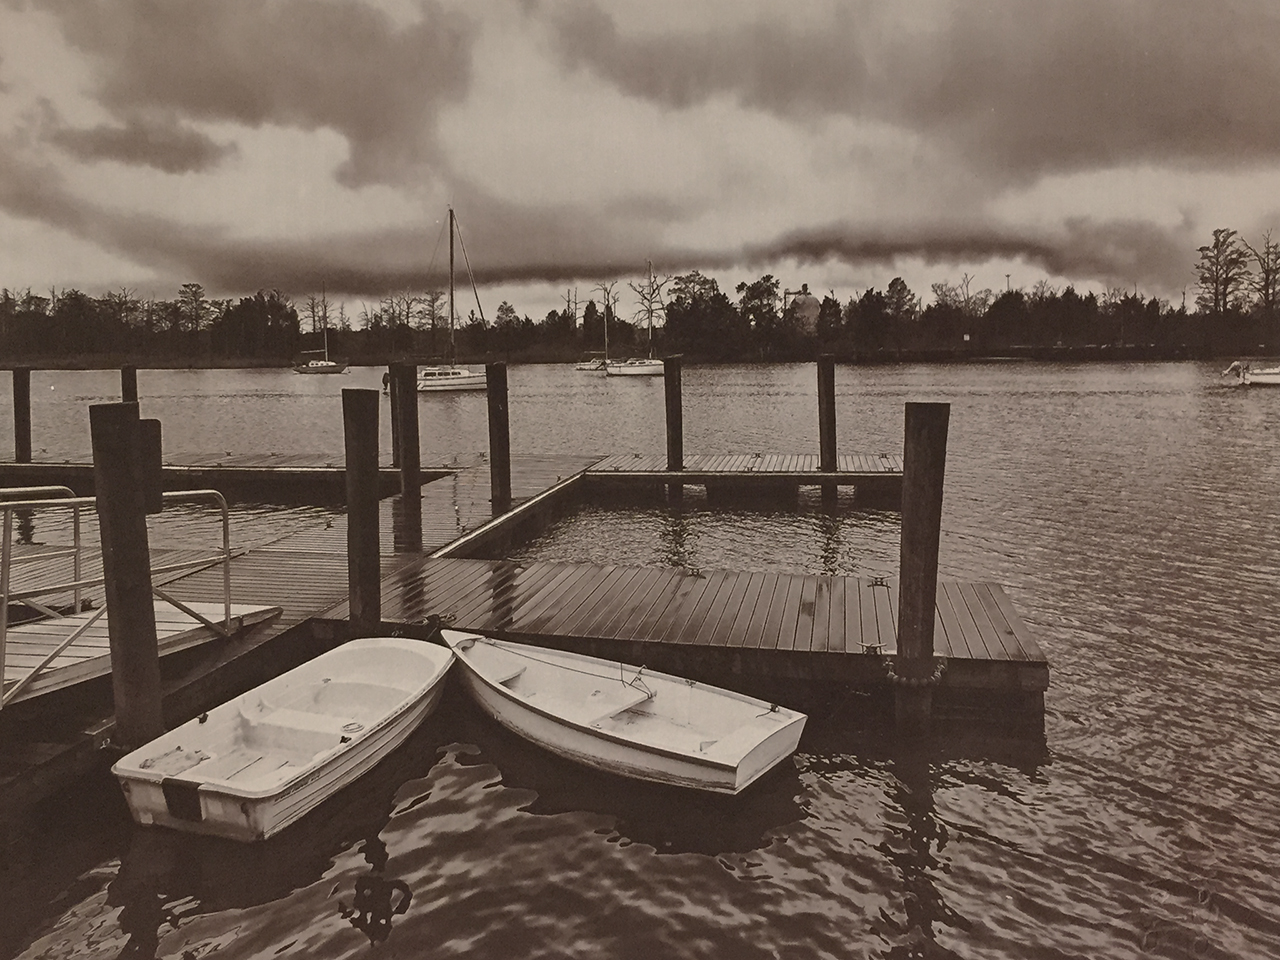
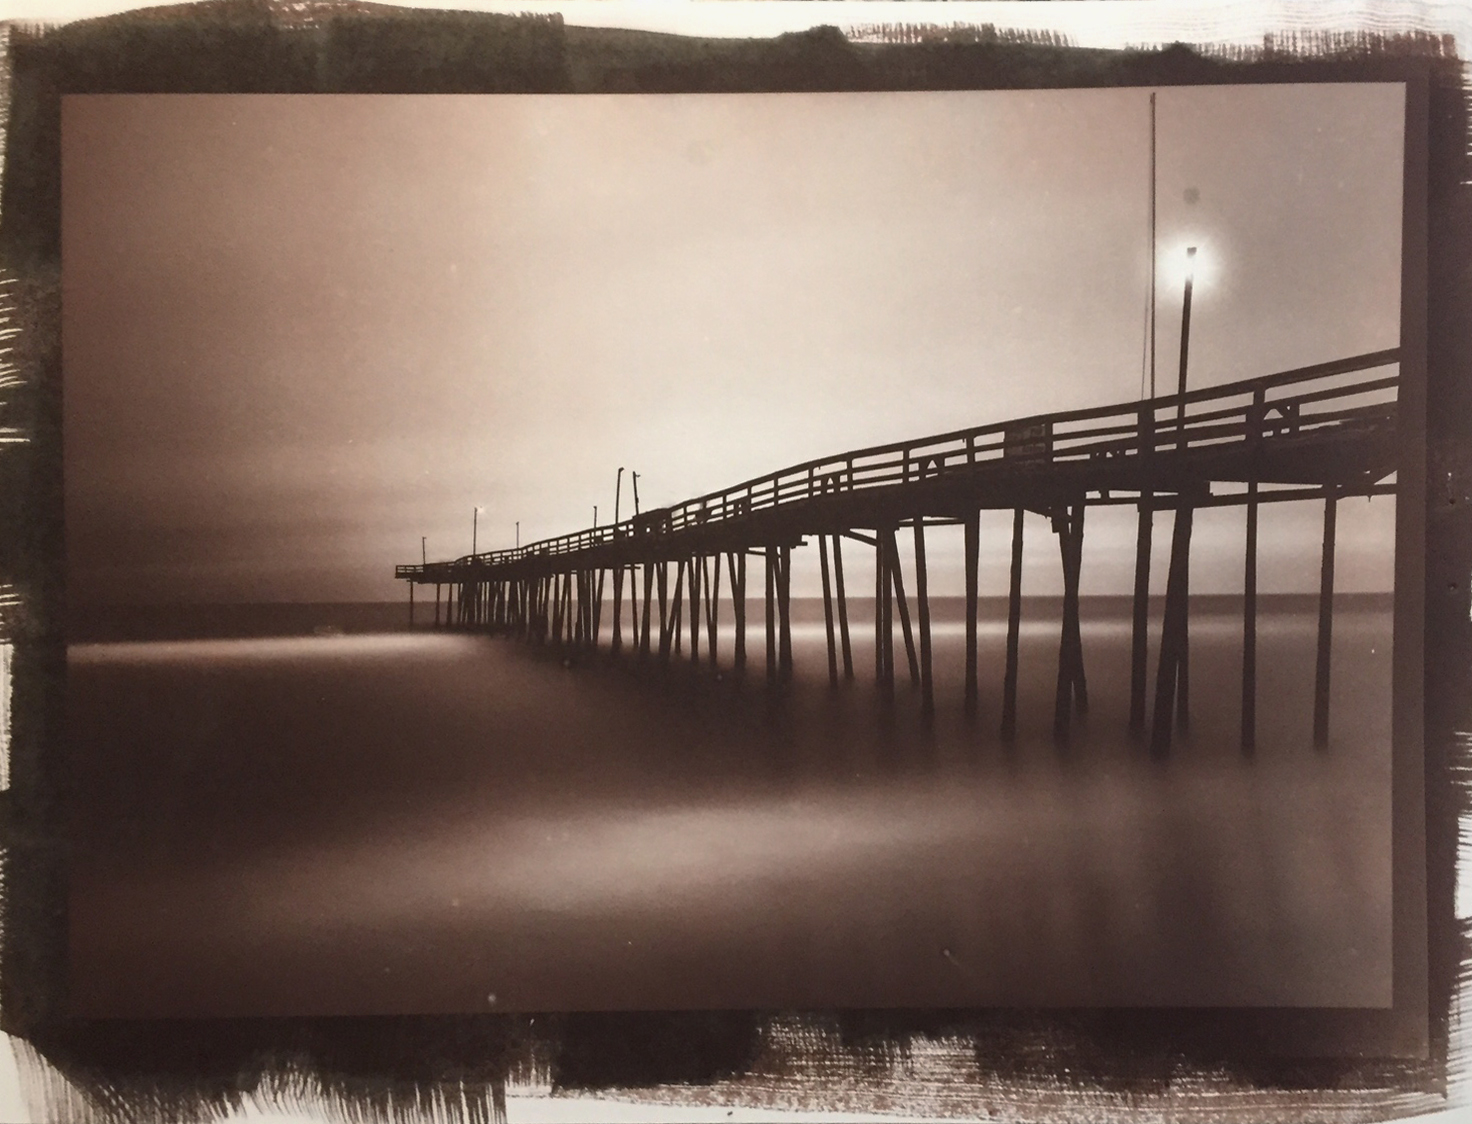
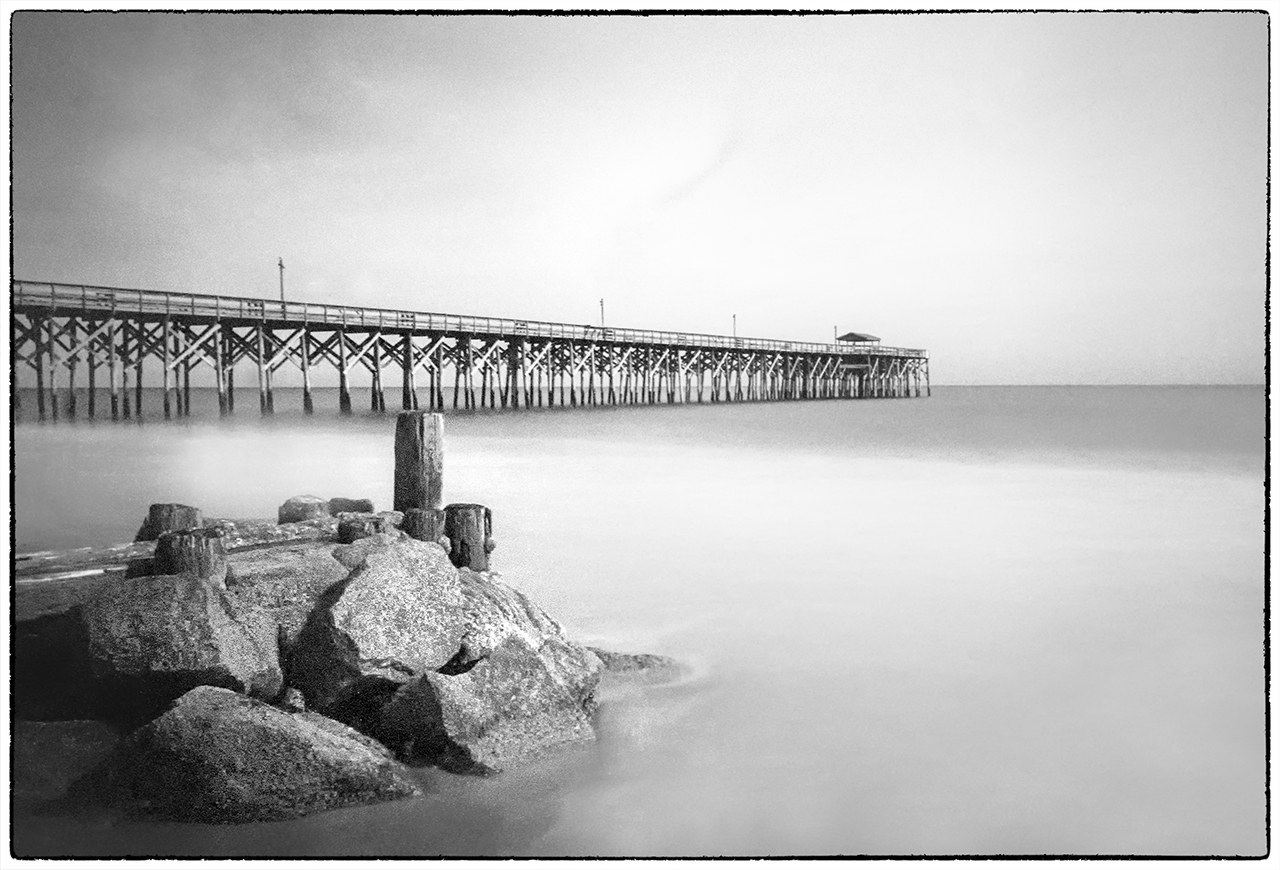
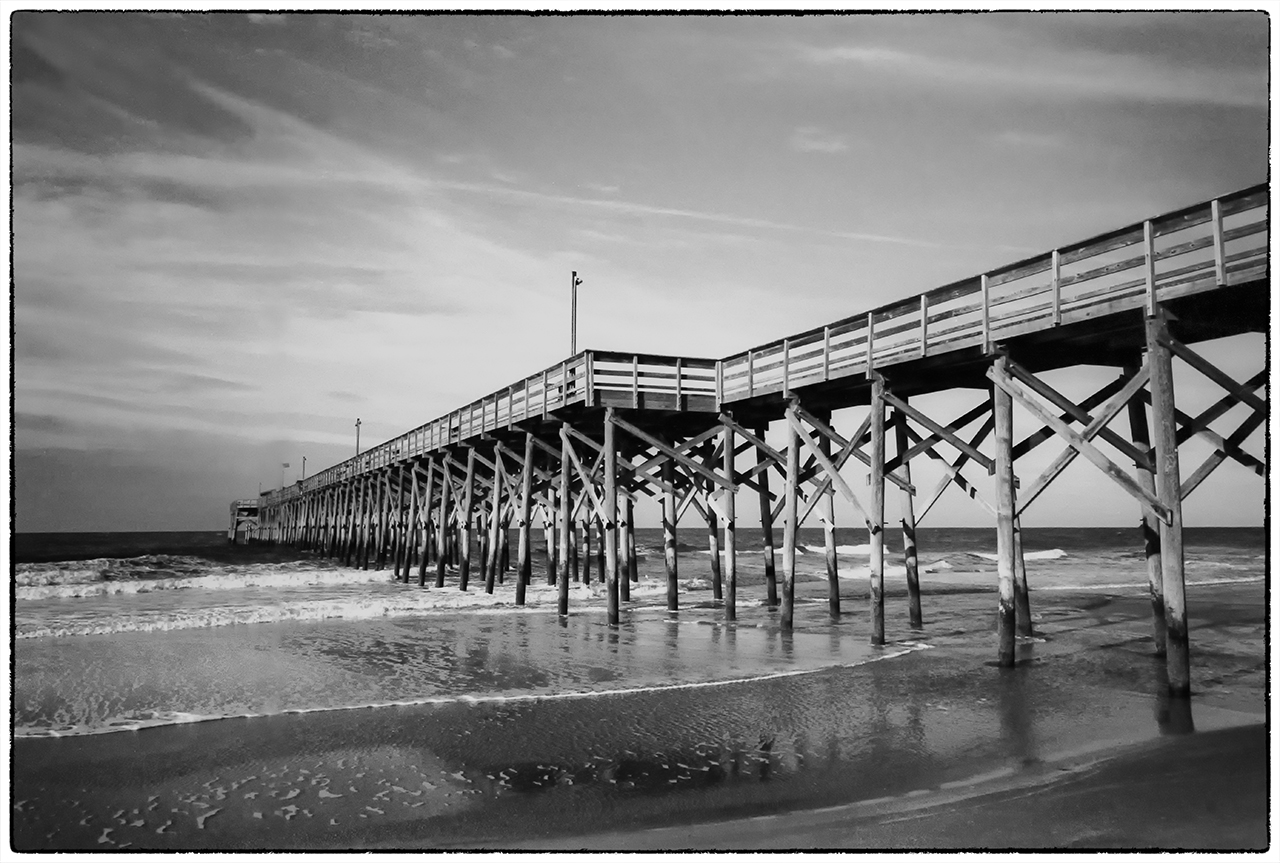
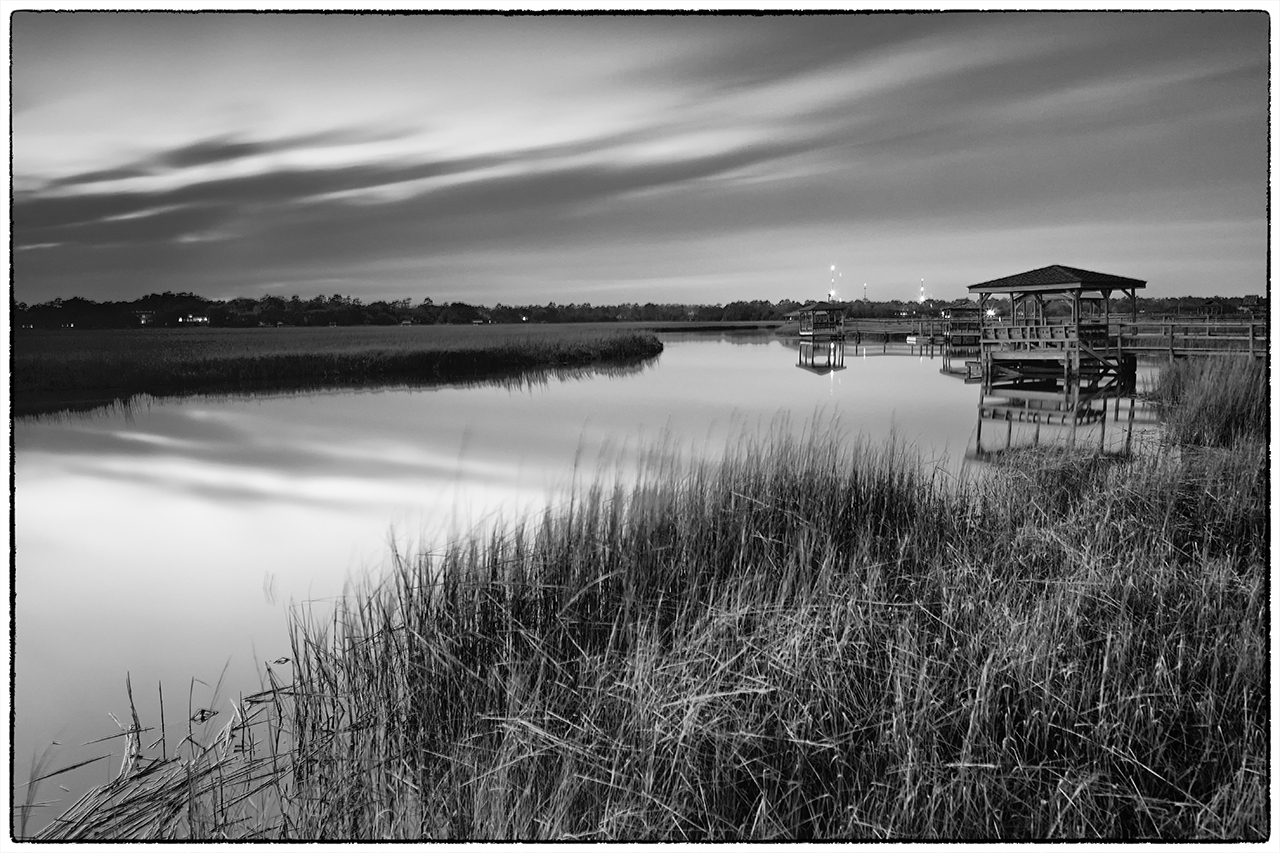
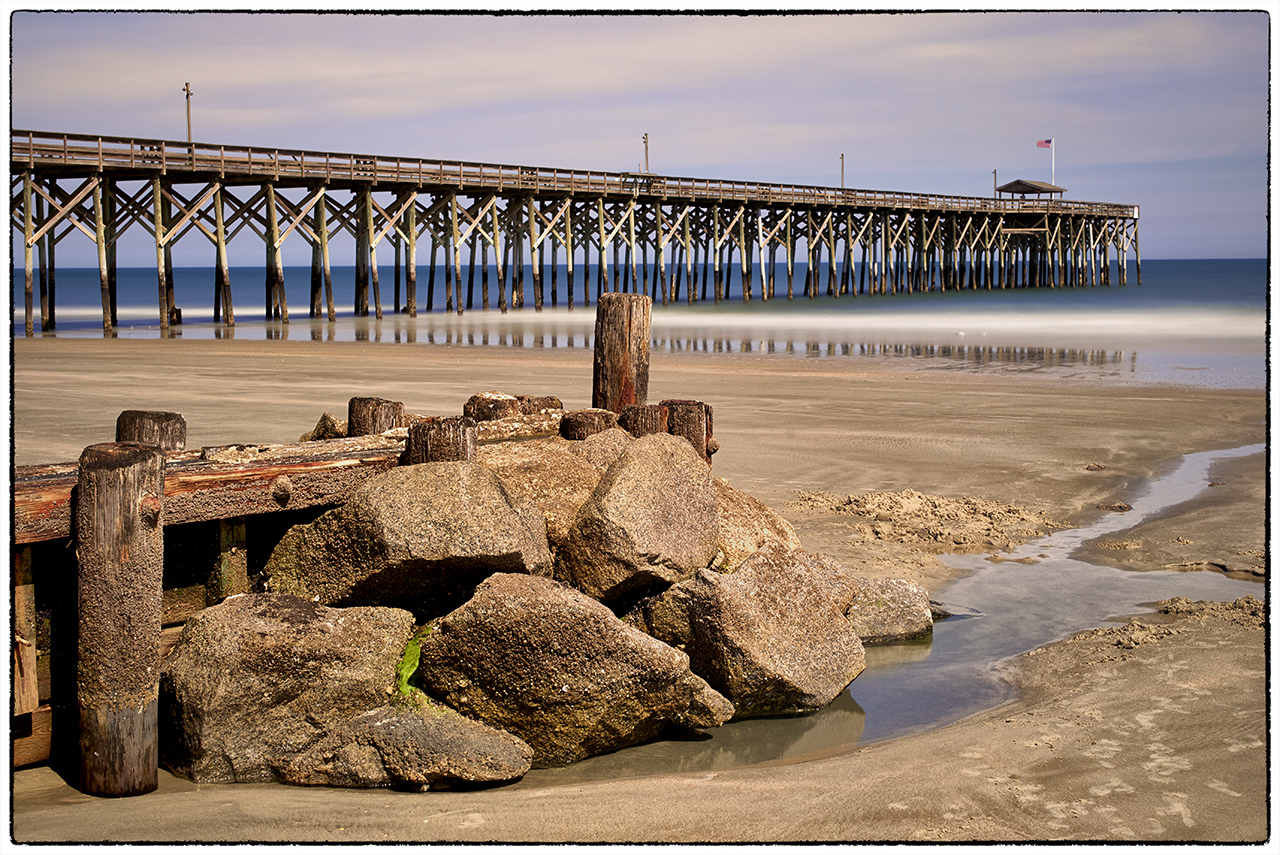
Pawleys Pier M7 Elmarit 28 Rollei IR400 film in Rodinal at 1:50 240 second exposure

1962 Petri 7S, Eastman Double X film in Rodinal at 1:60

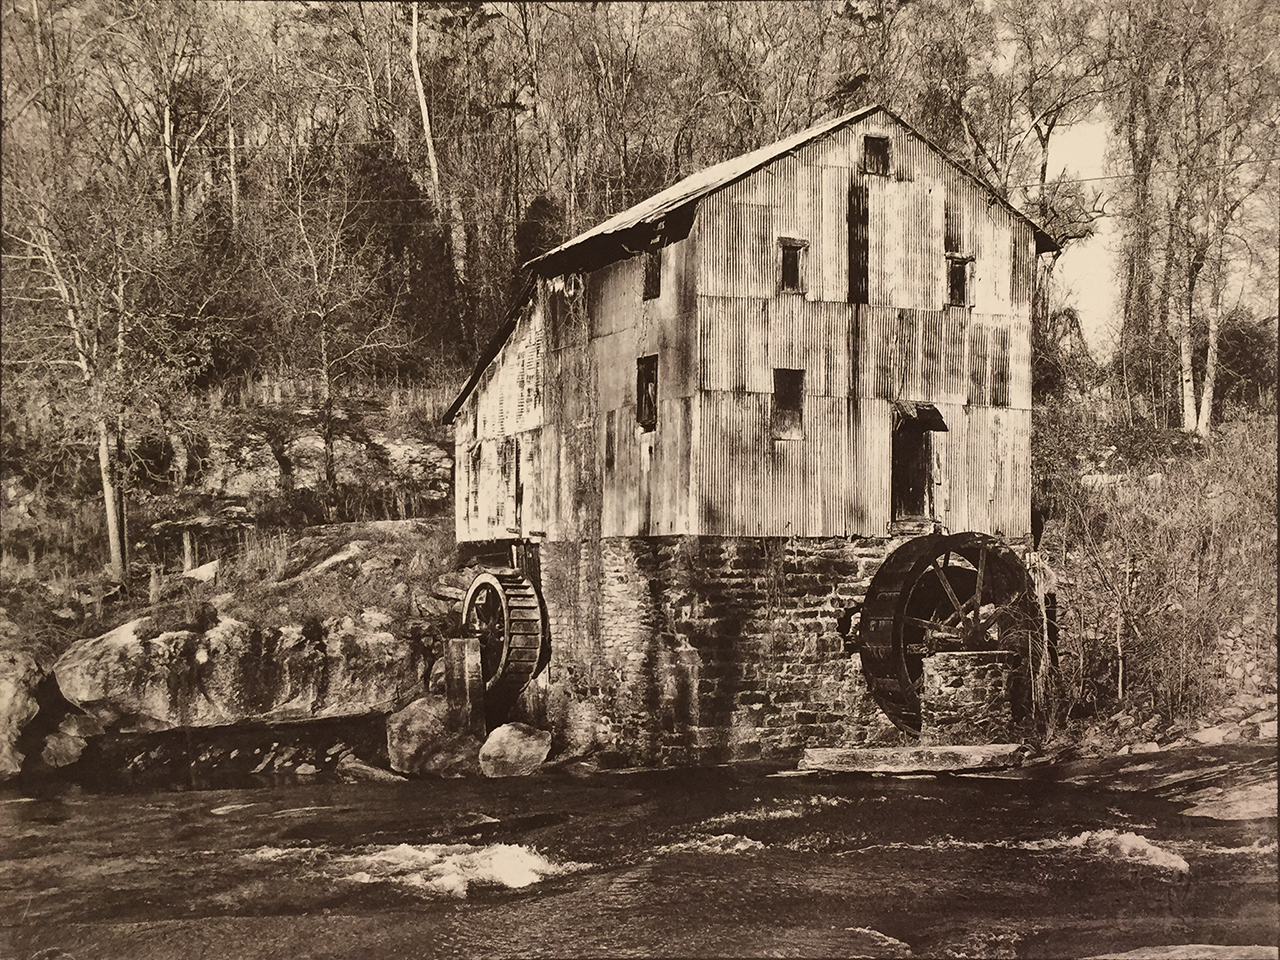
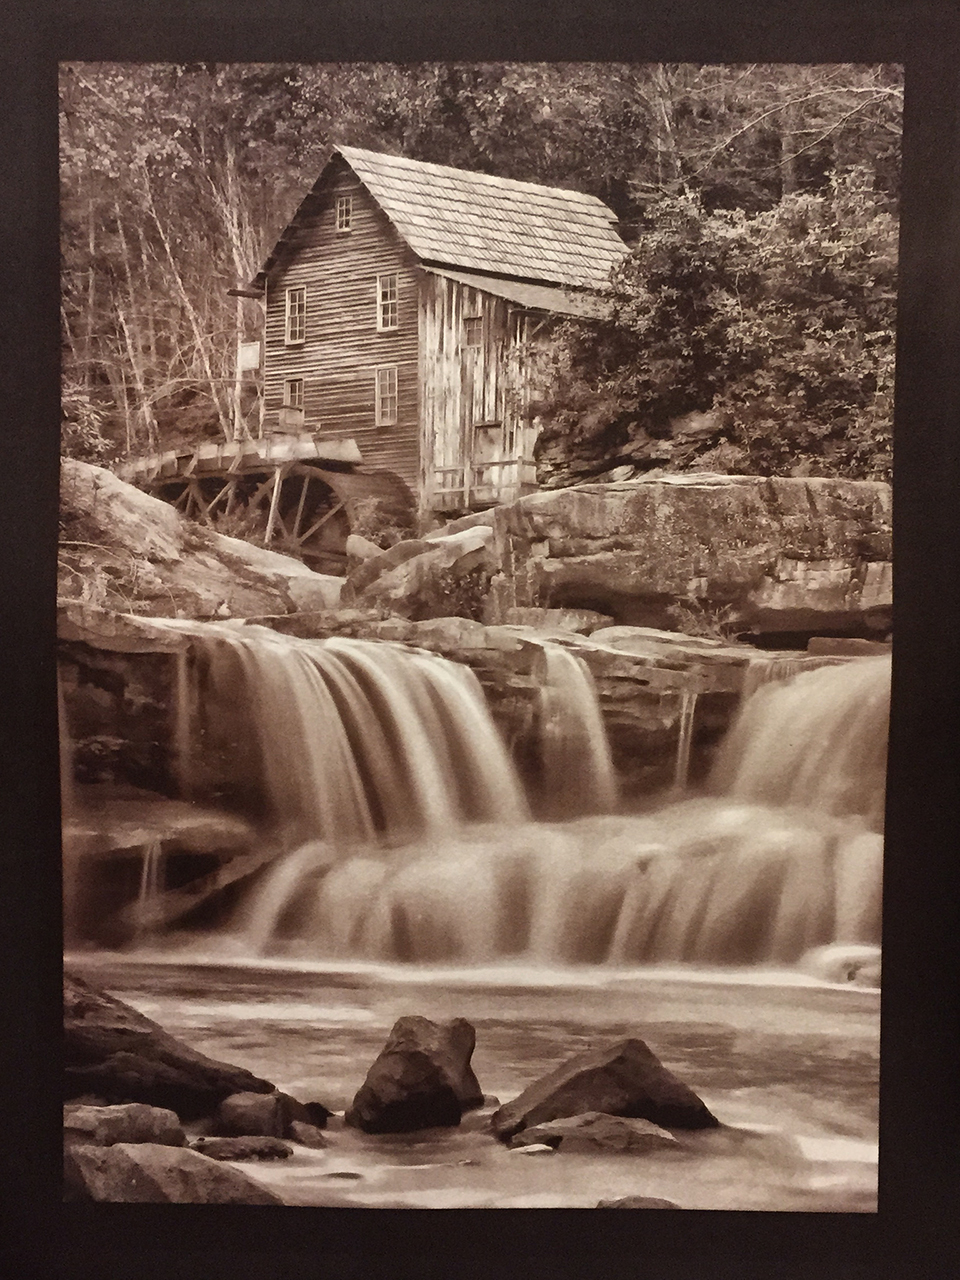
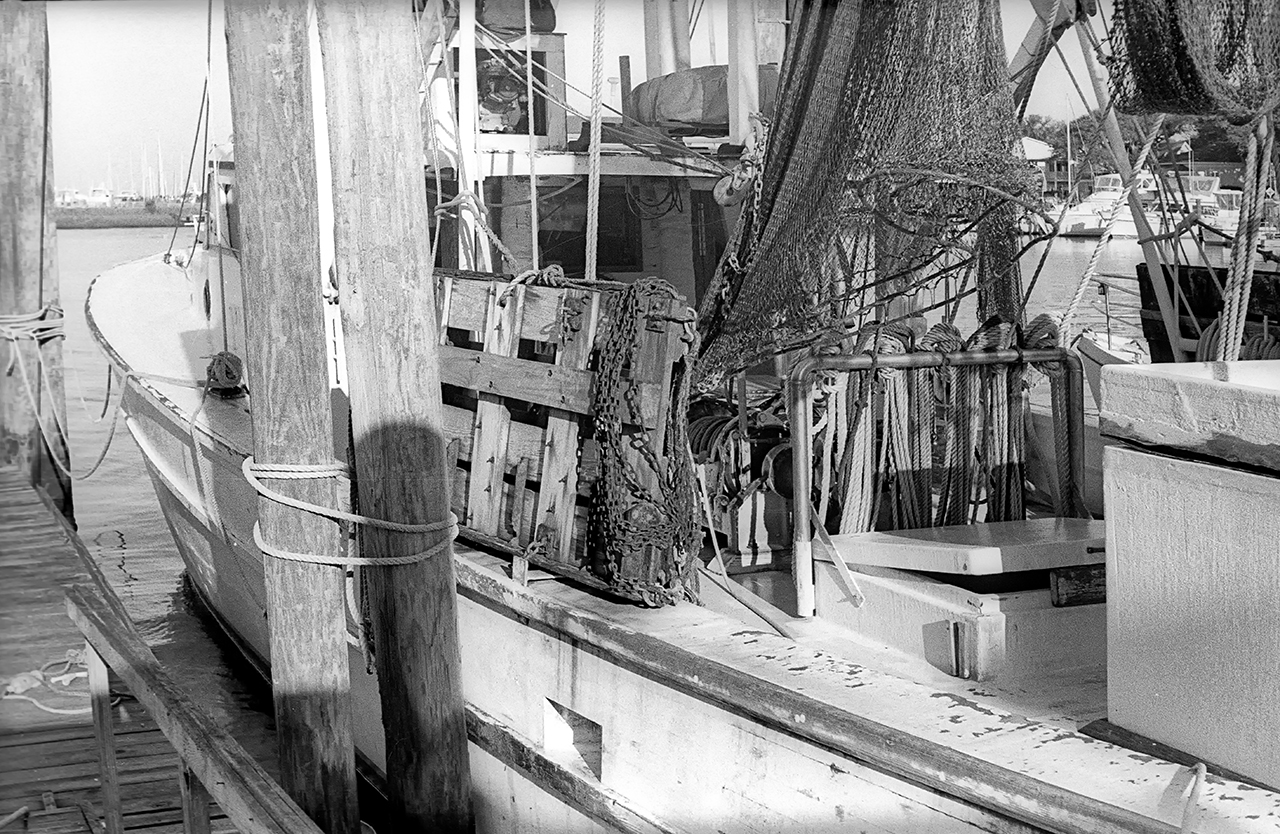
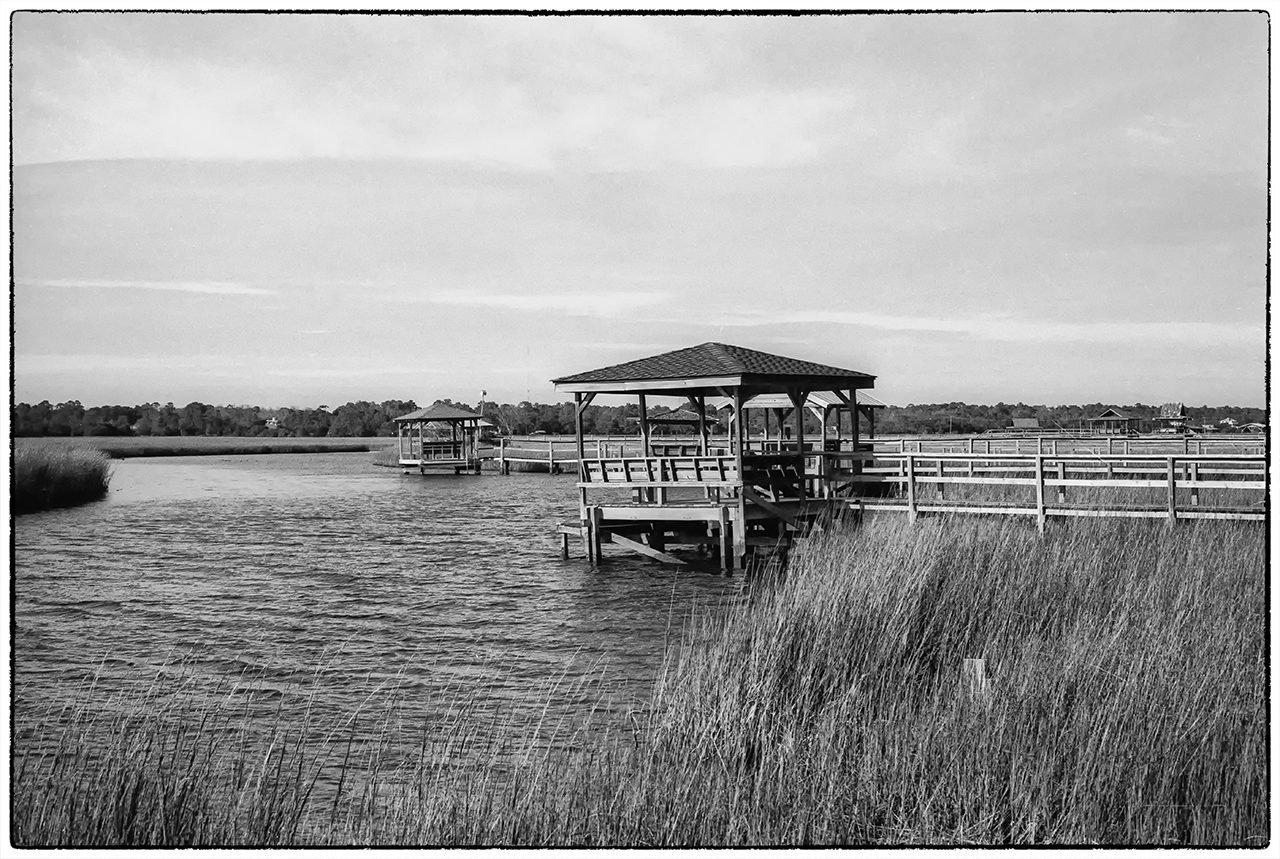
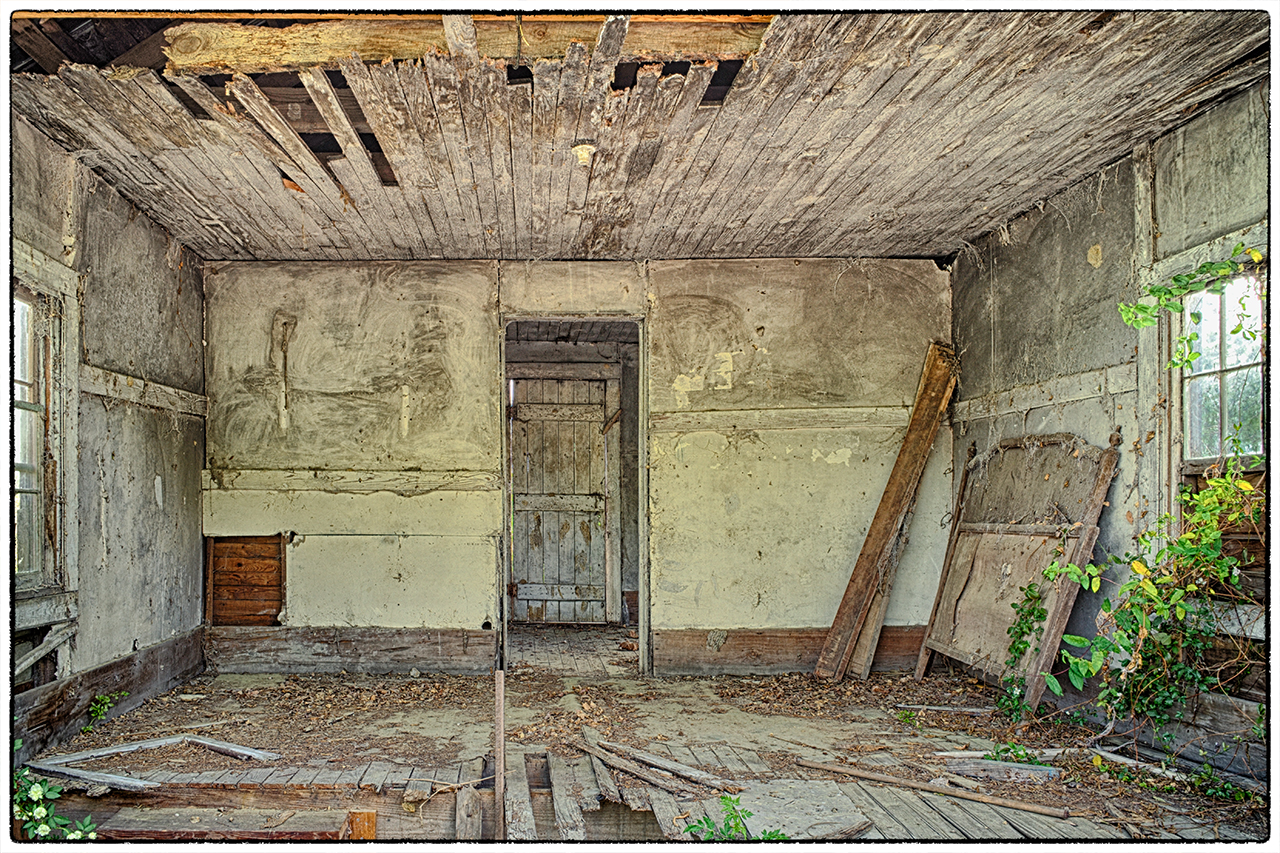
Eastman Double X Film – 1962 Petri 7S – Rodinal 1-50

1962 Petri 7S, Eastman Double X film in Rodinal at 1:60

1962 Petri 7S, Eastman Double X film in Rodinal at 1:60

1962 Petri 7S, Eastman Double X film in Rodinal at 1:60
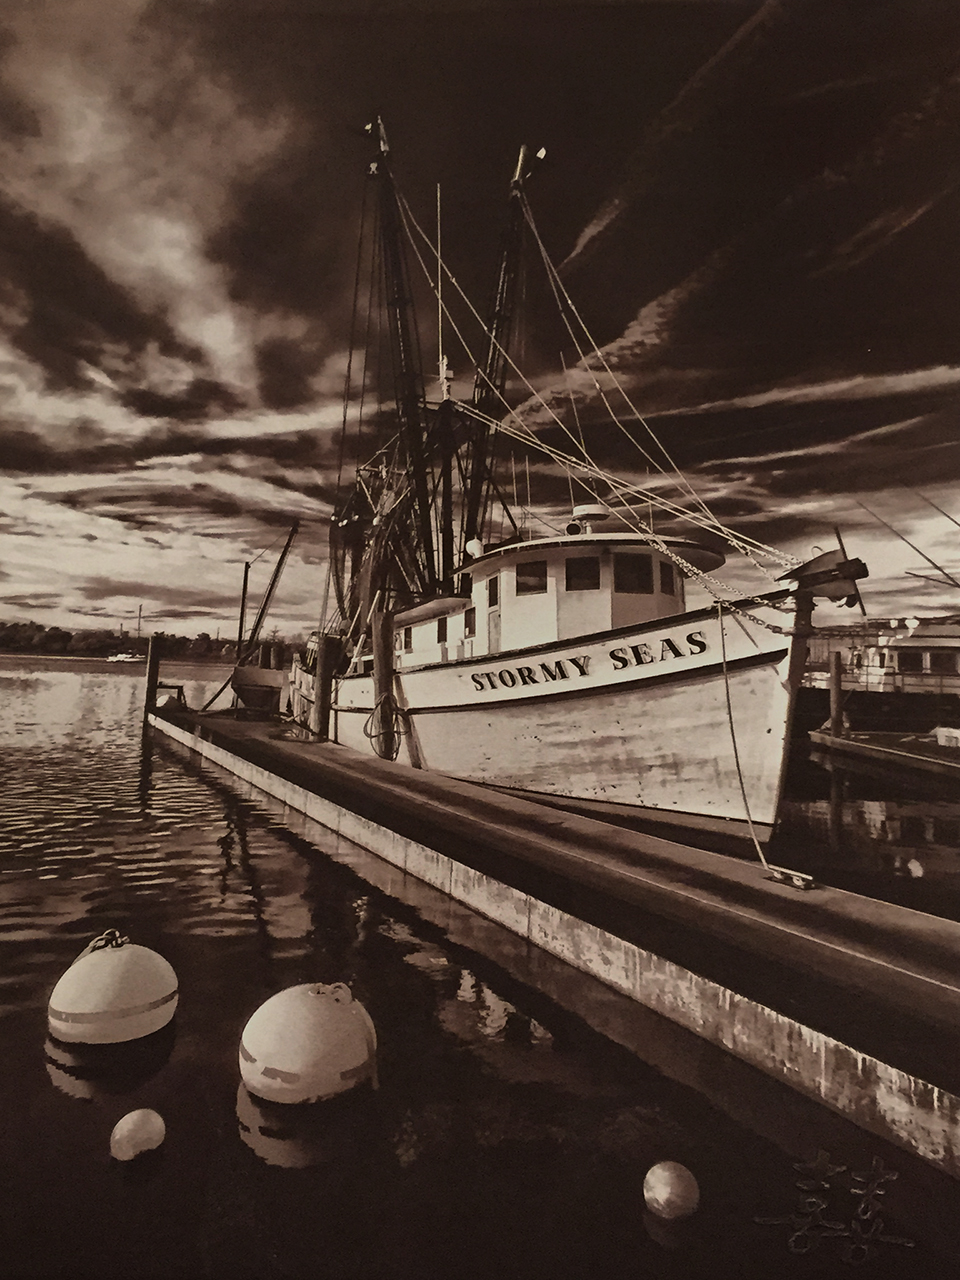
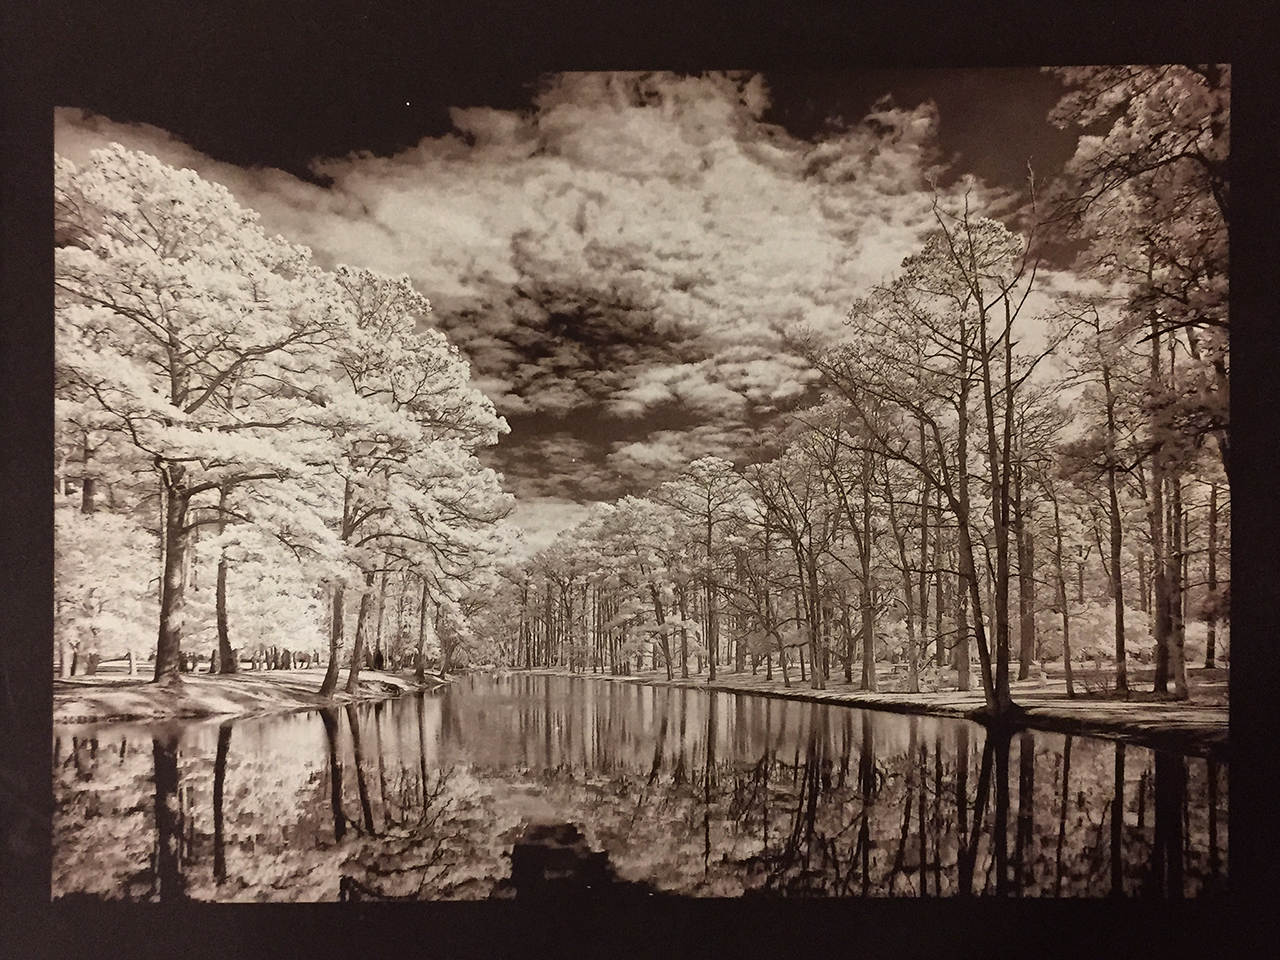
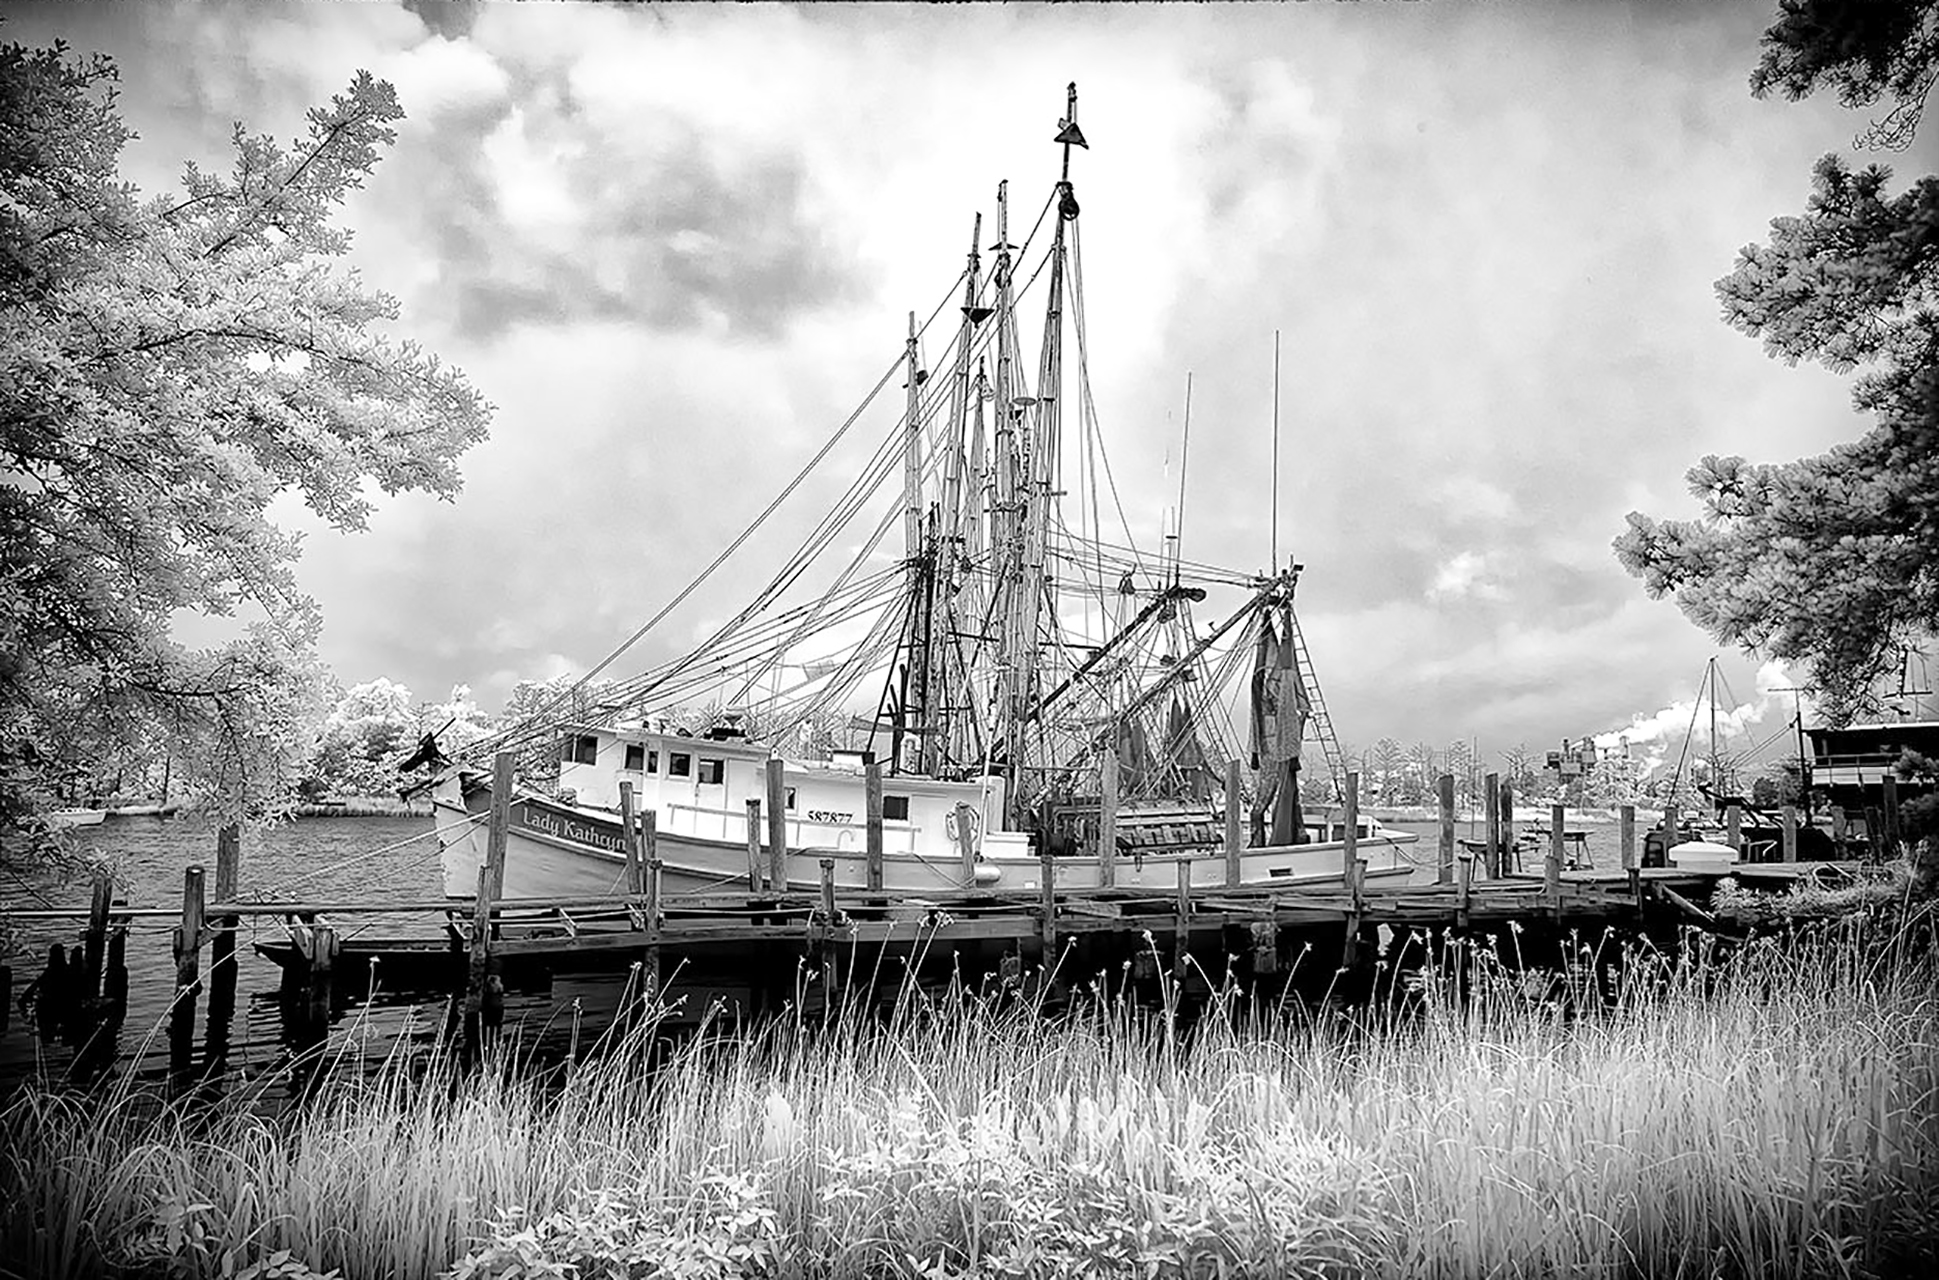
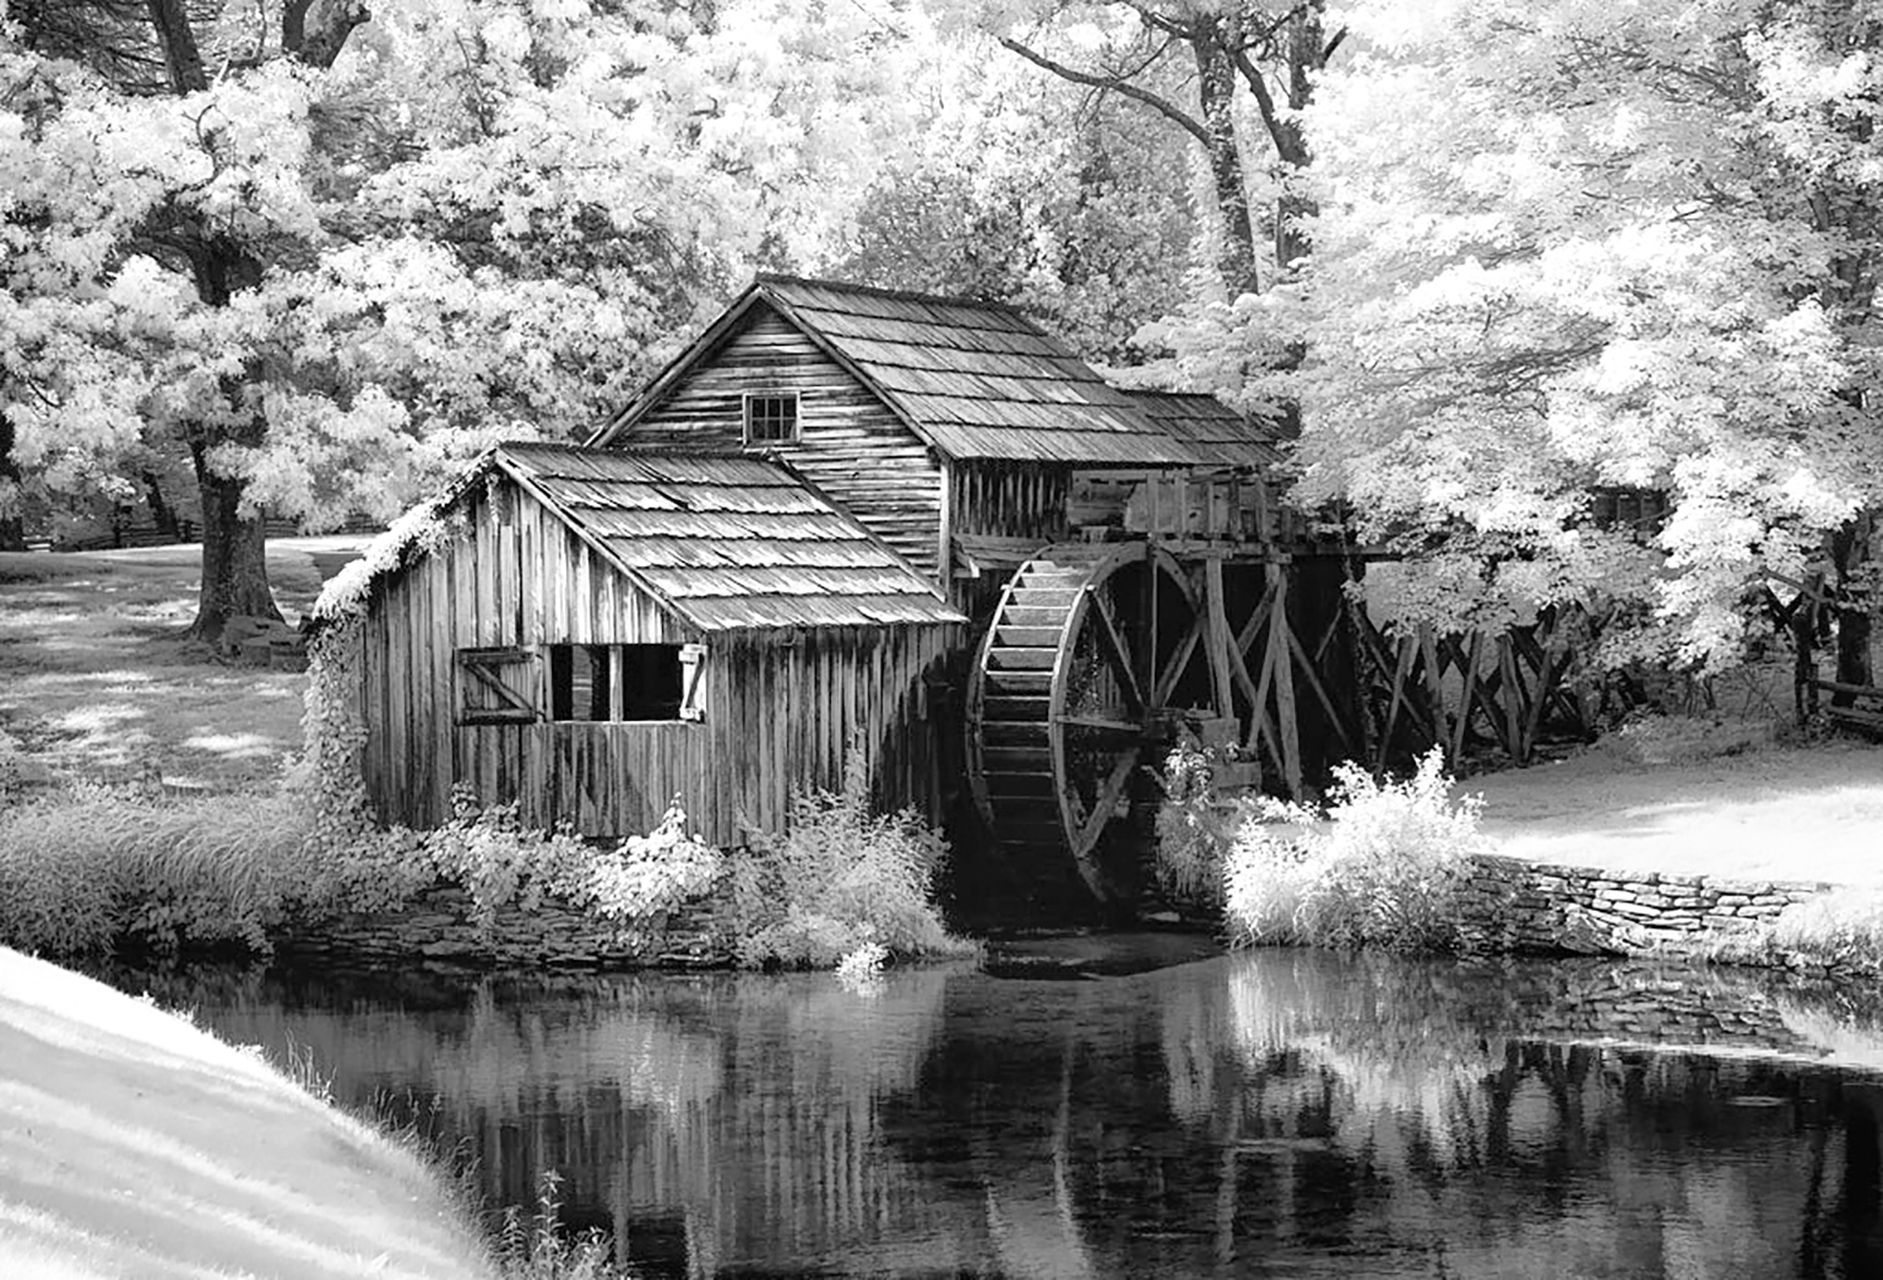
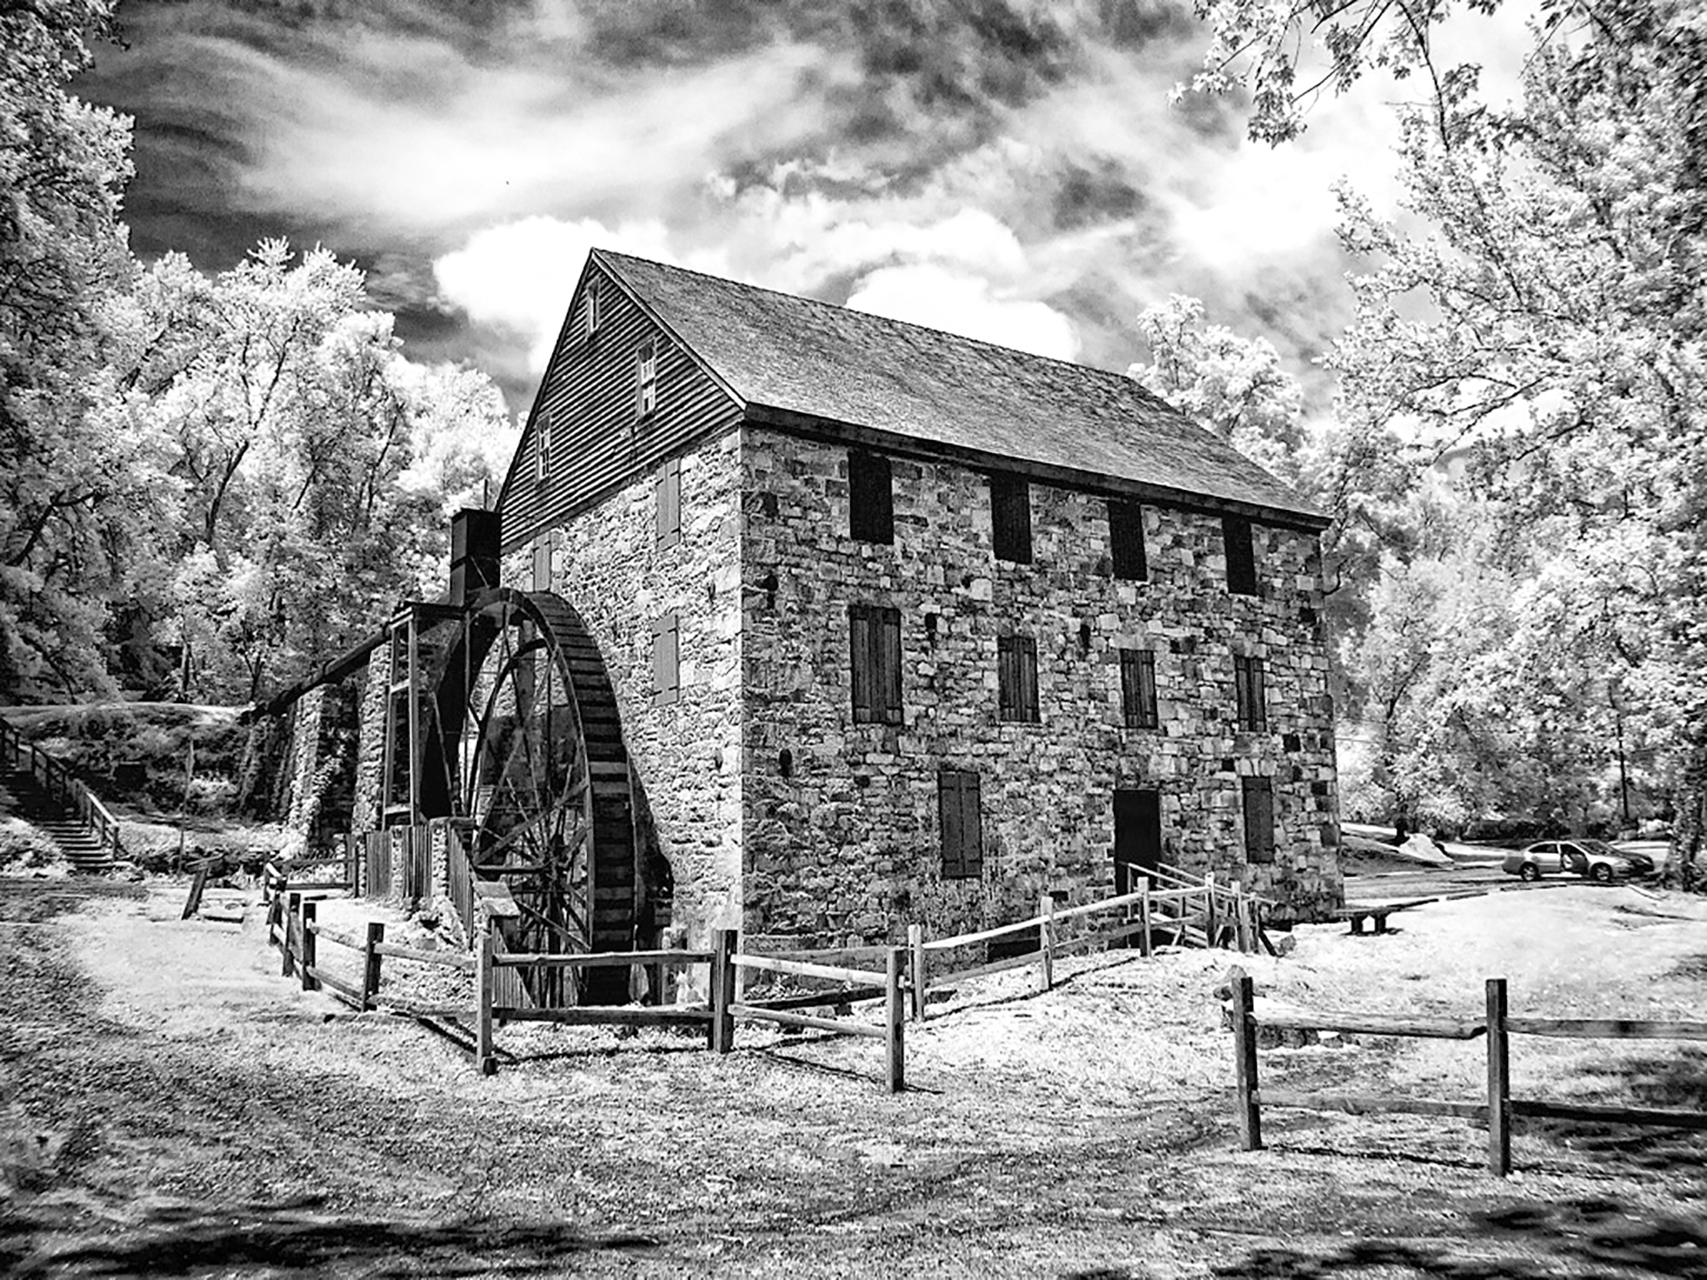
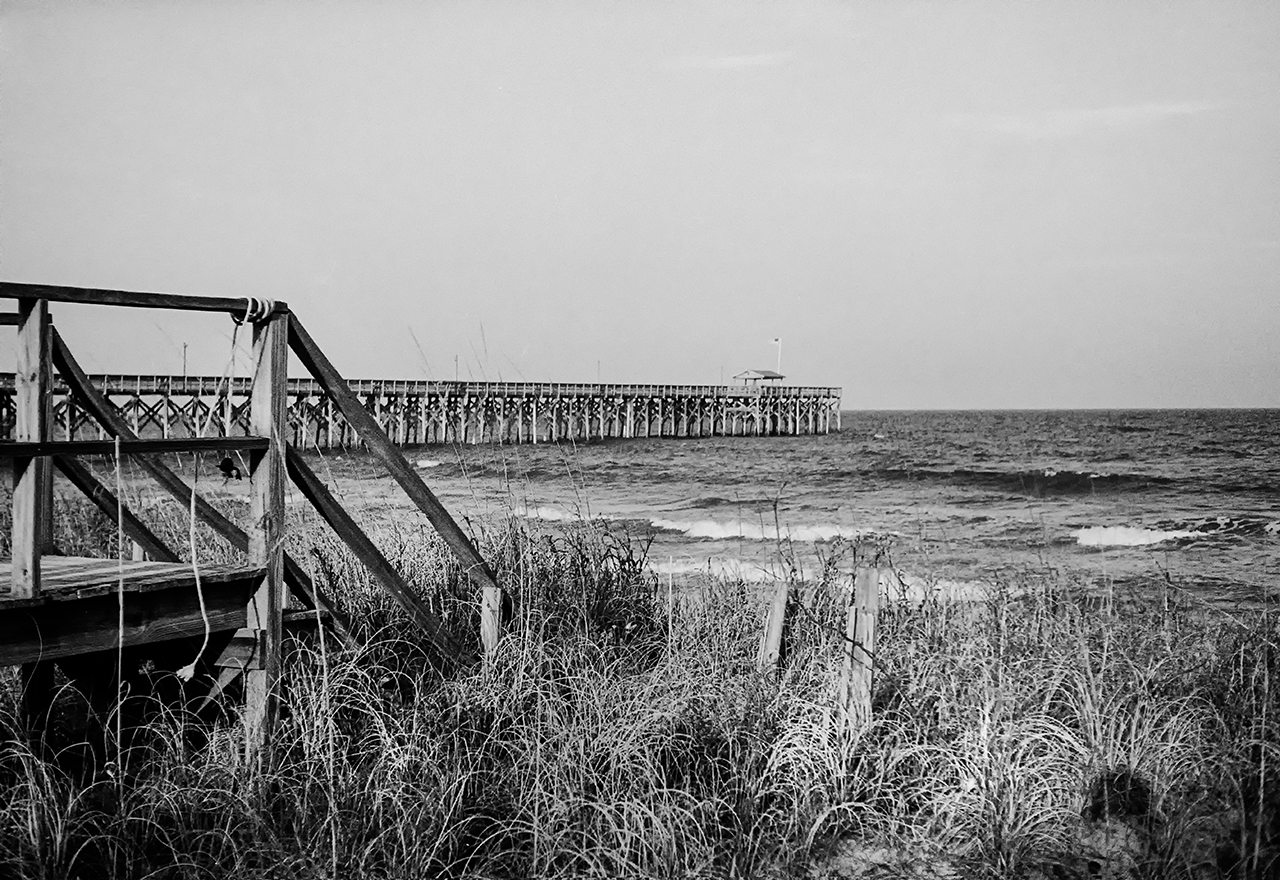
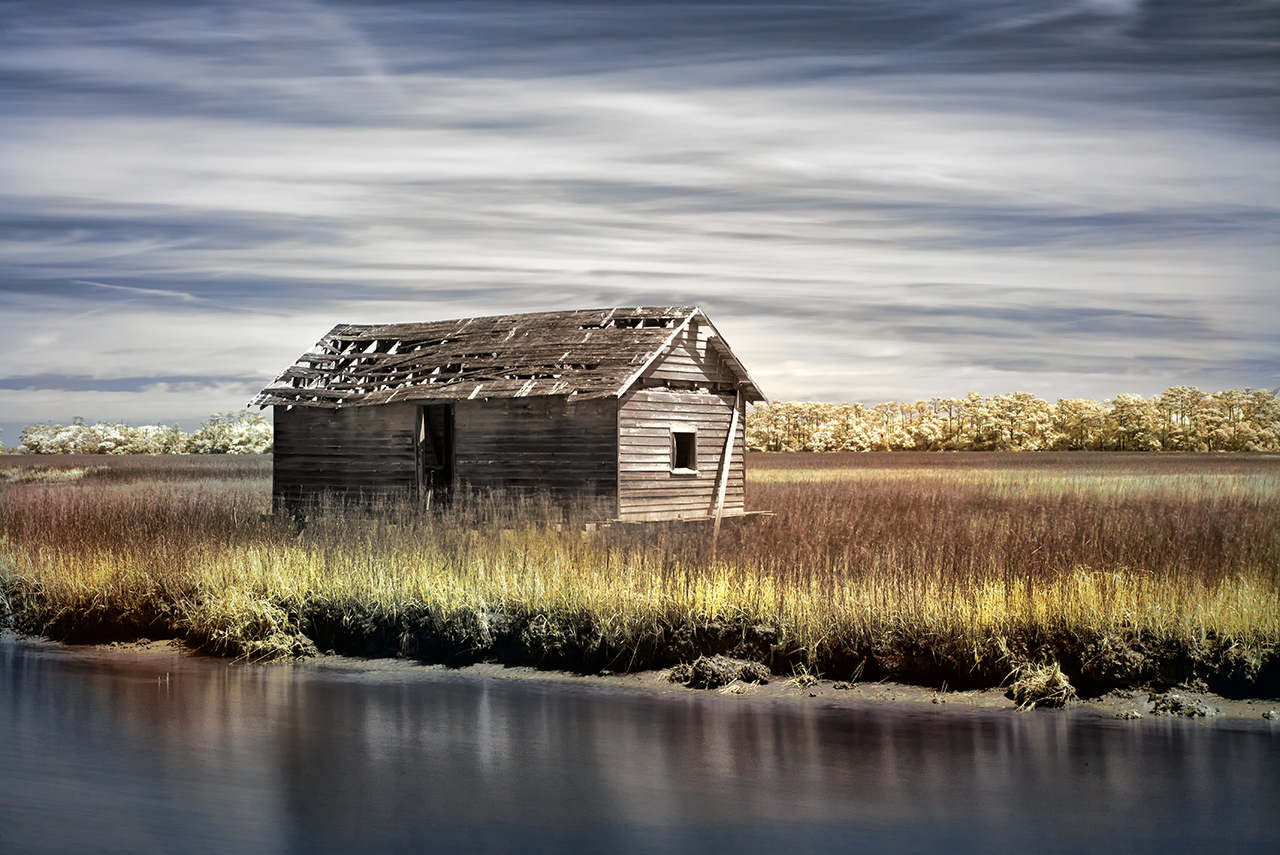
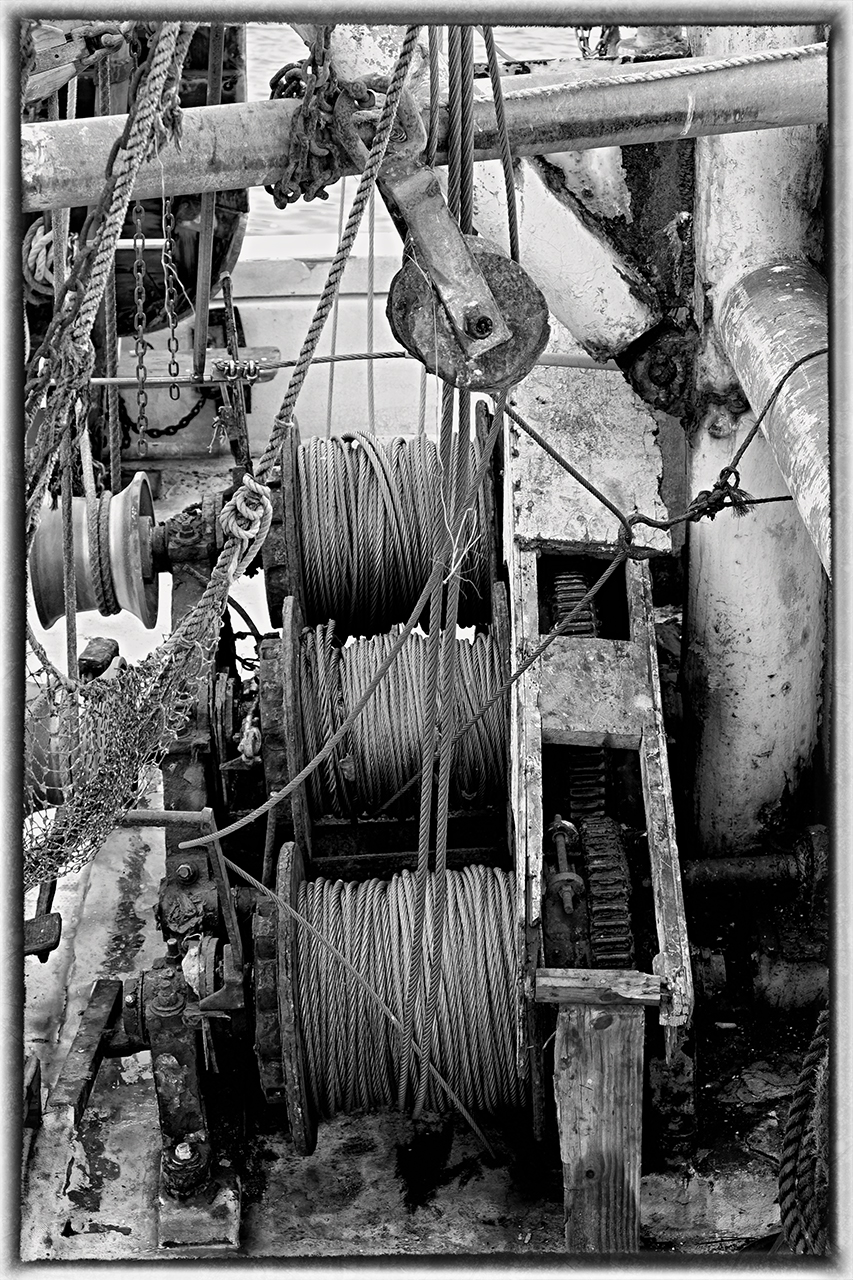
Rollei IR400 Film – Leica M7 50mm Lux – Rodinal 1-50

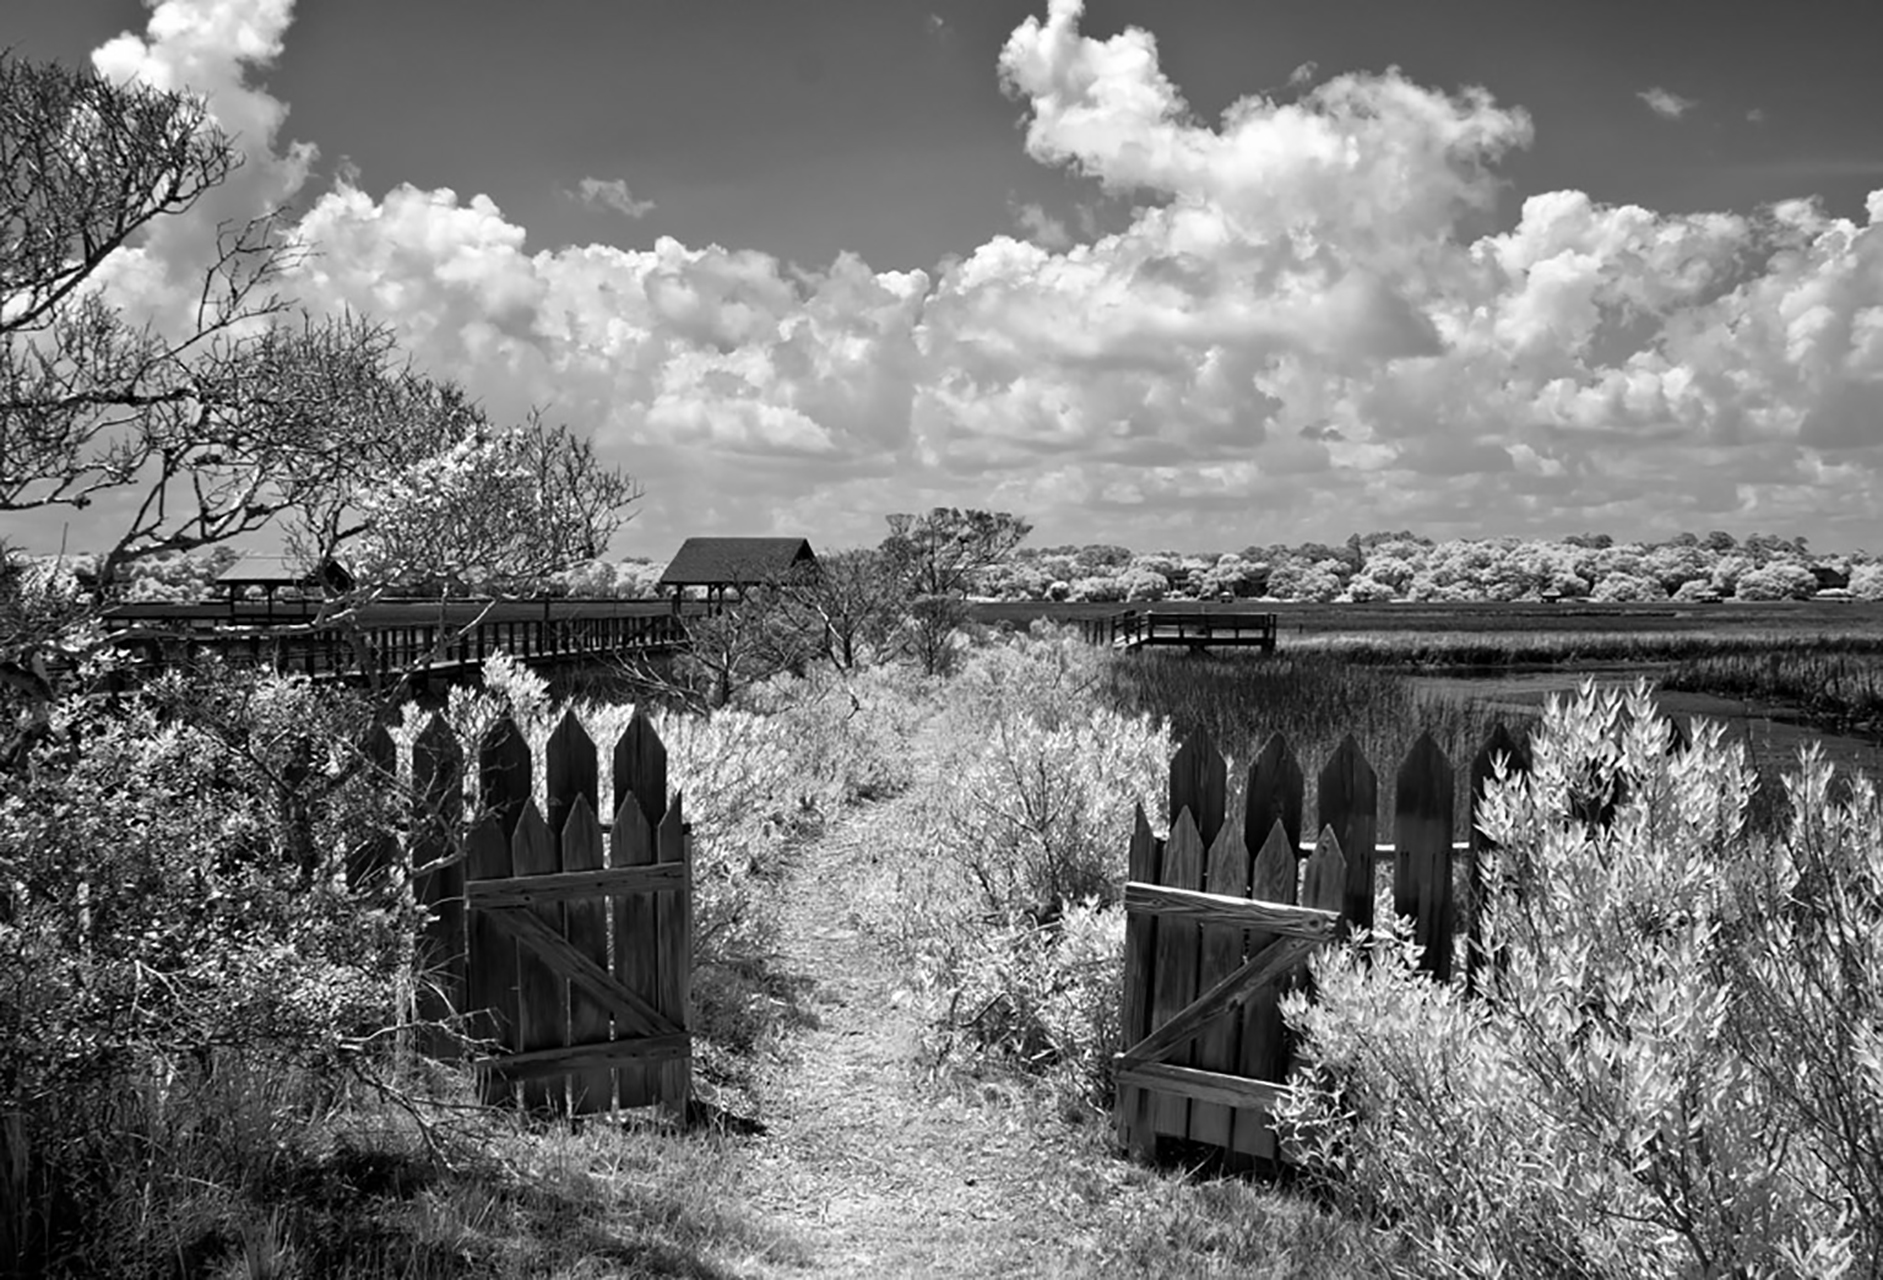
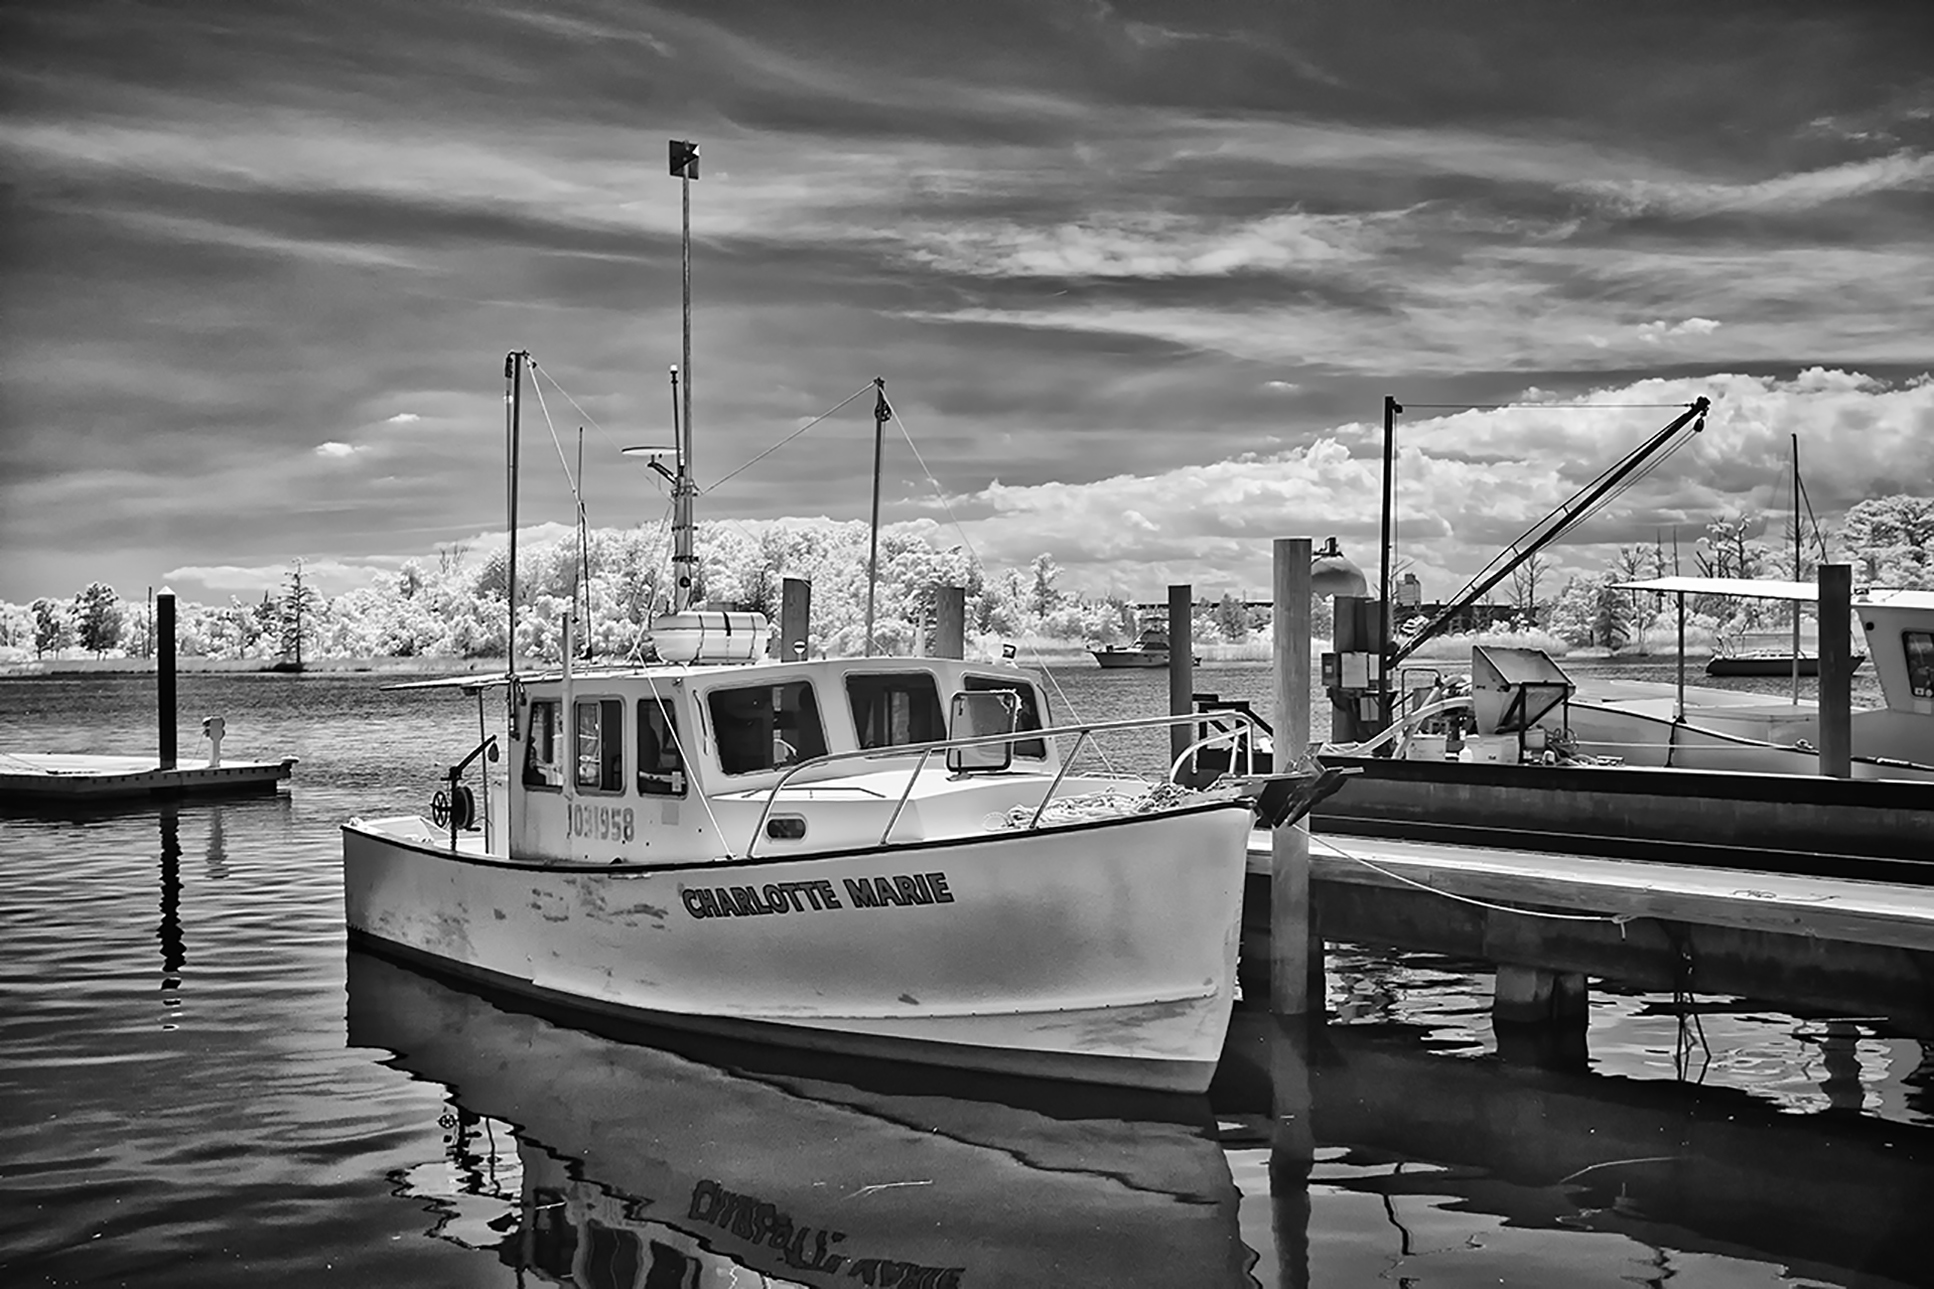
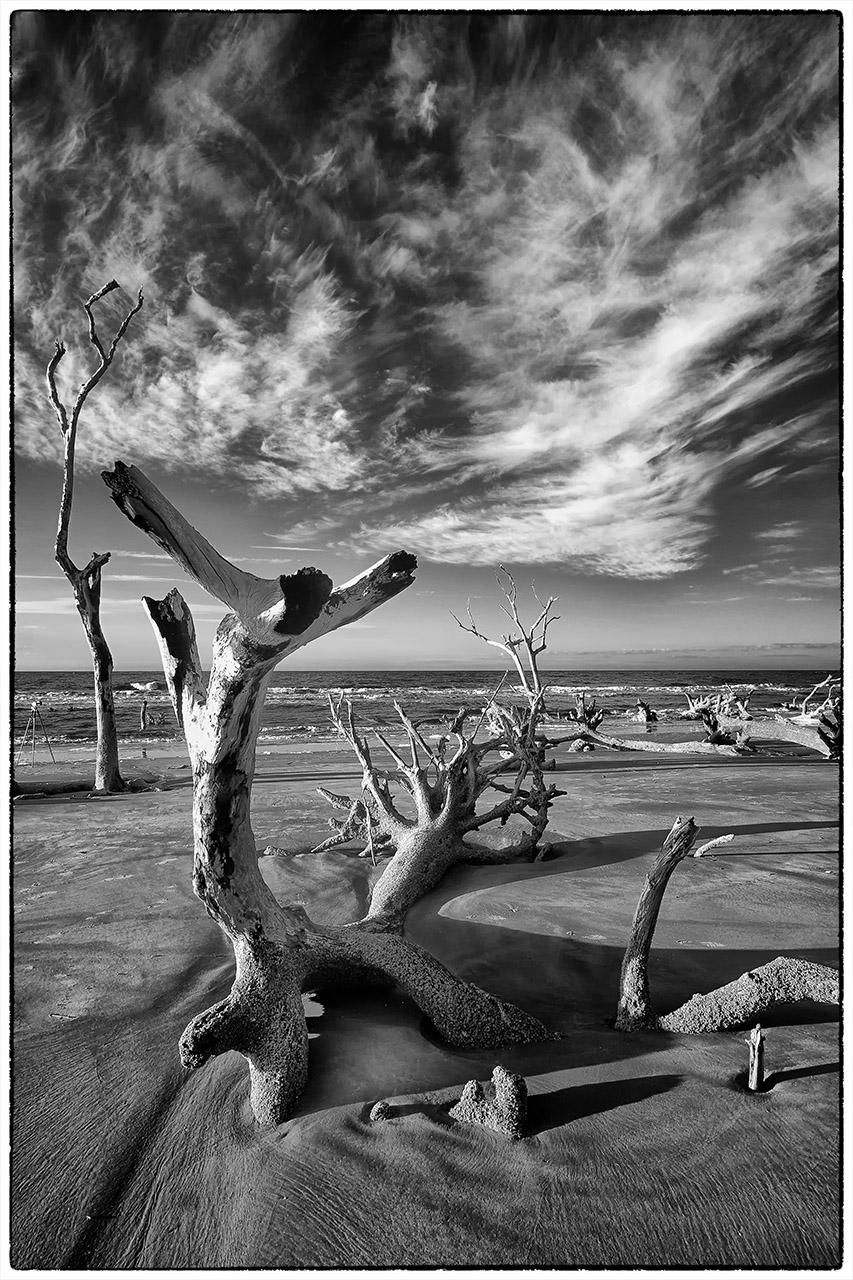
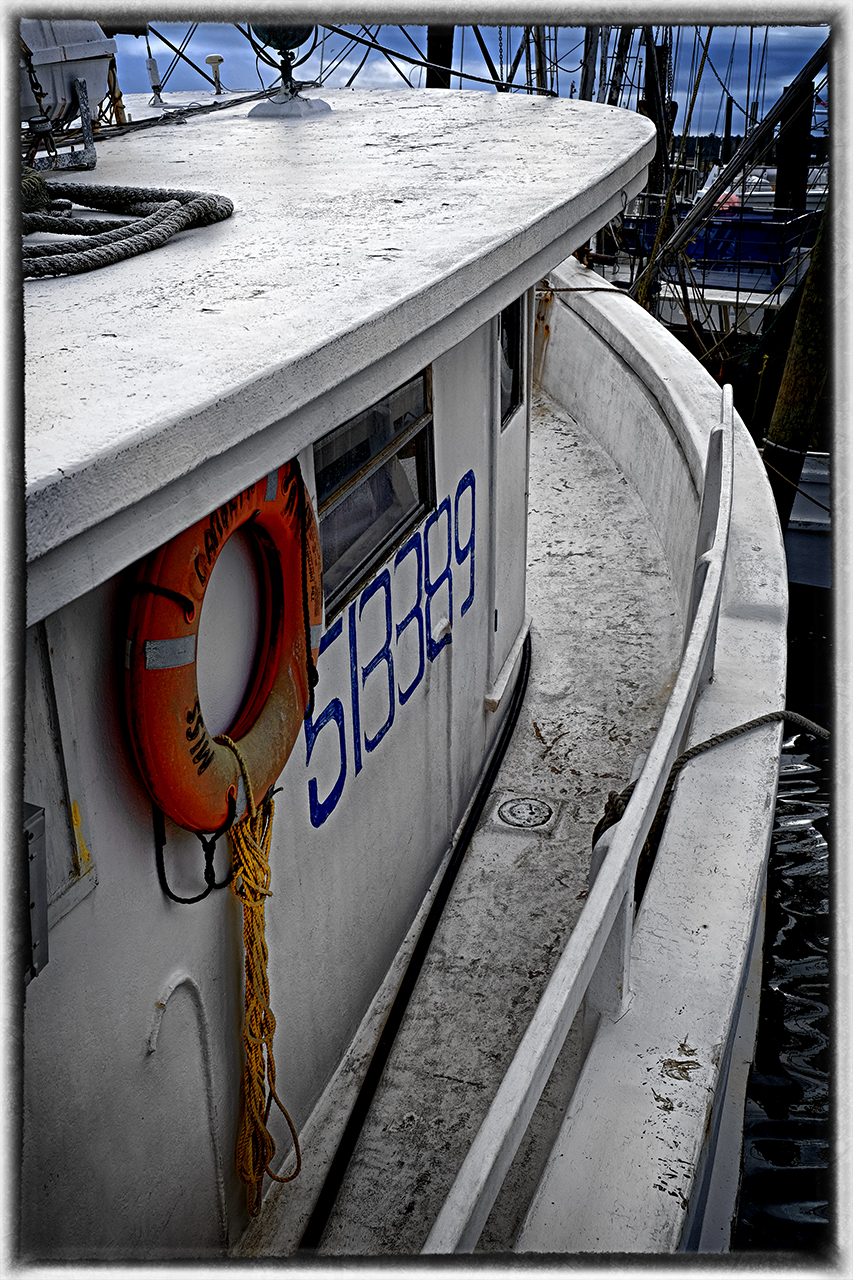
Rollei IR400 Film – M7 28mm Elmarit – Rodinal 1-50

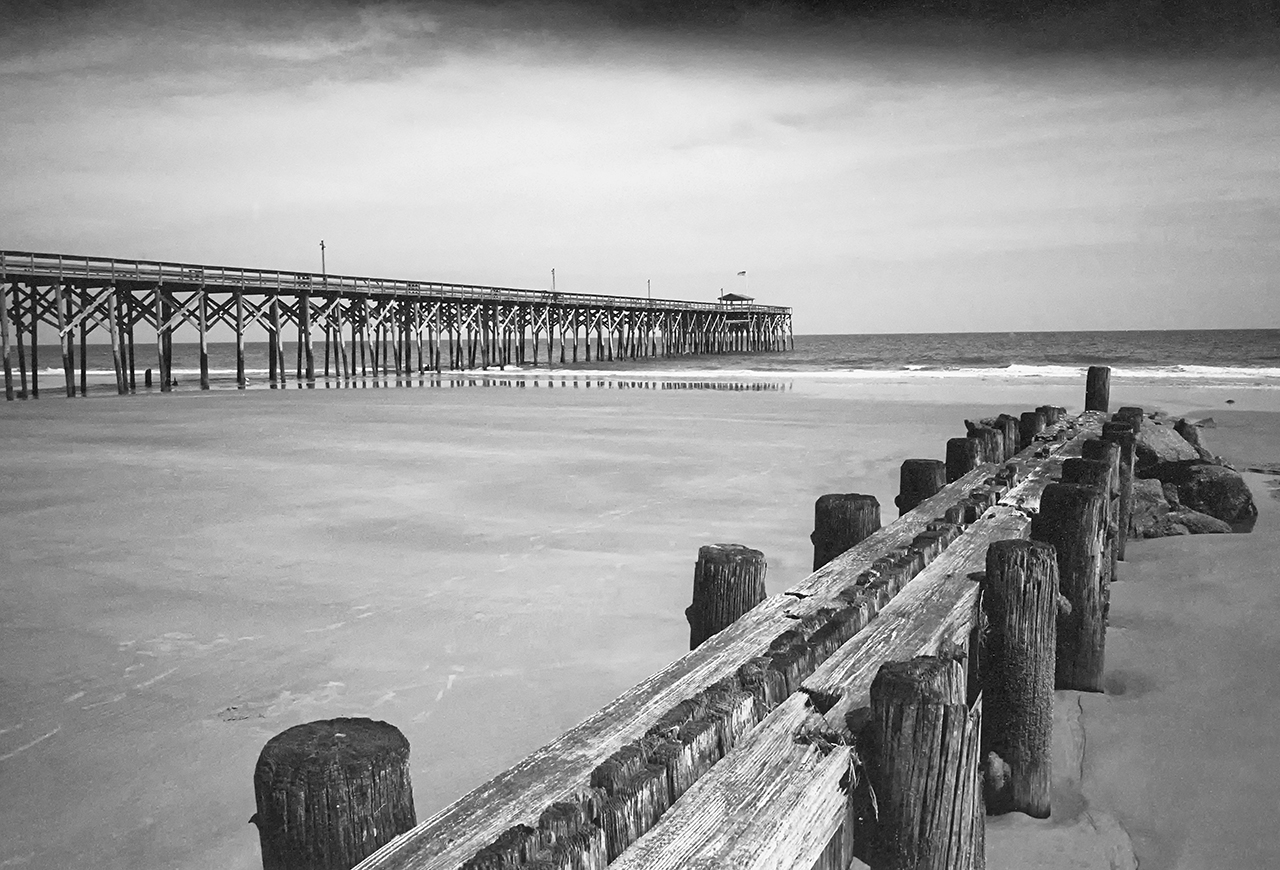
Rollei IR400 Film – M7 50mm Lux – Rodinal 1-50 240 second exposure

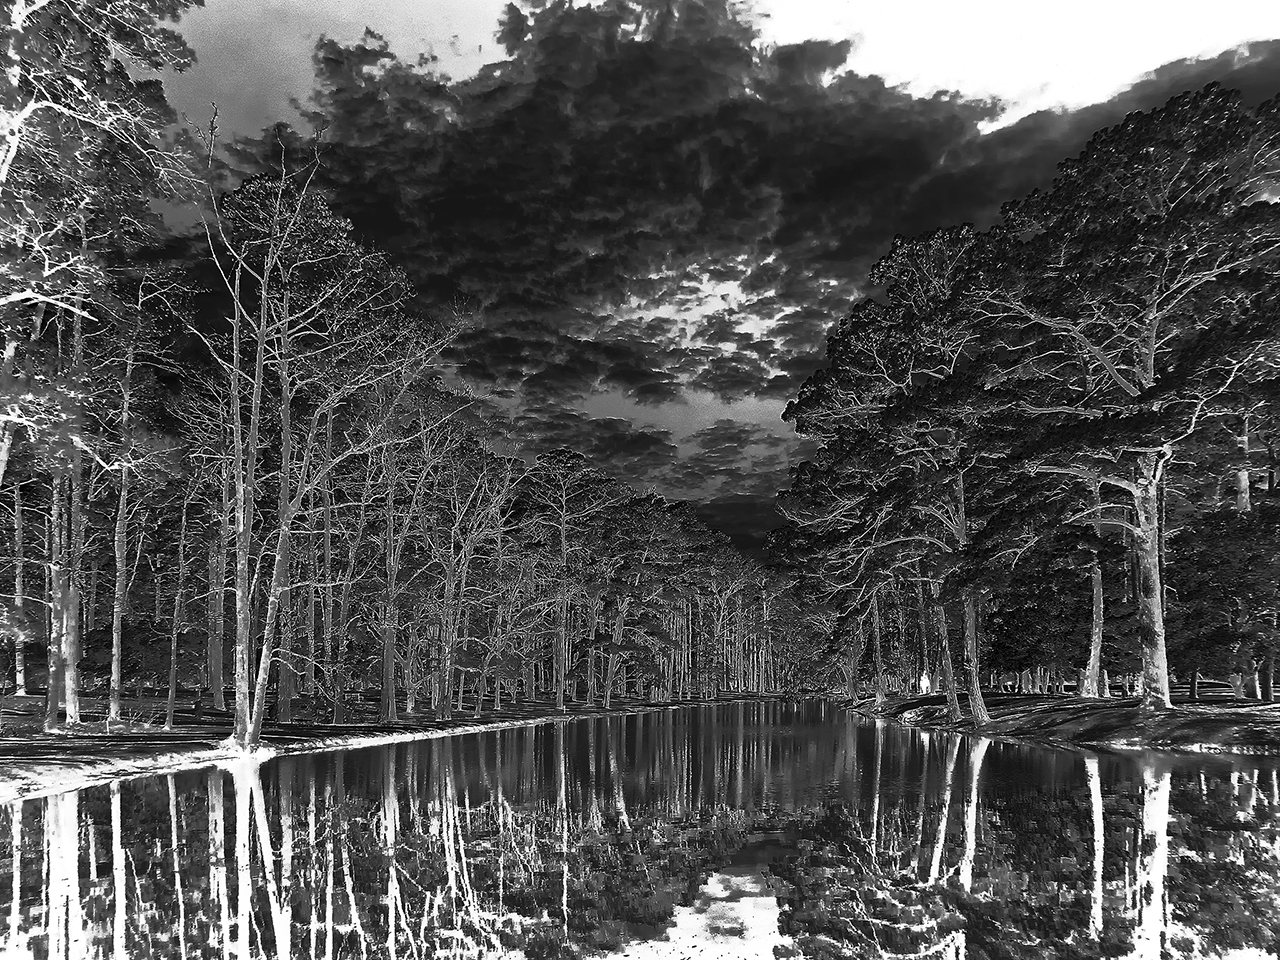
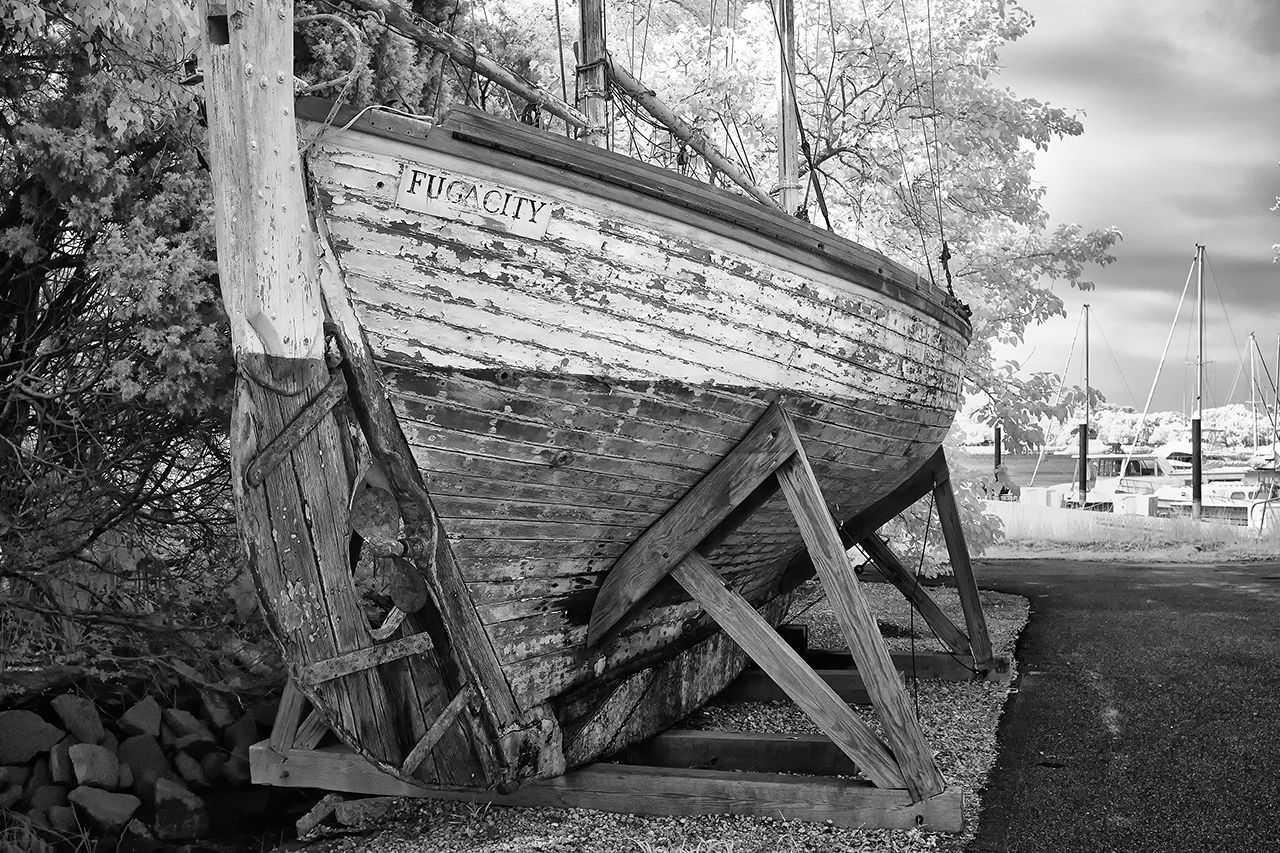
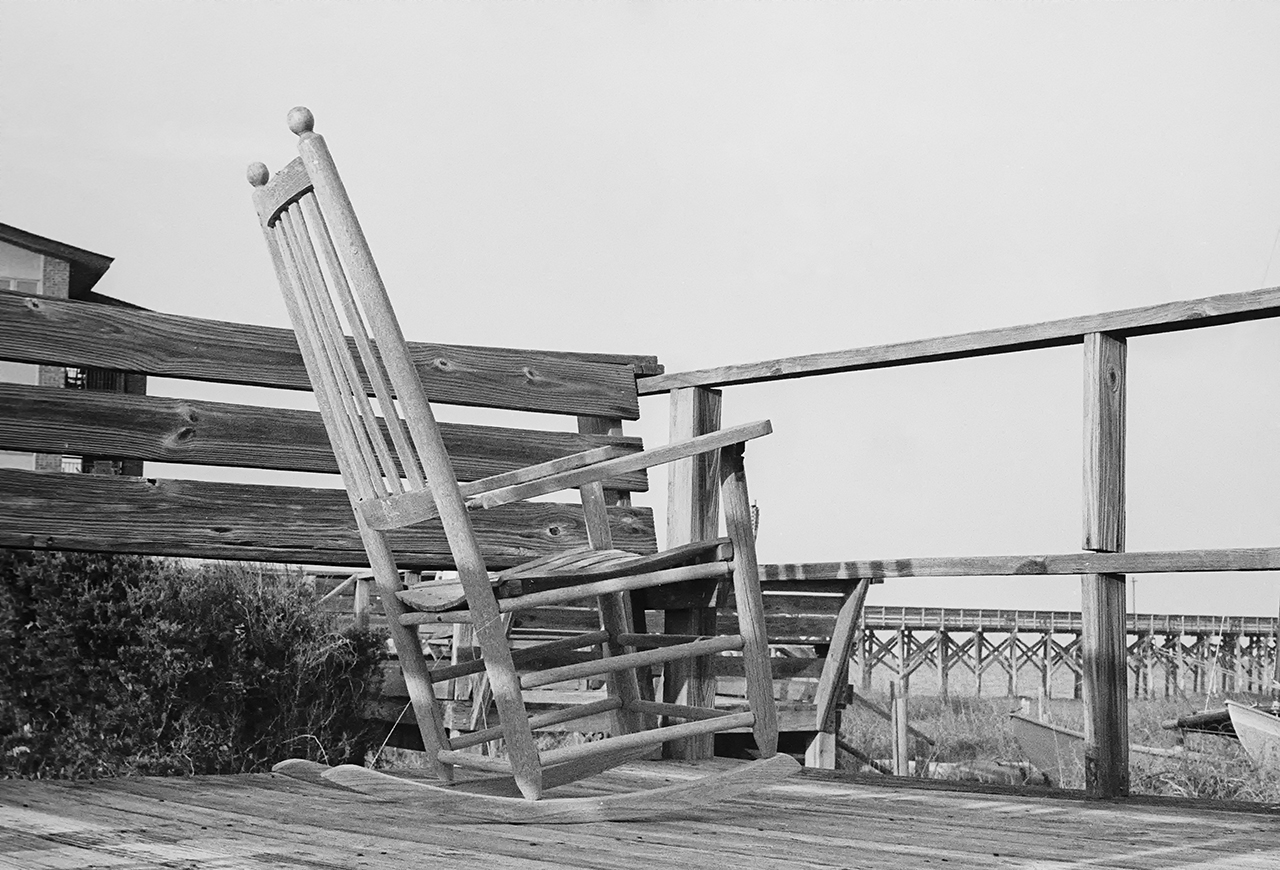
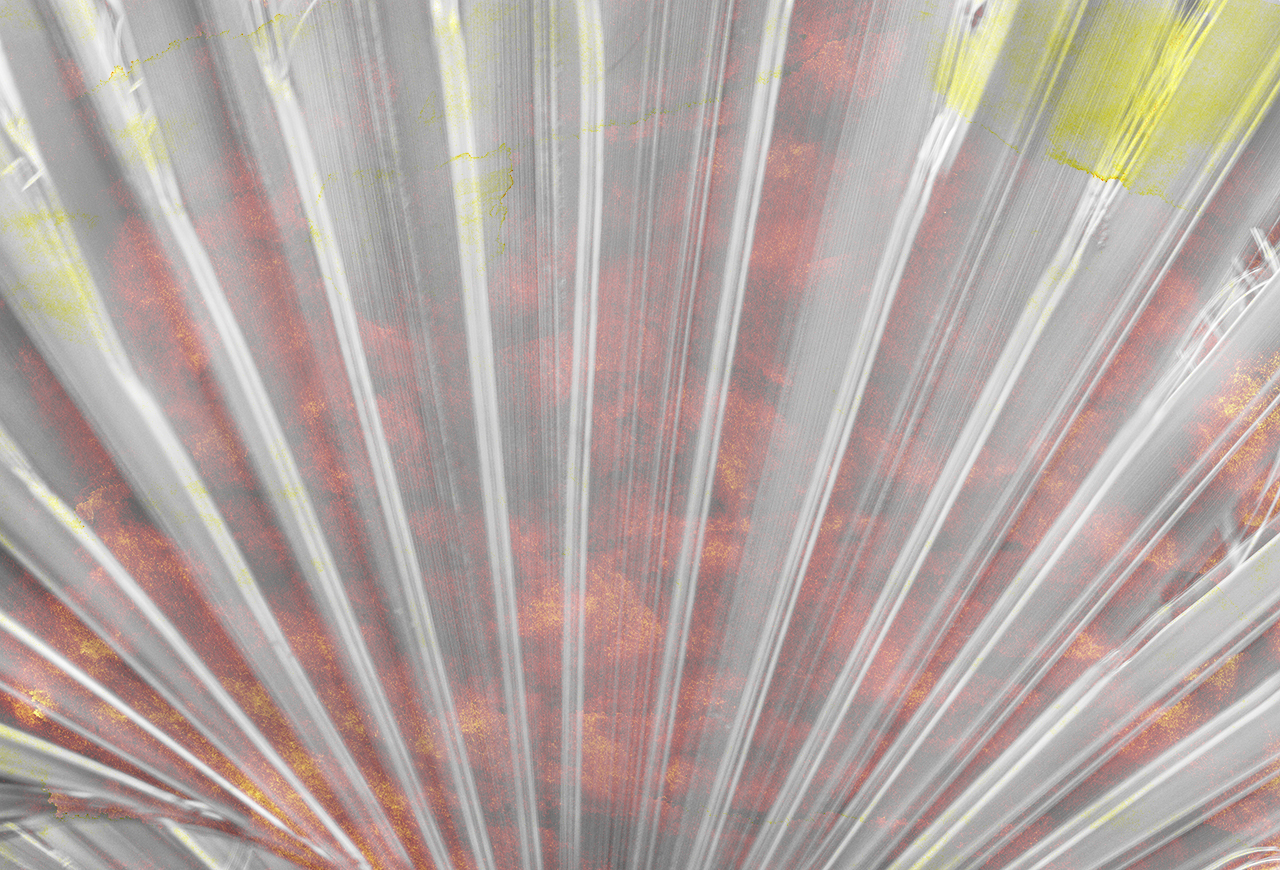
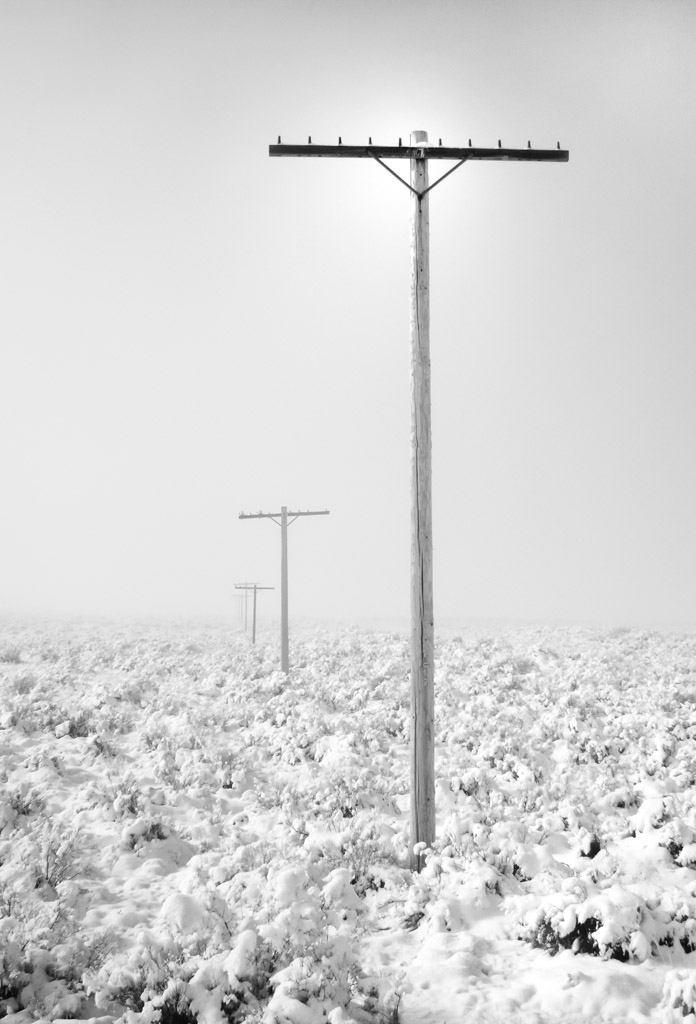
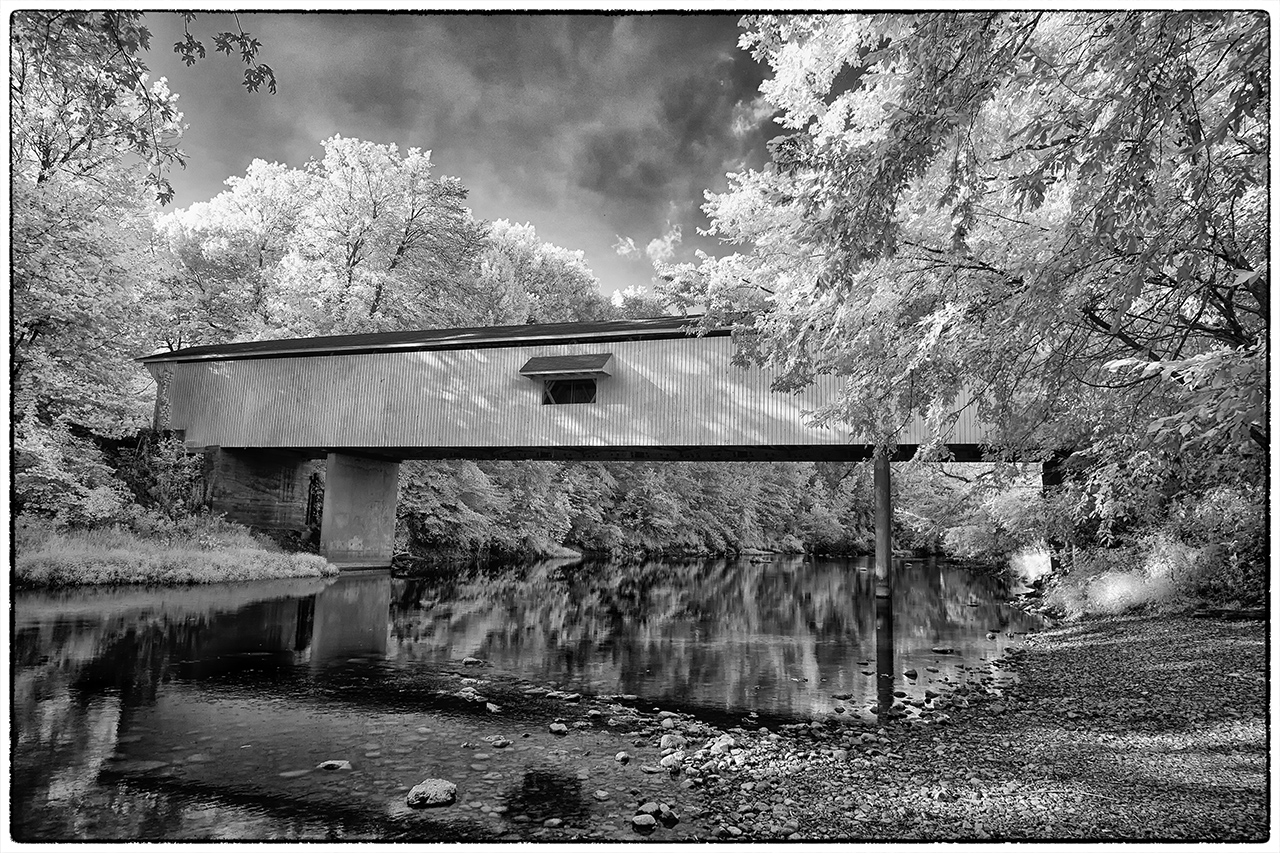
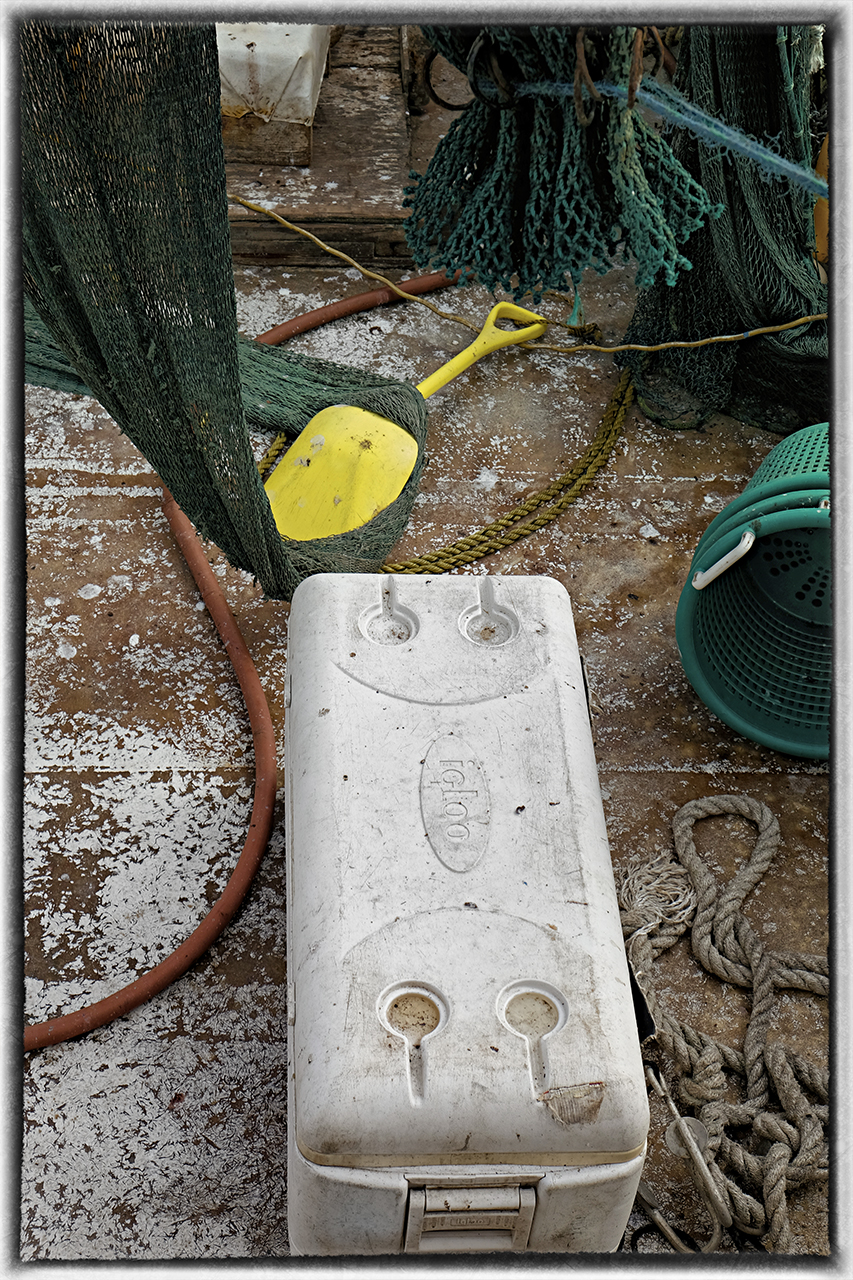
Rollei IR400 Film with R72 IR Filter – M7 50mm Lux – Rodinal 1-50

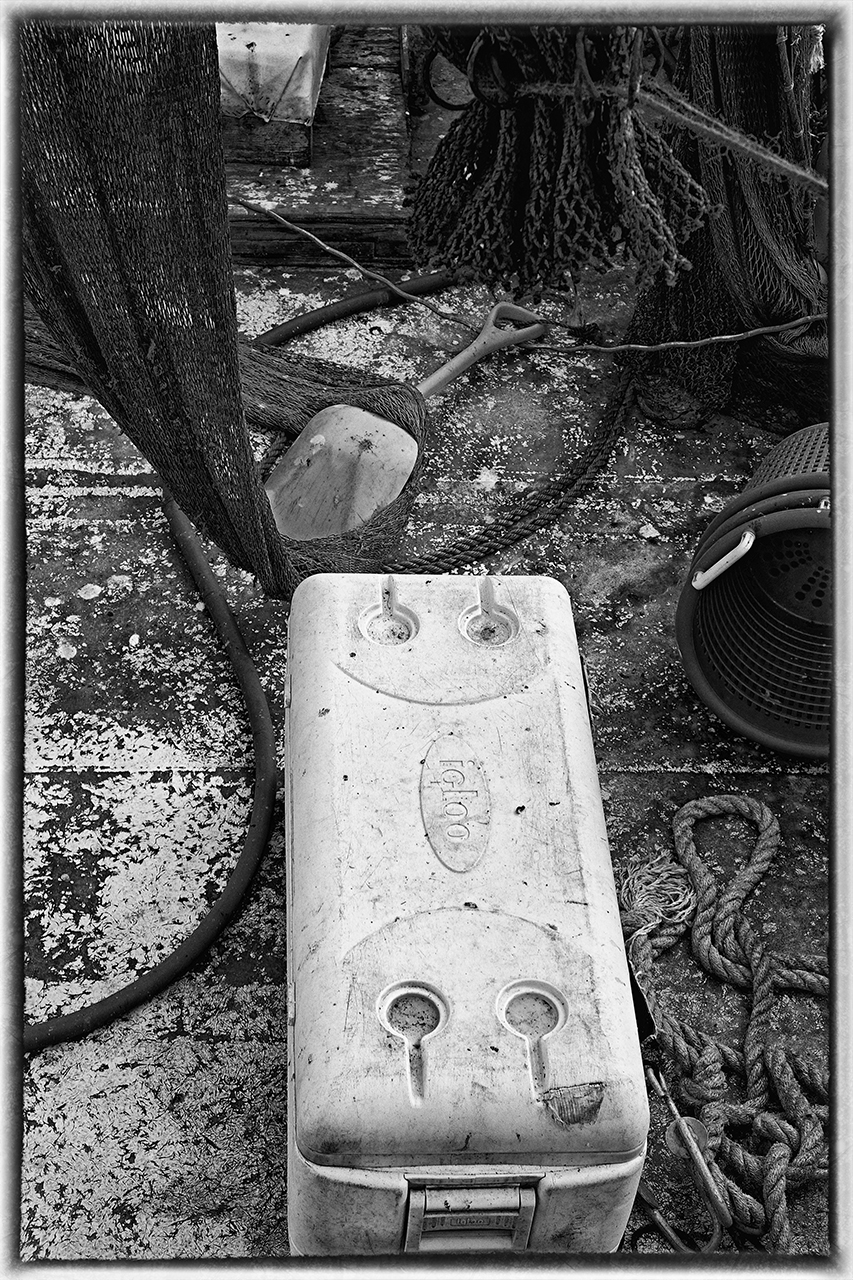
Rollei IR400 Film – M7 50mm Lux – Rodinal 1-50
I hope that you enjoyed this post and its associated images. I have been using film since I was 9 years old. At 13 I had my first darkroom at home. I worked in film in my own darkroom until I was 18 when that period of my life can to an end. 42 years later I re-engaged film photography again and cannot help but ask “Why did I wait so long?” I have been shooting digital since my career at Eastman Kodak when you could ONLY get B&W digital camera systems! I have spent fortunes on digital and have loved every moment of it. Film will NOT take any of that away, I still have digital and continue to use it. But I have to be honest and admit that working in film again fills me with a sense of peace that I have not experiences in a very long time….
Please let me know what you think of this post!