Fuji X Pro 1 and the Soligor MC C/D 70-300mm f/3.8 FD Lens


The Need to Reach Out and Touch Something!

These three old shrimp boats were in the boat graveyard in Georgetown, SC. The trouble is that they are just too far away to capture with any of the Fuji Lenses.  I have several other 3rd party lenses like the CV 12mm and 75mm f/1.8 but even the latter is just not long enough.  A friend dropped by my gallery last month and gave me a bunch of old Canon FD/FX lenses and one of them was the Soligor MC C/D 70-300mm f/3.8 FD Lens.  This is a big lens, about 10 inches long closed and 13 inches  zoomed out to 300mm.  It is a push pull design and surprisingly, clean of dust for a lens so old!  It is an amazingly smooth and sharp lens and a real pleasure to use.

One of the problems with the Fuji is that there are currently no long lenses out there.  Normally, this doesn’t bother me too much but once in a while I need the reach!  I am always keeping my eyes open for longer lenses hence the CV 75mm f/1.8 and the Soligor 70-300.  I also have a Canon 70-200 on the way from Roberts Camera which cost me $49.00.

I had to spend the day in Georgetown today so I decided to bring this lens along and give it a try!  This lens was designed to be the Canon L glass killer back in the day of FD/FX lenses. It is amazingly sharp. Now that the  X Pro 1 2.0 firmware is here manual focusing is EASY and SHARP!  When in focus the details just jump out at you.  I had a FD/FX to Fuji adapter on hand and after fussing with it and discovering that you had to adjust the position of the aperture lever inside the lens then mount the adapter I was in business!

As I said, focus is amazingly easy.  The glass is sharp and the combo works very good.  If you can find this lens out there in net land grab it, but I have NEVER seen one and searching online does not even turn them up!

The Three Shrimpers, Fuji X Pro 1 and Soligor 70-300, F/11, 1/2500, 400 ISO


Here is the color version:

The Three Shrimpers, Fuji X Pro 1 and Soligor 70-300, F/11, 1/2500, 400 ISO


I also wished to do some detail images for an upcoming magazine article so I took this camera/lens combination over to Stormy Seas and looked for boots and/or Gloves in the rigging!  Here is what I found:

The Work Gloves… Fuji X Pro 1, Soligor 70-300mm at 200mm, f/8, 1/1000s, 400 ISO


I was quite pleased with this combination.  As stated, the lens is quite large, but that is OK as I will not use it that often.  The new/old Canon 70-200 is only about half the size and hopefully it will work quite well also!

Ultra Long Exposures with Fuji X Pro 1 using the Zone System and a Heliopan Variable ND Filter


Interesting Things Come To Those Who Wait….

Pawleys Island Surf, X Pro 1, 2 1/2 min exposure

Heliopan Variable ND w/ Stops

This variable ND filter from Heliopan comes in a 52mm size which works on both the Fuji 35mm and 18mm lenses.  It is touted as being totally color transparent with no color shifts!  Online reviews have stated that it is by far the best variable  ND on the market.  My own testing has shown that it adds ZERO color cast to my images and that the physical stops on the filter work very well while the settings are quite repeatable.  The only negatives found are:

  • The fit of the ring components are very sloppy.  They are loose and easily moved.  I like a little tension between the moving rings on any adjustable filter and this one fails in that regard!
  • The base of the filter is wider than the top.  You cannot attach any lens hood because of this.  Since there are no filter threads on the front if the filter you cannot attach a screw on hood.  This bothers me quite a bit, but the fact that the filter adds no color shift allows me to overlook this.

Its stops on the filter that keeps you in the 2 to 6.2 stop range and generates no banding at all.  So far I have been very impressed with the images created with this filter in all way.  Yes you can do the same job with a fixed ND filter but even the high quality B+W ND filters add a slight color cast to your images!

Suggested Equipment:

  • Sturdy Tripod
  • Remote Shutter release cable ( I found a 40″ model online ) You can typically find many choices here for the X Pro 1 at Adorama, BH Photo and Amazon.  I have 2 in my kit, a 12 inch and a 40 inch model which allows me to back away from the tripod a little..
  • Bubble level. ( for some reason the internal built in level is not accurate ) You can always fix a tilted horizon in post processing, but you will loose part of your image in doing so.  As with all things photographic, the better the image created in the camera the better the final image will be!  The level really helps in this and you can find them for next to nothing on Amazon!
  • Charged camera battery ( long exposures chew up batteries), there is nothing worse than having to walk back to the truck for another battery!  Keep an extra in your pocket.
  • Lens cleaning kit ( beach shots in the wind cover everything in salt spray )
  •  ND filter (variable or fixed, Heliopan or B+W 6 or 10 stop)
  • External Spot meter like the Seikonic 508 (not necessary but make exposure a little easier!), more on this on later in the post!

Subject Considerations

  1. Foreground, Mid Ground & Background:  As with any photography, it is very important to have easily recognized areas within the images.  The best images contain three.  Foreground, mid ground and backgrounds that are clearly defined will draw you viewer into your image and make a longer lasting impression!  This is the same in long exposures.  I like to find objects in or that project into the ocean to achieve  this effect.  In the images here I have the rock groin, the ocean and the sky/horizon that cover these three areas.  You should consider these important compositional areas as you pick your image.
  2. Size and timing of the waves: When photographing the surf, and attempting to soften or smooth  the waters surface you need to consider the distance and timing of the waves.  A long period between the waves will require a longer exposure to even them out.  This is just as true with larger waves as well!  A good starting point for the normal surf is a 30 second shutter speed.  This should give you 3 or 4 waves coming ashore with which to average the waters movement.  The B&W image shown here in the post was a 2  min 30 sec exposure.  The reason for the difference is because to flatten the waters surface I needed a much longer exposure due the the size of the waves (12 feet).
  3. The Sky: The sky is a funny thing in long exposures.  Normally we hope for some structure in the sky, especially with color.  But the ultra white sky can also add a striking compositional element to our images as long as there are other darker areas within the composition to balance against.  The addition of clouds, especially clouds that are moving will add another etherial component to your long exposure image.  The clouds will be tearing across the image, trying to flatten themselves with movement.  Usually, this effect is very subdued due to the slower movement of the clouds as compared to the waves!  Some photographers make the moving clouds their main compositional components, something to think about…
  4. B&W or Color: For me this is an easy choice… I prefer B&W to almost any other type of image!  There is just something striking about a well done B&W image.  Don’t get me wrong, I do shoot in color and like it very much, but the B&W image is universal in the way it tends to draw viewers into the image.  The complexity of the colors having been removed seem to show the soul of the image in all of its splendor!  This is an area in which the Fuji X Pro 1 really shines!  The various built in art filters with their various options (red, green and so on) gives splendid B&W internal conversions within the camera.  I am always amazed by the clarity and quality of the Fuji B&W images that I get out of the camera! The B&W image shown here is one such example of an in camera conversion.  I used the B&W with Red filter choice in the Fuji X Pro 1’s film type selections!

Zone System Metering & Exposure:

Zone Exposure System
The ZONE system is an old exposure evaluation tool developed by Ansel Adams.  While old, it has a real place in modern digital photography as well.  There are many books and videos on the subject and I STRONGLY suggest that you take the time to learn about the tool.
Simply, by taking a spot meter measurement on a particular part of the subject, you can place it in the 18% gray area or Zone 5.  Then you simply adjust the exposure up or down to place it in its proper zone!
It is a very easy to understand exposure evaluation system that can save you important time and thinking when you are evaluating your exposure setup.
Here is an example on how I use the Zone System to evaluate exposure:
  • Take a SPOT meter reading on the sky.
  • The meter in the camera or hand held meter will place the tone of the spot it measured into 18% Gray or Zone 5.
  • Knowing that I wanted the sky to be in Zone 8, I will lighten it by adjusting my exposure lighter by 3 stops by opening the aperture 3 stops wider!
  • The entire image is shifted by the decision I made above.  I could have chosen ANY OTHER SPOT to measure and adjust according knowing that the camera spot meter would force that tone area under the spot meter to 18% gray!

The Zone System for exposure control in this image

So, looking at the sample image above, you can see that a spot meter reading on the sky which I want to place in Zone 8, is forced into Zone 5 by the camera metering system.  If I left it here then end sky would be a dark gray and the overall image way underexposed.  So, knowing this I simply adjust the exposure lighter by 3 stops, shifting the sky into Zone 8 and brightening the entire image properly!  Look at the image above, notice that I have shown spot meter readings for several areas of the image?  You could also choose ANY of these, knowing that the camera would force the area chosen into Zone 5 and then make adjustment up or down via the aperture to place it in the Zone that YOU wish it to be in.  Perfect control!
One last thought on this for you.  When using a fixed or variable ND filter, you simply take the meter reading through the filter then make your zone adjustments.  The LCD preview of the X Pro 1 works VERY well in low light and allows you to do so easily and accurately!
The Zone system is a very easy way to understand and control your cameras exposure for perfect pictures.

Pawleys Surf, Long Exposure, 25 seconds, Fuji X Pro 1

So, what do you think?  The Heliopan Variable ND Filter is a VERY good tool to have in the camera bag.  But, it is VERY expensive ($300/52mm).   Optically, it is pure with no color poisoning at all.  I have not check out how it works in the IR spectrum yet but I will in the future.  The only real complaint for me is the lose fitting elements!

Using Light Painting with Very Long Exposures!


Bringing Out Foreground Details..

A few months ago Jamie Davidson and I led a photo workshop and excursion to Charleston, SC. The workshop was in both Infrared and Color photography and we had several sunrise shoots in various locations.  One of my favorites was on Foley Beach looking out at the Morris Island Lighthouse.  There was a groin  (rock break wall) there as well as a boneyard (driftwood forest).

Morris Island Lighthouse Sunrise

My Vision:

What I had in mind was to photograph the  Morris Island lighthouse in silhouette  with the sun rising behind it with driftwood in the foreground as a very long exposure to flatten the ocean surf.  I also wanted to have some surface detail in the driftwood and beach in front of the camera so I knew that I would have to use a very high power flashlight to paint those items during the exposure. Long exposure photography will generate very etherial images that will draw the viewer into the image.  Learning how to generate these types of images is a very worth while endeavor and I hope that you are interested enough to experiment with it as well!

My Equipment:

  • I wanted to shoot this with my Fuji X Pro 1, but at that point I was still waiting for its delivery.
  • Canon 7d camera body.
  • Canon 17-40L lens.
  • Remote shutter release cable.
  • A very stable carbon fiber tripod!
  • Sure Fire U2 variable LED tactical 100 lumen flashlight.
  • Fortitude to get up very early and drive/walk out to the beach (no small task!).

Singh Ray Variable ND

After arriving on site, I looked  for a suitable piece of driftwood to place in the foreground and have it frame the lighthouse.  I setup back about 20 feet so that I could get enough depth of field to have both the tree and the lighthouse both in focus. Setting up the tripod well back from the surf to keep the water from under cutting its legs I framed the shot above.  It looks bright enough but it was so dark that I could not even see the tree!  Please keep in mind here that I also wanted to slow down the movement of the water, so I have installed a variable 8 stop neutral density filter from Singh Ray on the lens.  Even at its minimum setting there is still a 2 stop darkening of the image throughout he viewfinder.  What I am looking for is an exposure time of at least 30 seconds  but longer if possible. What I do is to set the ND at 2 stops then use the flashlight to provide a bright spot for focus. After focusing, I setup the camera in manual mode by adjusting the aperture to f/11 to f/16 and the shutter speed to a starting point of 30 seconds.  I then adjust the variable ND filter to give me a 0 ev exposure in the metering system!

It is this special filter that allows me to really slow down the shutter speed  enough to smooth out the ocean surface!  You do not have to use a variable ND, a set filter like a 6 or 10 stop ND from B+W filters will work fine, but you have to setup the composition and focus before you attach the filter because you will not be able to see through the viewfinder once it is installed.  All of these ND filters are expensive, the B+W ND’s will be over $100 and the Singh Ray will be just at $400!  But EVERY photographer needs some sort of ND filter in order to slow down the shutter speed to smooth out water or cloud movement for a soft etherial image.

The viewfinder must also be covered up once everything is set and before the exposure is made in order to not effect the camera meter.

Ultra Bright Tactical Light

Trip the shutter and step away from the camera/tripod.  Now taking the ultra high power flashlight I use it to paint the surface of the tree and sand around it.  This is a continuous movement of the flashlight over the tree and sand again and again.  I do not want them brightly lit, rather I am looking for just enough light to ensure that the tree is  not a silhouette and that the sand has some detail and structure in its surface.  This can be difficult and you might have to walk closer to the tree in order to have more light from the flashlight fall on it.  But being digital we can take several images before the sky becomes too bright to work!

You can use any light source but you do need to be careful not to use a light that is yellow in color.  The tactical lights are expensive but do not fail due to the bulb and will last a lifetime.  At high power the batteries will only last for an hour or two, but most of these lights have several power levels and can stretch the battery life up to 20 hours!  They are great for photography but they can also save your life in an emergency as well.

Here is a Black & White version of the image above.  This was converted in Photoshop CS6 with Nik Filters Silver EFX Pro 2.

Morris Island Lighthouse Sunrise

If you look up at the very TOP of this page you will see my Blog Banner Image, which was also taken at this location within moments of the Lighthouse image!  This type of photography (long exposure can be very pleasing in it process and is certainly easy on the eyes!

Below is one further image, this time taken by the Fuji X Pro 1 without light painting in the mid morning.  For this image I did use a 52mm B+W 10 stop ND filter, but no light painting as it was already too bright out and was not necessary.

Ultra Long Exposure with the Fuji X Pro 1

Please let me know what you think!

Pin Hole Photography Primer…


Today is the day!  Get out your Pin Hole cameras and go shooting!

World Wide Pinhole Photography Day, 2012!

Fuga City Detail, Pinhole image, Panasonic GH2 with the PinWide f/127 pinhole plate.

Today is the world wide pinhole photography day.  Thousands of folks around the world are out shooting pinhole images today and posting them on the http://www.pinholeday.org/ web site.  It is great fun and takes us back to an era when photographic experimentation was the word of the day!  A pinhole camera system is one without a lens. I simply has a VERY SMALL hole thru which the light passes and creates the image on the back of the camera on film or sensor.  You can purchase pinhole plates for most cameras made today plus you can easily create one of your own!

Do a little research here on the net thru Google and you will find a ton of information on it.  But remember today is the yearly big day!

I have pinhole plate adapters for ALL OF MY CAMERA systems.  There are many companies who make them.  Here is a short list to get you started:

  • Skink (ebay) (For ALL cameras)
  • Pinwide (for Micro 4/3)
  • Lenox Laser (good selection of models for various cameras!
  • Lens Baby

Here are what some of these plates look like…

Pinhole images are typically not very sharp, BUT they are at the same sharpness from the very front edge of the pinhole plate to infinity!  They can be created with one to several pinholes and there is no limit to how the film can be placed, flat, curved, round and so on!  For digital systems, you can indeed have multiple pinholes, but only a flat sensor.  They can and will create very etherial images that are very pleasing to the eye and great fun to create!

Here are some example images of my own pinhole creations, please let me know what you think!!

Pawleys Marsh Pinhole image. Leica M mount Skink f/207 pinhole plate at 3.2 second exposure

Pawleys Marsh Pinhole image. Leica M mount Skink f/207 pinhole plate at 3.2 second exposure

Fuga City Detail, Pinhole image with the Pin Wide f/127 pinhole plate.

Fuga City Detail, Pinhole image with the Pin Wide f/127 pinhole plate.

Tybee Island, GA, Hidden Paradise!


Once here it is difficult to leave!

Tybee Island Beach in front of our rental!

Every year I try to make it down to Tybee Island, GA for a visit.  It is one of the hidden treasures of the Southeast coast!  There are two lighthouses there, shrimpers, beaches, birds and many more photographic subjects!  Last year, my wife Ellen made arrangements for a family vacation there with a rental right on the beach.  There were 9 of us there in all and we had a great time!  For me the exciting parts of the week were the photographic excursions out and about.  I am always excited to visit the same places many times as they will always present themselves in a different fashion on each visit!  Below is a small selection of the many things to experience while visiting…

The sand on the beaches there is a fine off white sugar sand and the kids loved to play in it.  There were ALWAYS large ships lined up  to leave and enter the river going up to the port!  Every morning there were shrimp boats going back and forth just off of the beach fishing!

The Tybee Island Lighthouse is a MUST SEE!  It is one of the better looking lighthouses on the coast and always makes a great photographic subject!

Tybee Island Lighthouse in 590nm Infrared.

Cockspur Lighthouse , the 2nd local light house is up the river a mile or so from the Tybee Island Lighthouse.  You can visit it by heading north off of Tybee Island and stopping just before the first bridge and taking the small dirt road off to the right to the marina.  You will then have access with a longer lens to photograph it.  I have done this many times but for this trip we took a Dauphin boat trip out into the river and went around the lighthouse several times.

The Cockspur Lighthouse in Tybee Island.

One of the more interesting things about Tybee Island is the fact that during the summer there are usually daily thunderstorms the come thru the area and this makes for a good opportunity to grab some high speed lightning shots!

High speed daylight lightning capture from the deck of our rental!

Tybee Island is worth taking the time to visit anytime of the year.  Go for a day or a week, you will not be disappointed!

My grandson Jordan pondering the lighthouse keeper's hat as he gets ready to climb the lighthouse stairs!

Going Back To Momma…


Falling In Love With The Fuji X Pro 1 Camera system..

Or, what does a camera system have in common with a good doggie?

Fuji X Pro 1 System

A little history:

I started in photography over 45 years ago (yes I am an old fart)… A long time for sure!  I started using and learning on an Argus C3 35mm rangefinder camera then just started working up through many many more rangefinders.  Along came SLR camera systems and like  most other photographers of the time I decided that I too must have one of these so that I could actually see through the lens to see what I  am going to get.  Many years passed and every time I would pass a camera store I found myself looking with lust  at rangefinders of all things.  At first I thought that there must be something wrong with me, why else would I be drawn to an older technology after the many thousands of dollars I had invested in the best Canon bodies and lenses over the years?

Skittles the Dashound, #9

After much reflection I decided that it must be like dogs!  You know… your parents purchase you your first dog which you fall in love with,  and you are forever imprinted with love for the dog and the type of dog.  Then for the rest of your life you desire only that type of dog!  I am on my 9th dashound now and wouldn’t dream of any other type!  So, back to the point, cameras, like dogs are imprinted upon us at an early age and we tend to gravitate back to momma so to speak!  After coming to grips with this fact I went out and spent another $2500 on the Hasselblad XPan II rangefinder and was forever re-hooked.  Yes, I still have and shoot Canon bodies and L glass, but my true passion is for rangefinders and dashounds!  I have accepted this fact as part of who I am. I find that I even occasionally purchase an old rangefinder camera to display in a glass case in my studio!

Ok, enter Fuji!  Last year, Fuji introduced the X100, which is a digital rangefinder styled camera, not a rangefinder focusing camera.  It looked great and got great press. I wanted one from the very first but held off for a year.  Last fall I actually purchased one and was instantly in love with the thing!  It was small and light and SILENT…  It has a fixed 23mm lens and did I mention that it is totally silent in operation!!  Oh yea, in love to be sure.  This February (2012) my wife and I went to Italy for 11 days of photographic heaven and the only cameras I took were a small Infrared camera (Panasonic GH2) and the Fuji X100.  It was a match made in heaven for travel.  Light,  small and no work to lug around!  I got amazing images with the Fuji even though it had a wide fixed lens.  I simply had to rely upon my sneaker zoom to get close!

I found that I was not totally satisfied with the X100 because it was limited to a single lens.  So I ordered the new digital Fuji X Pro 1 interchangeable lens system with the 35mm f/1.4 and the 60mm f/2.4 lenses, and I have the 18mm f/2 lens currently on order.  It arrived at the end March and I was amazed by its light weight but enhanced functionality that the camera system provided!  now after a month of shooting with it I feel like I have returned to momma and have again found myself through my roots in photography!  God, please help me.. I am so locked onto this camera system that I can not  see any way to ever break away, hooked, addicted with a big fuji monkey on my back!  Fuji also says that  later this year they are offering a 14mm and a 18mm to 72mm zoom!  Then 3 more new lenses next year!  I can feel the dollars slipping away now.. I hope that my wife can forgive me for these future purchases.  I WILL keep the X100, it is after all a rangefinder styled camera and it is silent in operation!  I will purchase new lenses for the X Pro 1 and look to the future for the Pro 2 and Pro 3 bodies…

It seems as though I have found yet another addiction…

X Pro 1, 30 second exposure, 35mm f/1.4 lens, B&W Seascape of Pawleys Island Groin

This post is not a review of the X Pro 1, there are a ton of those out there on the web. It is simply a short series of statements and facts about the camera and why I love it so!

It will NOT replace my Canon 7d for (5%):

  • Lightning Photography, because it does not have a electronic shutter.
  • Water Drop Collision Photography, because it does not have an electronic shutter.
  • Macro Photography, well, it might actually work out for this one.
  • Birds in flight, focus is not fast enough.
  • Sports Photography, I simply don’t do this anyways.
  • Movies, has HD movies but no external mic hookup.

I will use this camera for(95%):

  • Landscapes
  • Seascapes
  • Hummingbirds in flight, works great.
  • Grist Mills & Covered Bridges
  • Long Exposures, works great.
  • Travel, light with many lens choices.
  • My MAIN every day camera system!

Leica Pin Hole pancake

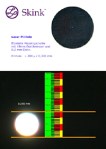
I was considering the Voigtlander Super Wide Heliar 15mm f/4.5 M Mount Lens instead of the Fuji 18mm but there have been so many web posts on how bad this lens is on the Fuji that I have decided against it.  I instead will use a Leica M mount Pin Hole plate from Skink on the Leica to Fuji adapter!   I love Pin Hole photography and have them for ALL of my camera bodies!  There is just something very peaceful and satisfying about using technology for the early 1800’s and the resulting images are very etherial!

Ok, more to come on this great new camera system in the future, I have to have a chance to actually go out and shoot the thing!

Antique Gas Pump, Fuji X Pro 1

So…

Returning to the love of our roots can mean:

Camera Love <= Really does equal => Doggy Love

Told you I was a sic person…

Smile!

Galleries Are Here!


The Gallery pages are coming online!

Sunrise on Folley Beach, Light painting on the driftwood with a white LED light! Very LONG Exposure...


On the top menu of the blog you will find several pages listed across the top.  The one labeled Galleries is actually a series of drop down menus which will let you select several organized image galleries containing my favorite work from over the years.  So far, I have 4 galleries populated but will be expanding over this month to around 15.  Please stop by for a visit and come back often to see the changes there!

I hope that you enjoy viewing them as much as I enjoyed creating them!  They cover about 15 years of my work since living in the Low Country of South Carolina and cover about 19 different states and 6 different countries! I even have some high speed water drop photography thrown in as good measure.

Comparing Color To B&W For Viewer Impact


Mattamuskeet Light, B&W Conversion

B&W or Color, The Eternal Question!

Wow, talk about a loaded topic!  I have ALWAYS preferred B&W over color, but until recently the public voted with their dollars for color over B&W about 3 to 1.  Along came Infrared and the trend totally reversed!  So I find myself looking at B&W conversions of my color images each and every time I sit down in front of the computer!  This is especially true in Infrared also.

What this means is that as I post process my color images I also do a B&W version just to be sure…


After doing my RAW conversion and basic cropping for my master image library size I use the Nik filters in the following way…

Color Work Flow:

  • Nik Define 2.0 – In the auto mode simply select the defaults and check OK to complete.  If needed you can switch over to Manual and add extra control points in noisy areas but make sure you select the measure noise button before clicking OK.  This process cleans up the  the image but doesn’t reduce clarity!
  • Nik Color EFX 4.0 – I usually run the Tonal Contrast recipe but always try the Warmth and Brilliance and others as well.  This is to sharpen and adjust the saturation levels!
  • Nik Viveza – Overall spot corrections.
  • Flatten Layers and save as a 16 bit PSD file with a usable name keeping the camera image serial number as part of the name.

B&W Work Flow:

  • Always run through this workflow after finished with your color processing.  Never switch your camera over to it’s B&W internal mode.  You will get better conversions using the Post Processing!
  • Nik Silver EFX 2.0 – Boy this is a tough one.  There are so many recipes plus millions of individual adjustments.  For me I usually use the Basic recipe, or the Full Spectrum recipe (my choice most of the time) but for some images the Wet Rocks recipe is too magic to overlook!
  • Under Image > Mode select B&W than flatten the layers keeping the image in the 16 bit mode.
  • Save As giving the image a new name with BW in the name field.

That’s all there is to my workflow from the color world.  Infrared is much different and you can read great volumes about it on my IR blog at:

infraredatelier.wordpress.com

OK, here are some color/B&W comparisons for you to ponder over…

Capt James, Very Moody & interesting image

But, check out how the B&W version draws you into the image and smacks you around a little!  Both images are good but the B&W works better for me!

Emotionally Charged, Moody... Perfect!

B&W - Down & Out, Moody, Nice but a little plain don't you think?

But the Color image is something else!

The Color version tells more of a story and works better!

As you can see, I like the Color version much better.  This goes to prove that you never know which is going to work out the best so you should process for both each and every time!

What do YOU think?

Shrimp Boats from the NC Infrared Workshop!


Infrared vs. Color/B&W, So Many Choices – So Little Time!

Shrimp Boats & Crab Pots!

I know, it really was an Infrared workshop given in the Swan Quarter area of North Carolina!  BUT, (really big but!) I wanted to capture these shrimpers in color.  The lighting was perfect, the clouds were moody and there were literally hundreds of the boats in port in both Swan Quarter and Englehard.  It was a dream come true!

Joane B. - Englehard, NC

Just look at these colors!  This first image was taken in Swan Quarter.  The fleet infrastructure was dismal and beyond poor condition.  Some (most) docks were physically crumbled but yet still had boats tied up!

The difference between Swan Quarter and Englehard was simply amazing!  Englehard was well maintained and full of boats.  Everything was sparkling (well, as much as a fleet of shrimpers can be!)

And yes, I did shoot in Infrared as well but will post those images on the IR Blog at infraredatelier.wordpress.com.

Ok, and now for some of my favorite shrimp boats of the weekend.  All were shot with the 7D switching off between the 24-70L f/2.8 and the 17-40L f/4 lenses!

Wonder Woman, Englehard, NC

Swan Quarter Fleet

Mary Elizabeth, Englehard, NC B&W

I did mention B&W shrimp boat images didn’t I? Sometimes, B&W images can be so stunning that they can take your breath away.  They pack and incredible emotional punch that can grab the viewer by the throat and scream “Look At Me!”

Swan Quarter Fleet, B&W

Mary Elizabeth, Englehard, NC

All images were processed in Adobe CS5 using the Nik Filter set.

Please let me know what you think!

Time & Time Again…


How Infrared Changed My Life!

I am getting old and definitely tired.

I shoot Canon gear and always have.  I always purchase 1D bodies and currently have the 1DMK3.  For lenses I only use L glass.  I have been a photographer for 48 years and am retired from Eastman Kodak.  I have a lifetime of photographic experience.

That being said I must tell you that except for my hummingbird shots in Sept and Oct (on the tripod only) that I have not used my Canon equipment since June 2009.

On June 9, 2009 I went into the hospital to have severe spinal damage fixed in my neck that had taken the use of my arms in less than 30 days. I was only to be there for 4 days.  53 days later (25 in ICU on a ventilator) I came home with a breathing tube in my neck and a feeding tube in my stomach because everything in my neck was paralyzed and I could not swallow water or food for another 6 months. In 2010 both tubes were removed when I started to swallow again and I started thinking about photography again. I lost 50% use of both hands and 80% of my neck motion due to 3 levels of cadaver bones and 5 levels of steel cage.

I could NOT even hold the Canon body let alone a 400mm prime!  So what I did was to buy an Olympus E-P1. I was amazed by the quality from this little camera that I COULD carry so I started buying lenses. One thing led to another and along came a E-PL1 so the E-P1 was turned into Infrared and I was so happy with it that I started my IR blog (below). So (OK, I told you that IR was an addiction!)within a week of having the L1 that I had it converted to full spectrum IR!  Eventually I missed the ability to use a remote shutter release (water drops and lightning trigger) so I got an E-P2 which I am going to LEAVE color!

The only thing that I miss is the Canon L glass which is superior in ALL WAYS to the Olympus micro 4/3 glass except that it is HEAVY.  But even this would not make me give up my Olympus system!  I might never be able to fully use my Canon equipment again but I am happy enough with the PEN that I do not obsess over it any more!  Understand, the PEN is a compromise system which does have good quality glass (which is all important) and the quality it produces places my images almost on equal footing with my past works with my Canon. My normal print size is 22×32 canvas prints which the PEN’s produce brilliantly!

Well, you ask yourself, what in the world does this have with Fine Art Photography?  Simple…. Smaller Lighter ultra high quality Infrared camera systems mean that I HAVE THEM WITH ME 100% OF THE TIME! I am taking more images, better images more often! This had lead to a rejuvenation of my artistic juices!  I am re-born artistically…

That being said, you have to know now that I shoot about 100 Infrared images to every single color image except during hummingbird season! I am enthralled with the ethereal nature of a WELL TAKEN infrared image.  They talk to me on an emotional level that no other type of photography has ever accomplished!  So much so that I have dedicated TWO web pages to it (see links on the right side)!  But I digress, the reason you are here is to see and experience the images (hopefully) the way that I meant them to be experienced!
Enjoy…

"The Wheel House Bell" B&W Infrared

"The Nets" Faux Color Infrared

"Carolina Trunk" Faux Color Infrared

"The Boots" B&W Infrared

"A Gathering Of Egrets" Faux Color Infrared Image

"Hagood Mill" Faux Color Infrared, Pickins, SC

"Pawleys Pier In Hurrican Hanna" Faux Color Infrared Image

This is just a SMALL example of some of my own personal favorite Infrared work.  Each of these images have been selected based upon the emotional impact generated within me as I view them.  I literally have thousands of such images and invite you to visit my two Infrared WEB sites (links menu on right) for more information and images!