Things that I think about. It is just so sad…
“I drifted into photography like one drifts
into prostitution. First I did it to please my friends,
and eventually I did it for the money”
-Philippe Halsman
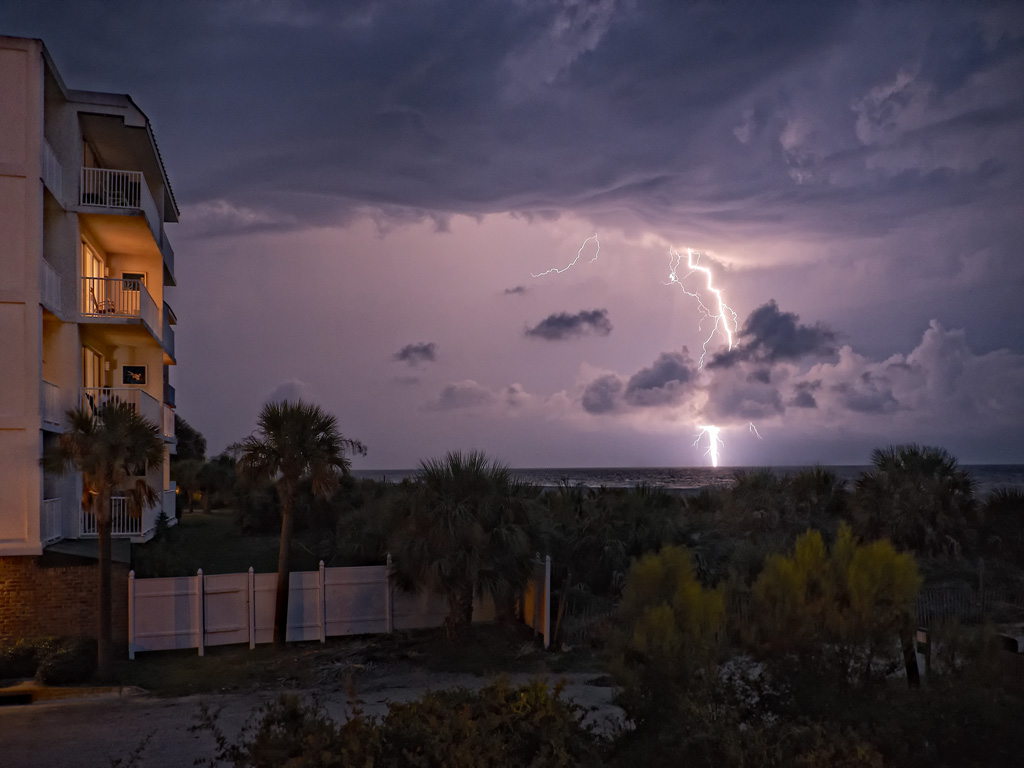
Sea Strike… Panasonic GH2

Sea Strike… Panasonic GH2
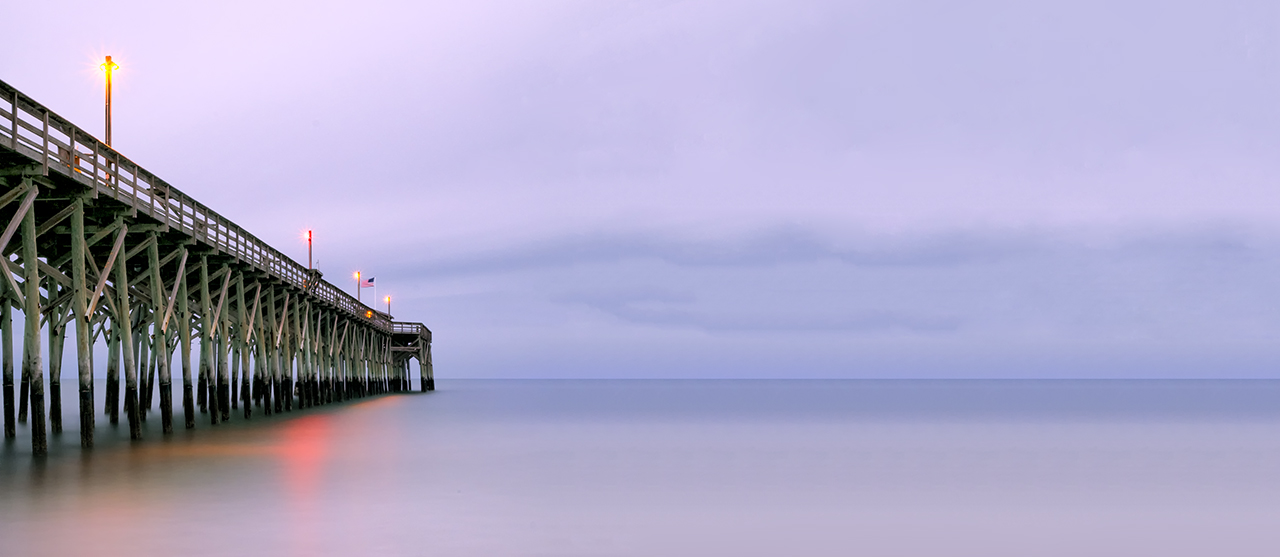
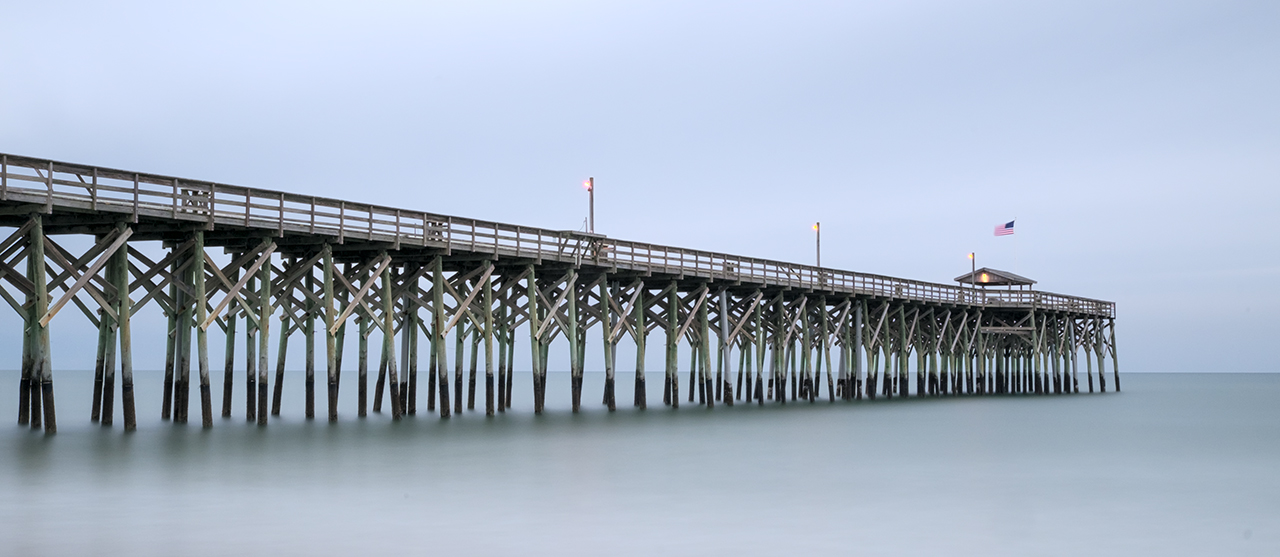
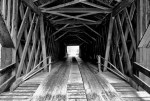
Pawleys Pier at night, Fuji X-E1, 480 seconds, f/22, 6 stop ND
Ultra long exposure photography can be a very fulfilling pursuit and generate etherial images that draw your viewer into them leaving them week in the knees! As a photography master generalist I can tell you that there are a few speciality areas that can really excite me and force my juices to flow! Specifically they are:
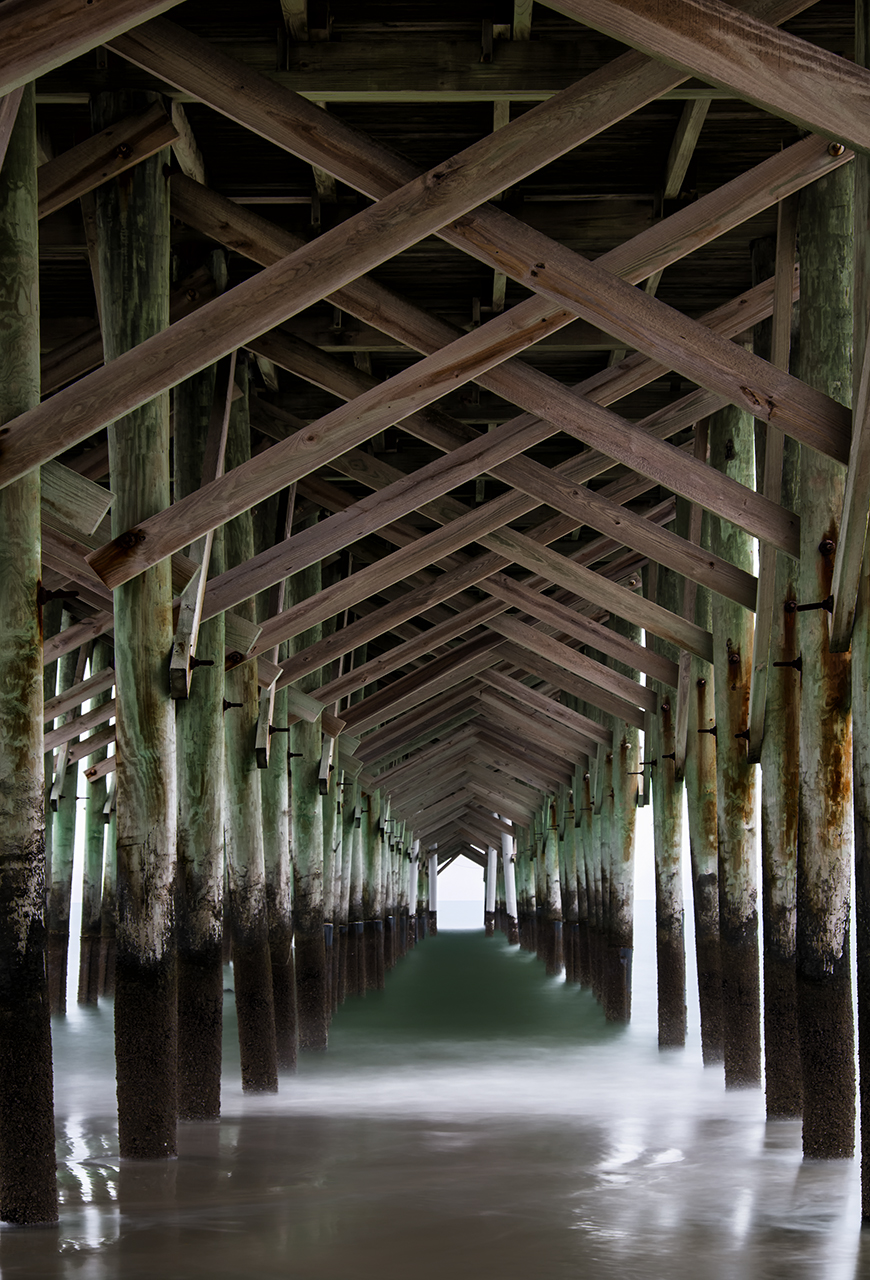
This post is a tutorial on Ultra Long Exposure photography using the Fuji X-E1 camera with its 18-55mm lens, a 6 stop B+W ND filter and a Sekonic L758DR spot meter.

Fuji X-E1 with its 18-55mm lens
The Fuji X-E1 is my 3rd in the Fuji line. I started with the X100 and moved to the X Pro 1 in order to have interchangeable lenses, then to the X-E1 to take advantage of its Electronic Shutter Release. I have always been a Canon shooter with closets full of L lenses. But due to a spinal operation that went dreadfully wrong I lost 80% use of both hands and arms. No longer able to hold heavy camera equipment I started on a long journey searching for high quality camera system that was small and light weight and produce world class images. A long story shortened, I settled on the Fuji X lineup and their fine quality lenses along with a few CV and Leica M mount lenses.
Now, the Fuji X-E1 with its electronic shutter allows me to hook it up to my water drop machine, Lightning Trigger and Hummingbird control system! The only lacking item is its short lens lineup. With the introduction of the new 55-210mm lens this spring even that will no longer be a problem for me!
Long exposure has several issues that you must overcome to successfully create the etherial, emotionally charged image.
The Long shutter speeds generally can range from 15 seconds to 20 minutes. These are difficult to reach unless you shoot at night with light from the moon. What I find that I do is shoot at dusk on or just before sunrise to overcome this issue. Usually I will add a Neutral Density Filter (ND) to reduce the total amount of light reaching the image sensor. This will allow you to shoot with more ambient light and generally make this style of photography easier!
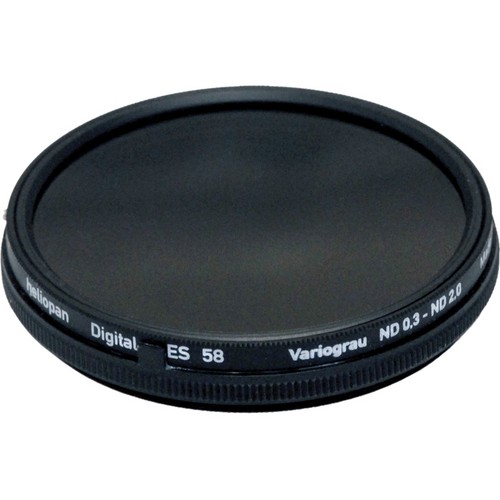
Heliopan Variable ND Filter

Shutter Speeds in Full Stops
I like the B+W line of ND filters and keep 3 on hand for each of my lenses I use: 3 Stop, 6 Stop and 10 Stop. There are also some really good variable ND filters as well. But be warned: You get what you pay for with these! If you get one of the Fader filters on Ebay for $30 then you are sure to be disappointed. But on the other hand if you get the Singh Ray Vari ND (~$450) or the Heliopan Digital Vari ND (~$350). The trouble with the variable ND filters is that they are generally limited to 6 stops before they start to generate artifacts into your images.
If you take a look at your standard 1 stop shutter speeds you can see what adding 6 stops of ND filter will do… If you have a metered exposure say, f/8 at 1 second, adding a 6 stop ND filter will give you a 1 minute exposure!

Aperture in Full Stops
If you desire a longer shutter speed you can also increase your aperture value up to a higher number forcing the shutter speed down to allow more light to strike the sensor.
We started at f/8, but by moving it 3 full stops to f/22 (see chart on the right) we can then move our shutter speed 3 more stops slower to 8 minutes!
You can move the aperture and shutter speeds up and down to get the balance you need for your artistic interpretation you desire for your image. Remember though, the sharpest that most lenses are capable of is at f/8!
It is dark out, you can see very little detail in your viewfinder! How can we accurately focus? Here are some ideas for you to consider!
Use a Light as a focus point
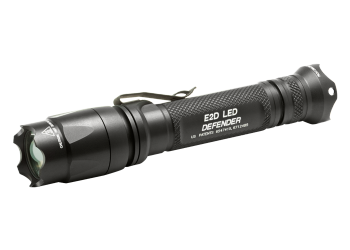
Surefire E2D
Ok, this is a biggie. You will find that when using a 10 stop ND and on some cameras, the 6 stop ND that the in camera metering system does not work reliably. Plus to make this even more interesting consider a very long exposure, say 10 min where the light is changing and getting a stop or 2 darker during the exposure! These are not small matters to overcome. There are several work arounds for this from a simple pain in the but to advanced hand held meters!
Here is a list of suggestions for you to consider..
Now, it is time to go through exactly how I created these images using the spot meter and the Fuji!

The scene as seen from my eyes at the time I was setting up…
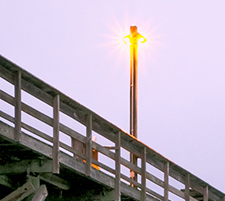
Above is how the scene looked like at 7:30 pm (dark) when the image was taken. As you can see it was so dark that the only way to focus was to use the bright spots of light on the pier to manually focus, then pot meter on the sky with the L758DR meter. This gave an initial meter reading of f/22 @ 2 seconds thus making the sky 18% gray (too dark for me) with ZERO exposure compensation dialed into the meter (not yet adjusting for the 6 stop ND)! Now, adjusting the meter for the 6 stop ND filter by entering 6 stops of exposure compensation, the reading became f/22 @ 2 minutes but with the sky still at 18% gray. My imagined, finished image was one with the sky 2 stops brighter, or moving the spot metered point from Zone 5 to Zone 7 which is 2 stops! So I simply added 2 more stops and moved the shutter speed to 8 minutes (2 stops brighter) and shot the image.
Normally, I would have the 6 stops of compensation dialed into the meter ahead of time and make this a 1 step process.
So here is the resulting image…
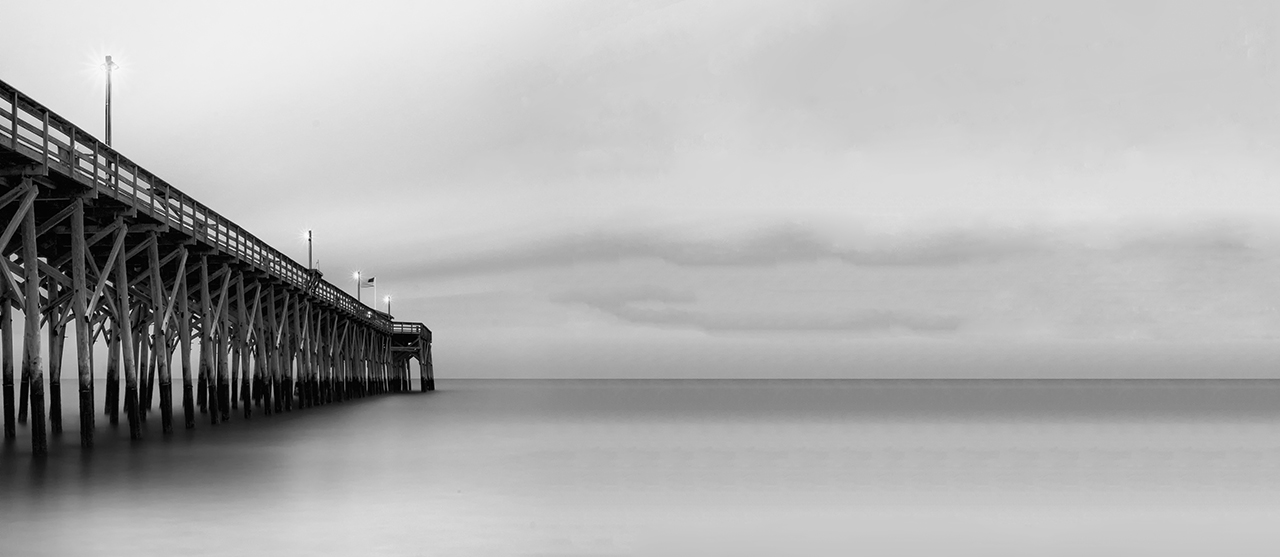
f/22 @ 8 minutes with a 6 stop ND and moved to Zone 7
I am showing you the images in B&W so that you can better visualize the shades of gray to see the 18% moved from Zone 5 to Zone 7! The Sekonic is very easy to use and is a true 1degree spot meter. To dial in the 6 stops of exposure compensation I held down the ISO1 and ISO2 buttons and turned the control dial. The meter reading adjusted for the ND filter and gave a perfect exposure the first time!
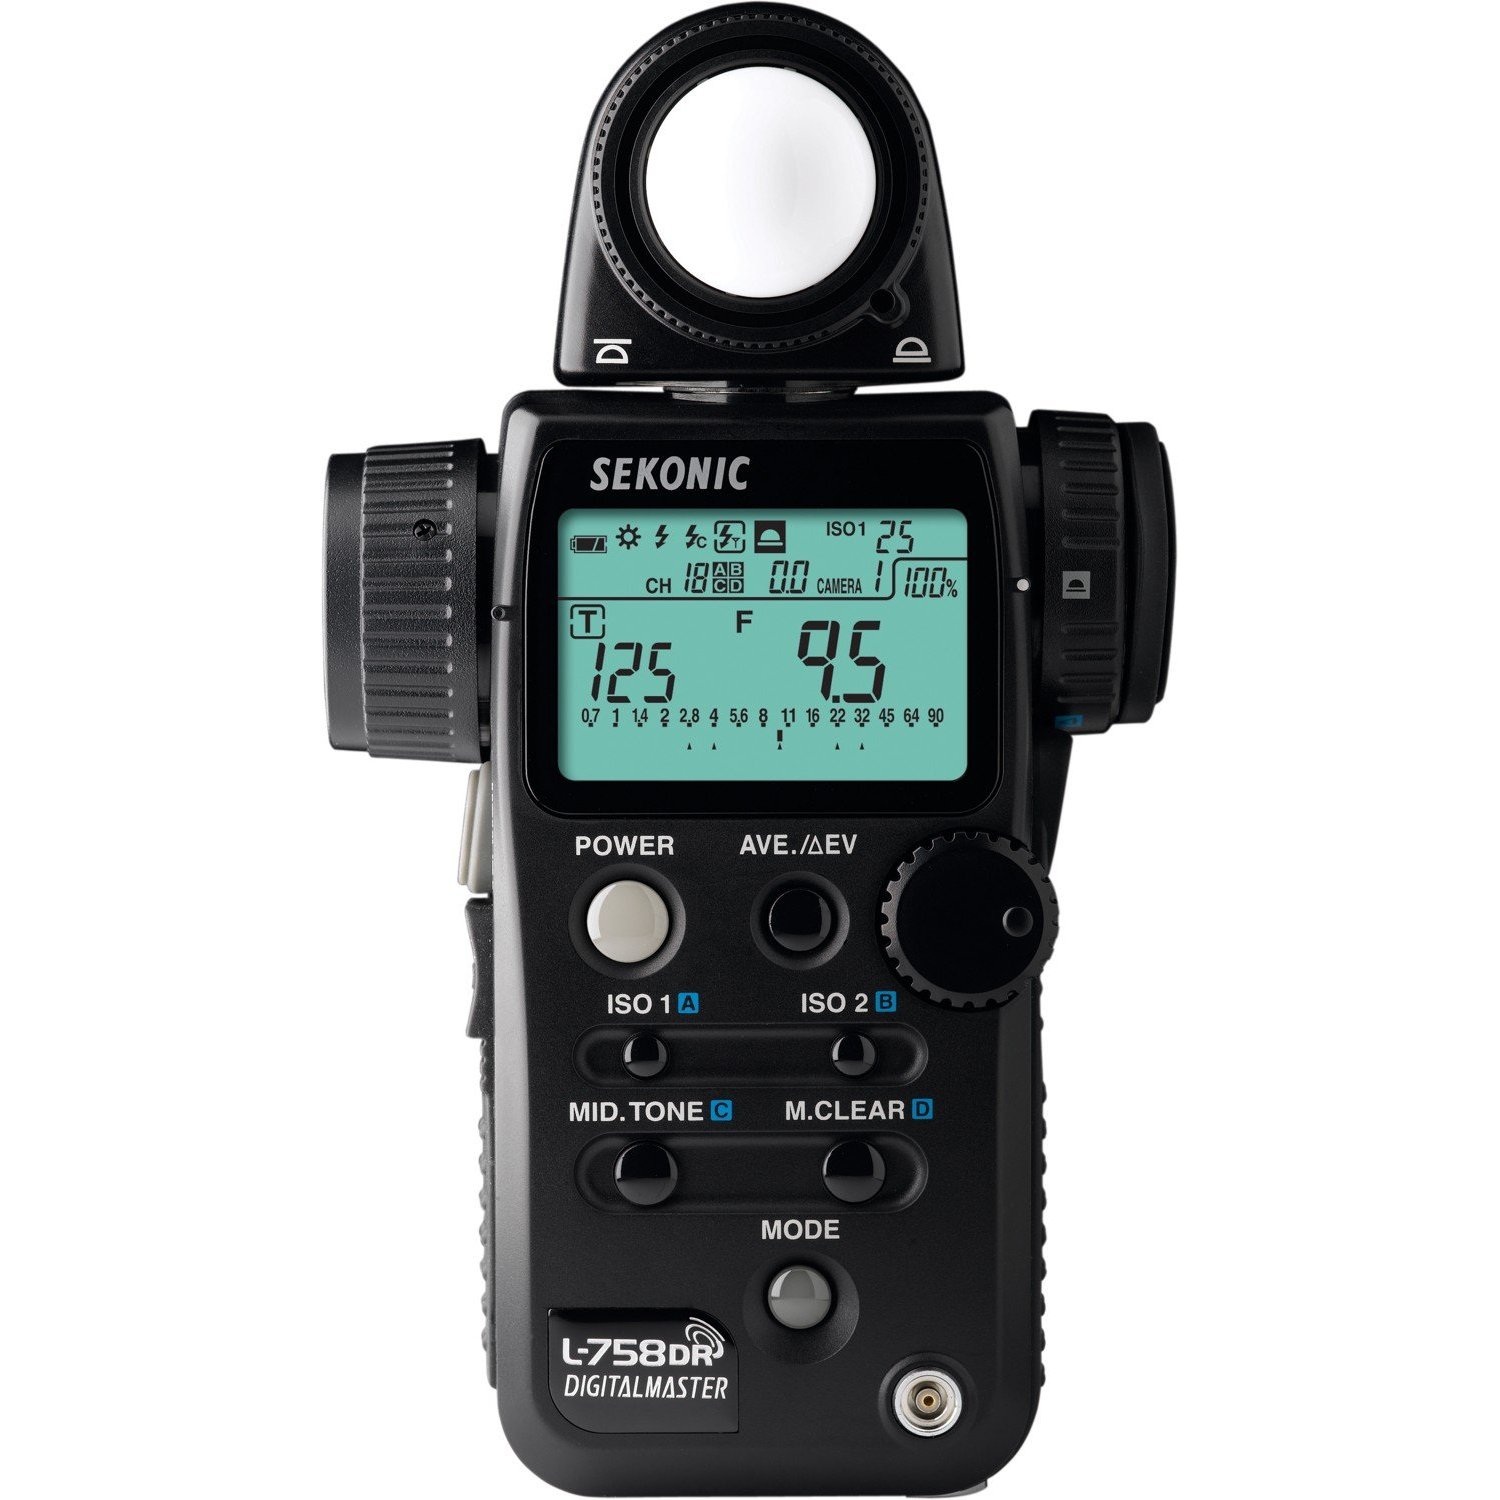
Sekonic L758DR Spot Meter
The exposure compensation shows up on the LCD screen so that you know what you are actually measuring. You could have easily set it to 4 instead of 6 and that would have taken the move from zone 5 to zone 7 for you but I prefer to do that adjustment in my head!
Zones…
Simply stated the Zone System (Ansel Adams), assigned a series of stepped gray changes, 1 stop apart and across a valued scale of 10 stops with Zone 5 being 18% gray which is where ALL camera and handheld meters place the exposure. By looking at the chart below you can see the change between Zone 5 & 7 (2 stops) and what difference it will make on the brightness of the sky! I use the Zone System in ALL of my exposure calculations and it is how I see contrast changes across my image!

The Zones…
There are plenty of great books out there that will teach you the Zone System of exposure control and adjustments! Here are 2 on Amazon:
Here is how you would apply actual Zone values to an image. Then you can shift the exposure to move the metered Zone up or down to adjust the overall brightness of the image!
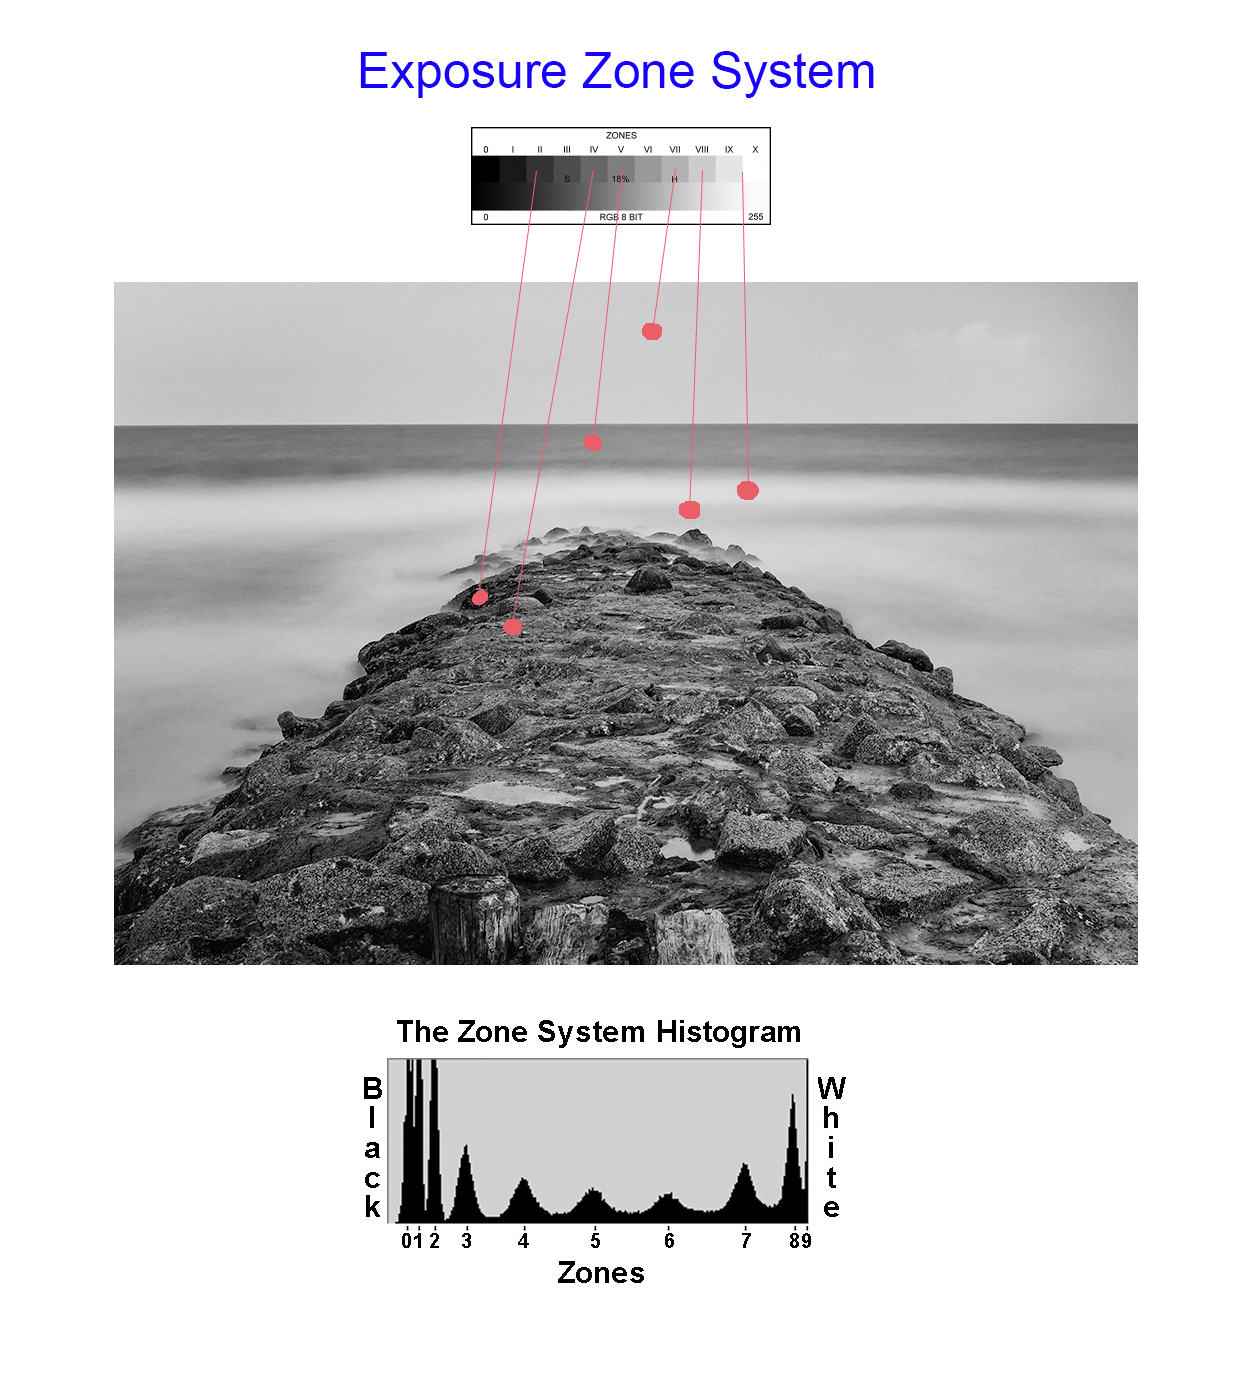
Using Zones to understand what your meter sees…
Now given the meter reading for Zone 5 you can change the exposure up or down to brighten/darken the overall image! Combine Zone Exposure techniques with Long Exposure photography then you can see how easy it is to control your final image. Plus if you use a handheld spot meter that allows for +/- 10 stops of compensation then you can see how easy it becomes to get a good exposure that is measured in seconds or minutes!
Here is a simple explanation of what each Zone looks like:

The Zone System explained.
Here are a few more images taken this night on the beach! I hope you enjoyed both the article as well as the images! Please let me know!
250 second exposure, Fuji X-E1
30 second exposure just before sunset, Fuji X-E1 shifted to zone 7
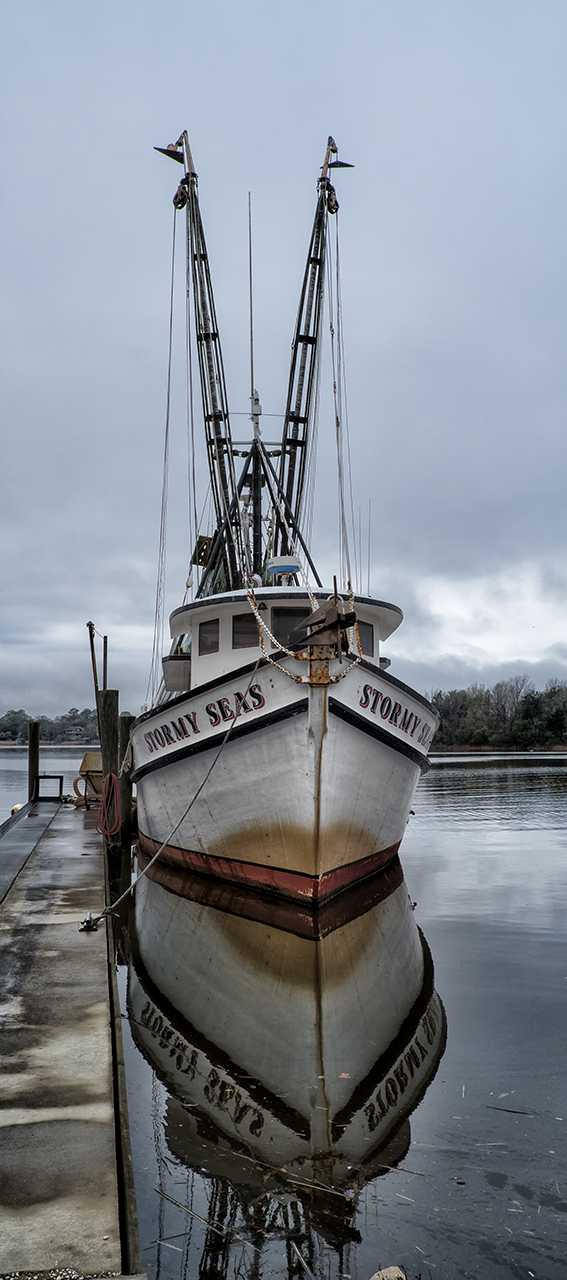
Stormy Seas Pano, Fuji X-E1 & Fuji 18-55mm lens
Well, while the X-Pro 1 is a much finer camera than the X-E1 due to its hybrid viewfinder, but the E1 offers some minor upgrades that make it more attractive to me. First and foremost was the addition of an electronic remote shutter release! This one single change allows me to attach the camera to both my High Speed Water Drop system as well as my Lightning Trigger. I can also use it now with high speed hummingbird photography! This is in following my plan to completely remove my Canon equipment from my photographic tools in order to achieve a leaner lighter photographic system (click HERE for an explanation as to why this is so important!).
I am REALLY HAPPY with this decision. The camera is light and small, people around me rarely notice it in my hands! It generates GREAT images that I can use in place of images generated on my Canon 1DSMK3 and 7D without the need for a donkey to carry it around! (if you did not follow the link in the above paragraph as to the WHY reason, please do so, it will explain sooooo much!).

B&W Foggy Dingys, X-E1 and the 18-55mm lens
Now that I have completed the evaluation and testing of the new E1 camera I have decided to send the X-Pro 1 off to LDP in New Jersey to be converted to 830nm Infrared. I have a Panasonic GH2 Micro 4/3 system already converted to 590nm IR so I am thinking that the X-Pro 1 will be a novel deep contrast B&W IR system to have. I really do like the X-Pro 1 and love the hybrid viewfinder so I will likely be watching closely next year to see what its replacement can do!

Dingys in the Fog, Georgetown, SC with the Fuji X-E1 & 18-55mm lens

CV 75mm f/1.8
So with all of these photographic paths in mind I jumped on the X-E1 camera system. I also ordered the new Fuji 18-55mm lens as a walk around lens further allowing me to reduce the camera bag by three extra lenses, the 18mm, 35mm and the 60mm. Now all that I carry is the 18-55, 8mm fisheye, Voigtlander Heliar 75mm f/1.8 Lens with two 5mm Leica extension tubes (I LOVE the Leica and Voightlander M mount lenses for this system!) and a Pin Hole lens! This makes for a much lighter camera case.

Rotten Meat Mushroom, member of the Stinkhorn family. Fuji X-E1 with the Fuji 60mm macro lens.
There is no sense in evaluating the new camera, it has been done a thousand times all over the world, and basically it is identical to the X-Pro 1 in all ways except for the Viewfinder and the LCD panel and has the addition of 2 separate inputs for an electronic remote shutter release.

Shem Creek Shrimpers in B&W, Fuji X-E1 & 18-55mm lens
What is important here is to show that in operation, the camera handles just like the X-Pro 1 and generates great images. I shoot in RAW and currently am using Adobe’s ACR within Photoshop CS6 and I am anxiously awaiting the release of Phase One’s Capture One V7 with Fuji support! Capture One has been my main tool for RAW conversion for years and it is just killing me to have to wait so long for this update!
I hope that you can see why I am so excited over this smaller sister to the X-Pro 1 camera! It really will fill every of my photographic needs in time. I am anxiously waiting for the release of the 55 to 200mm lens in 2013!

Salt Marsh in the fog…

Outer Banks FIshing Pier Sunrise, Fuji X Pro 1 + 10 stop ND filter

Avalon Pier Sunrise, 30 second exposure
I just got back from leading an advanced photo workshop & excursion to the outer banks on Nags Head Island in the Outer Banks! The subject was HDR and Long Exposure Photography. It was an amazing workshop filled with great students and we visited amazing locations. What was so special about this was the sunrise locations at the Avalon Pier (which was broken into 3 parts) and the Outer Banks Fishing Pier. The wave conditions were a little high due the the North Easter having just passed and made for tough long exposures due the the required shutter speeds!
As you can see with the image on the left, the waters surface was still a little bit misty even with a 30 second exposure. The light was simply too bright and the waves too large to get a slower shutter speed. Still, the image is pleasing and as you can see from the blue sky it is just after the sunrise was finished.
For rough seas, the longer you can get the exposure the smoother the water will become. The X Pro 1 will allow up to a 30 second exposure in the T mode. You simply use the arrow keys to change the exposure up or down, but 30 seconds is the max. For longer, you must use the BULB mode. The Fuji has a very well designed BULB mode! When you trip the shutter, a counter will start on the back LCD screen counting up! This makes for very easy timing control. Here then is an example of a 90 second exposure in both Black & White and color.

Outer Banks FIshing Pier Sunrise, 90 second exposure with the 35mm lens. Exposure: 90 seconds, f/16, ISO 200, 10 stop ND filter.

Outer Banks FIshing Pier Sunrise, 90 second exposure with the 35mm lens. Exposure: 90 seconds, f/16, ISO 200, 10 stop ND filter.

Voigtlander Heliar 75mm f/1.8 Lens
Not all long exposures require such a long shutter speed. For some a shorter speed can generate a nice image as well. Here are two for your consideration. The first is simply a daylight shot of a creek mouth into the bay but with the exposure slow enough to smooth out the water and show a little pattern there! This was a 15 second exposure using the incredible Voigtlander Heliar 75mm f/1.8 Lens with the Fuji M mount adapter shot at f/16 and ISO 200.

Mid Day Creek Mouth, CV 75mm f/1.8 lens.
You can see patterns in the water just at the point on the right side.
 The second image is of the Roanoke Marshes Lighthouse at sunrise. This was a .3 second exposure at f/3.2. This image was a bit challenging as I wanted detail in the front of the lighthouse. I used a Sekonic 758 DR hand held spot meter to measure the building and set the exposure accordingly. This is a very easy to use metering system and will NEVER fail you in use. Sometimes you simply cannot use the cameras metering system to get the proper exposure. This is always a factor when you are using ND filter attached to the lens!
For this shot I used the Fuji 35mm lens with a lens hood attached to keep incident light from striking the objective element at an angle.

X-Pro1-Roanoke Marshes Lighthouse Sunrise

Avalon Pier Sunrise

Outer Banks Fishing Pier Sunrise, 60 second exposure

Sunrise

60 second exposure, Outer Banks FIshing Pier Sunrise
So, take heart, get a ND filter and go out and try some long exposures at sunrise or sunset. If you do not have access to the ocean then use the exposures to slow the motion of the Clouds! There are all sorts of possibilities out there for you to experiment with!

Ohh, a pretty lead in tease image!
Today was gallery day for me. I really wanted to go out and shoot but decided that I needed to sit and be open. So… I dug out my high speed water drop kit and setup on my work table and decided that today I would test out my Fuji X Pro 1 and my Olympus OMD for water drops. This then is the X Pro 1 post!
First, I can hear you asking, “How can you possibly use the X Pro 1 for water drops?”, well the answer is both frightening and simple at the same time! I do several types of photography where the camera in use must have an electronic shutter release so that I can hook the camera up to a remote controller, like a Lightning Trigger or a Time Machine for water drops. But water drops really do not need to be triggered by the Time Machine since the exposure is about a second long to enable the machine to trigger the timed water drops generated for the collision, the size of the drops, the distance between them, the shutter release and lastly the strobes! This is all done in the following order:
Thats it! So, while sitting there taking about 600 OMD images of water drops and cursing the fact that the only macro lens I currently have is the 12mm to 50mm macro, I asked myself: “Hey Mark! Why dont you get out the X Pro 1 and put on the 60mm macro and set it up for water drops and simply push your mechanical shutter release at the same time you push the Time Machines fire button?”. WOW, I was amazed by the simplicity of this thought and immediately got out the X and setup! The rest is history!

Fuji X Pro 1 with the 35mm w/Canon 500D. Egg cup with green water and the time machine dripper with red water. Black backdrop.

Boat Drinks! Fuji X Pro 1 with the 35mm w/Canon 500D. Egg cup with green water and the time machine dripper with red water. Black backdrop.

Fuji X Pro 1 with the with 35mm w/Canon 500D. Egg cup with green water and the time machine dripper with red water. Black backdrop.

“Lizardo” Fuji X Pro 1 with the Fuji 60mm macro lens attached.
Now, I do have to tell you that I encountered a MAJOR issue with the Fuji 60mm Macro. Since this technique uses multiple flashes to light and freeze the water drops, I discovered that the lens is VERY PRONE to LENS FLAIR! ANY light that makes it into the objective from ANY angle reguardless of the placement of the flashes, even room lights will cause a flair in the direct center of the image EACH AND EVERY TIME! This was VERY FRUSTRATING and took about an hour to overcome with CAREFUL flash placement, darkening of the room and shading the back of the camera to keep stray light from even coming into the gallery windows in the front! I have to tell you that this was a major pain in the butt! I can see another lens in my future to shoot macro with. I even tried my CV 75mm f/1.8 but couldnt get close enough to the water drop to get a full frame image with a Canon 500d attached. So as you can see, the first 3 images were taken with the Fuji 35mm with a Canon 500D +2 diopter filter attached. Even so this is as close as I could get. The last image is with the 60mm macro.
Please let me know what you think! The lens aside, you can see that the camera worked great for the images and I will be using it for this again provided that I find a more macro/flash friendly lens!
These three old shrimp boats were in the boat graveyard in Georgetown, SC. The trouble is that they are just too far away to capture with any of the Fuji Lenses. I have several other 3rd party lenses like the CV 12mm and 75mm f/1.8 but even the latter is just not long enough. A friend dropped by my gallery last month and gave me a bunch of old Canon FD/FX lenses and one of them was the Soligor MC C/D 70-300mm f/3.8 FD Lens. This is a big lens, about 10 inches long closed and 13 inches zoomed out to 300mm. It is a push pull design and surprisingly, clean of dust for a lens so old! It is an amazingly smooth and sharp lens and a real pleasure to use.
One of the problems with the Fuji is that there are currently no long lenses out there. Normally, this doesn’t bother me too much but once in a while I need the reach! I am always keeping my eyes open for longer lenses hence the CV 75mm f/1.8 and the Soligor 70-300. I also have a Canon 70-200 on the way from Roberts Camera which cost me $49.00.
I had to spend the day in Georgetown today so I decided to bring this lens along and give it a try! This lens was designed to be the Canon L glass killer back in the day of FD/FX lenses. It is amazingly sharp. Now that the X Pro 1 2.0 firmware is here manual focusing is EASY and SHARP! When in focus the details just jump out at you. I had a FD/FX to Fuji adapter on hand and after fussing with it and discovering that you had to adjust the position of the aperture lever inside the lens then mount the adapter I was in business!
As I said, focus is amazingly easy. The glass is sharp and the combo works very good. If you can find this lens out there in net land grab it, but I have NEVER seen one and searching online does not even turn them up!

The Three Shrimpers, Fuji X Pro 1 and Soligor 70-300, F/11, 1/2500, 400 ISO
Here is the color version:

The Three Shrimpers, Fuji X Pro 1 and Soligor 70-300, F/11, 1/2500, 400 ISO
I also wished to do some detail images for an upcoming magazine article so I took this camera/lens combination over to Stormy Seas and looked for boots and/or Gloves in the rigging! Here is what I found:

The Work Gloves… Fuji X Pro 1, Soligor 70-300mm at 200mm, f/8, 1/1000s, 400 ISO
I was quite pleased with this combination. As stated, the lens is quite large, but that is OK as I will not use it that often. The new/old Canon 70-200 is only about half the size and hopefully it will work quite well also!
Painting with light… Really this is just the perfect description of what I do with my photography! I rarely take snap shots. I will walk up to a subject and study it, allow it to wash over me and evaluate its emotional impact upon my sense of self, then I will take my my camera and use it as the tool of creation and force it to capture the scene as I visualize it!
Such was the case during my last workshop where Jamie Davidson and I took a group of students deep into the New River Gorge in West Virginal to photograph Grist Mills, Water Falls and Vistas. Usually I used my Fuji X Pro 1 (my main creative tool) but at one location I was forced to use a longer lens in order to overcome intense, harsh mid day lighting on a small set of water falls. So I choose to try my new Olympus OMD E-M5 camera system with the Panasonic 14-140mm f/4 – 5.8 lens and a 10 stop B+W ND filter (110) and of course on the tripod.
These waterfalls images were very difficult to capture in the fashion that I visualized them in my mind. I was looking for dark, forbidding images of the water and dark rocks surrounding it with a little highlight detail on either side on the rocks. I ended up spot metering on the water then placing its exposure into Zone 7 on the 10 zone scale (yes I DO use the Zone system for exposure as you should! This will be the subject of a future post!). After setting the proper exposure for the Zone 7 water and very dark rocks I then used a 900 lumen tactical LED flashlight to light paint the rocks around the water to bring out some slight detail there. The exposures were long, 3.5 seconds for one and 1/5 second for the larger falls. The longer exposures allowed me to repeatably repaint the rocks with the very, very bright tactical light. Take a look at the results below and decide if the effort was worth it or not!

Water Falls, New River Gorge, 3.5 second exposure, f/22, 10 stop ND with high intensity light painting around the falls area.
As you can see in this first image, I have created an etherial image with slight edge detail which was generated by the small high power tactical flashlight. The image worked much better in B&W so I did not really work at the color version of it at all. My intention was to create a dark moody image that would wash over me emotionally…

Water Falls, New River Gorge, Color, .5 second exposure, f/22, 10 stop ND with high intensity light painting around the falls area.
This second image in color was my 2nd attempt on a different location at the same series of falls. I really like this one in color. The exposure time was much shorter due to an increased amount of ambient light falling on the water and I did not have enough time to paint both sides of the falls with the light. Still, all in all the image is quite pleasing and the colors brought out during the long exposure are quite stunning.

Water Falls, New River Gorge, B&W, 3.5 second exposure, f/22, 10 stop ND with high intensity light painting around the falls area.
This last image I chose to process in B&W with a little darkening of the image corners to make it slightly more moody. I think that I like the Color image a bit more than the B&W version. What do you think?
All in all, I have to say that I am very impressed with the functionality of the OMD camera body. It worked perfectly for these difficult images and allowed me to capture the images as I envisioned them in my mind and that is the best that one can hope for when you are out in the world creating art… I will also admit that if I had a longer lens for my Fuji X Pro 1 at the time that I would have used it instead, but at the time the Fuji 60mm macro was the longest I had. I have since purchased the CV 75mm f/1.8 for the Fuji!

LED Tactical Light
Now, as to the tactical light, Surfire makes lights for the police and military but will sell to you directly or at Amazon or even in a local gun store. They are used in 2 ways, mounted on the weapon or hand held and are used during a gunfight to see the target and half blind them. They can be VERY powerful and VERY costly. Being LED, they will not burn out. All of them have multiple output powers and the one I used here had 2, 20 lumens and 900 lumens. You must be very careful with the high power mode as you can damage peoples eyes with it but being so bright, you can use it during a bright sunny day. These lights use lithium batteries and they will last about 30 hours on low power and 2 hours on high power. I keep this light in my camera kit at all times as you never know when you will need to add some detail light on a scene!
OK after one of my readers left a comment suggesting that the new version of Nik’s HDR EFX Pro 2 was likely supported in Lightroom I decided that I should perhaps do a little research!

Detailed compatibility specs for NIK HDR EFX PRO 2
So, as you see, as long as you are running a 64 bit OS plus very specific hardware in the graphics department it seems as if you can now run this fine HDR tool in Lightroom and Aperture!

The Glade Creek Mill, Fuji X Pro 1 w/ 60mm lens, 10 stop ND and Nik HDR EFX Pro 2 with 3 source files
I just got back from a major workshop that Jamie Davidison and I led to the New River Gorge in West Virginia where to took our students on a hectic 4 day workshop/excursion. We explored waterfalls, grist mills, trains and vistas while studying Infrared and Color post processing back in the classroom each night till about midnight. This was EXHAUSTING to say the least but never the less, a great workshop full of great photographers who gave as much as they took! My days started every morning at 5am and ended about 1am. I am still recovering!

The Glade Creek Mill, Fuji X Pro 1 with the VC 12mm lens
While the main focus was shooting in Infrared and its associated post processing, I needed to provide loaner IR camera systems to those who did not yet own one, so even though I own three IR systems I was forced to shoot color! The sky each day was free of clouds and very bright, so if I wished to photograph in color I was forced most of the time to shoot HDR images in order to overcome the dynamic range of the day! A lot of the time I was able to successfully capture an image with The X Pro 1 in a single shot like the one shown here on the right of the Glade Creek Mill. But the norm was indeed HDR. The X Pro 1 camera has an unfair advantage over most other camera systems, it has a wider dynamic range and can capture more image data!
Notice that the mill did have some running water which forced me to use very long exposures in the range of 10 to 5 seconds in order to slow the water down. While there was not a lot of water flow there was enough to make the images very nice. I used the 60mm lens on the camera along with a 10 stop ND filter in order to slow it down!
OK so let’s get to it! From this point on, we are going to be working with the same three source files. I will take you through the post processing for the following HDR tools:
I also will be using Nik’s Color EFX Pro 4 and Viveza 2 for post processing (fine tuning) after the HDR conversions are finished!
OK, what is HDR? HDR stands for High Dynamic Range. Think of it this way… You are out taking pictures during the brightest part of the day. You can get a good image of the foreground subject, but the sky is totally blown out, you know pure white. The total range of the light from black to white in your image exceeds what your camera is capable of recording, but our eyes can still see and understand the complete range. So, in the world of photography, we have developed the ability to take several photographs, say three to six, each one with a different exposure from way too dark to really blown out. With these pictures in hand you can now run one of several software programs available that will combine the best of each of these differently exposed image into one that can display the entire range of of the image from black to white!
Now this requires a image with more data than you can store in a 8 bit JPG image, and even more than your 16 bit RAW, TIFF or PSD image! Now we move into the world of 32 bit images that can hold and display a far greater range of black to white data. Now, 32 bit images are all but useless to us in the real world so the HDR software will compress it down to 16 bits by removing select bits of brightness data without really negatively affecting the view of the image and making it possible to view and print the image! Pretty neat technology don’t you think?
What I normally do when shooting HDR is to take a test image and evaluate the histogram. I will look to see what areas are out range, or totally black or totally white. Usually, the blacks will be fine but the whites will be blown out. I will then retake the same image with a negative EV dialed in and re evaluate the image again looking to see if the blown out white areas of the image are now in the proper range. This gives me an idea of just how wide the range of the image needs to be. If the blown out areas take two or three stops of adjustment to bring them back into range then I will then decide upon how many HDR images are needed to be taken to get the total range covered in 1/2 stop increments. You will need to set your camera on a tripod and have it locked down to assure that you get the same exact composition in each shot. You can either use the auto bracket mode on your camera to generate your shots or do it manually. Weather or not you change the ISO or shutter speed is dependent upon the scene or your artistic intent. Some cameras will bracket at most three shots, some 5 and some even 7 or more! You can usually choose to bracket with Aperture, Shutter Speed or ISO. It is important to keep the Aperture constant as to not change the depth of field.
For these shots, as long as I kept the shutter speed longer than 3 seconds I would not have any issues with keeping sharply defined slow moving water to generate the HDR. So I chose a 3 stop bracket using the Shutter Speed, leaving the Aperture and ISO steady.

3495, -1.3 ev, f/8 8 seconds, I chose this value to get the correct exposure on the trees

3495 Histogram, -1.3 EV
________________________________________________

3496, -.6 ev, f/8, 13 seconds. I chose this value to get the rocks and mill exposure correct knowing that the water would be blown out

3496, -.6 ev
________________________________________________

3497, -2 ev, f/8, 5 seconds, I chose this exposure for the correct falling water exposure

3497, -2 EV
________________________________________________
These three images are the only ones that I will use to explore the various HDR processing software.
This HDR program comes built into Photoshop CS6. It is quite powerful and gives you a lot of options. I found it very easy to use and it gives very nice results. You will find it under the FILE > Automate menu and it will ask you to locate and open your component images or add images already open!
Once your images have been chosen, it will open them and drop you into a full screen dialog where you can make any image adjustments. Once done the software will drop the finished image into Photoshop where you can then do your final tuning with Nik’s Color EFX Pro 4. I like to use the Tonal Contrast filter due to the ability to adjust color contrast in the Highlights, Midtones and Shadows separately from each other. This one tool will really bring out the full potential of your images.

X-Pro1-3495 3496 3497 -Glade Creek Mill -2012 -M to HDR Pro
OK, onto Nik Softwares HDR EFX Pro. This is the first version that Nik offered earlier this spring (2012) It has a great interface and does a pretty good job, but requires a little more fine tuning after the HDR conversion is finished. The tuning process was again done using Color EFX Pro 4 and Viveza 2. This is a plugin filter for the Photoshop family and requires that you run a 64 bit operating system in Windows or OSX. It will NOT run on Elements and Lightroom.
I found that the images to be a little flat and lifeless until I applied the Color EFX Pro 4 in the after process tuning steps, then the images started looking pretty good.

X-Pro1-3495 3496 3497 -Glade Creek Mill -2012_NIK HDR EFX Pro
OK, now, this is a MAJOR upgrade to Nik’s HDR software. This one revision corrected all of my complaints about flat and lifeless images! There is VERY LITTLE fine tuning needed at all. I think that Nik’s HDR EFX Pro 2 is my favorite conversion tool out there. But I will let the images speak for themselves!

X-Pro1-3495 3496 3497 -Glade Creek Mill-2012 NIK HDR Pro 2
Photomatix is likely the most popular HDR conversion package on the market. It cost around $150 and does NOT require CS5 or CS6 to run. It is a standalone system and when it finishes it will directly save a 16 bit version of your HDR image on your computer that you can then open for further editing. It has many recipes and adjustments and you can do great work with it. I highly recommend it even if you are already running a 64 bit operating system and CS6. You will not be sorry!

X-Pro1-3495 3496 3497 -Glade Creek Mill -2012 -Photomatix Pro HDR
As you can see, the 4 converted HDR images are not at all the same. That would be difficult if not impossible to achieve. Each software package has its own adjustments and none of them are exact. I like Nik’s HDR EFX Pro 2 and Photomatix 4.2.3 the best. They are all easy to use and as long as you properly evaluate the scene that you are trying to photograph and properly choose the exposure values of the component images you will get really nice HDR shots!

Voigtlander Heliar Ultra Wide-Angle 12mm f/5.6 Lens

Fuji M Mount Adapter
I have been testing the Voigtlander Heliar Ultra Wide-Angle 12mm f/5.6 Lens with the Fuji M mount adapter on the X Pro 1 for the last week or so and have to admit that I am both impressed and love use and feel of this lens! It is well made and smoooooth to operate!
I have tested it both on the Kipon adapter and the new Fuji M mount adapter and have to say that the differences between the two are major due to the fuji’s ability to adjust corner color and darkened corners live with version 1.11 firmware! Pincoushion adjustments still require you to shoot and adjust.
I adjusted the pincushion by taking a picture of the pattern of 2×4’s on the surface of a deck. This allows you to maintain straight lines. I found for the 12mm that an adjustment of +4 was perfect.
I took the 12mm out to two locations for testing, Shem Creek in the Charleston, SC area and the waterfront in Georgetown SC. Both locations provides nice vistas and shrimp boats full of color and character.

Stormy Seas at the dock. Voigtlander Heliar Ultra Wide-Angle 12mm f/5.6 Lens. Notice the focus from about 3 inches to infinity.
As you can see, the DOF of the 12mm is simply amazing. The cleat was about 3 inches from the camera.

Here is a monochrome of the same image.


Shem Creek with approaching storm, Voigtlander Heliar Ultra Wide-Angle 12mm f/5.6 Lens

Shem Creek Shrimpers, Voigtlander Heliar Ultra Wide-Angle 12mm f/5.6 Lens
Notice the light rays coming down from right to left thru the clouds! The lens is VERY sharp and a real pleasure to use!

Pawleys Island Surf, X Pro 1, 2 1/2 min exposure

Heliopan Variable ND w/ Stops
This variable ND filter from Heliopan comes in a 52mm size which works on both the Fuji 35mm and 18mm lenses. It is touted as being totally color transparent with no color shifts! Online reviews have stated that it is by far the best variable ND on the market. My own testing has shown that it adds ZERO color cast to my images and that the physical stops on the filter work very well while the settings are quite repeatable. The only negatives found are:
Its stops on the filter that keeps you in the 2 to 6.2 stop range and generates no banding at all. So far I have been very impressed with the images created with this filter in all way. Yes you can do the same job with a fixed ND filter but even the high quality B+W ND filters add a slight color cast to your images!
Suggested Equipment:

The Zone System for exposure control in this image

Pawleys Surf, Long Exposure, 25 seconds, Fuji X Pro 1
So, what do you think? The Heliopan Variable ND Filter is a VERY good tool to have in the camera bag. But, it is VERY expensive ($300/52mm). Optically, it is pure with no color poisoning at all. I have not check out how it works in the IR spectrum yet but I will in the future. The only real complaint for me is the lose fitting elements!
A few months ago Jamie Davidson and I led a photo workshop and excursion to Charleston, SC. The workshop was in both Infrared and Color photography and we had several sunrise shoots in various locations. One of my favorites was on Foley Beach looking out at the Morris Island Lighthouse. There was a groin (rock break wall) there as well as a boneyard (driftwood forest).

Morris Island Lighthouse Sunrise
My Vision:
What I had in mind was to photograph the Morris Island lighthouse in silhouette with the sun rising behind it with driftwood in the foreground as a very long exposure to flatten the ocean surf. I also wanted to have some surface detail in the driftwood and beach in front of the camera so I knew that I would have to use a very high power flashlight to paint those items during the exposure. Long exposure photography will generate very etherial images that will draw the viewer into the image. Learning how to generate these types of images is a very worth while endeavor and I hope that you are interested enough to experiment with it as well!
My Equipment:

Singh Ray Variable ND
After arriving on site, I looked for a suitable piece of driftwood to place in the foreground and have it frame the lighthouse. I setup back about 20 feet so that I could get enough depth of field to have both the tree and the lighthouse both in focus. Setting up the tripod well back from the surf to keep the water from under cutting its legs I framed the shot above. It looks bright enough but it was so dark that I could not even see the tree! Please keep in mind here that I also wanted to slow down the movement of the water, so I have installed a variable 8 stop neutral density filter from Singh Ray on the lens. Even at its minimum setting there is still a 2 stop darkening of the image throughout he viewfinder. What I am looking for is an exposure time of at least 30 seconds but longer if possible. What I do is to set the ND at 2 stops then use the flashlight to provide a bright spot for focus. After focusing, I setup the camera in manual mode by adjusting the aperture to f/11 to f/16 and the shutter speed to a starting point of 30 seconds. I then adjust the variable ND filter to give me a 0 ev exposure in the metering system!
It is this special filter that allows me to really slow down the shutter speed enough to smooth out the ocean surface! You do not have to use a variable ND, a set filter like a 6 or 10 stop ND from B+W filters will work fine, but you have to setup the composition and focus before you attach the filter because you will not be able to see through the viewfinder once it is installed. All of these ND filters are expensive, the B+W ND’s will be over $100 and the Singh Ray will be just at $400! But EVERY photographer needs some sort of ND filter in order to slow down the shutter speed to smooth out water or cloud movement for a soft etherial image.
The viewfinder must also be covered up once everything is set and before the exposure is made in order to not effect the camera meter.

Ultra Bright Tactical Light
Trip the shutter and step away from the camera/tripod. Now taking the ultra high power flashlight I use it to paint the surface of the tree and sand around it. This is a continuous movement of the flashlight over the tree and sand again and again. I do not want them brightly lit, rather I am looking for just enough light to ensure that the tree is not a silhouette and that the sand has some detail and structure in its surface. This can be difficult and you might have to walk closer to the tree in order to have more light from the flashlight fall on it. But being digital we can take several images before the sky becomes too bright to work!
You can use any light source but you do need to be careful not to use a light that is yellow in color. The tactical lights are expensive but do not fail due to the bulb and will last a lifetime. At high power the batteries will only last for an hour or two, but most of these lights have several power levels and can stretch the battery life up to 20 hours! They are great for photography but they can also save your life in an emergency as well.
Here is a Black & White version of the image above. This was converted in Photoshop CS6 with Nik Filters Silver EFX Pro 2.

Morris Island Lighthouse Sunrise
If you look up at the very TOP of this page you will see my Blog Banner Image, which was also taken at this location within moments of the Lighthouse image! This type of photography (long exposure can be very pleasing in it process and is certainly easy on the eyes!
Below is one further image, this time taken by the Fuji X Pro 1 without light painting in the mid morning. For this image I did use a 52mm B+W 10 stop ND filter, but no light painting as it was already too bright out and was not necessary.

Ultra Long Exposure with the Fuji X Pro 1

Using the Fuji X Pro 1 for Infrared
Infrared photography means so many things to me… I have a popular Infrared Educational Blog at http://infraredatelier.wordpress.com/ where I have shared all of my secrets surrounding Infrared photography for several years, I have a book in work on Infrared photography, but MOST IMPORTANTLY, I have practiced the art of creating emotionally charged Infrared images for longer than I can remember, even as long as 45 years ago with film. Here, today, I will disscuss with you the technical details of using your Fuji X Pro 1 camera system to create these emotionally powerful images as well.

X Pro 1 Faux Color IR Image with only the channel swap
Understand this, you can create Infrared images several different ways:

Hoya R72
Standard Digital COLOR Camera: With the addition of a 720nm or 850nm IR filter on your camera lens your camera can capture Infrared images. There is a tradeoff to this way though because each camera manufacturer places some sort of UV/IR blocking filter over the image sensor that allows only visible light to pass through. Some of these filters are weaker than others and these cameras make for a system that will do well in Color and OK in Infrared with reasonable IR exposure times around a second or two. Others have a strong filter allowing only a small amount of IR energy to pass. These require VERY LONG exposure time in order to overcome this filter. The Fuji X Pro 1 is one of the cameras with a weaker filter! This is exciting because it enables you to easily create IR images with an unmodified camera system!

What your camera sees!
So with regard for the Fuji X Pro 1 system we are going to discuss option #2, the standard color camera with an external IR filter attached to its lens. But you ask: “What filter can I use?”. Well since we are not modifying the internal UV/IR blocking filter you must understand that the camera will pass normal visible colors as well as IR if the external filter allows it. This is both good and bad! If you were to install a 590nm IR filter on your lens the camera, it would see everything from 590nm up to 1000nm. But because the internal UV/IR blocking filter allows much more visible light than IR through, it will poison the exposure metering system. It is going to see the vast majority of the light as color (red) and expose for that rather than the IR portion. So attempting to do this will cause very unreliable exposure and great frustration on the part of the photographer.
What we need is to attach an IR filter that blocks ALL of the visible light and only passes IR to the sensor! So it is best to choose a 720nm IR pass filter to your lens like the Hoya R72 or a 800nm B&W IR only filter like the B+W 093. The higher you go in nm the longer the exposure time will be…
Now, knowing that we are going to use the 720nm filter which will only pass IR energy from 720nm and up while blocking ALL of the visible light our metering system will now function as it should!

Fuji X Pro 1 with a custom WB right out of the camera. This is as close as you can get but will still generate a great image.
White Balance is IMPORTANT when shooting in IR! The X Pro 1 will NOT reliably do a custom white balance with the 720nm IR filter installed. But it does have a manual Kelvin White Balance option, so when shooting IR you need to go to this sub menu in the WB settings and set it to 2500K. I have talked to others doing this and have heard that they also take away green as well in the menu. I personally think that this is unnecessary and by leaving the green neutral you will get more pleasing Faux Color images. A properly white balanced image taken on your camera has s slight reddish cast, the sky should be bronze and the green leaves should have a monochromatic feel with a bluish cast. (more on this later) An improperly white balanced camera image will be pure dark red. While you can still use this image in post processing the lack of a good white balance will throw off your exposure system. Read your camera manual on white balance and understand it!
Ok, enough of this for now. Lets talk images…
The Hoya R72 IR filter is almost black. You can see very little through it but don’t worry, the camera can see through it just fine! You can find these filters on Amazon for about $58.00 in 52mm. There are a lot of other filter companies out there that make these, some good some not so good… I trust the Hoya!
Mount the filter on your lens, set the ISO to around 1000 and put the camera on a tripod. Make sure that you have properly set the WB either as a custom on or as a Kelvin entry. If you choose custom, the camera will require a lot of light to due this properly. Use green grass to generate the custom white balance.
I like to use the optical viewfinder rather then the LCD or EVF for shooting in IR. Choose and frame your subject carefully. Hmm, a word about composition…
There are three items that can make IR images really powerful and full of emotional impact:
The more of these items you can get in your images the better they will be! Here is an example…

Clouds, Water and Leaves! What more could you ask for? While not done on a X Pro 1, this image could just have well been so!
As you can see, the sky, reflections and leaves create an emotionally packed, etherial image that draws your viewer into it! Keep these three compositional elements in mind as you go forth and create your images!
OK, last part of this post! There are a few small exposure issues that you need to be aware of while doing IR work. They are:
OK, this is enough for today. The next post will be a detailed Post Processing tutorial that will take you through both Faux Color and B&W processing. I even have a photoshop action that you can download to semi automate the channel swap and cut down your post processing time!
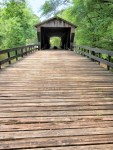
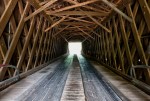
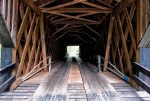
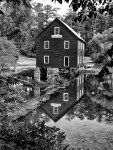
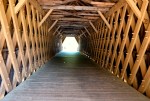
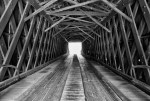
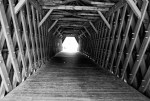
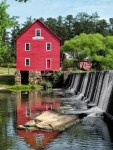
 I have just updated the images in my Grist Mill & Covered Bridge gallery in the menu on the top of the page under galleries! I added about 25 new mills and bridges plus provided name and state data under each image! I hope that you enjoy them as much as I did in creating them!
There is something especially pleasing about mills and bridges that can transport me back to a different time and age! I will literally travel hundreds of miles out of my way to visit them! In 2011 I spent 3 weeks visiting 19 states on the eastern seaboard doing just so, plus this year in May, I spent several days exploring the mills and bridges of south central Georgia!
You can visit the updated gallery by clicking on the drop down under Galleries in the top menu or if visiting from off site click on the link below:
https://markhilliardatelier.wordpress.com/gallery/color-infrared-grist-mills/

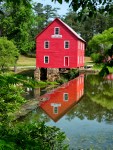
Starr’s Mill, GA

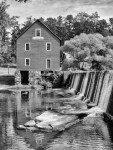
BW Auchumpkee Creek Bridge, GA
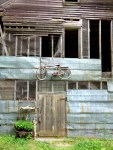
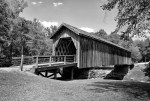
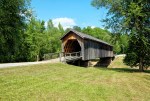
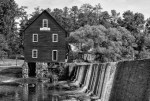
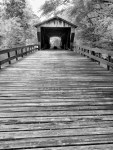
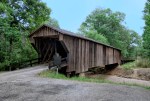
Well my wife and I spent a day exploring the counties north of Columbus Georgia on Thursday looking for covered bridges and grist mills! We actually visited 2 bridges and 2 mills but only one of the mills was really worthy of any type of photography (more on that later…) All in all a very enjoyable day!

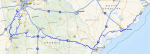
GPS Track of this trip. Yellow Pins are Mills and Bridges!
I will drive hundreds of miles out of my way to visit a Grist Mill or Covered Bridge and today was no exception. We left Columbus early and drove about 150 miles in a large circle to hit these 4 locations. There is just something very special about these old landmarks don’t you think? I still have about 15 more mills to visit in Georgia and around 20 more bridges! We have 2 more trips planned this year there, one in August and another in September. If I can capture 4 or 5 good locations then it will be well worth the time and money to visit them!


Pinhole
Oh boy! I do so love the use and functionality of the new Fuji X Pro 1 camera system! I have it plus the Fuji system lenses (35mm, 18mm & the 60mm) and haven’t touched my other camera systems since it arrived! But, the point of this post is Pinhole Photography! Last Sunday was the World Wide Pinhole day. This got me thinking earlier in the month that I ought to be able to use the X Pro 1 for this as well. No one makes a pinhole plate for the Fuji X mount lens system as of yet, so what to do? Well, I had purchased the Kipon Leica M converter for the X Pro 1 in advance of getting the Voigtlander Super Wide Heliar 15mm f/4.5 M lens and thought: “Why don’t I find a pinhole plate to fit the Leica M?”

Skink Pinhole Plate For Leico M
Well, sure enough there it was on EBay! Skink out of Germany and they had several models and one of them caught my eye. It is 24mm wide and has a aperture of f/110. It is all black and came with the pinhole, a zone plate and a sieve plate! So I ordered it and had it arrive before the pinhole day. I did some initial testing and found that if you select the 24mm frame lines that it matches up perfectly with the pinhole plate with the optical viewfinder! What more could you ask for? Of course with any pinhole work you are required to work on a tripod and this is no exception. The nice thing about using the X Pro 1 for pinhole is that the gain of the LCD view changes dynamically and allows you to see the image on the back of the camera for setup and composition! There is no focus of course so it is just basically point and shoot from the tripod.
I have always been passionate about the old ways in photography. I still have film in my freezer and a 4×5 film camera in a glass case waiting for the day to be used again! But I also have various pinhole systems in film and adapter plates for ALL of my digital camera systems. I have purchased several from Linex Laser and many from Skink, I even have the Pinwide adapter for micro 4/3’s. The point is, that shooting with pinholes is just plain fun. People walk by and always ask what I am doing since they see no lens. If you have not tried this old technology you should give it a try. It is inexpensive (well except for the X Pro 1 since you also have to have an adapter) and will amaze you with the results!
Now, REMEMBER, pinhole photography does NOT use a lens of any type! It uses a simple hole in a metal plate thru which the light passes and diffracts! The resulting image on the film or sensor is slightly diffused but equally sharp from the lens to infinity! All of this with no glass lens!
Well suffice it to say, Pinhole day was a great success and filled with fun! If you have not tried it you really should. You do not have to purchase a pinhole, you can modify your camera body cap and create one yourself, it is very easy!
Here are some images for you to consider. Most are taken with the X Pro 1 but one or two are on a Micro 4/3 body only to show that ANY camera system will do for this!

Pawleys Marsh Pinhole. X Pro 1

Pawleys Island Marsh Pinhole, X Pro 1

Fuga City Detail Pinhole, GH2

Fuga City Detail, Pinhole image, Panasonic GH2 with the PinWide f/127 pinhole plate.
Today is the world wide pinhole photography day. Thousands of folks around the world are out shooting pinhole images today and posting them on the http://www.pinholeday.org/ web site. It is great fun and takes us back to an era when photographic experimentation was the word of the day! A pinhole camera system is one without a lens. I simply has a VERY SMALL hole thru which the light passes and creates the image on the back of the camera on film or sensor. You can purchase pinhole plates for most cameras made today plus you can easily create one of your own!
Do a little research here on the net thru Google and you will find a ton of information on it. But remember today is the yearly big day!
I have pinhole plate adapters for ALL OF MY CAMERA systems. There are many companies who make them. Here is a short list to get you started:
Here are what some of these plates look like…


Pinhole images are typically not very sharp, BUT they are at the same sharpness from the very front edge of the pinhole plate to infinity! They can be created with one to several pinholes and there is no limit to how the film can be placed, flat, curved, round and so on! For digital systems, you can indeed have multiple pinholes, but only a flat sensor. They can and will create very etherial images that are very pleasing to the eye and great fun to create!

Pawleys Marsh Pinhole image. Leica M mount Skink f/207 pinhole plate at 3.2 second exposure

Pawleys Marsh Pinhole image. Leica M mount Skink f/207 pinhole plate at 3.2 second exposure

Fuga City Detail, Pinhole image with the Pin Wide f/127 pinhole plate.

Fuga City Detail, Pinhole image with the Pin Wide f/127 pinhole plate.

Tybee Island Beach in front of our rental!
Every year I try to make it down to Tybee Island, GA for a visit. It is one of the hidden treasures of the Southeast coast! There are two lighthouses there, shrimpers, beaches, birds and many more photographic subjects! Last year, my wife Ellen made arrangements for a family vacation there with a rental right on the beach. There were 9 of us there in all and we had a great time! For me the exciting parts of the week were the photographic excursions out and about. I am always excited to visit the same places many times as they will always present themselves in a different fashion on each visit! Below is a small selection of the many things to experience while visiting…
The sand on the beaches there is a fine off white sugar sand and the kids loved to play in it. There were ALWAYS large ships lined up to leave and enter the river going up to the port! Every morning there were shrimp boats going back and forth just off of the beach fishing!
The Tybee Island Lighthouse is a MUST SEE! It is one of the better looking lighthouses on the coast and always makes a great photographic subject!

Tybee Island Lighthouse in 590nm Infrared.
Cockspur Lighthouse , the 2nd local light house is up the river a mile or so from the Tybee Island Lighthouse. You can visit it by heading north off of Tybee Island and stopping just before the first bridge and taking the small dirt road off to the right to the marina. You will then have access with a longer lens to photograph it. I have done this many times but for this trip we took a Dauphin boat trip out into the river and went around the lighthouse several times.

The Cockspur Lighthouse in Tybee Island.
One of the more interesting things about Tybee Island is the fact that during the summer there are usually daily thunderstorms the come thru the area and this makes for a good opportunity to grab some high speed lightning shots!

High speed daylight lightning capture from the deck of our rental!
Tybee Island is worth taking the time to visit anytime of the year. Go for a day or a week, you will not be disappointed!

My grandson Jordan pondering the lighthouse keeper's hat as he gets ready to climb the lighthouse stairs!
Or, what does a camera system have in common with a good doggie?

Fuji X Pro 1 System
A little history:
I started in photography over 45 years ago (yes I am an old fart)… A long time for sure! I started using and learning on an Argus C3 35mm rangefinder camera then just started working up through many many more rangefinders. Along came SLR camera systems and like most other photographers of the time I decided that I too must have one of these so that I could actually see through the lens to see what I am going to get. Many years passed and every time I would pass a camera store I found myself looking with lust at rangefinders of all things. At first I thought that there must be something wrong with me, why else would I be drawn to an older technology after the many thousands of dollars I had invested in the best Canon bodies and lenses over the years?

Skittles the Dashound, #9
After much reflection I decided that it must be like dogs! You know… your parents purchase you your first dog which you fall in love with, and you are forever imprinted with love for the dog and the type of dog. Then for the rest of your life you desire only that type of dog! I am on my 9th dashound now and wouldn’t dream of any other type! So, back to the point, cameras, like dogs are imprinted upon us at an early age and we tend to gravitate back to momma so to speak! After coming to grips with this fact I went out and spent another $2500 on the Hasselblad XPan II rangefinder and was forever re-hooked. Yes, I still have and shoot Canon bodies and L glass, but my true passion is for rangefinders and dashounds! I have accepted this fact as part of who I am. I find that I even occasionally purchase an old rangefinder camera to display in a glass case in my studio!
Ok, enter Fuji! Last year, Fuji introduced the X100, which is a digital rangefinder styled camera, not a rangefinder focusing camera. It looked great and got great press. I wanted one from the very first but held off for a year. Last fall I actually purchased one and was instantly in love with the thing! It was small and light and SILENT… It has a fixed 23mm lens and did I mention that it is totally silent in operation!! Oh yea, in love to be sure. This February (2012) my wife and I went to Italy for 11 days of photographic heaven and the only cameras I took were a small Infrared camera (Panasonic GH2) and the Fuji X100. It was a match made in heaven for travel. Light, small and no work to lug around! I got amazing images with the Fuji even though it had a wide fixed lens. I simply had to rely upon my sneaker zoom to get close!
I found that I was not totally satisfied with the X100 because it was limited to a single lens. So I ordered the new digital Fuji X Pro 1 interchangeable lens system with the 35mm f/1.4 and the 60mm f/2.4 lenses, and I have the 18mm f/2 lens currently on order. It arrived at the end March and I was amazed by its light weight but enhanced functionality that the camera system provided! now after a month of shooting with it I feel like I have returned to momma and have again found myself through my roots in photography! God, please help me.. I am so locked onto this camera system that I can not see any way to ever break away, hooked, addicted with a big fuji monkey on my back! Fuji also says that later this year they are offering a 14mm and a 18mm to 72mm zoom! Then 3 more new lenses next year! I can feel the dollars slipping away now.. I hope that my wife can forgive me for these future purchases. I WILL keep the X100, it is after all a rangefinder styled camera and it is silent in operation! I will purchase new lenses for the X Pro 1 and look to the future for the Pro 2 and Pro 3 bodies…
It seems as though I have found yet another addiction…

X Pro 1, 30 second exposure, 35mm f/1.4 lens, B&W Seascape of Pawleys Island Groin
This post is not a review of the X Pro 1, there are a ton of those out there on the web. It is simply a short series of statements and facts about the camera and why I love it so!

Leica Pin Hole pancake
I was considering the Voigtlander Super Wide Heliar 15mm f/4.5 M Mount Lens instead of the Fuji 18mm but there have been so many web posts on how bad this lens is on the Fuji that I have decided against it. I instead will use a Leica M mount Pin Hole plate from Skink on the Leica to Fuji adapter! I love Pin Hole photography and have them for ALL of my camera bodies! There is just something very peaceful and satisfying about using technology for the early 1800’s and the resulting images are very etherial!
Ok, more to come on this great new camera system in the future, I have to have a chance to actually go out and shoot the thing!

Antique Gas Pump, Fuji X Pro 1
So…
Returning to the love of our roots can mean:
Camera Love <= Really does equal => Doggy Love
Told you I was a sic person…
Smile!


Sunrise on Folley Beach, Light painting on the driftwood with a white LED light! Very LONG Exposure...
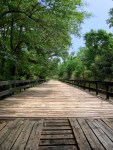
On the top menu of the blog you will find several pages listed across the top. The one labeled Galleries is actually a series of drop down menus which will let you select several organized image galleries containing my favorite work from over the years. So far, I have 4 galleries populated but will be expanding over this month to around 15. Please stop by for a visit and come back often to see the changes there!
I hope that you enjoy viewing them as much as I enjoyed creating them! They cover about 15 years of my work since living in the Low Country of South Carolina and cover about 19 different states and 6 different countries! I even have some high speed water drop photography thrown in as good measure.

