The New CLiR Infrared Processing System and Photoshop panel!

Download Here: https://f64elite.com/hilliard20


Download Here: https://f64elite.com/hilliard20
I will be presenting at this years NECCC Photographic Conference from July 12 to the 14 at the University of Massachusetts. Please consider attending if you are in the area!
I have posted a short video on what the session will be covering that my dog and I made today (she says to watch it to the very end)!
Infrared FILM photography has always been on the difficult side, but not because of lack for film because there are several films on the market. Rather it is due to the poor quality of the available 720nm filters on the market.
Recently Kolari Vision www.kolarivision.com has come out with a new series of infrared filters with their AR (anti reflection) that stop or greatly reduce hot spots in the center of your film or digital sensor. These hot spots are due to the various coatings, paint and other reflective coatings on the glass elements and coatings on inside of your lenses causing the light to bounce back and forth several times then hit the film dead center causing the hot spot.
The main filter on the market has been the Hoya R72 filter which works but gives a low contrast washed out image. Along come the new Kolari filter and now I am getting more contrast and even images with greatly reduced hot spots. AMAZING!
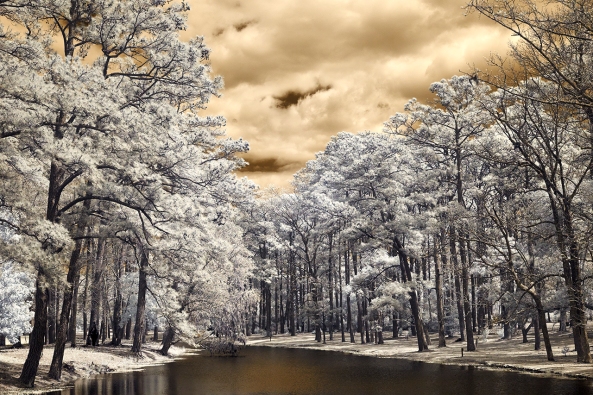
So lets take a look at the image above. This is the Tomotley Plantation about 20 min west of Beaufort, SC and was taken with the Rollei IR400 film rated at 720nm. Without a IR filter the ISO is 400 and the emulsion generates a very good likeness of Kodak TriX 400 film. If you add the 720nm filter the ISO drops down to 12 or 6 but you get the amazing whites on the grass and leaves. You even get the Wood Effect where the green items BLOOM out with an etherial soft white energy on the image!
Normally the Wood Effect is difficult to achieve at 720nm and is better seen at 800nm and and above. I have been very happy with this new filter from Kolari in combination with the Rollei IR400 film because I am constantly getting the effect plus deep contrasty images. It simply works as expected which is way more than I can say for others on the market!
Technical Data:
Development:
Look closely at the image below of the neither regions of the Folley Beach Pier. This was taken with a B&W only DEEP CONTRAST Infrared camera converted by KolariVision.com with their new AR coating. Look at the detail and depth captured here. Do you think that if the sand was actually in color that you would even notice the pier going off into the distance past the initial structure? This is what the power and purity of B&W gives to us!

Fuji X100s 850nm Deep Contrast B&W Infrared by KolariVision.com with their new AR coating: Under The Folley Beach Pier
I love working in B&W, so that I would only create them if the market would support such endeavor. There is something about a well crafted monochrome image, having the distraction of color removed leaves you with the soul of the image.
I find that it is so powerful for me that I look at EVERY scene I approach with B&W in mind. Yes, I can visualize in B&W. So can you! It only takes a little practice… OK, a LOT of practice really, but it is well worth the investment in time and energy!
I am so into fine art B&W that I even have a Leica Monochrom digital camera that is dedicated to it in that it only takes B&W images! Not to mention digital B&W infrared cameras!
The baby blue is a Olympus 35RC rangefinder that I had rebuilt, cleaned and given a nice new set of baby blue clothes! The second is a Polaroid 900 that my daughter found at a garage sale and sent to me. I kept it in a display case for a year or 2 then sent it off to WWW.Alpenhause.com where Steven Icanberry took it apart, cleaned, re-gasket, replaced the lens with a Fujicon 150mm lens and added a 4×5 film back. He also calibrated the internal rangefinder to the new 150mm lens and gave it an adult blue suite! It is a dream camera come true!
I shoot 35mm, 120mm and 4×5 film systems. Usually, I will expose about a dozen rolls a week in 120, Develop, Dry and Scan then treat them as I would a digital image except for the fact that I will never be starting with a color image!
I mainly shoot with my Sony A7rii camera and a selection of 4 lenses in my normal day to day work. I shoot in COLOR but always process both color and B&W in post processing. I can just hear you say “why not just shoot in B&W in camera?” Well the easy answer is while you can do so, you will get much better B&W images by shooting in color then post processing to get the best possible color image, THEN convert to B&W. I use The NIK filter Silver EFX Pro for my B&W conversions, and by feeding it a finished color image it will have enough data to generate a wonderful B&W image!
Here is an example of just what I mean:
First an image of Daddys Girls, a shrimp boat out of Bluffton, SC. The image is a great one, full of colors and textures with an interesting sky! I feel that in color this makes a wonderful image and think that there is a market out there for it. I spent the time with the image during post processing to bring out the colors, textures and contrasts to make the image pleasing.
Then, and ONLY THEN I ran the image through Nik’s Silver EFX Pro B&W converter. I Chose a deeply sepia tinted output with a slightly scratched texture and a minor border. This to me is a pure image with which you can witness and feel the soul of the scene!

Sony A7rii w/ Sony/Zeiss 24-70 f/4 lens. Stormy Seas, Head On with the clouds of tropical storm Colin.
Another example from the Sony that I took and post processed today is this image of the shrimper Stormy Seas, likely the MOST PHOTOGRAPHED shrimp boat in South Carolina, IN COLOR.
Again, I shot in COLOR in order to have as much data as possible for the B&W conversion. Again I found myself in a sepia mood and processed it as the examples above! As you can see, it has a totally different look, feel and emotional impact from its color version above!

Sony A7rii w/ Sony/Zeiss 24-70 f/4 lens. Stormy Seas, Head On with the clouds of tropical storm Colin.
B&W images can be really powerful in their emotional impact. There was a time when B&W was all you could have, then color became popular because of the fact that it was different! But guess what? B&W is again VERY POPULAR to the point of actually out selling color in fine art shows and to collectors! This should give you pause if you are concentrating in color only. You are missing have of the scene, the most important half!
I LOVE shooting IR and have a long history with it in both Film and Digital. I have had over 25 conversions from ALL of the big conversion companies around the country! But, once in a while I would get a camera that no mater how hard I tried, I will get a hot spot with it or the lenses I used. You learn how to deal with this by selective use of the aperture but once in a while you would just not be able to get around the problem and loose the shot….
Well about 3 weeks ago Ilija from Kolari (http://www.kolarivision.com ) sent me a note telling me about a new coating process for his conversion filters. I have a long history with Kolari, LDP and Lifepixel but I have never heard of this till now. Ilija offered to do a free conversion with this newl IR AR coating for me in return for evaluating it in the real shooting world! So I told him that I would send the X100s off as a test camera and that I needed it back fast in order to allow others to play with the camera also! Off it went on Tuesday. Imagine my surprise when I got it back in hand the following Wednesday!
Here is what Kolari says about this new AR IR coating:
So as you can see they are up and almost ready to start filling orders for these new filters.
I have to tell you that with my test conversion on the Fuji X100s to AR 850nm that ALL of my hot spot issues simply went away. This camera has always had a tendency for IR hot spots. I have converted, tried and sold so many IR systems in the past that I have lost count. I could not, would not sell this one as it is one of my most prized IR systems. To say that I am pleased with the results of the Kolari IR AR Coating is the understatement of the year!
Remember, if you decide to order from Kolari, give them my name for a $15 discount!
Testing Fumed Alumina…
Van Dyke Brown emulsion is basically on the acidic side of things chemically and as a result of this I have been forced to wash most of my papers with a acid bath. This caused a increase in my process by 2 days. So I am testing Fumed Alumina which is acidic unlike Fumed Silica which is neutral. I decided to go with the Alumina test first and will do a followup post down the line with the Fumed Silica.
Initial results were quite pleasing with both Revere Platinum and Lana Aquarelle papers. I got a MAJOR increase in Dmax with both the Lana and Revere papers, but upon completion of my final wash the Revere was VERY EASY to damage with finger smudges until it dried. The Revere had a tendency for the Alumina to easily rub off the Alumina while wet whereas the Lana was strongly attached.

Anderson Mill, Van Dyke Brown, Lana Paper, Fumed Alumina Brush Coated, Gold Toned, Leica M Monochrom
The Alumina did fix ALL of the spotting issues that I had when using the Revere Platinum paper but the fact that it will rub off when wet causes some concern but it is easily overcome with careful handling.
The Process:
All in all this was a VERY easy fix to the acid washing step and only added about 30 seconds to roll on the Alumina. The Fumed Alumina can be purchased at Bostick & Sullivan for $15/500g which will do about 100 sheets of 8×12 paper.
The increase in Dmax with the Fumed Alumina is amazing and the resulting images are stunning.
After another 2 weeks working on the negative density, I have finally gotten to the point of good negatives, not great yet but I will get there. I have to master the use of UV blocking color in the negative for them to be perfect and that is a project for the future. To date though I have reached perfection using normal B&W negatives.
Here is the corrected negative that I used in the image of the Oak trees above. It is much dense and has been corrected for the mid tones as printed in the Van Dyke Brown Process! It has much greater contrast and required only a 3 min exposure in my UV unit.
One thing that you have to remember when making your UV exposures is to place the ink side of your negative down on the paper surface. If you reverse this the picture will be backwards, but more importantly, the UV light will burn the ink surface and ruin both the negative and the print.
Compare it to the negative on the right. This negative was used in the previous post here where the image printed much darker and with less mid tone data. Take a close look at the difference between the two negatives, the first has much brighter areas for increased black contrast and more detail in the trees. The difference is amazing and was easily achieved by the process discussed below…
Here is a small copy of the print generated by the 2nd negative from the previous post. Notice how much darker it is and that there is no detail in the mid tones of the image! It only took me a short while to create the Gradient Map from the process that I learned in Peter Mrhar’s book below.
Easy Digital Negatives is another remarkable book by Peter Mrhar that I use in the creation of my negatives. It enables you to easily create Gradient Maps to adjust the mid tone values of your negative tailored to the alternative process that you are printing with! I highly recommend this text over all of the others!
There are several good books on Digital Negatives out there but As I said the is the easiest that I have read and used plus the results of using a Gradient Map over a Custom Curve. I suggest that you purchase several texts and try them in your workflow to see what works best for you!
Van Dyke Brown is an early photographic printing process. The process was so named due to the similarity of the print color to that of a brown oil paint named for Flemish painter Anthony van Dyck.
The Vandyke brown print is based on the first iron-silver process, the argentotype, invented in 1842 by the English astronomer, Sir John Herschel. Both processes utilize the action of light on ferric salts and their chemistry is very similar. The Vandyke process gets its name from its similarity in color to the deep brown pigment used by the Flemish painter Van Dyck. Vandyke brown prints are very simple and economical to make, with the sensitizer consisting of three readily available chemicals. Clearing is carried out in water and fixing is done in a weak solution of hypo.
As you can see, this is a very early way of printing developed a long time before our current Silver Salt paper process. The images are a deep brown instead of the normal black and white that we are used to seeing. They are somewhat easy to create provided that you have done your homework and created the proper calibration images to create a calibration Gradient Map or Curve to apply to your negatives which adjust them for loss of mid tones in the printing process.
This is strictly a CONTACT PRINTING technique that requires a true negative that is placed on top of paper that YOU as the artist coat yourself with the Van Dyke Brown emulsion that you mix from simple chemistry! The coating process is done with a special brush that requires a very light touch or a glass coating rod that you use to push a line of liquid emulsion across the paper.
The liquid emulsion is measured by the number of drops from a glass eye dropper into a small glass then with a drop of two of a wetting agent like Tween 20 to help the coating process. The paper/emulsion is allowed to dry then the negative which was created using my Epson 7900 printing on transparency material is placed on top of the coated paper. This sandwich is then placed in a printing box filled with 12 Fluorescent Black Light tubes which then expose the paper with UV light. The exposure for the current paper I am using (Revere Platinum) has been calibrated to 3 or 4 min based upon the test chart above.
This process is a POP process in which the image after being exposed can be seen on the paper once removed from the UV box. It is orange and yellow in color. It is placed in 2 consecutive distilled water baths that remove the yellow and darken the orange. Then it is placed in the fixer solution (Sodium thiosulfate) for 2 min. When the image is placed in the fix, it IMMEDIATELY changes from orange to a very dark brown and white picture. Finally the print is placed in a live water wash for 30 min then dried!
This is a simple process that creates beautiful images that will leave you breathless as you view them! I am going to further develop and learn the process over the next month or two before I start on mastering the Platinum/Palladium printing process as well!

Pawleys Pier, 830nm 300 seconds, f/16, ISO 200, 8 stops of ND with the 10 stop B+W 110 ND filter
Normally you do not see much in the way of Long Exposure photography in the Infrared world. The reason is that it is necessary to use Neutral Density filters (ND) to cut down the amount of light reaching the sensor to enable very long shutter speeds. The infrared spectrum will reduce the the effective value of any ND filter that you attach to your lens from between 20% to 30%. Have you ever taken a photograph of a person wearing a pair of sunglasses in infrared and noticed that they are totally clear? This is the effect that I am talking about. The general rule is that the cheaper filters suffer much greater loss in infrared and the variable ND filters do not work well at all (yes, even the expensive Singh Ray).

B+W 110 10 Stop ND
Should you desire to pursue this style of photography I strongly suggest that you purchase and use B+W ND filters which loose around 20%. I am also told that Lee filters do not loose too much effect as well but I have not yet tested them even though I own them all.
The B+W ND filters display the ND values on the side of the ring, but the easiest way to understand them is to simply look at the 3 digit number.

Fuji X100s
I am using the Fuji X100s for the images in this post. It is a 16 mpix camera that is a rangefinder styled system. I includes an internal, drop down 3 stop nd filter that actually gives about 2 stops of reduction when used in the infrared spectrum. I had the camera recently converted via Kolari Vision, http://www.kolarivision.com to what they call the Dual Spectrum conversion. This is where the internal UV/IR blocking filter is removed and a strong UV filter is put in its place. This gives you the same capabilities as any Full Spectrum conversion except that it will not work with any IR or UV filter that combines multiple spectrums that include UV. This means that the 047b in camera Faux Color or Super Blue filter and the UG1 UV/IR dual band filter will Not work. All of the others work fine from 590nm up!
Plus you can convert the camera back to normal visible color with the addition of a filter on the lens to block UV and IR. With the Full Spectrum filter you need to stack the B+W 486 reflective UV/IR blocking filter with the LDP http://maxmax.com CC1 absorption filter. With the Dual Spectrum conversion you need only add the B+W 486!
So, I have ALL of the normal IR filters sized for 49mm which is what the X100s uses including the B+W 486. I am using the B+W 093 820nm IR filter for this camera almost 100% of the time though.
Another nice thing about the X100s is the fact that it has aperture priority mode with a shutter speed up to 30 seconds and a BULB MODE that goes up to 60 minutes! Where the X100 really excels is the fact that is gives a count up timer in the viewfinder or on the back LCD panel for timing your bulb exposure!
The camera is so small and easy to handle that it is a pleasure to work with and as you can see, the images are stunningly sharp!
I will be posting more long exposure images here in the future and discussing the various post processing recipes with you. Now, one last image. Here is the same shot with only the 3 stop internal filter engaged in the X100s. The shutter speed at ISO 200 and f/16 was 1/6 second. Not nearly long enough to slow the water down or blur the cloud movement but it would likely work for slowing down the moving water in waterfalls!
If any of you all out there shooting in Infrared work in long exposures please drop me a line or comment and we can share data about the various ND failures and successes!
Infrared photography with digital camera systems have been around for several years now and a lot of photographers have embraced this different spectrum of photography. Infrared is wildly popular in photography and fine art galleries now and my workshops are full of lots of talented photographers who desire to learn or expand their infrared skills.
The typical starting point for most infrared shooters is 720nm (standard) or 590nm (Goldie) IR conversions. We have all seen the amazing color images that these two conversions can generate. As previously discussed, we always process not only in Faux Color, but for B&W also. The B&W images are usually more accepted among the arts community though.
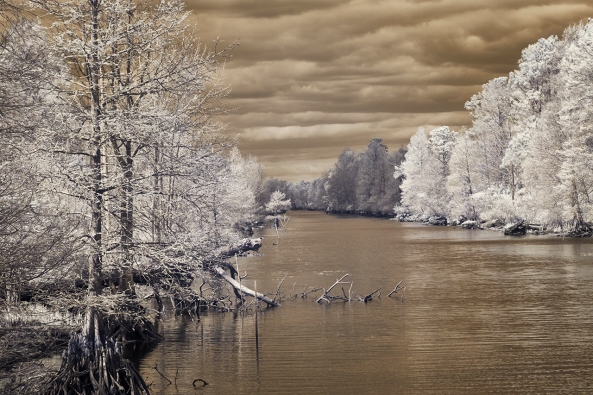
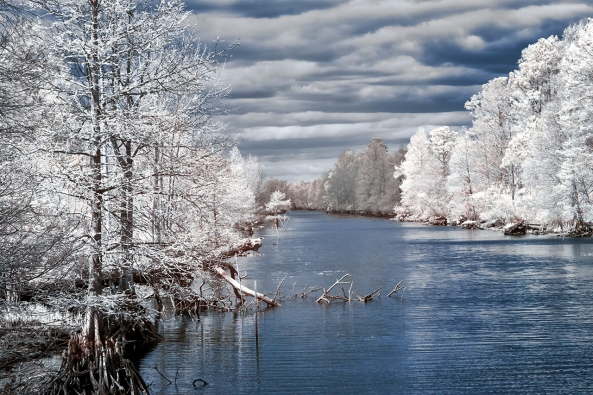
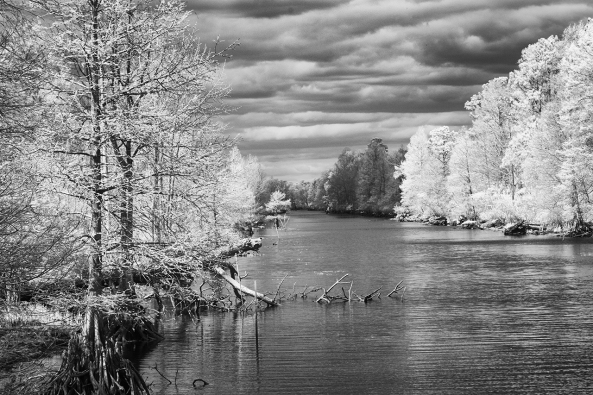
But did you know that with each increase in the IR Nano Meter band (the frequency goes down as the number goes up) that the contrast levels go up in B&W as well? This increase in the NM band starts to generate the most stunning, contrasty, ethereal images that have to be seen to be believed! The higher you go in the NM range also increases the white “glow” around the leaves and grass and the blue sky takes on a deep black. This effect is named the “Wood Effect” after doctor Robert Wood who discovered it 1910. What happens is that the leaves get a bloom or glow of white around them that generate that wonderful ethereal feel in the image. Take a look at image 1 which was taken at 830nm. Do you see the dark black where the blue sky is? Look at the leaves on the trees and how they take on the pure bright whites! Now compare that to 720nm image above in Image 2. The most striking difference is the gray sky rather than black, plus the leaves are grayer rather than white.
I would like to suggest that if you shoot in IR or are interested in doing so then you should consider a deep contrast IR conversion beyond 800nm. There are a lot of benefits to be found in that spectrum. This new spectrum sees ONLY in B&W, which will force you to visualize your scene in B&W.
The benefits to a Deep B&W IR conversion are:
There are several ways to have a camera converted to deep B&W above 800nm.
With either the full or dual conversions you can shoot every of the following light spectrums:
* Requires Live View capable camera
Now, Normal Visible Color simply means that your camera can take normal color images as it did from the factory! This means that you have a multi purpose camera that can take anything.
The only issue is that if you have a Full Spectrum conversion you need to stack a B+W 486 reflective IR/UV blocking filter on your lens with a LDP CC1 absorption filter to get back to good normal color.
For the Dual Spectrum conversion you only need to put the B+W 486 reflective IR/UV filter on your lens and it is back to normal color!
Disadvantages to the Full or Dual Spectrum Camera Conversion:
I have several cameras converted to above 800nm and several full spectrum and a new dual spectrum converted Fuji X100s. The images that I am getting from the Fuji with a B+W 093 830nm filter are the sharpest and most stunning deep IR images that I have ever produced! But that doesn’t mean that you need to go out and purchase that one. Any camera with live view will work great with the 830nm spectrum. Keep in mind though, that the more modern your camera is the higher the usable ISO will be!
You can contact Mark at his web site at http://www.MarkHilliardAtelier-blog.com for information on his Color & IR workshops, which he teaches with Jamie Davidson, and for his IR Post Processing DVD Tutorials!
Oh my, I do NOT know where it came from but I got the BUG again for more film photography! I have a cabinet here in the Gallery just full of old film cameras plus a Leica M7 film body that works with ALL OF MY M MOUNT LENSES! (see the last post HERE for more info on the lenses). I decided to purchase a new stock of several films:
I picked up some stainless 2 roll developing tanks with a bunch of Hewes (don’t skimp on your reels, buy the best!) Stainless Steel 35mm Reels. For developing I like Rodinal One Shot due to its ease of use and a life span of around 40 years. I simply mix it one tank at a time usually at a 1:50 ratio with water using a small syringe. It allows a very wide latitude of contrast and iso control. I have used several other developers but I keep coming back to Rodinal!
Now, I am playing with several cameras. As I said my main and BEST camera is my Leica M7. But here is a current list of those cameras I am using:
The Petri 7S has been in my hands since 1962 and still shoots great ( I did send it off to have the light seals replaced and a new leather covering ). The Petri has no batteries but rather a solar cell around the lens that drives a needle exposure meter that you simply place into its center notch for a good image!
All of the cameras in my list above have proven reliable but with the Petri you get a link to the past, specifically MY past as this was my 2nd camera I owed when I was young!
The Olympus 35 RC is an amazing small rangefinder with very nice controls. It is smaller then the Petri 7s and actually has better control functionality. It does require a battery to run its metering system though which is a step down from the Petri 7S in my opinion. The nice thing other than the size is the fact that EVERYTHING is displayed inside of the viewfinder. Unlike a refurbished Petri 7S which can be found for around $100 used on Ebay, the Olympus 35 RC camera refurbished is demanding around $250! This is a big difference in price and tells you a lot about its quality and demand! I was lucky to find one from a collectors inventory that he sent off to be totally refurbished and re-skinned for much less than $200.00! For you film shooters out there on a budget this is the camera that I recommend if you find yourself desiring a rangefinder.
The Olympus XA was a 35mm rangefinder camera built by Olympus of Japan. It was one of the smallest rangefinder cameras ever made, together with the Contax T.
It was designed by Yoshihisa Maitani who had joined Olympus Optical Co Ltd in 1956. He was the chief camera designer and managing director of Olympus Optical Co Ltd., having developed a number of legendary cameras during his career. These included the Pen series, the OM series, the XA series, the IS series and the [mju:] series of cameras.
The original model, the XA, was sold from 1979 to 1985. The original XA features true rangefinder focusing, a fast 35mm f/2.8 lens, and aperture prioritymetering. The lens was protected by a sliding dust cover.
This is the smallest 35mm rangefinder ever made. It will fit in the palm of my hand and will make a great system to have with me everywhere I go!
The Leica M7 uses batteries and sports a center weighted spot meter measured either off the film or off the shutter. I find that it meters very reliable. It is the top of the heap when it comes to 35mm film cameras. There are a lot of high end rangefinder cameras on the market but the Leica is the top. I really excels in the area of long exposures with either a count down timer in the viewfinder for images metered and controlled in the aperture priority mode or a count up timer for exposures done in the bulb mode. In bulb, it will count up to 16 min then stops counting for battery conservation, but will continue exposing until you release the remote shutter release. It will use NO battery power after the 16 min count up timer turns off until you release the shutter then it requires a pulse of electricity to close the shutter. NO other rangefinder can say this unless you use a pure mechanical camera like a Leica M2 which has no metering system at all.
The Leica M7 is surprisingly heavy but easy to handle. I keep reading about other high end rangefinder bodies out there but when you do the comparison of features I always come back to the M7.
All of my cameras are fun to use and reliable. With the Leica M7 you get the world class glass but with the Petri 7S you get a link to the past, specifically MY past as this was my 2nd camera I owed when I was young! The Olympus 35 RC is an advanced rangefinder from the 1970 era and is slick and fun to shoot. You will see examples from these cameras towards the end of this post!
______________________________________________________
I usually develop my negatives on Sundays. I have a film drying cabinet that I use to dry the film without dust spots overnight. I then will scan the negatives on Monday or Tuesday using a Nikon 4000 ED film scanner at 4000 dpi into the DNG format for editing and cleaning later in the week. I usually shoot 2 or 3 rolls a week.
My favorite film is Rollei IR400. This is available at the big camera stores like Digitaltruth, Freestyle and B&H. What makes this film so special is the fact that is very much like Kodak Tri-X 400 as shot. It has a VERY THIN film base which really makes scanning easy. BUT the most amazing thing about this film is that it is sensitive to INFRARED! If you place a Hoya R72 IR filter on the camera lens the film will record 720nm IR images! There is an ISO hit due to the filter being so dark down to 12 ISO but it is worth it being able to shoot in both normal B&W and IR B&W!
Next I like the Kodak Tri-X 400 film. It gives great contrasts and has a very wide latitude in development. It is well known and tested and for ultra long exposures.
Then comes Eastman Double X Cinema film. This is a GREAT B&W film that gives a very smooth gradation and lovely warm tonality with slightly increased contrasts. This is motion picture film so unless you are going to buy a 400 foot reel you will need to purchase it from the store at Film Photography Project. They will sell it in either 24 exposure rolls or a 100 foot bulk loader roll. It develops nicely in Rodinal at 1:60 for ISO 200 but there are ratios for 100 up to 800 ISO! This film is very much worth experimenting with.
I need to say a few words about the folks at Film Photography Project. They offer an amazing wide selection of films and old cameras! This includes Polaroid cameras and film also! Their Podcast is amazing and I find that it is so good that I now have it running all day while I am working at my gallery in Pawleys Island. Good Stuff, check them out here: Film Photography Project.
Whatever film you decide to use you will be pleased with the results. Processing is easy to do with a VERY small investment. You will need:
That is it. It normally takes me about an hour to develop 2 rolls. I will let them dry for several hours then cut them into strips of 6 and put them into plastic storage sheets.
For scanning, as I said above, I use a Nikon 4000ED film scanner. As you can guess from the name it will scan at 4000 dpi and has a lot of adapters for different types of film scan feeders. It has slide auto feeders, single slide feeders, a 6 position film rail for troublesome film and an automatic roll feeder to scan entire rolls automatically. If you couple this with VIEWSCAN software you have an amazing scanning system that rivals those that pro labs use!
Ok, lets take a look at the results of 3 types of film in 2 cameras!
I hope that you enjoyed this post and its associated images. I have been using film since I was 9 years old. At 13 I had my first darkroom at home. I worked in film in my own darkroom until I was 18 when that period of my life can to an end. 42 years later I re-engaged film photography again and cannot help but ask “Why did I wait so long?” I have been shooting digital since my career at Eastman Kodak when you could ONLY get B&W digital camera systems! I have spent fortunes on digital and have loved every moment of it. Film will NOT take any of that away, I still have digital and continue to use it. But I have to be honest and admit that working in film again fills me with a sense of peace that I have not experiences in a very long time….
Well, in a wild turn of events I have picked up some new camera equipment… This is a really no surprise as it is a sickness or rather addiction! But onward and upward!
I do have to tell you that I am REALLY excited over acquiring these new systems though. And unfortunately, one thing has let to another and thus a long journey has also been started into the realm of film again!
But first let me highlight the “What”!
As you can see in the top image, the newest body is the new Leica M240 24 full frame 24 mega pixel body. It also has a true “live view” which allows use of all sorts of other lenses like the Leica R series that you would NOT normally be able to focus. This means everything from long telephotos to true macro (subject of the next post!). After a few months of use I can tell you that this is the BEST digital system that I have ever used! Along with it I also picked up several lenses.

Leica 50mm Summalux ASPH f/1.4
First, the main lens is the Leica M 50mm f/1.4 Summalux ASPH lens in silver. This is a HEAVY lens. If attacked by a bear I could use it to beat him half to death. The lens itself has turned into my main lens that I use 60% of the time. It has a built in leans hood and takes 46mm filters. The Bokah that this lens can generate is amazing beyond description. It is extremely smooth and easy to use and generates images that are truly amazing!
The next lens is the Leica M mount 28mm f/2.8 Elmarit ASPH. This is a TINY light lens that takes 39mm filters. These smaller filters sized considerably cut the cost of purchasing top of the line B+W filters. Since the M240 camera is a full frame sensor the 28mm really is 28mm! The lens is sharp beyond words and quick to focus. I am really please with this lens and use it for landscapes and lightning photography when mounted on my Fuji X-T1 camera.
The example image for this lens below is a texture overlay. The main image was an Infrared image taken by placing a R72 (720nm) infrared filter on the lens giving a white IR image of a palm leaf, then doing a texture overlay of colored flowers.
The next lens is the Leica Macro-Elmar-M 90 mm f/4 and its macro adapter with split image view. This is a very unique lens in that it collapses for storage. By itself it is a great 90mm lens and has proven useful for mid range subjects as well as for Infrared work with the addition of a R72 IR filter. When you add its macro adapter (extension tube coupled to a viewfinder modifier) it will then give you macro capabilities down to a 1:3 image ratio! Below is an example of a macro image shot with this lens last week at Moore Farms in Lake City .
Now, I already had my two Voigtlander M mount lenses that I was using with the Fuji systems, but they are M mount!

Voigtlander 75mm f/1.8
First is the Voigtlander Heliar 75mm f/1.8 Lens. This is an amazing lens that is very fast at f/1.8. The focus is smooth and long and it works very well with M mount extension tubes for true macro work (1:1 image ratio). I do have 3 of the 10mm extension tubes for it as well as a Canon 500D closeup lens. For my really small stuff this is my goto lens. It is a little long but has a very nice clam on lens hood. While it is NOT a Leica lens it is very close in terms of quality and ease and the f/1.8 aperture gives lovely bokah!
Here then is an example of a 1:1 life-size macro shot with it!
The last lens that I am going to talk about here is the Voigtlander Ultra Wide-Heliar 12mm f/5.6 Aspherical M Mount lens. Another heavy all metal lens with remarkable focus and DOF. Since it is so wide you can almost have a DOF from right in front of the lens out to infinity! Plus 12mm is really 12mm on the camera! Given that the camera is both full frame and has a live view you can see the power of using this lens and the ease of composition and focus!
In the example image below please notice the extreme range of the depth of field!
As you can see, all of the system components are extremely high quality and easy to use giving stunning results. I like to create Long Exposure and Infrared images as well so I thought that I would share some of them with you below.
I am VERY particular in how I process my images, either color or IR it doesn’t make any difference! This comes from years of visualization, photography, a career at Eastman Kodak, endless hours of post processing and just plain being old and cranky! I look for specific compositional elements in each and every image I create then look to create a stepped series of varying contrast levels to draw the viewer into the image. This is important in my color work, but CRITICAL in my B&W images.
This post though, is specifically about B&W IR post processing. But before we actually get to that point I wish to share with you my workflow that I go through up to the point of processing it for B&W.
Assuming that our images have been edited for choice and artistic content and been processed from RAW to 16 bit TIFF…

Step 1 Evaluate the RAW image to see it it stands on its own!

Step 2 Process the RAW image into Faux Color.
Only when these steps are completed do I start my B&W conversion and processing. The reason for this is that the best B&W conversions are generated when we have gotten the best possible color adjustments done! The better the colors the better the B&W! This is true of both color camera or an IR camera.
As you can see from the B&W image above of the bone yard at Cape Romain here in South Carolina, the image is full of alternating contrast areas that draw the viewers eyes into the image from the bottom left corner up to the center. This was a choice made in post processing.
So remember, you will get a much better B&W image if you first post process the color version! This will give the software (Nik’s Silver EFX Pro) a greater latitude of colors and contrasts to work from rather than just converting the RAW version directly into B&W.
In Infrared photography, there are 3 main elements that we need to get an emotionally charged image:
If you can get all 3 you will get a much more powerful image, but as long as you can get at least 1 you will have more to work with to get a good image. If you find yourself in a location where none of the 3 desired elements can be found then look for repeating patterns! Look at the example below. This image is of old Rt. 66 through the west taken at the height of a world class snow storm a few years ago in 720nm IR. There is no water, clouds or plants to work with. But we have a vanishing perspective due to the repeating telephone poles plus great structure in the snow cover scrub! There is also just a hint of the sun behind the top of the first telephone pole which adds interest and change of contrast.
Now, as easy as all of this sounds, it really does take some planning and simple photoshop skills. Plus the more you practice it the better and faster you will get!
So lets take a look at our sample B&W converted per post processed B&W image below. To get to this point, you take your color image and open it in Niks Silver EFX software filter. You would then choose the recipe that you like the best from the left hand menu watching the effect on the preview image on the screen. When you find the version you like the best you would then adjust the contrast, structure and highlights/shadows to get your starting image, then accept it and drop it back into Photoshop!
This is a very nice image to be sure! But, it can be drastically improved with very little work. By selecting areas of alternating contrasts we can enhance the emotional impact of this image and draw the viewers eyes into the image giving it an almost 3 dimensional feel! Lets take a look at these areas!
Take a close look at the image. Look for ways to give alternating areas of light and dark, low contrast and high contrast. Use these areas to create steps into your image. For the image above of the Adams Mill un processed this is how I approach it:
Looks like a puzzle doesn’t it! But is is really easy once you decide HOW you want to approach the image. We are going to use the Nik plugin filter called Viveza to accomplish all of these changes. Simply start on one edge of the image and work your way across. Nik gives you a very powerful selection and masking tool call selection points. These points pick out areas of similar color or shading.
Go back and forth, look at the differences between the 2 images. In the 2nd image, there is a tonal range of complete black to complete white. The un-edited version has a little contrast but lacks punch and it does NOT have a complete tonal range!
This looks very simple doesn’t it! Well it is!! It just requires that you pre visualize what you desire in your finished image then simply make it so.
I hope that you enjoyed this simple tutorial. If you would like an enhanced version with complete step by step instructions and screen captures please visit my BLOG at:
I have to tell you that I am REALLY a Fuji fan. I have the following Fuji bodies:
I also have ALL of the lenses but 2!
I moved to Fuji after a long search for a small light weight camera system after loosing 80% use of both hands and arms. I went through ALL of the micro 4/3 systems (and even kept 2!). I sold $40,000 in Canon bodies and L glass and have NEVER looked back!
In the Fuji, not only have I found perfections but being a range finder styled system it is like going home to mom!
I have a X100s that I use for most of my walk around work, it is just so tiny and generates amazing images. So when Fuji announced the X-E2 with the same sensor and with even more upgrades I ordered one from Amazon. Much to my amazement it shipped a week later! I have had it in hand now for about 2 weeks and just yesterday took it out to a local fishing port for a bit of creative work. I love the upgrades and how fast this camera is. It even passes the X100s in ability. I originally purchased the X-E1 in order to take advantage of its electronic remote shutter release. It enables me to hook it up to devices like a lightning trigger and my water drop collision system. The X-E1 did a great job with these devices and I expect no less with the X-E2 but that is for another day.
Yesterday I took it out to shoot shrimp boats in North Carolina and have to tell you that the camera just blew me away. It is such a major upgrade over the X-E1 that I cannot believe that they came from the same company! The controls are CRISP, the knobs just snap from position to position with no play and they stay where you put them. The larger LCD is nice but the faster EVF is a sight to behold. I dressed the camera in a RRS L bracket with grip and put on a nice soft release. Physically except for new buttons and placement the camera is identical to the X-E1. One MAJOR improvement is the addition of 3 stops of EV adjustment instead of the normal 2 that Fuji has provided in the past.
All in all I am really happy with this upgrade. I will keep the X-E1 and convert it to 800nm IR in the near future. There is no sense in letting that viable and great camera go to waste!
Next I put the camera into the JPG mode and shot color & B&W images in camera. The results speak for them selves!
This posting was never meant to be a review, rather a statement of its impact upon me with sample images!
I have started getting feedback and comments on the new IR/Color Video Tutorial. As they arrive I will share them here in this post with you. I am very excited over these. So far there are about 100 shipped videos out there!
The cost is $29.95 plus shipping which will automatically be added when you order.
___________________________________________
All prices are in USD
___________________________________________
________________________________________________________
________________________________________________________
________________________________________________________
________________________________________________________
________________________________________________________
________________________________________________________
________________________________________________________
I would like to thank those who have taken the time to send feedback and comments! It means a lot to me and will help improve on the next Video Tutorial that I put together!
The majority of the video is screen capture taking you through the post processing workflow button by button, click by click. All of the major RAW converters have their own separate video and you will learn about all 3 which will enable you to make intelligent decisions on which one is for you then be able to run it!
This is an in-depth tutorial and will give you the knowledge and recipe to take your own images from one end of the process to the other without pulling your hair out in frustration!
The cost of the video for US customers is $29.95 plus $5.95 shipping which will be automatically added when you order.
___________________________________________
All Prices are USD
___________________________________________

Pawleys Marsh, Fuji X Pro 1 720nm IR conversion w/ the new 55-200mm lens.
Yes, the new Fuji 55-200mm lens arrived for my fuji camera systems! I am currently shooting with a color X-E1, a color X Pro 1 and a IR converted (720nm) X Pro 1. I know how well the 55-200 works on the color bodies but what I really needed to know how did it work with the IR system! Would it give hot spots as so many of the Fuji lenses do? This post is the report of my findings. The final verdict is that it works very well and as long as you do not go higher than f/16 there are no hot spots to worry about at any zoom range! To me this is a really big deal.
So far only the 14mm and 35mm Fuji lenses are usable in infrared. So the addition of another lens really helps.
I am going to give you some examples of how this lens actually does at both the wide and long ends of the zoom range wide open and closed down so that you can get a feel of the usable Infrared range that you can use. Next week I will do a posting using the lens for color work only.

Pawleys Marsh, Fuji X Pro 1 720nm IR conversion w/ the new 55-200mm lens.

55-200mm @ 55mm, f/23.5 No hot spot

55-200mm @ 55mm, f/11 Small hot spot

55-200mm @ 55mm, f/22 Bad hot spot
As you can see as you get to f/11 we start to develop a small hot spot, but nothing that cannot be fixed. Above f/11 the lens becomes unusable at the wide end.
The difference at the long end of the zoom is amazing and is usable over the entire range of the aperture! This is great news for us IR shooters.
There is starting to be a large number of IR photographers out there who are using converted Fuji X Pro 1 camera systems. There are currently 2 conversion companies out there who can do the conversion. I HIGHLY recommend the X Pro 1 as an Infrared platform and with the addition of the 55-200mm lens to our shooting arsenal we are way ahead of the game!

A dark and stormy night, Fuji X Pro 1 w/ 14mm fuji lens at 720nm Infrared.
Images that are dark and moody tend to grab our attention. It is as though there is something hidden and dark that demands our attention. We stare at them and analyze the image for a deeper hidden meaning. This creates emotional impact that allows our viewers to share what we felt as we created the images!
Look for dark, stormy skies, moody clouds, dark trees or water. Work in Infrared and you will find that you have a much better chance to capture these kinds of images more often than when working in color. It is still possible to do so in color but you have to work harder at it!

Paradise Island Light, Nassau
As you can see in the image above, it is moody and draws the viewer into the scene, but it does not have that “dark and stormy” look and feel! As I stated before, it is much easier to capture these types of image when working in Infrared!

A dark and stormy night
Work in both Faux Color and B&W. You never really know what you are going to get unless you take the time to post process both ways. You should even look seriously at the properly white balanced raw image right out of the camera! Sometime you can get a really stunning image there.

Lady Katheran, 720nm Infrared, Fuji X Pro 1 with Fuji 14mm lens.
Here is the same image processed in B&W.

Lady Katheran
Try adding a lens vignette to your images to darken the corners. This will give more mood!
Here are some examples of RAW and B&W post processing!

McClellanville Shrimper, RAW right out of the camera!

McClellanville Shrimper, B&W
As you can see both versions give stunning results. The most important thing for you to remember is that to get the best results from all of your images it is necessary to take the time to post process in all three modes. Do not short change yourself by cutting corners. Take the time to give each image your best try!
The Fuji X Pro 1 has turned out to be one of the best Infrared camera systems that I have ever used… period! The only good Fuji lenses for Infrared have proved to be the 35mm f/1.4, the 18mm f/2 and the new 14mm. The Viogtlander 75mm f/1.8 has also proved to be a STUNNING lens also! So, the camera has proven its infrared capability, now it is time to discuss in detail the recipe for post processing! It is all quite simple but there are a few requirements that you must understand in order to follow my workflow with understanding.
Needed:
As you move your RAW (shoot only RAW for IR because of the ability to shift the white balance easily) onto your computer you should automatically tell yourself that you are going to process each selected image in Faux color and B&W. Sometimes you will notice that the un processed image looks great also (wonderful bronze tones) and decide to do a version like this as well!
Lets talk about the RAW conversion process a little bit. Photoshops ACR built in RAW converter will NOT apply the white balance correctly and your images will appear deep red. For this reason I use Capture One version 7 from Phase One. It is simply the BEST RAW converter that I have ever used. You can download a trial version and decide for yourself if what I am telling you is true!
My Initial Editing Steps:
Save your image again with a NEW file name that reflects the difference in your master image library tree!

Murrells Inlet Salt Marsh, X Pro 1 720nm IR
Remember: Process ALL IMAGES as both Faux Color and B&W. You really do not know what you are going to get till you do so.
All of this really is VERY SIMPLE and once you have done it a few times it will become second nature to you. Soon you will be a post processing Infrared God or Goddess! Congratulations
No, let’s take a look at the image below. Notice the areas that I have circled as places where I desire to change the colors, contrasts and saturations (both plus and minus). Also consider that this is a 720nm converted camera and as such has a very limited color range (light pinks and warm tones and blues).

Annotated Faux Color, X Pro 1 720nm IR
It is in this area and others like them (similar color values that are the same) that we are going to place control points on and change these values! If you notice that the areas around them also change a little you can place what we call anchor points which are simply control points with no adjustments to bring those areas back to where you wanted them!
You will find this ENTIRE process from the initial loading into photoshop to finish will just take 4 or 5 minutes or less as you become more practiced!

Stormy Seas Faux Color, X Pro 1 720nm IR

Stormy Seas B&W, X Pro 1 720nm IR
Sometimes Faux Color images simply do not work, then you still have the great B&W ones to work with!

SC School Bus Boat, X Pro 1 720nm IR

SC School Bus Boat, X Pro 1 720nm IR
 Well, it arrived! After months of consideration after I got my X-E1 I finally decided to send off the X Pro 1 for Infrared conversion. It went to Dan at LDP (maxmax.com) and the cost was $500.00. YIKES! yes I said $500.00! Dan explains that the X Pro 1 is the most difficult conversion that he does! It required him 1.5 days to do the conversion and lots unsoldering/soldering to get to the sensor. Still, better than sitting on the shelf or an attempted sale on Ebay, plus I really like the camera and the hybrid viewfinder is just perfect for IR.
I had to decide between 720nm and 850nm so decided to go for the 720 in order to have a little color ( I really like the bronze tones right out of the camera at 720nm). The total time for shipping – conversion – shipping was 8 days, door to door. Very fast!
Importantly, the Fuji X Pro 1 camera White Balances perfectly. For these tests I white balanced on a green shrub in front of my gallery. The process to do so on the camera is simple and fast!
The scope of THIS post is to talk about the conversion itself and to give you some sample images testing each of my normal Fuji and Voigtlander lens set that I use.
My first image out of the camera was with the Fujifilm XF 35mm F1.4 Lens. It is stunningly sharp with great contrasts and tones without any processing at all! This is simply a perfect IR image right out of the camera.
Fuji X Pro 1, Brookgreen Gardens, 720nm RAW un-processed. Fuji X 35mm lens.
OK, the original hot mirror can tell us a lot about the capability of the Fuji body to take IR with no conversion. The strength of the internal filter from the X Pro 1 is quite strong! It is actually 2 filters sandwiched together. They are very much like the B+W 486 IR blocking filter and the LDP CC1 IR blocking filter back to back. The 486 is a pink/gold filter that extends a little further into the visible light spectrum before falling off and allows a little less IR to pass through. The CC1 filter is wider at the UV end. The two filters together will pass light to the sensor from about 300nm to 700nm. You can see this in the image below. This is the same filter arrangement (hot mirror) that we normally see in the Canon DSLR line and on the Panasonic Micro 4/3 camera line.
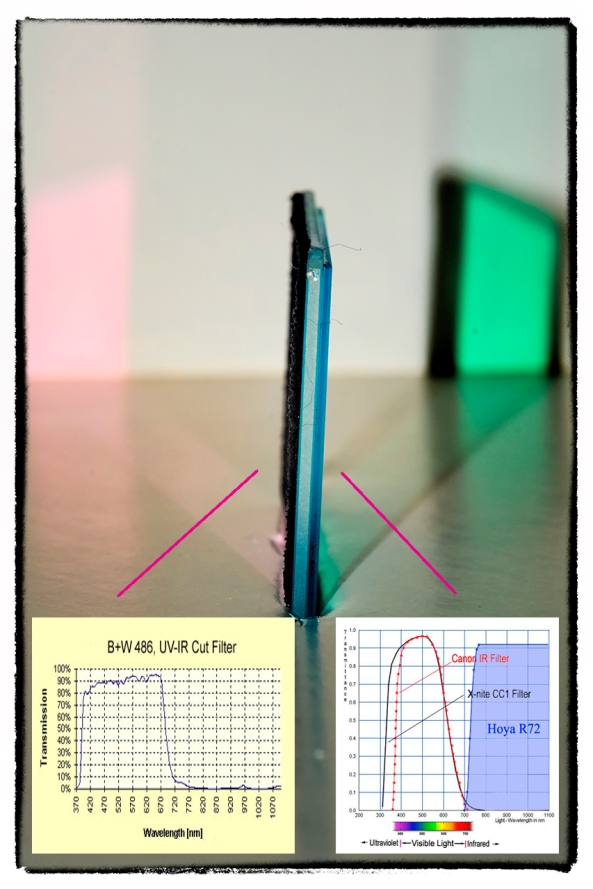
X Pro 1 Hot Mirror showing both Wide bandpass side (gold tint) and the Lower UV side (Aqua)
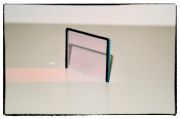
X Pro 1 Hot Mirror showing the Wider bandpass side (gold tint)
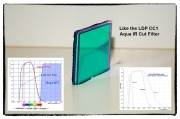
X Pro 1 Hot Mirror showing the Lower UV side (Aqua) similar to the CC1 filter from LDP
If you were to look at the 486 and CC1 filters they are the same general colors and pass band to what we actually see here! So , what does this all mean to you? If you decide (and convince Dan) to have a full spectrum conversion done on your X Pro 1, you can convert it back to a normal color camera by stacking both of these filters (B+W486 and the LDP CC1) on the end of your lens. The full spectrum Infrared conversion is one where the hot mirror (IR blocking filter) is removed from in front of the sensor and replaced with a piece of clear glass. Then, the camera is programmed to the specific UV or IR band with the addition of the appropriate filter on the end of the lens.
Normally, the hot mirror can bee seen as the colored layer of glass under the lens as shown here where you can now see the 720nm filter installed.
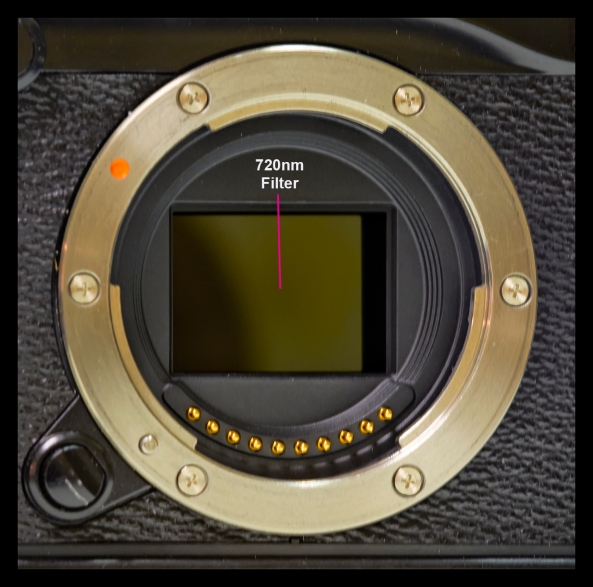
Inside the X Pro 1 showing the 720nm filter.
Lens Hot Spots
As you may know (or guessed), not all lenses work well in the Infrared spectrum. This is due to many things, but most commonly, the coatings on the lens elements and the coatings on the internal lens barrel and how they reflect IR light energy. The common failure then is in the form of HOT SPOTS in the center of the image captured by the camera. These are always dead center in the middle of the image and present as large round white areas. Sometimes, they can be overcome by using a wider aperture, but not always…
Lets talk about the lenses that I tested that work (or in 1 case mostly work)…
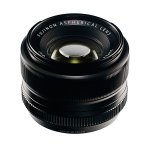
Fuji X 35mm Lens
WOW, what can I say? This lens works perfectly in the 720nm spectrum at all apertures! The camera auto focuses perfectly and fast, the images are sharp and there are no hot spots at any aperture! Lets take a look. This first image is raw out of the camera. I have done not post processing for B&W or Faux Color but there is enough color in the 720nm spectrum to have some interesting Faux Color results. These types of images will be covered in another post next week and we will spend a lot of time and effort teaching and going through each step in the recipe used to create them in Photoshop CS6 and the Nik filter set.

Fuji X Pro 1, Brookgreen Gardens, 720nm RAW un-processed. Fuji X 35mm lens f/8
Next, is the same image post processed using CS6 and Nik’s Silver EFX Pro for B&W…
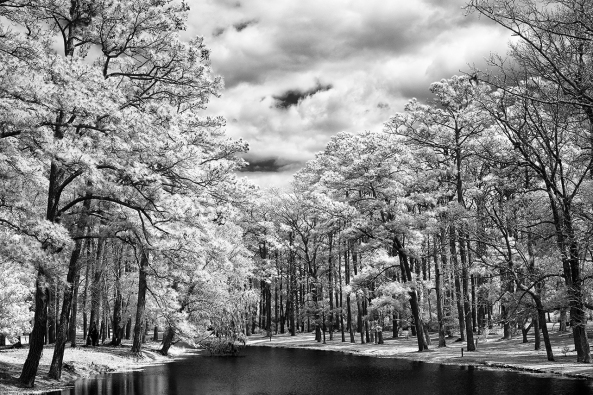
Fuji X Pro 1, Brookgreen Gardens, 720nm B&W processed. Fuji X 35mm lens f/8
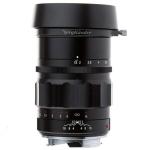 This lens from Voigtlander is one of the sharpest, easy to use lenses that I own. The fit and finish on this lens is something to behold. The lens has an included clamp on lens hood that works very well. The focusing is so smooth that it is scary… It is a PERFECT match for the Fuji X system (X Pro 1 and the X-E1) and works just as well here in Infrared! I was very happy to discover this in my tests at 720nm! There are no hot spots at any aperture. It takes Take a look:
Voigtlander Heliar 75mm f/1.8 Lens at f/11. Raw (notice the nice bronze coloring)
Voigtlander Heliar 75mm f/1.8 Lens, f/8 Faux Color Post Processing
Voigtlander Heliar 75mm f/1.8 Lens, f/8 B&W Post Processing
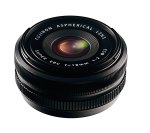
Fuji X 18mm lens.
This lens works well as long as you do not go beyond f/8. Past that it generates very discinct hot spot in the center of the image. While this can be overcome in post processing with Nik’s Viveza, it is still slightly disappointing… Still, when used at f/8 or wider the lens generates pleasing sharp images that make it worthwhile to carry in your camera bag! Here are the RAW test samples for you to consider.

Fujifilm XF 18mm F2.0 Lens at f/2
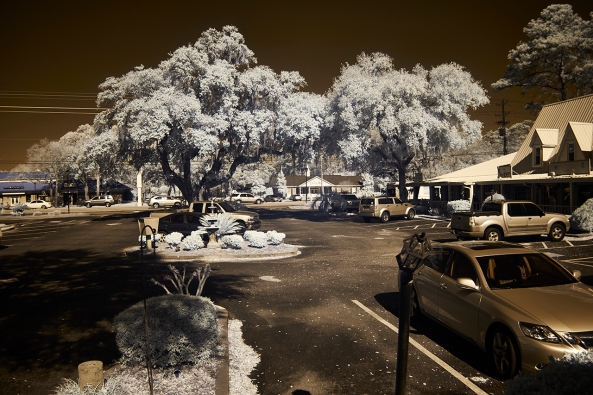
Fujifilm XF 18mm F2.0 Lens at f/4
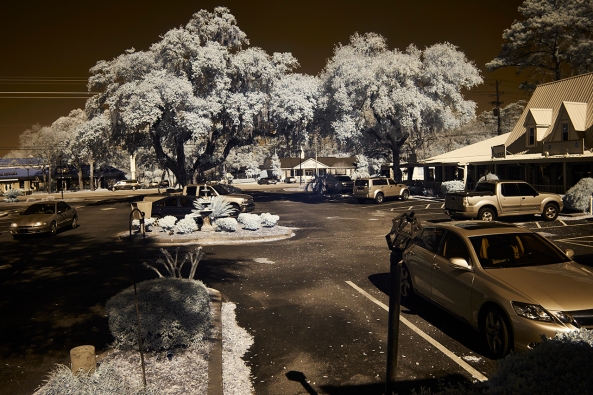
Fujifilm XF 18mm F2.0 Lens at f/5.6
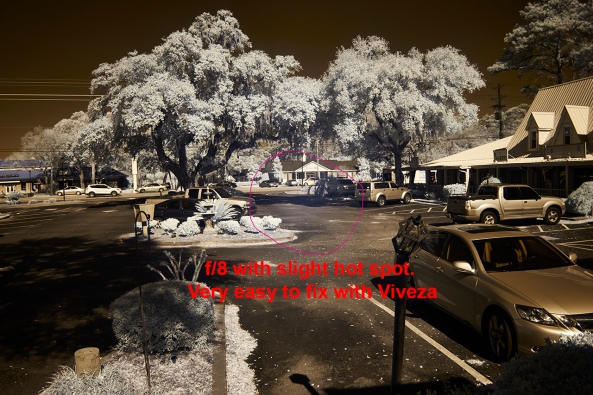
Fujifilm XF 18mm F2.0 Lens at f/8
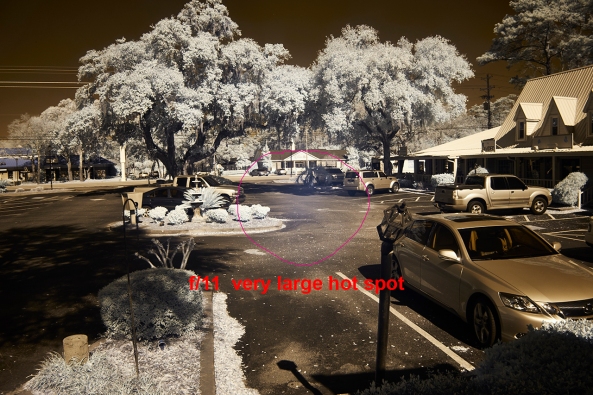
Fujifilm XF 18mm F2.0 Lens at f/11
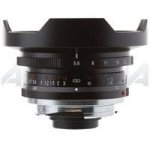
Voitlander 12mm
Another great lens from Voigtlander. This one has a built in lens hood and while it will take screw in filters they need to be wide angle versions. It also has that super smooth focusing feel but since it is so ultra wide at 12mm you can focus it pretty much at infinity and it will always be in focus. I love this lens on the X Pro 1 and X-E1. For 720nm Infrared, it works great until you hit f/22 then it gives a faint hot spot. This is just fine with me as I rarely go beyond f/11 or f/16.
Take a look at the samples:
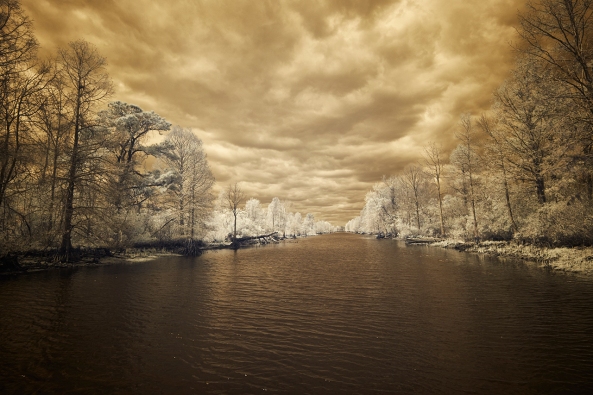
Voigtlander Ultra Wide-Heliar 12mm f/5.6 at f/8 RAW
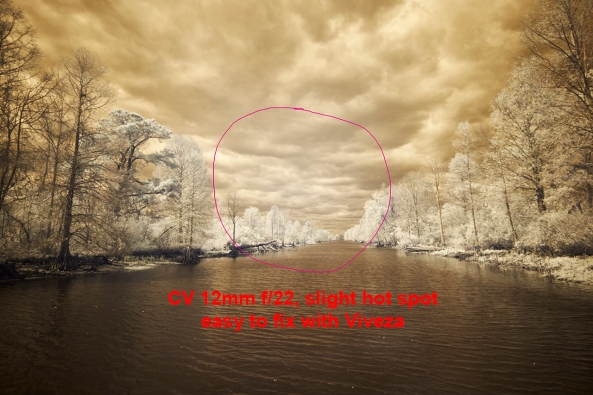
Voigtlander Ultra Wide-Heliar 12mm f/5.6 at f/22 RAW with hot spot
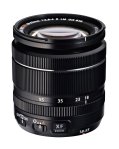
Fuji 18-55
This lens is such a disappointment to me… It is without a doubt my favorite walk around Fuji lens on the X-E1 camera. I hardly ever take it off. Sharp and clear with great contrast. That being said it is all but USELESS for Infrared! There is a major hot spot problem at ALL focal lengths at ANY aperture past f/4. At f/4 it did take nice images but as you understand, useless for landscapes. Bummer….. I am beyond disappointed over this one.
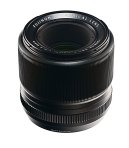
Fuji 60mm
I am going to initially tell you to simply forget this lens for Infrared. It has a seriously bad hot spot at all apertures. I will also share with you that I might actually have a bad copy of it. It gives a terrible hot spot on my X-E1 when shooting in color as well, especially when using a flash. I think that I am going to send it back to Fuji for repair and see what they think. Depending upon that I might re-evaluate it for Infrared later on!
The next post will focus on post procseeing and what can be acheived artistically with this new Infrared Fuji X Pro 1!
Please let me know what you think!