Amazing New AR Coated IR Filters from KolariVision.com


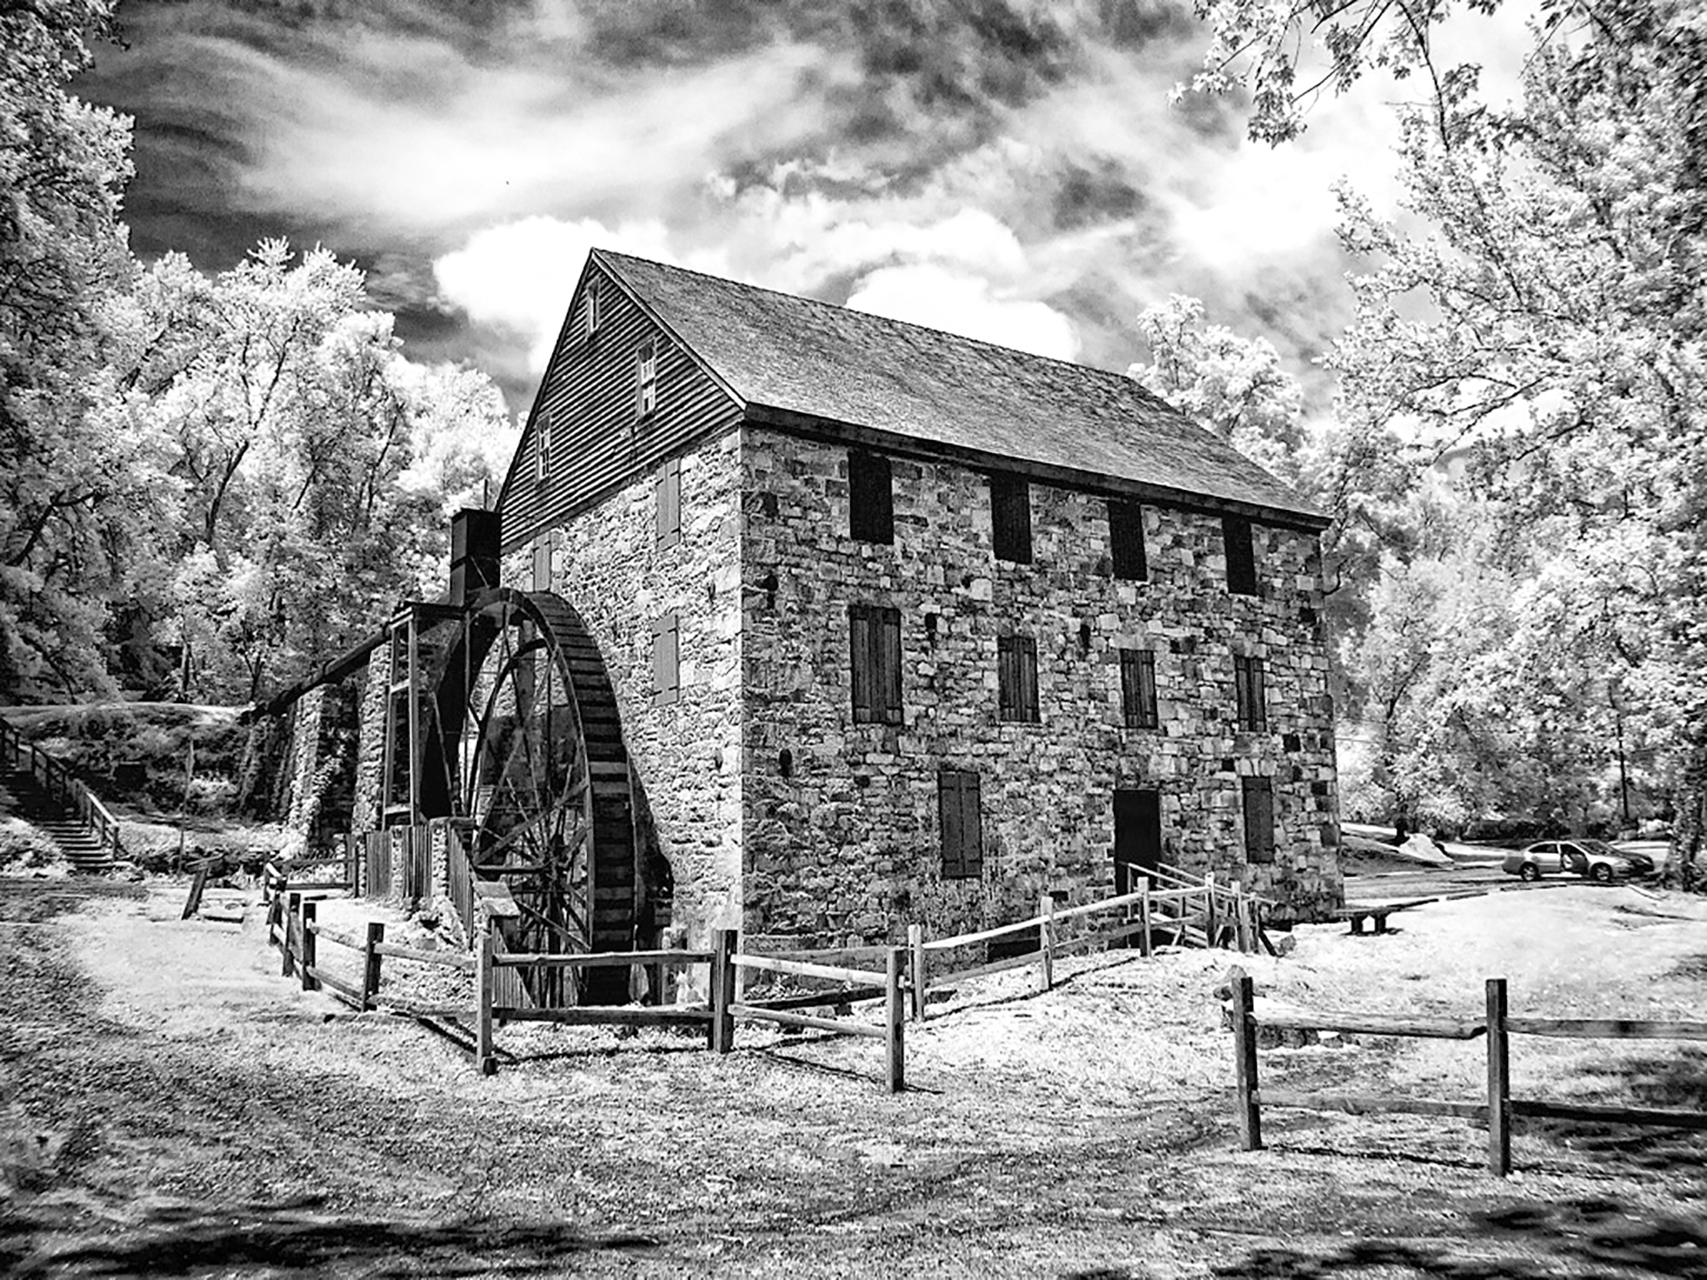
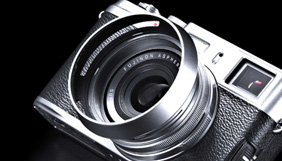
Kolari Vision introduces a NEW Anti Reflective IR coating for their conversion filters!

Fuji X100s, 850nm Kolari AR conversion - Under Foley Pier

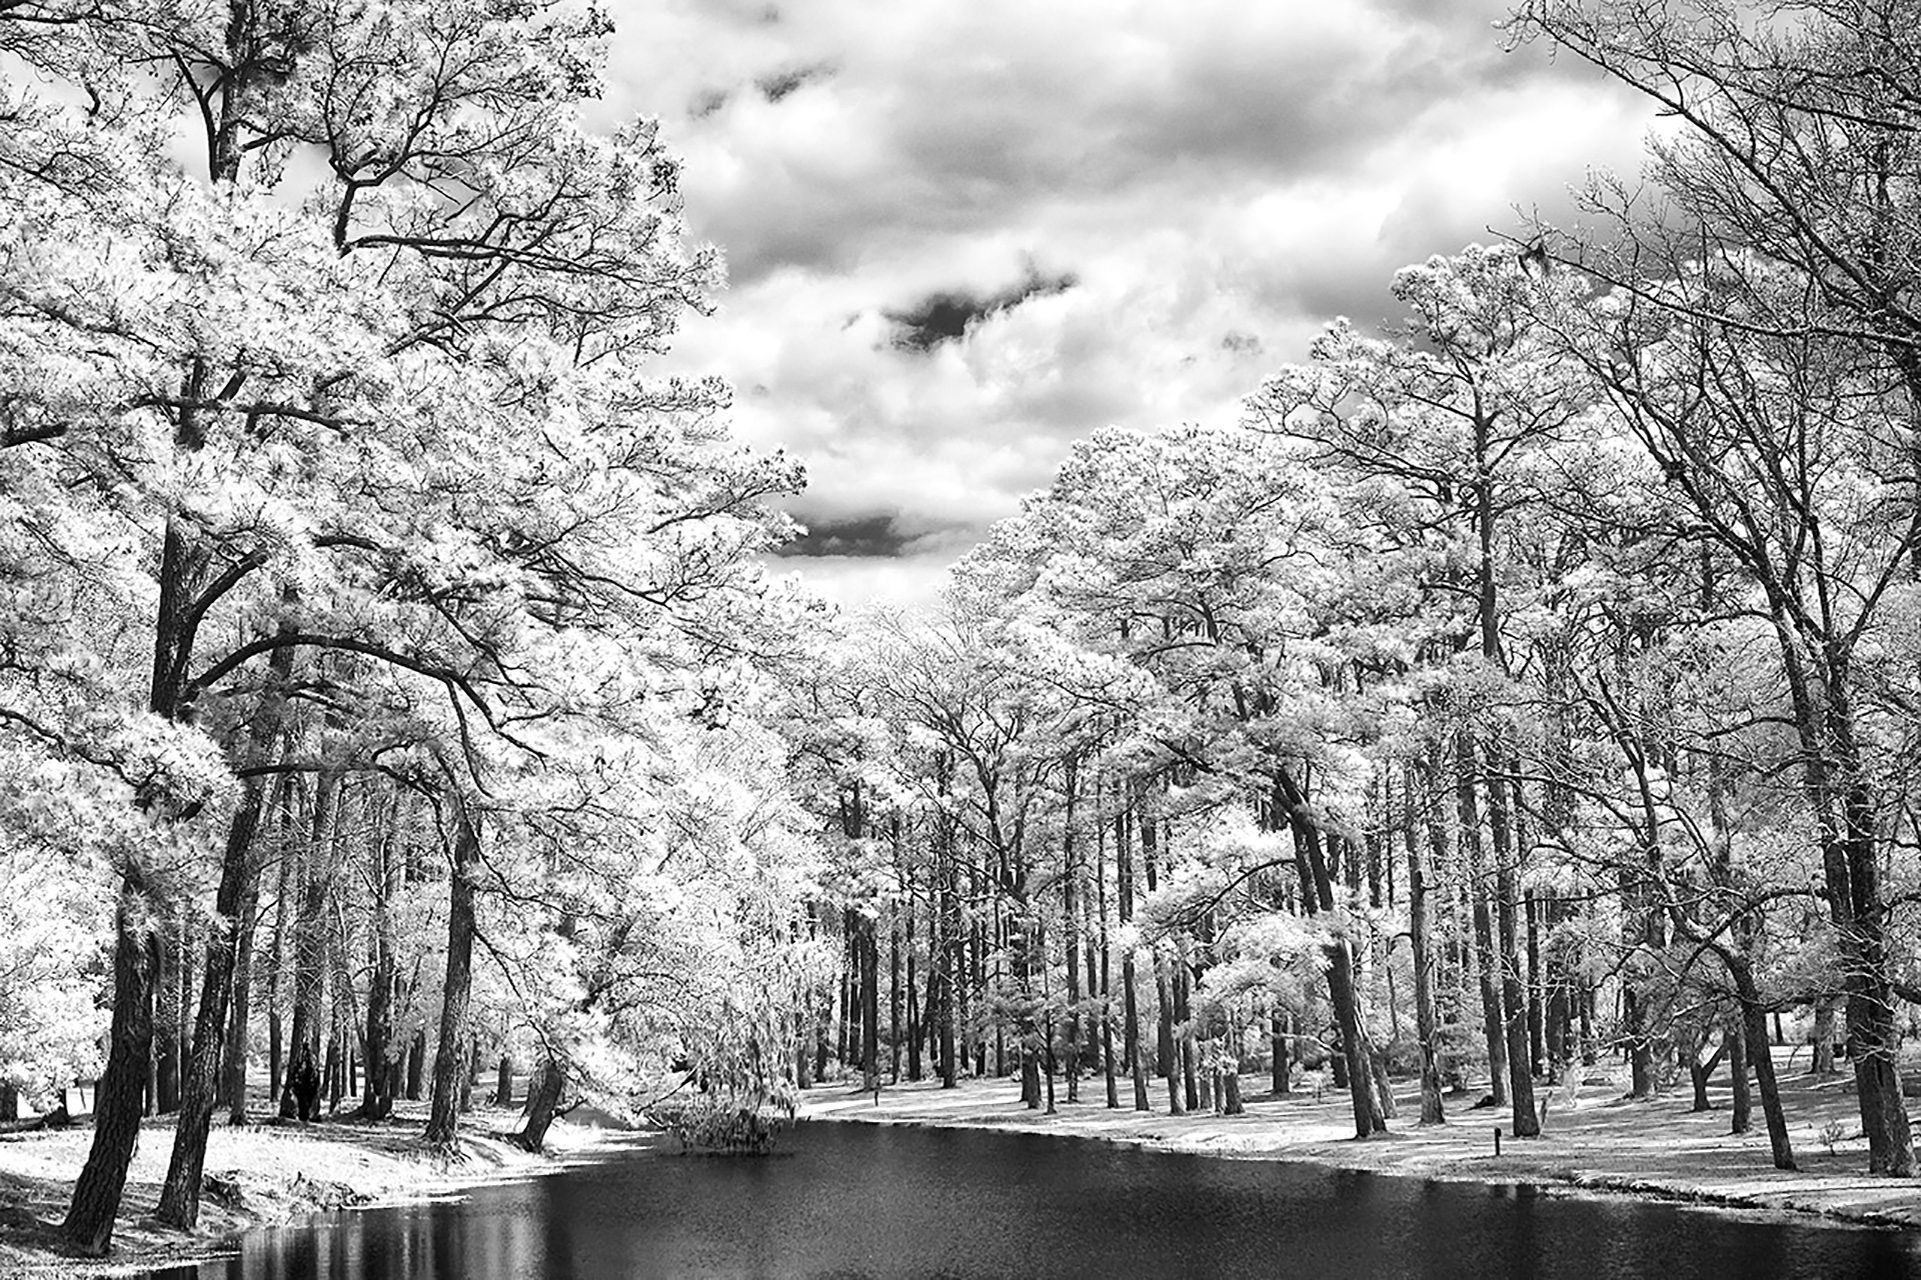
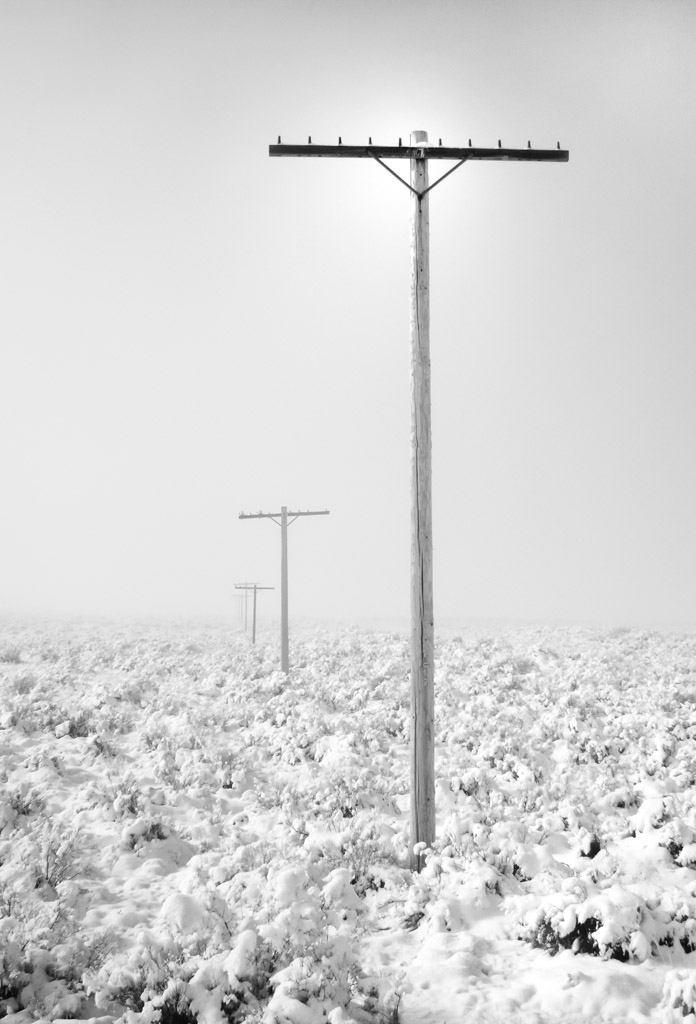
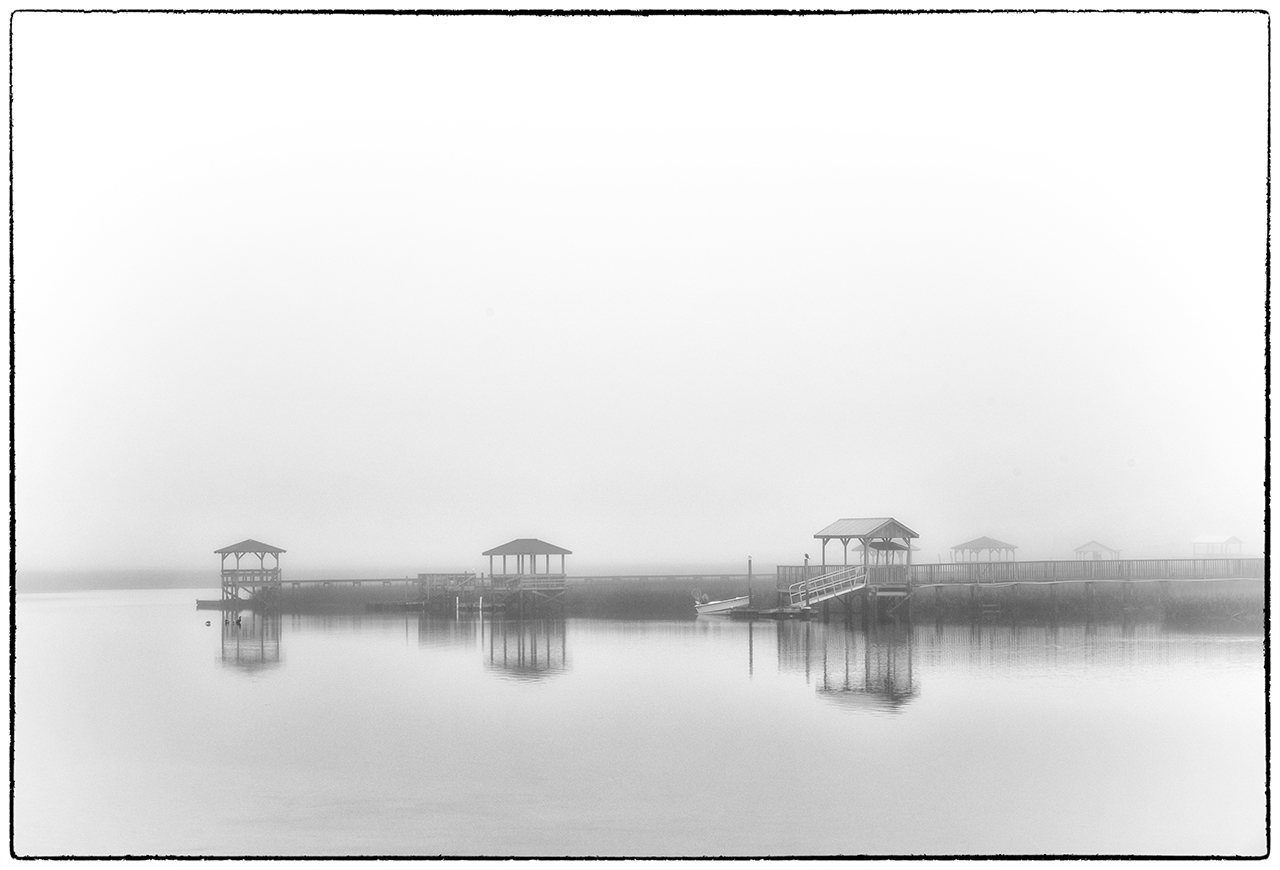
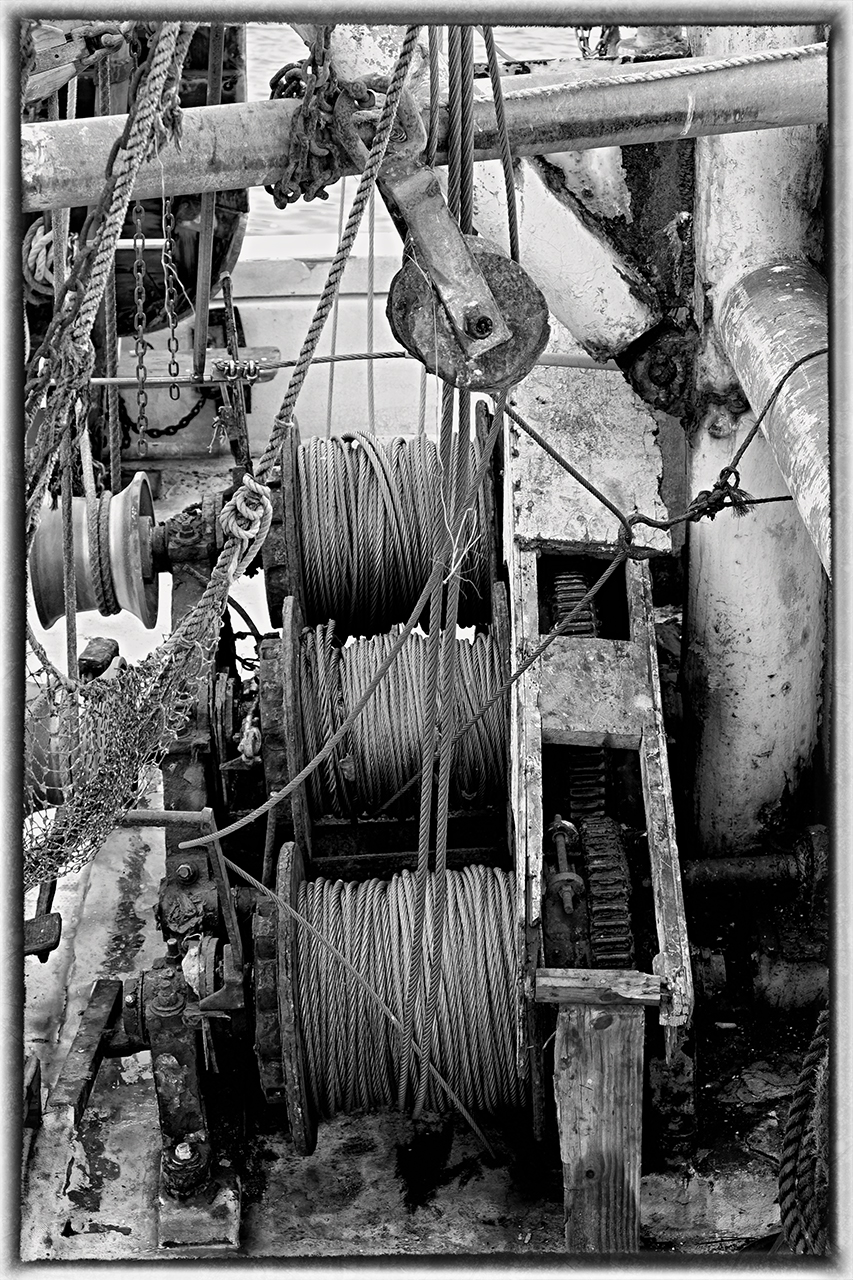
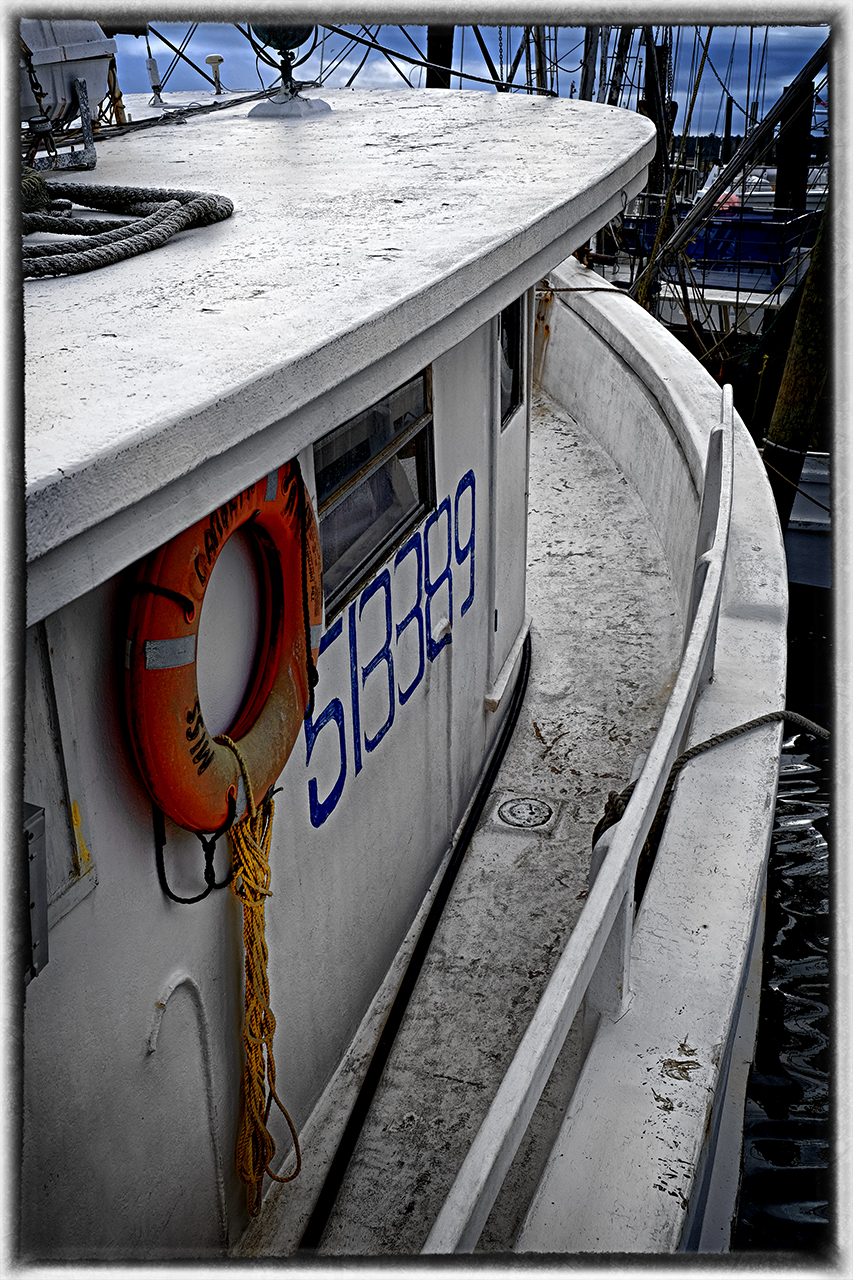
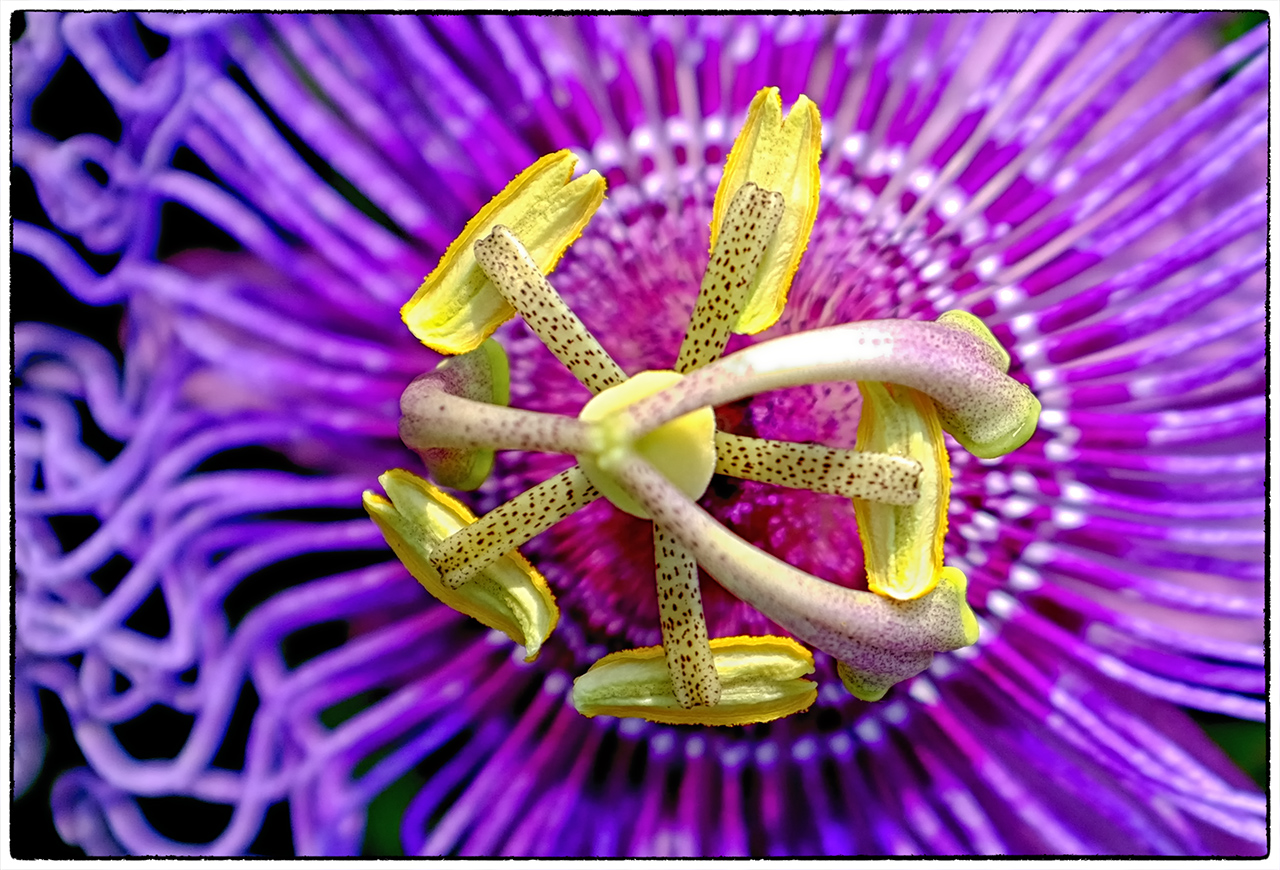
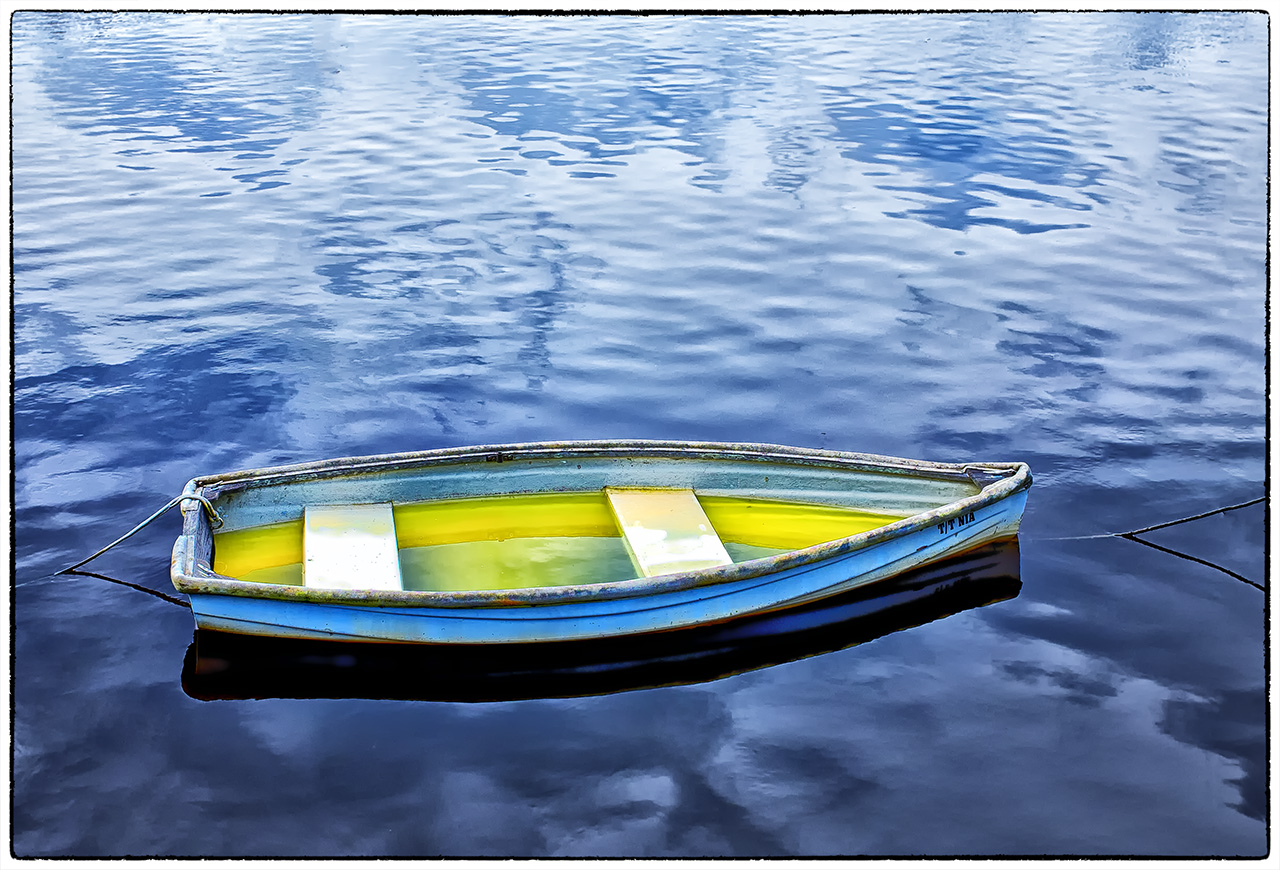
Fuji X100s, 850nm Kolari AR conversion – Under Foley Pier

I LOVE shooting IR and have a long history with it in both Film and Digital.   I have had over 25 conversions from ALL of the big conversion companies around the country!   But, once in a while I would get a camera that no mater how hard I tried, I will get a hot spot with it or the lenses I used.   You learn how to deal with this by selective use of the aperture but once in a while you would just not be able to get around the problem and loose the shot….  

Fuji X100s, 850nm Kolari AR conversion - Shrimp Boat

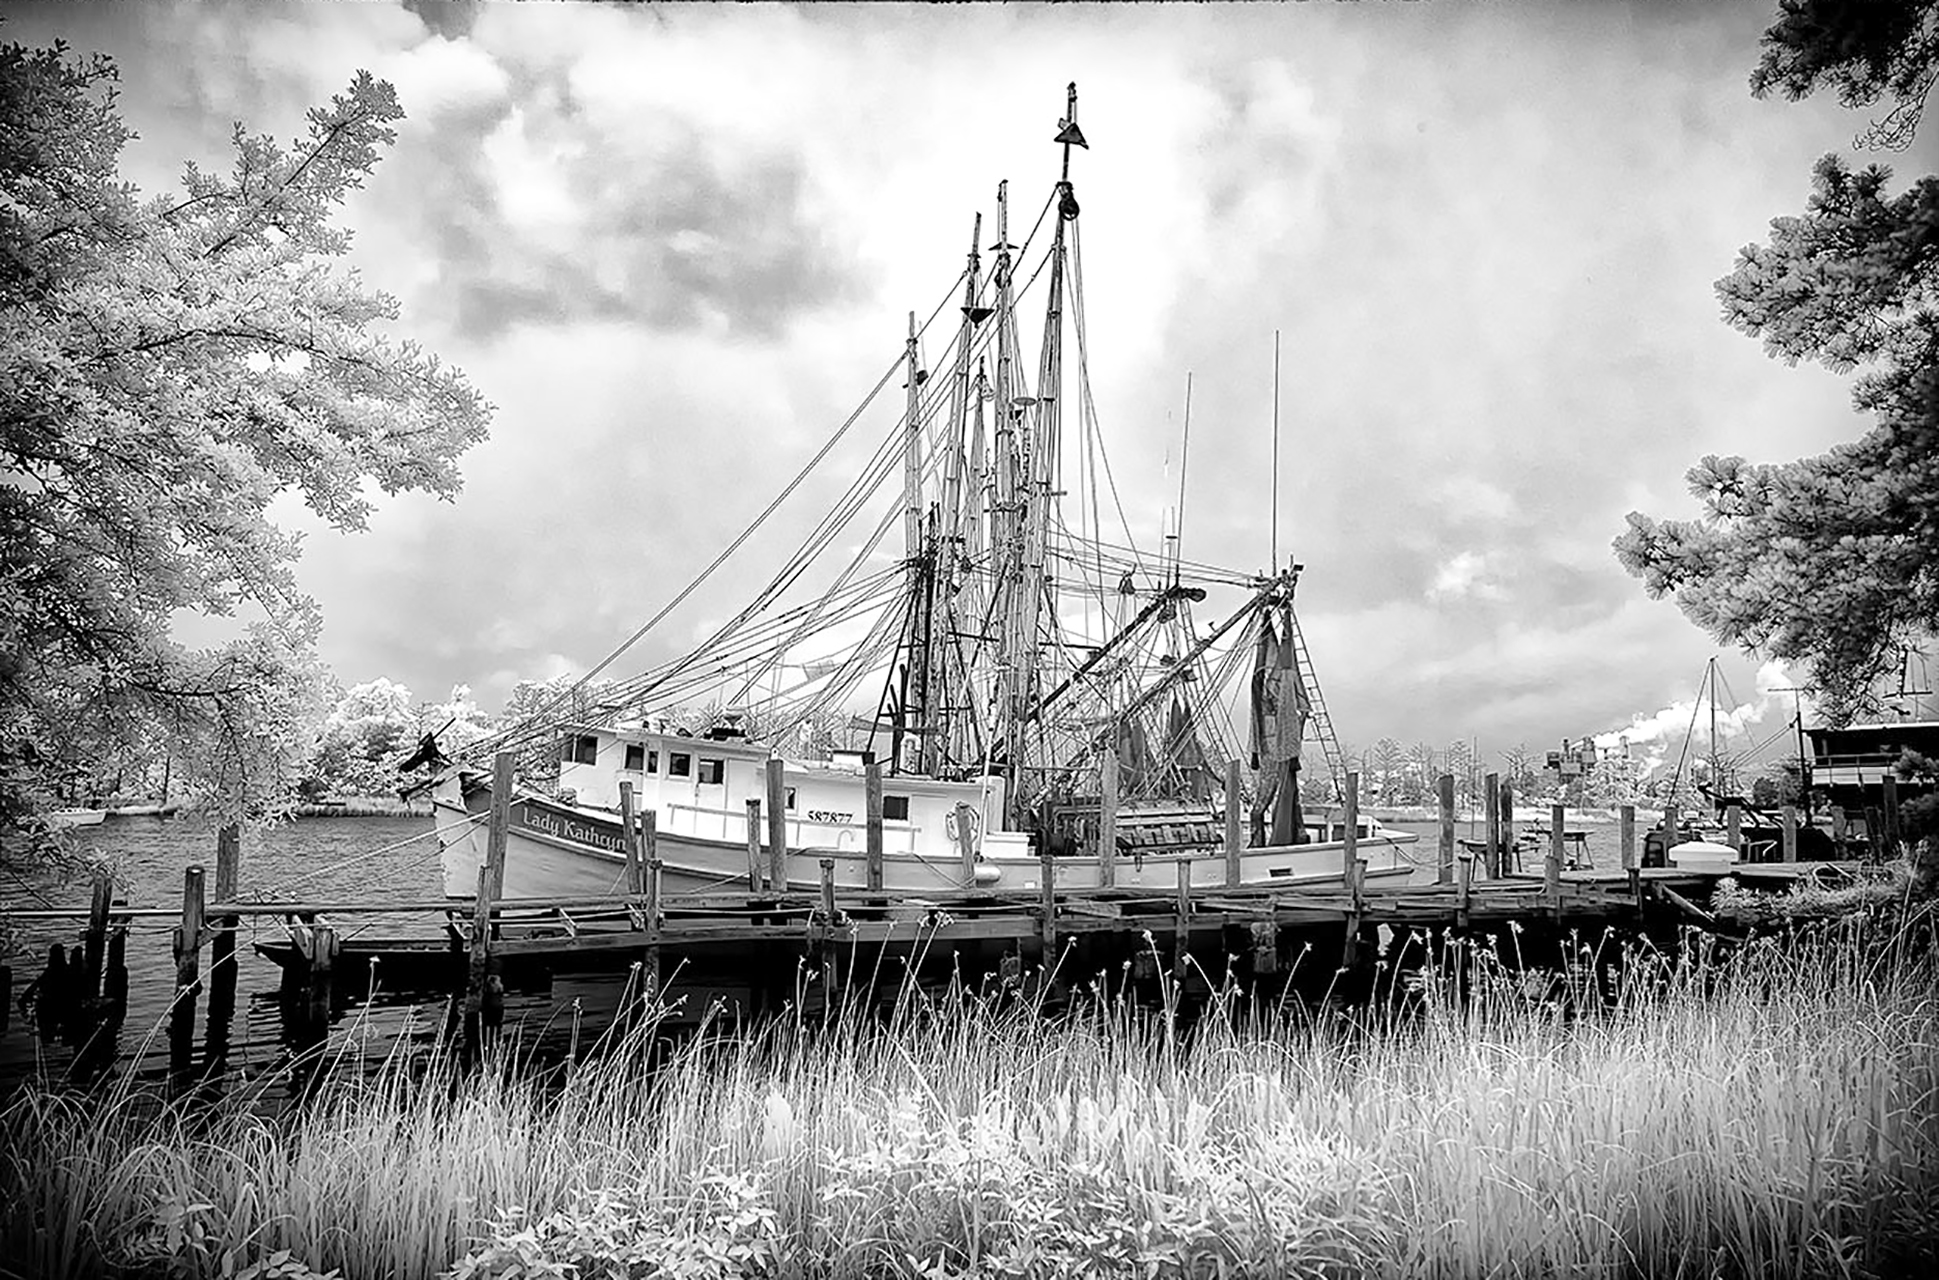
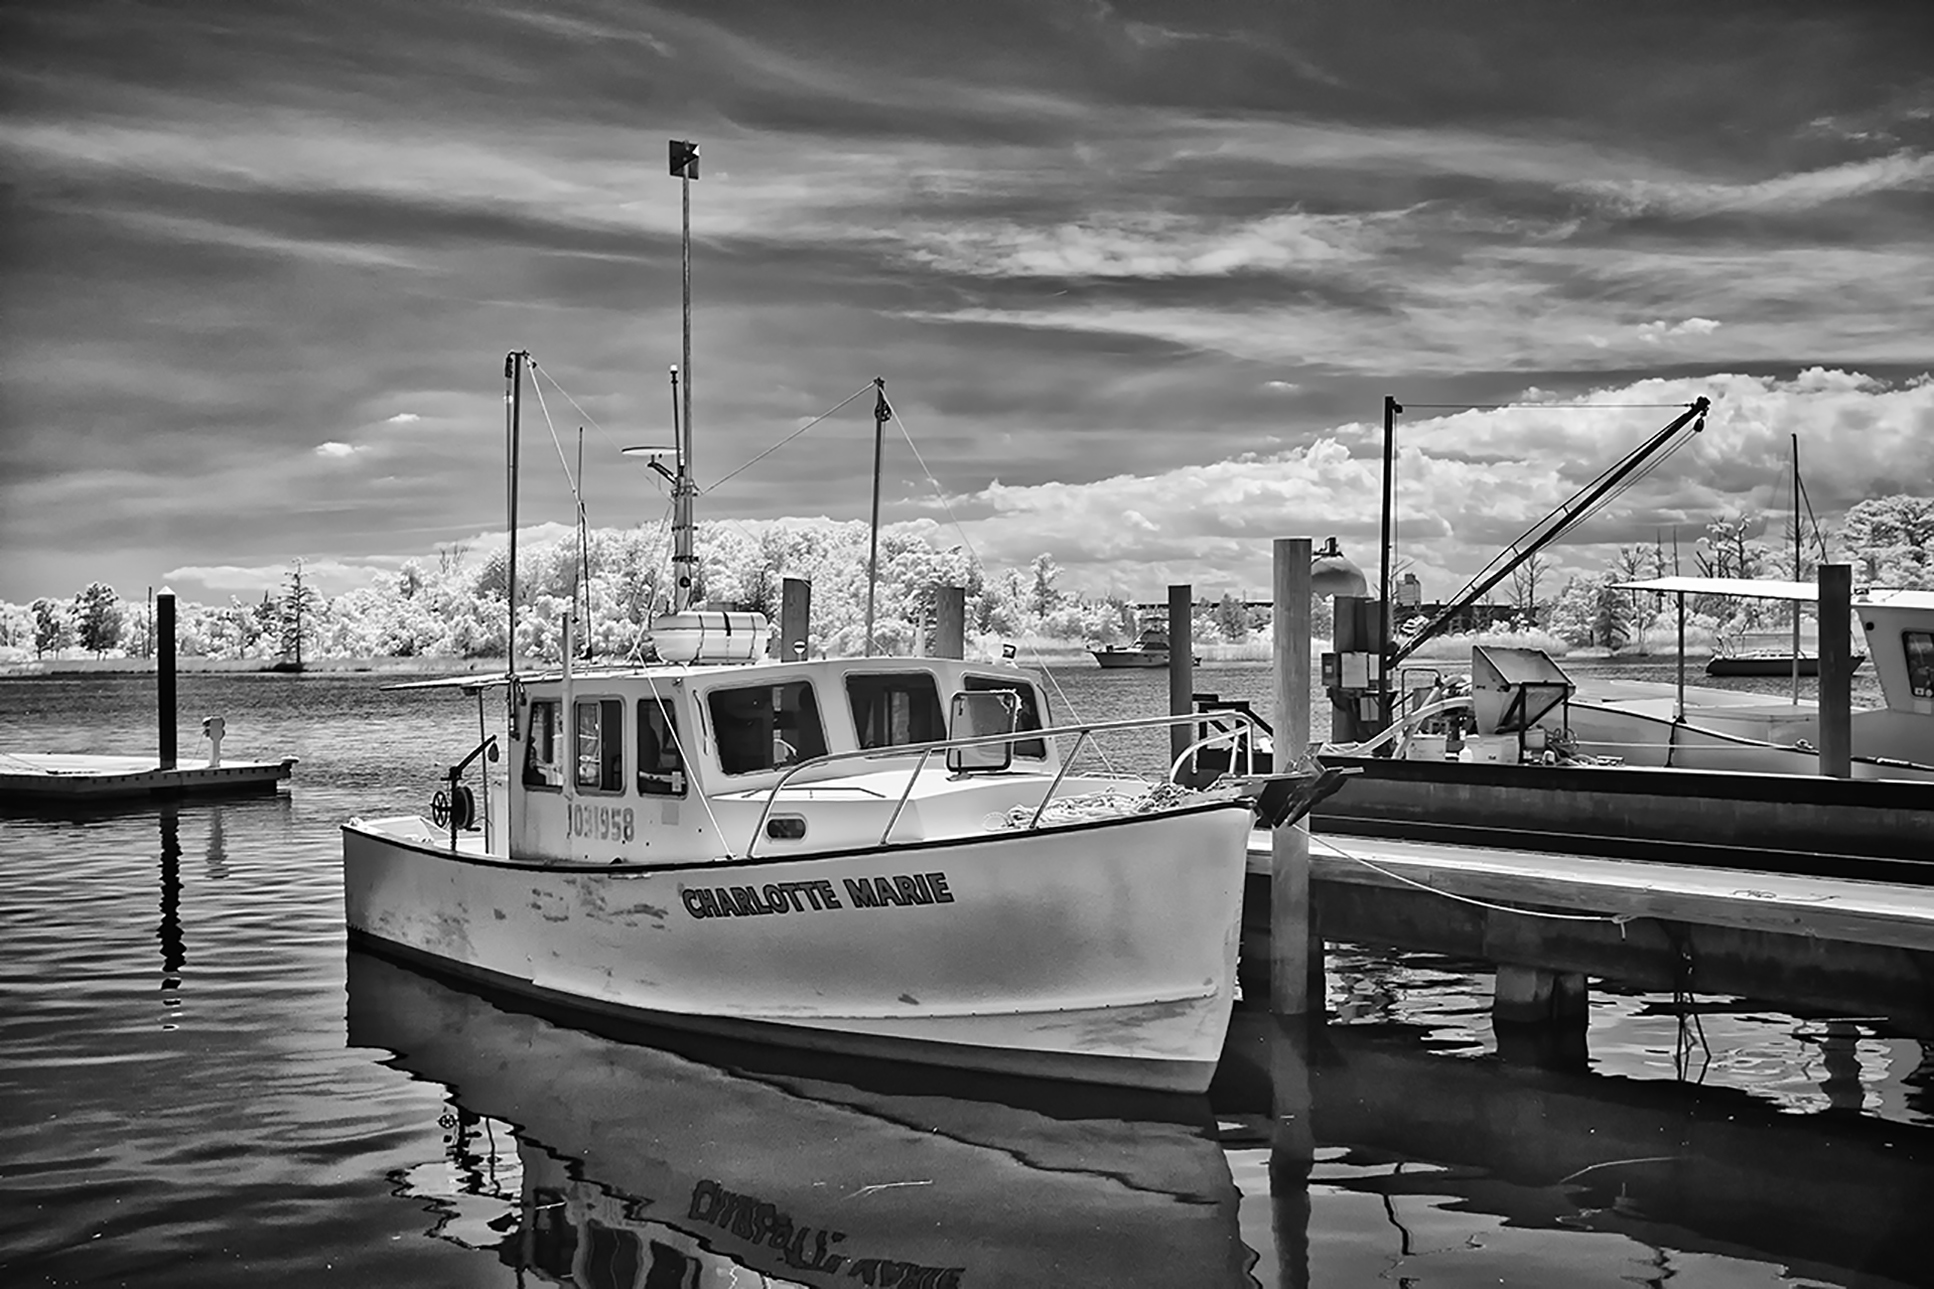
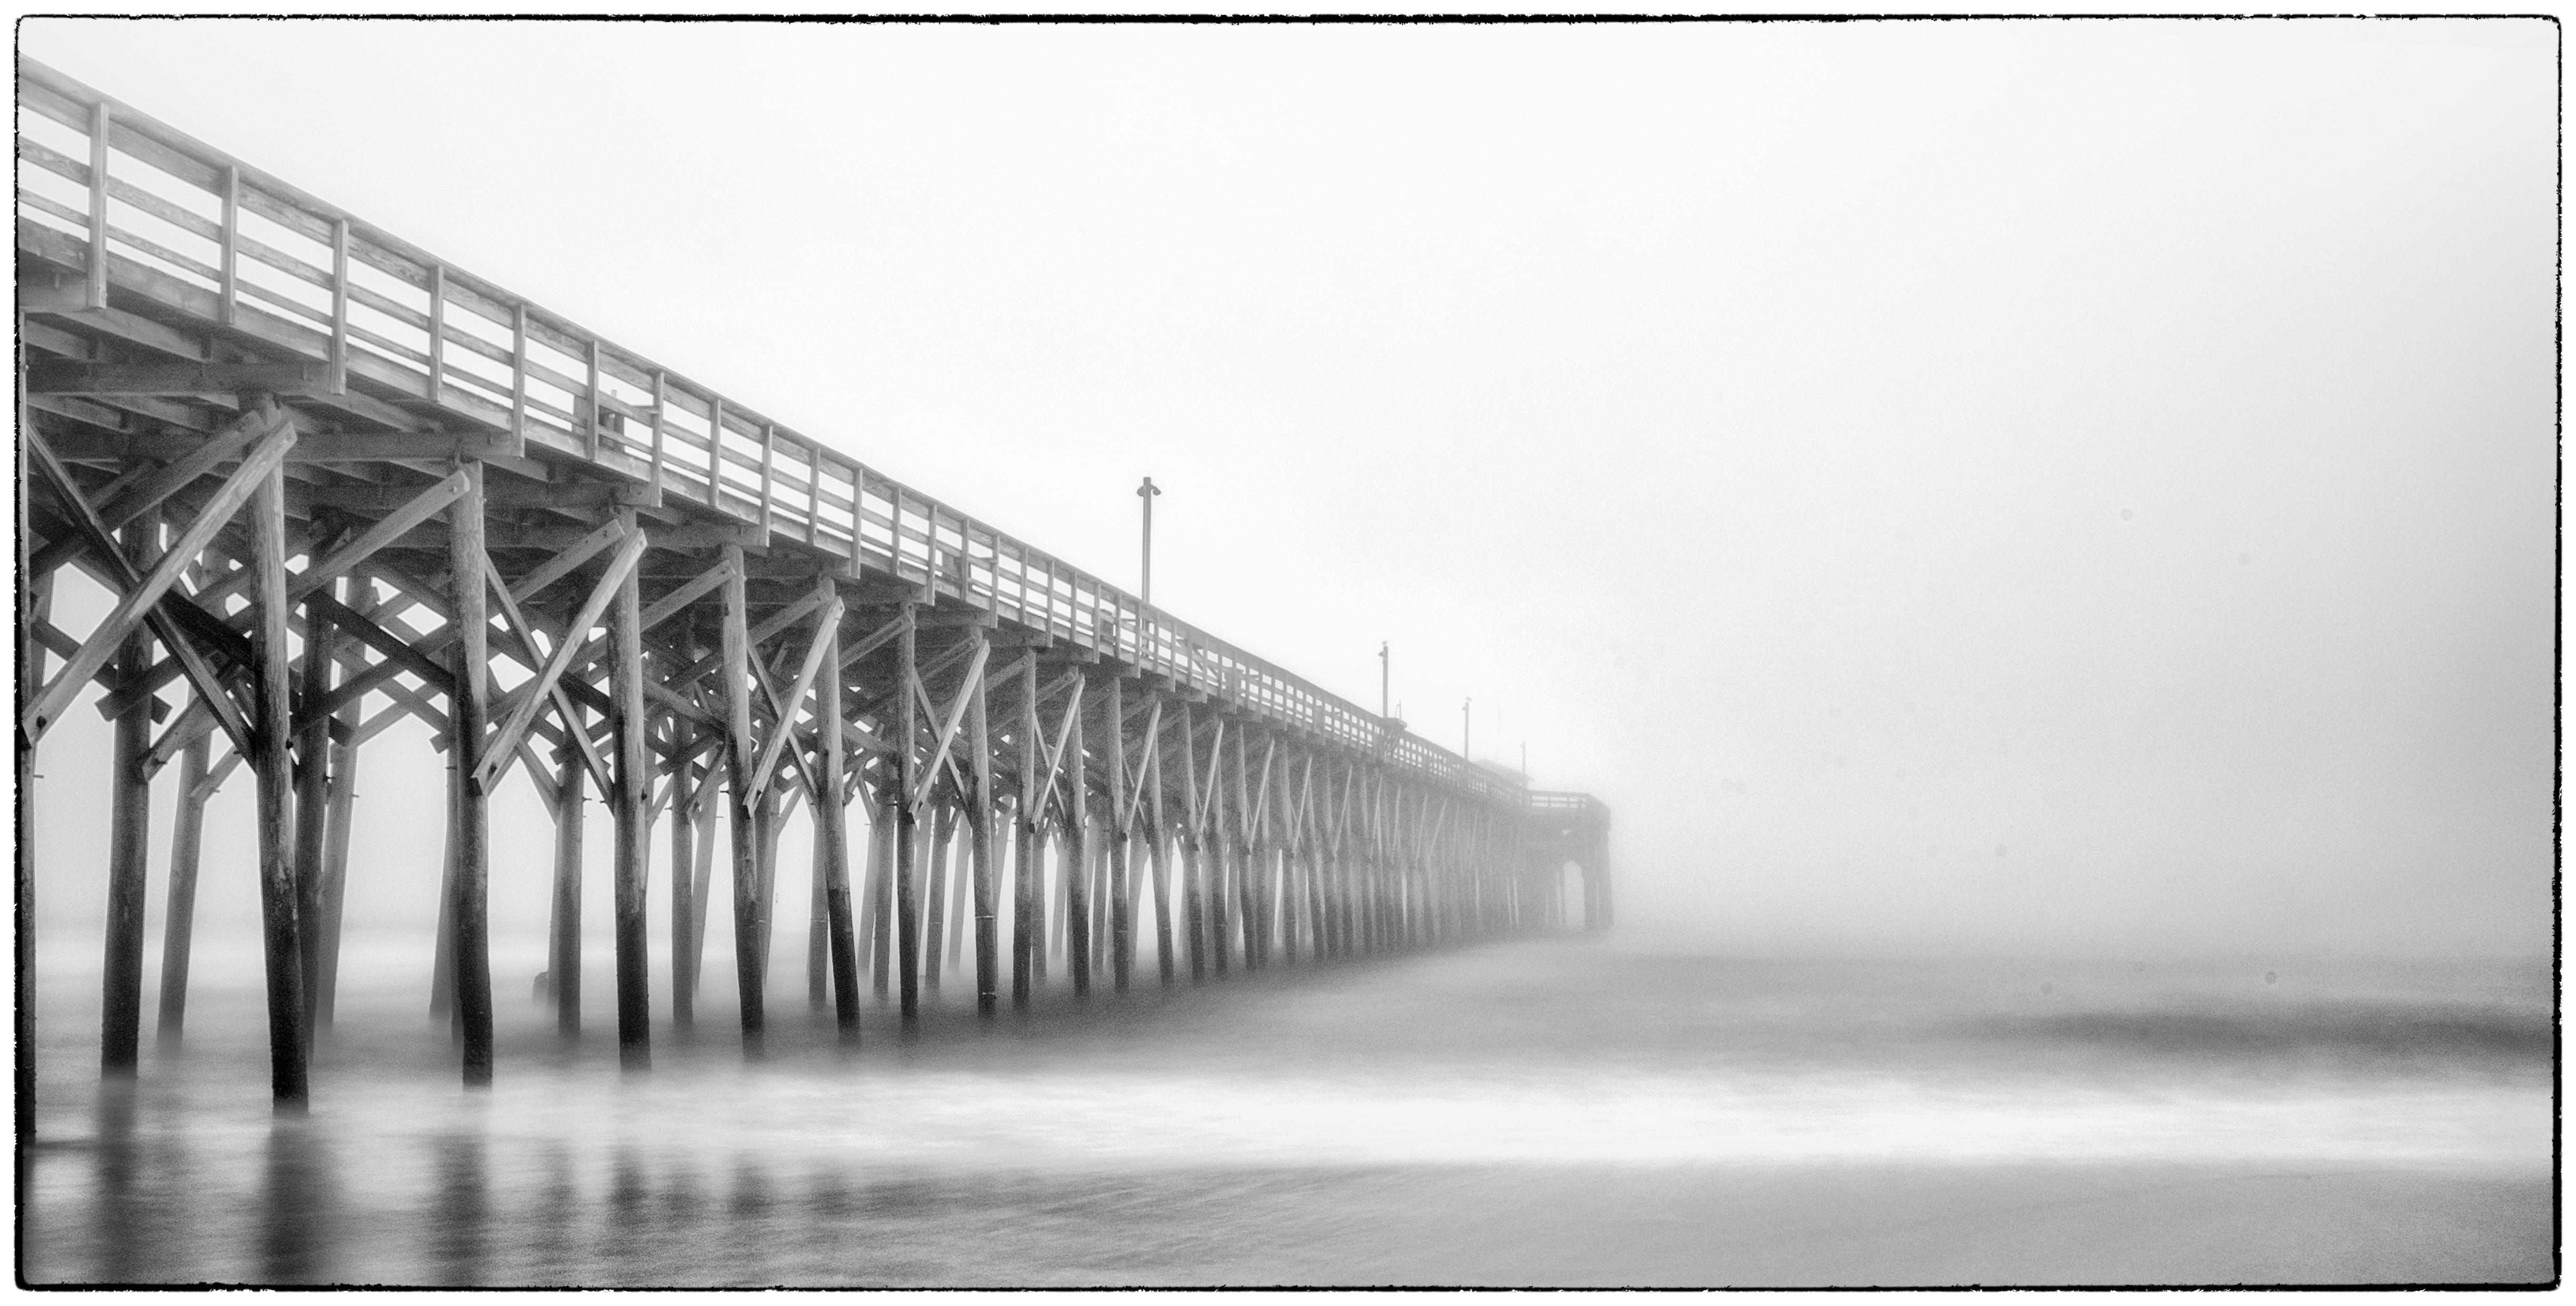
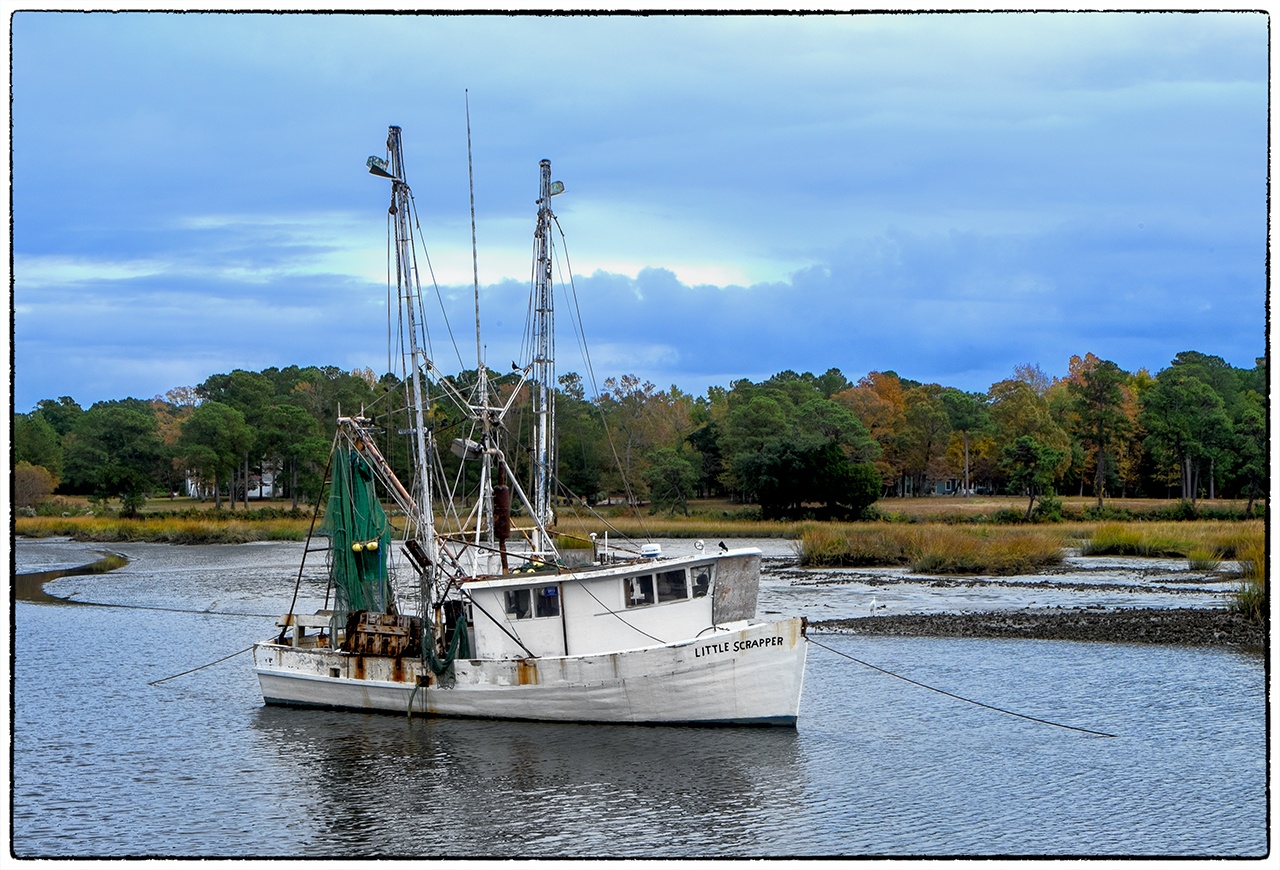
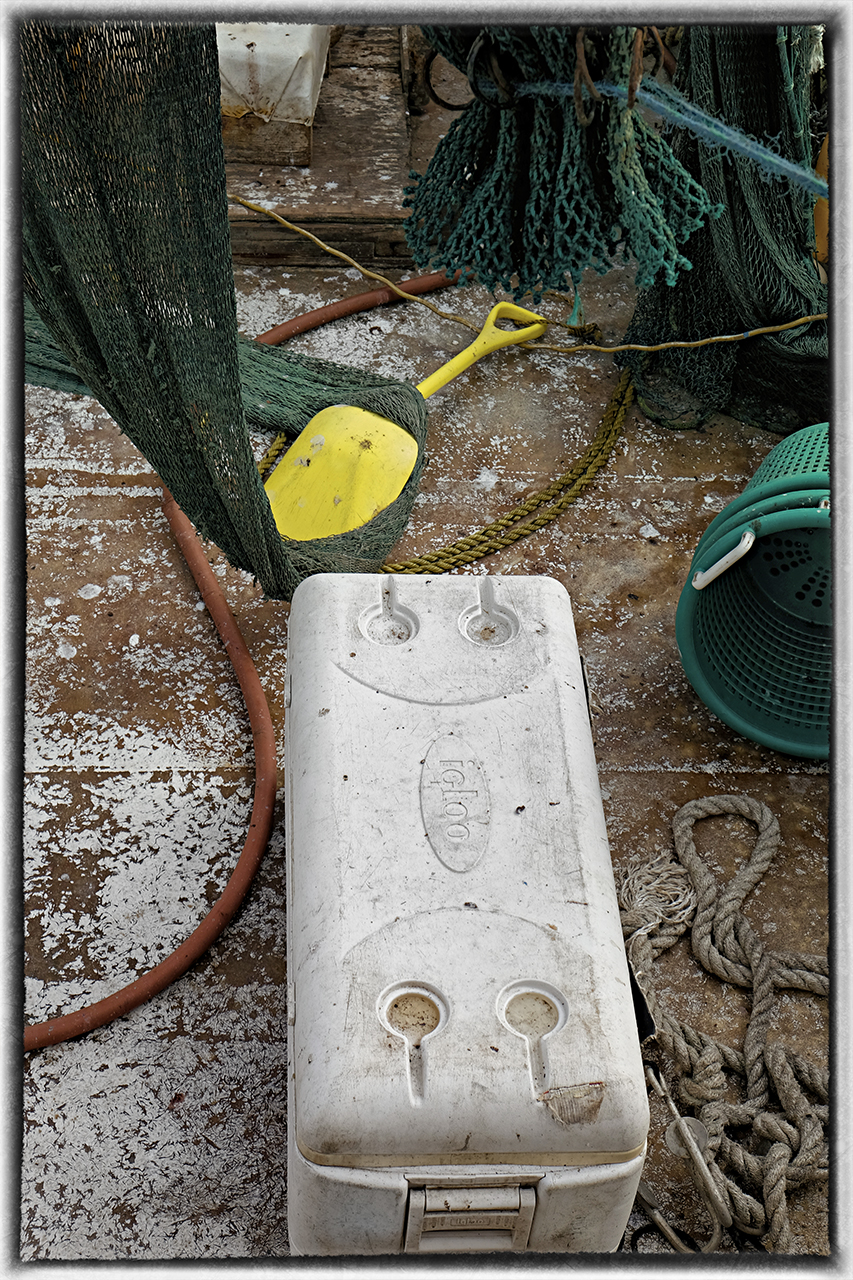
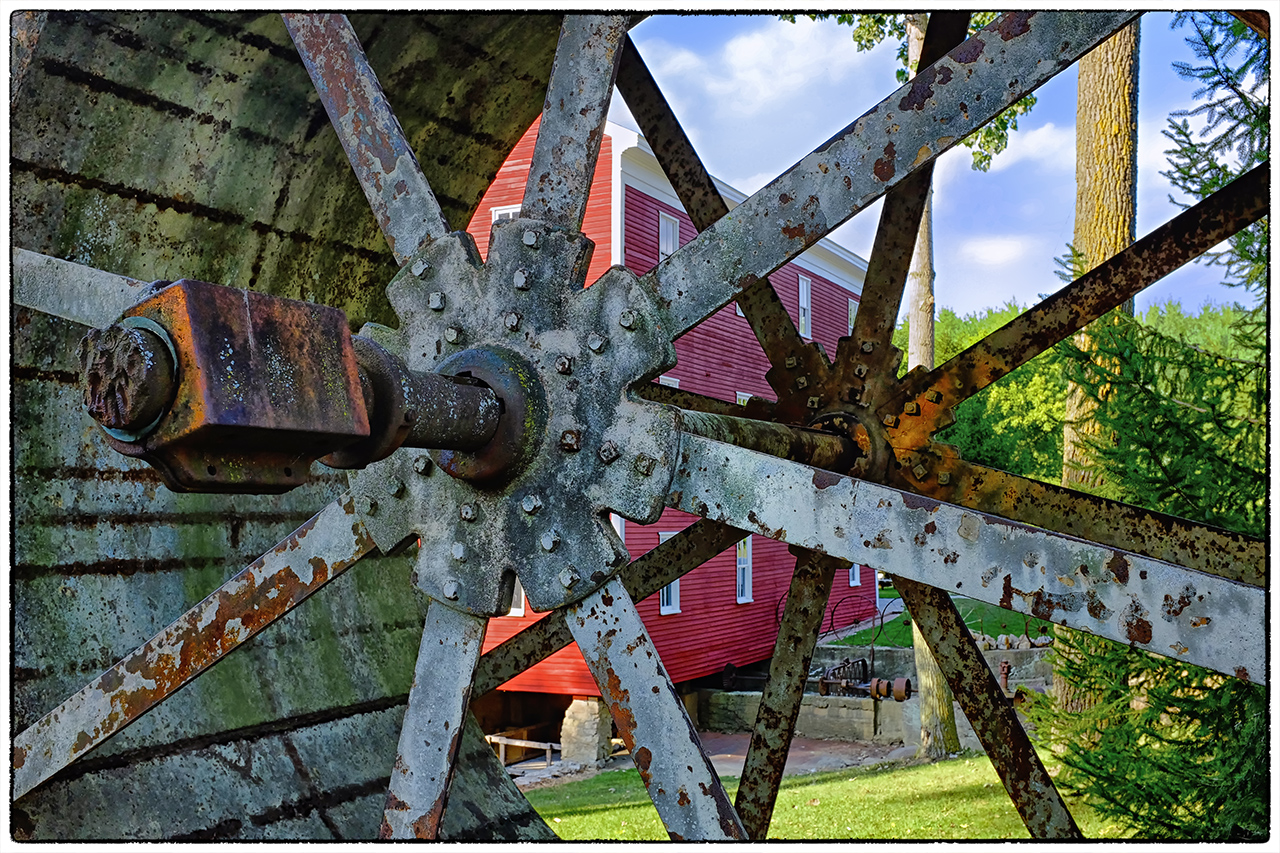
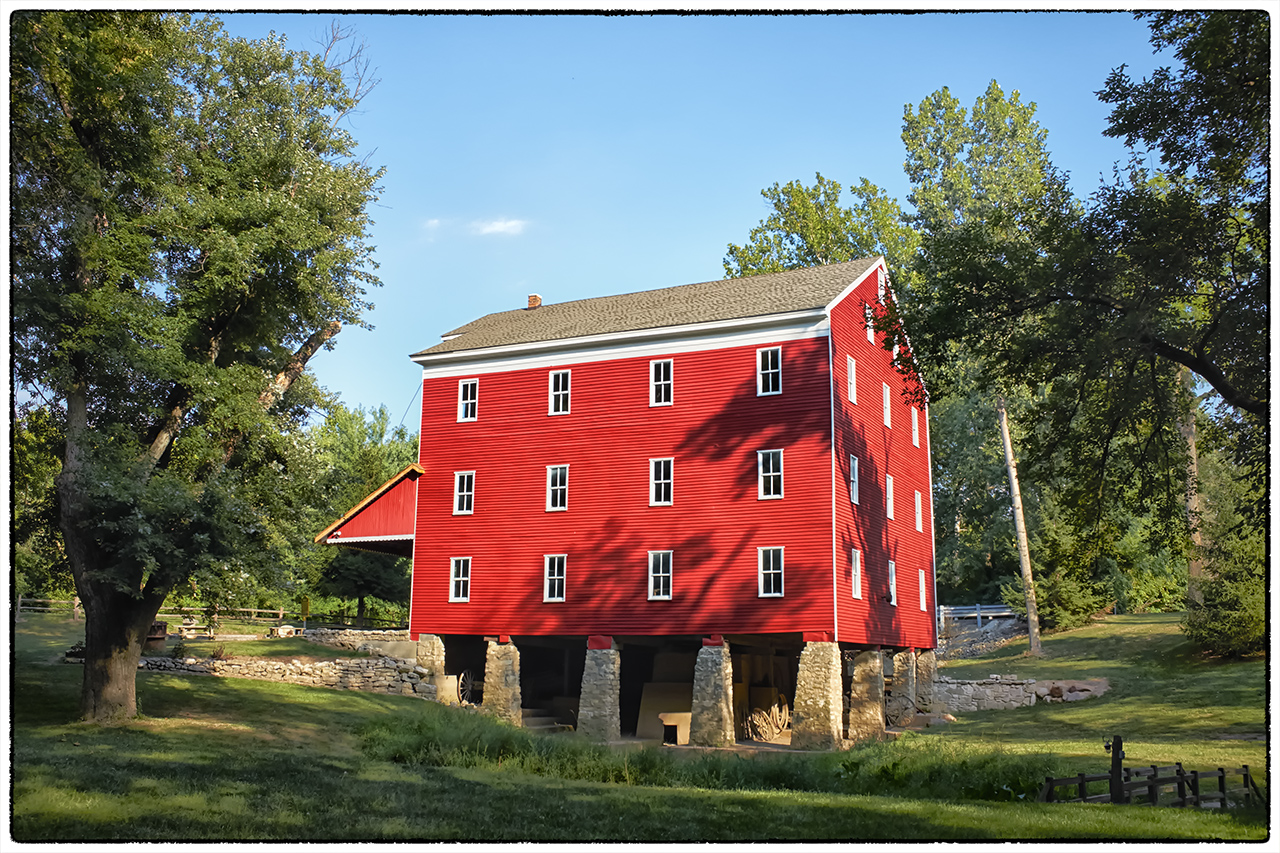
Fuji X100s, 850nm Kolari AR conversion – Shrimp Boat

Well about 3 weeks ago Ilija from Kolari (http://www.kolarivision.com ) sent me a note telling me about a new coating process for his conversion filters.   I have a long history with Kolari, LDP and Lifepixel but I have never heard of this till now.  Ilija offered to do a free conversion with this newl IR AR coating for me in return for evaluating it in the real shooting world! So I told him that I would send the X100s off as a test camera and that I needed it back fast in order to allow others to play with the camera also!   Off it went on Tuesday.  Imagine my surprise when I got it back in hand the following Wednesday!

Here is what Kolari says about this new AR IR coating:

  • Uncoated glass has a reflection of around 4-5% at all wavelengths, and we found that this reflection off the sensor filter was bouncing off the glass and reflecting back from the lens housing and aperture blades to cause the hotspots.  We developed this anti-reflective coating that is centered around the IR wavelengths that cause hotspots, and reduced the 5% reflection down to <0.5% (see the attached graph for reflection % by wavelength scan, and the picture of the IR filters for the visual difference of IR reflection).
Unknown

  • The coating does not reduce visible light reflections as much, and does not reduce blue reflections at all. This gives the glass we use a blue shine, since that is the only range that is fully reflected still (see picture of black filters). 
AR coating test on Visible Light

AR coating test on Visible Light

AR coating tests on BLUE light

AR coating tests on BLUE light

  • I am getting ready with a new website which I hope to launch in 1-2 weeks, so I have not put the coated version of the conversions online yet, but they will be offered on our Full spectrum, two spectrum, 590, 665, 720, 850, and Blue IR/NDVI conversions. There will be a $50 optional upgrade on all of our conversions at this point.


  • I plan on offering only the coated version eventually, but the batch runs are expensive and I cannot coat our full inventory at once. I’m not sure if you are aware, but we stock custom made custom thickness filters for all our camera/filter combinations so that each conversion gets a piece of glass that maintains the original optical distance (refractive index x physical thickness) as closely as possible, which changes for each filter material. Other companies use a few general size pieces of glass, glue them directly to each sensor, and calibrate the focus for an arbitrary lens, which reduces what they have in inventory. Our design choice means that we have around 200 unique pieces of glass in inventory for DSLR and mirrorless cameras, and another 200 for point and shoot models, so you can imagine the challenge in getting them all coated. – Ilija

Fuji X100s, 850nm Kolari AR conversion - Thru The Door

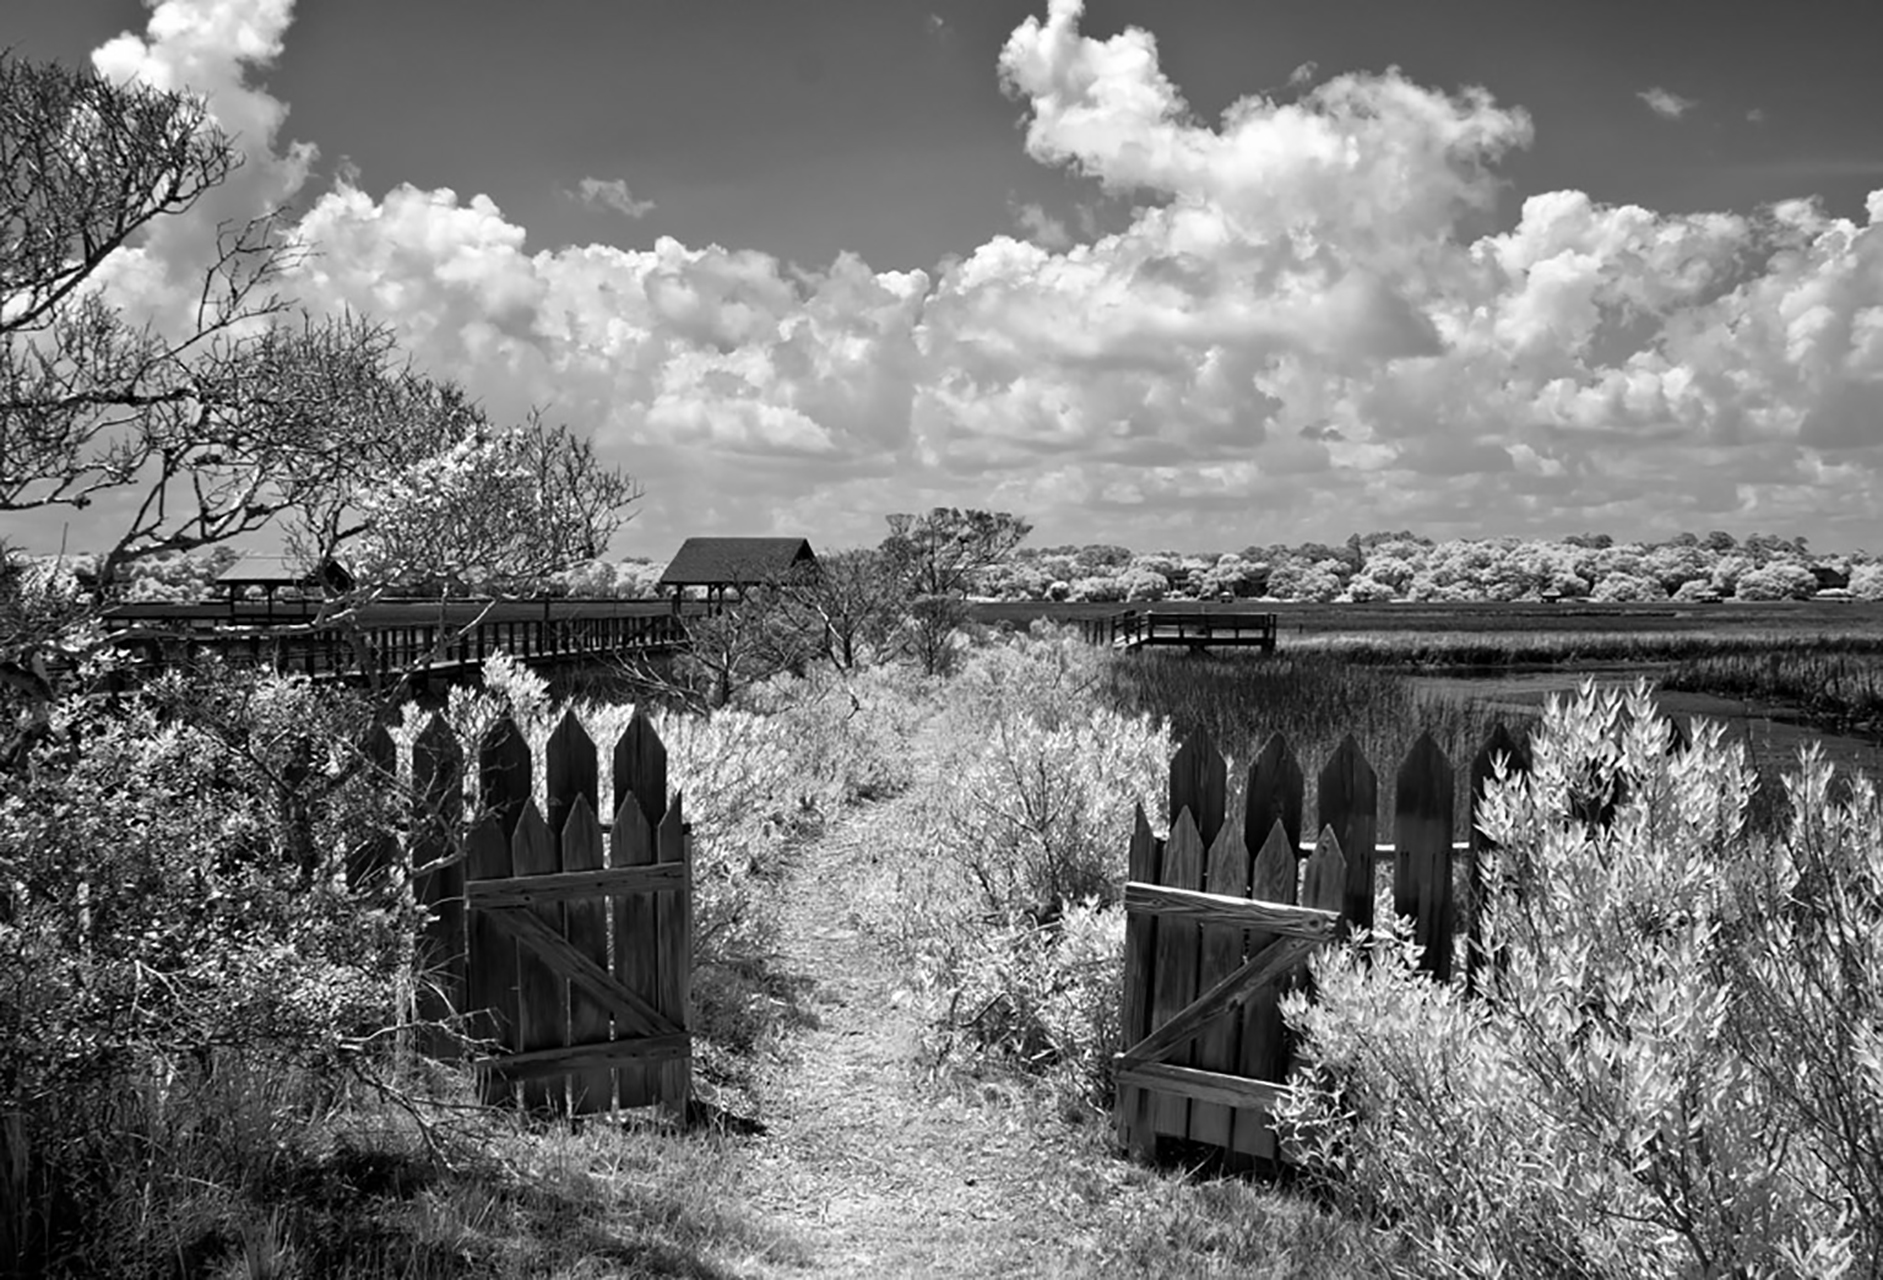
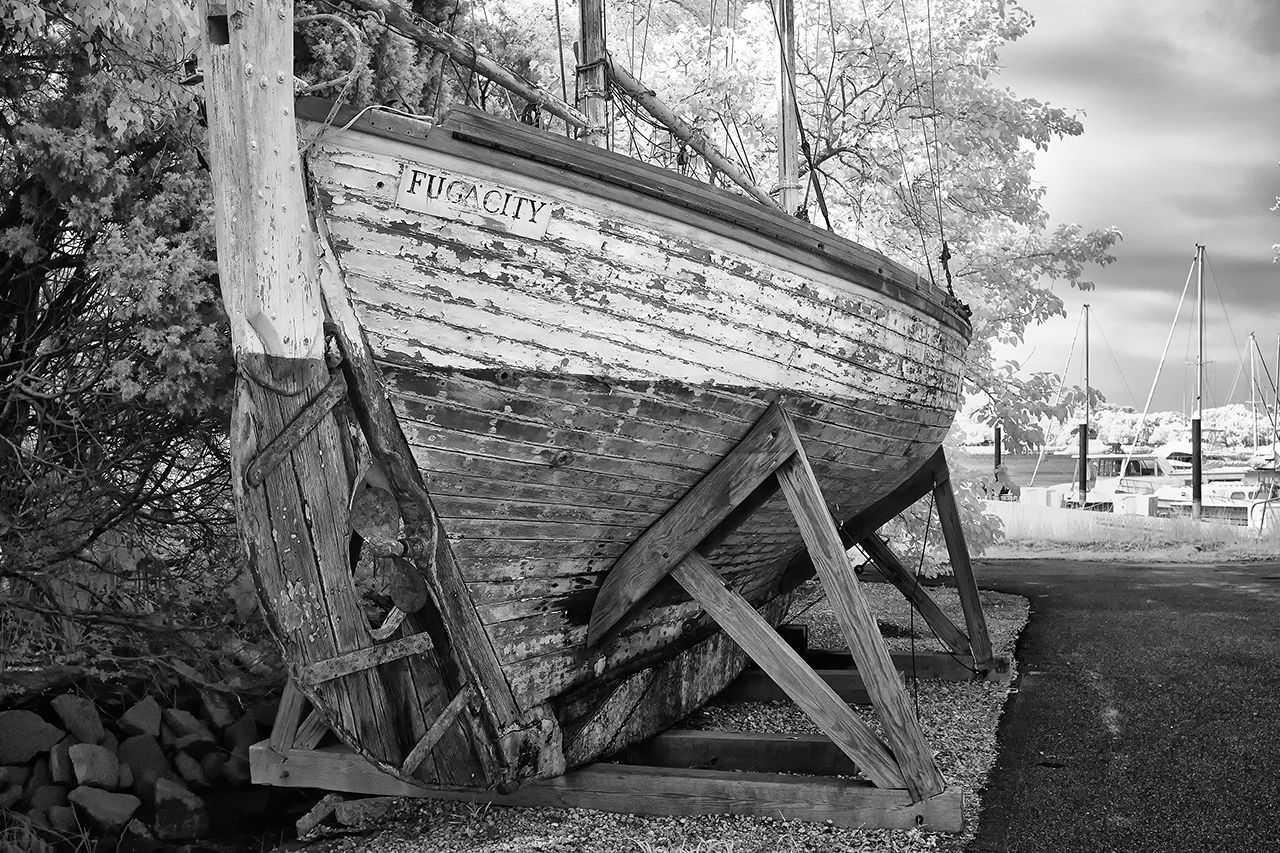
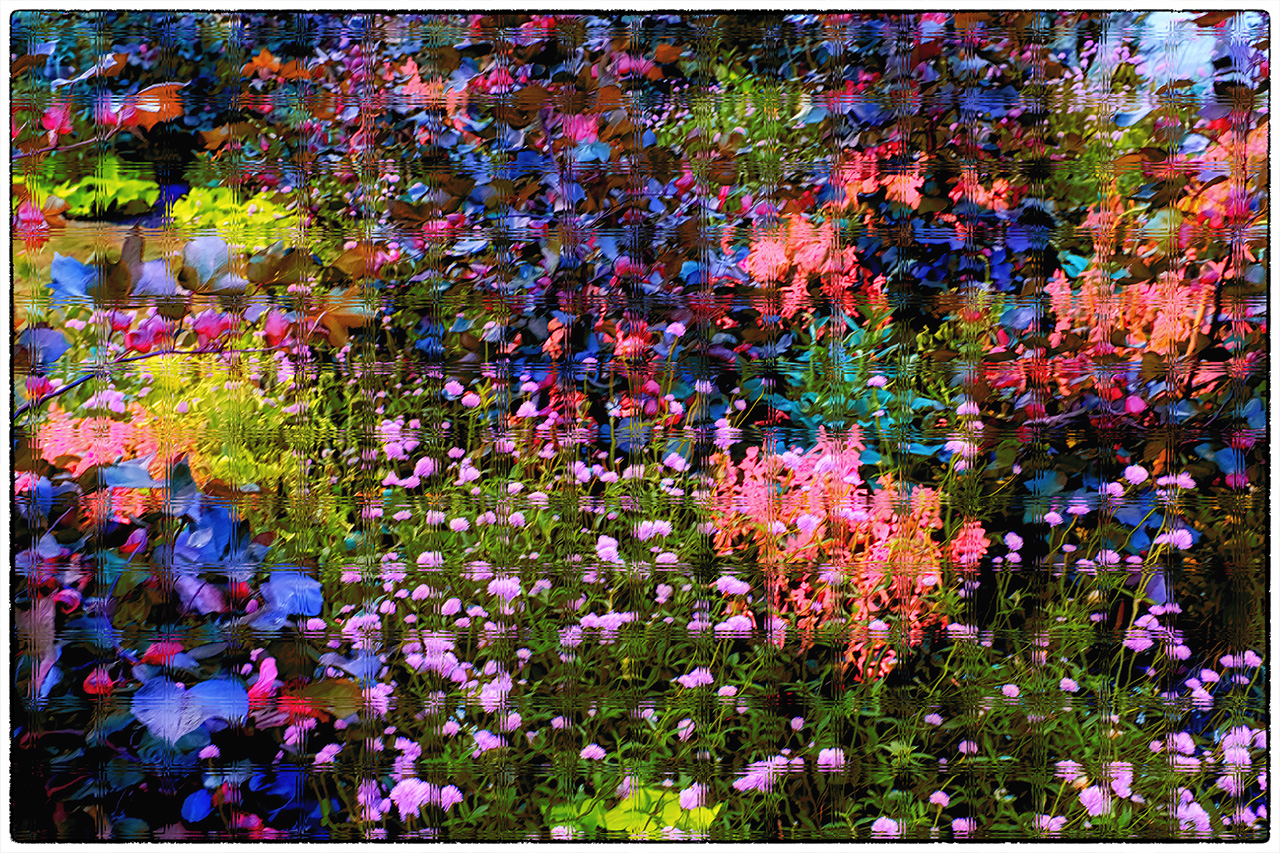
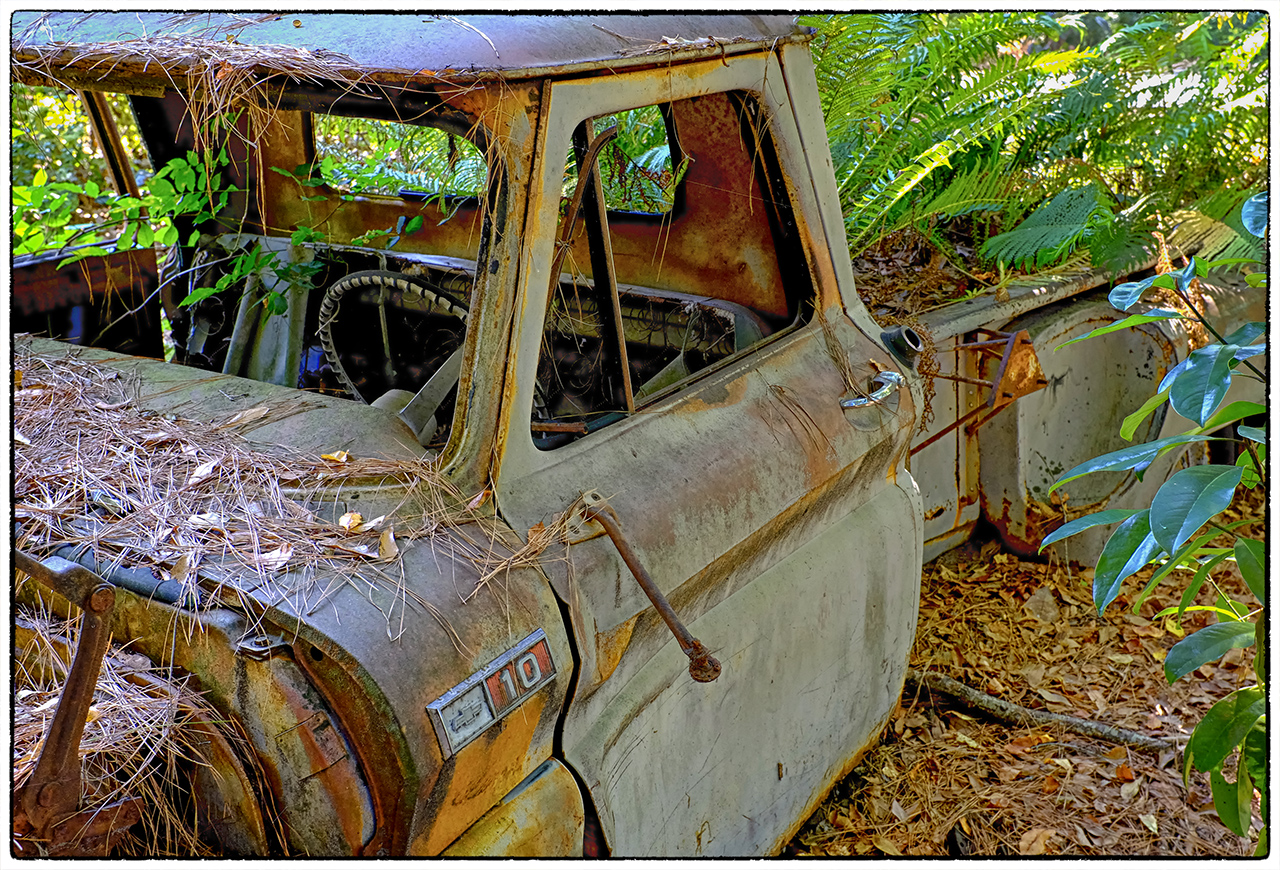
Fuji X100s, 850nm Kolari AR conversion – Thru The Door

So as you can see they are up and almost ready to start filling orders for these new filters.   

Fuji X100s, 850nm Kolari AR conversion - McClellanville Fleet

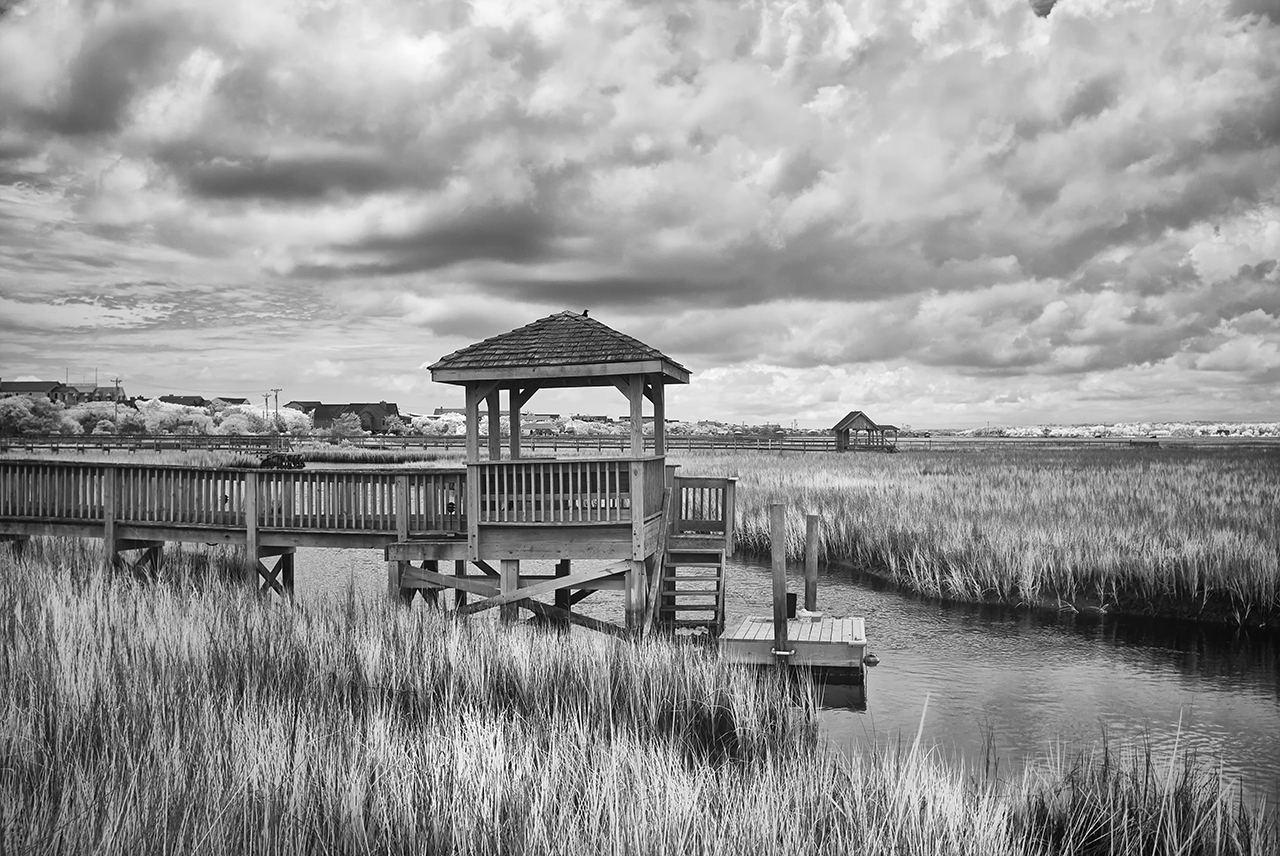
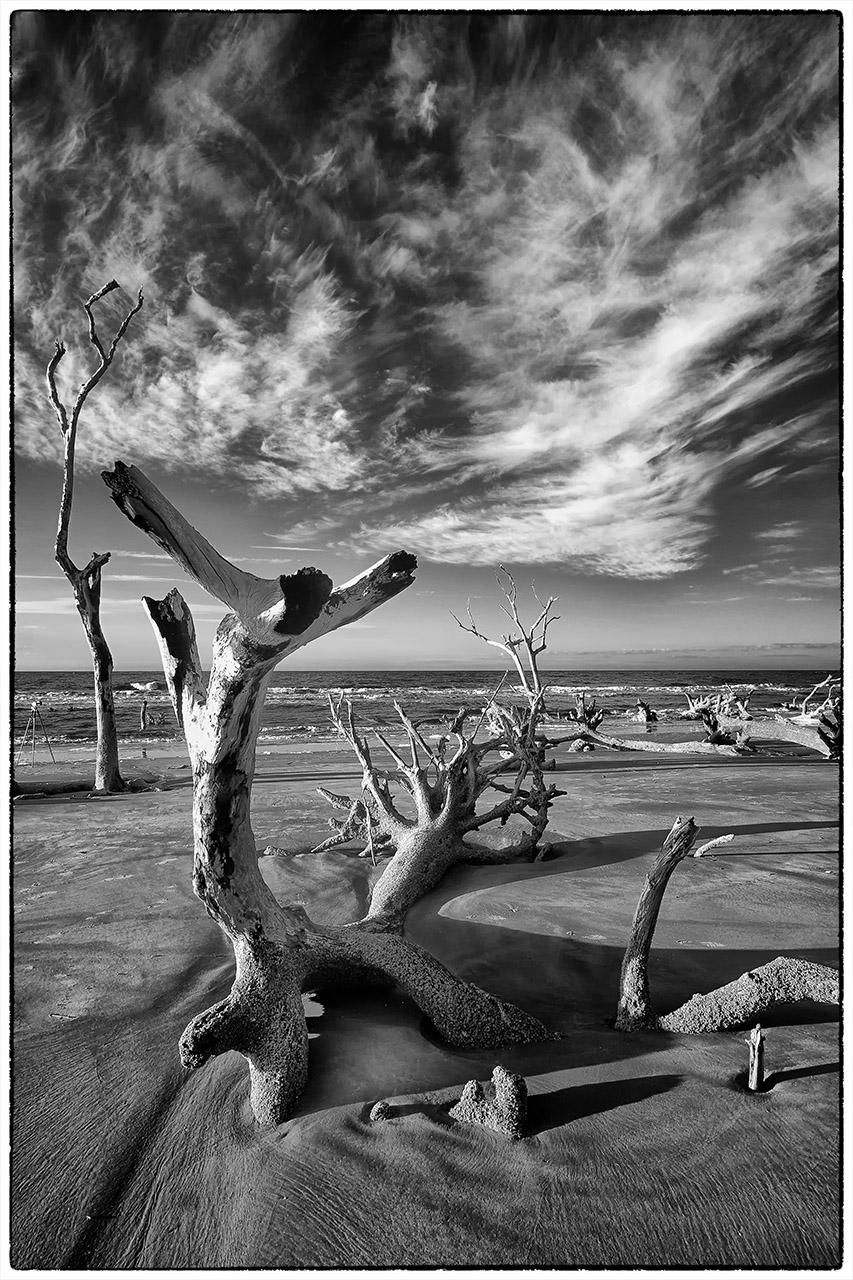
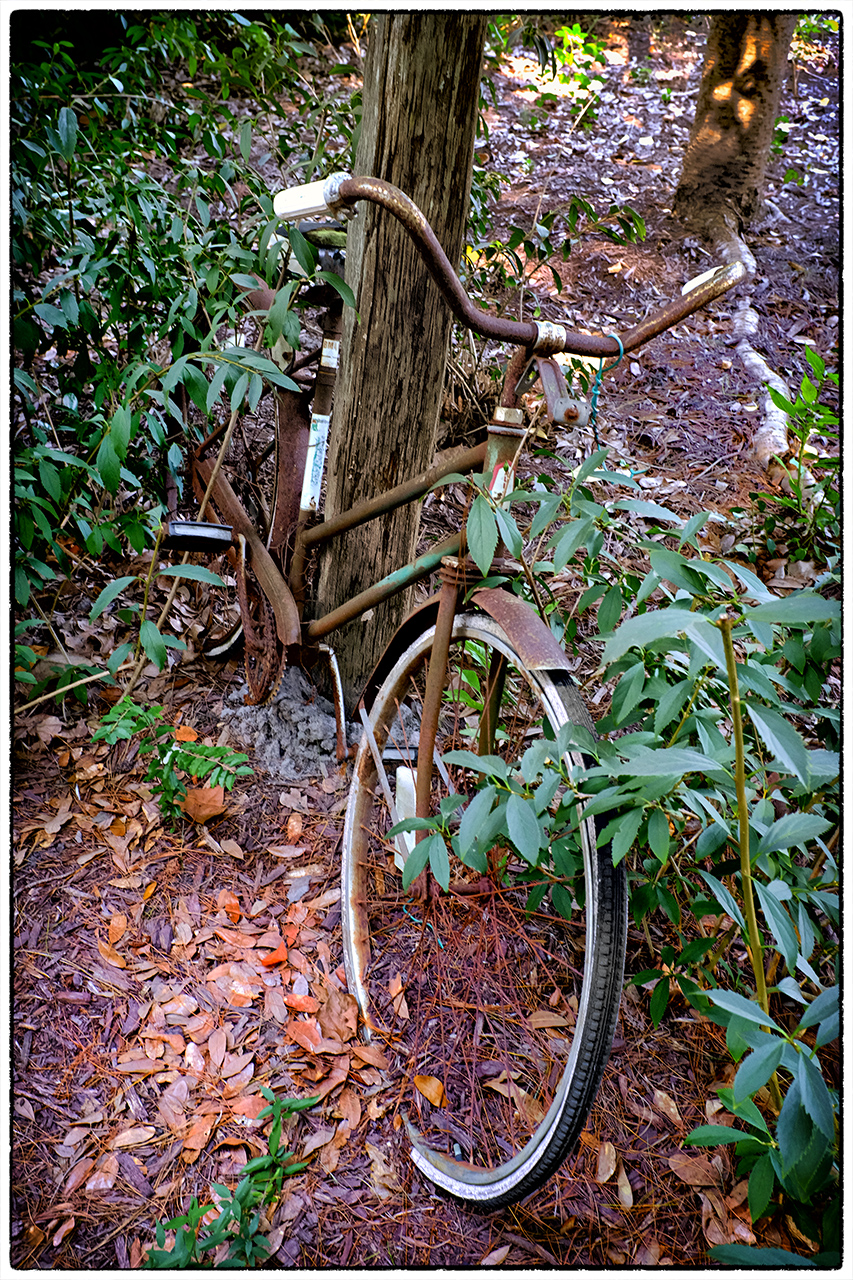
Fuji X100s, 850nm Kolari AR conversion – McClellanville Fleet

I have to tell you that with my test conversion on the Fuji X100s to AR 850nm that ALL of my hot spot issues simply went away.  This camera has always had a tendency for IR hot spots.   I have converted, tried and sold so many IR systems in the past that I have lost count.  I could not, would not sell this one as it is one of my most prized IR systems.  To say that I am pleased with the results of the Kolari IR AR Coating is the understatement of the year!

Remember, if you decide to order from Kolari, give them my name for a $15 discount!


Fuji X100s 830nm Infrared and Long Exposures


It just keeps getting better….


Pawleys Pier, 830nm 300 seconds, f/16, ISO 200

Pawleys Pier, 830nm 300 seconds, f/16, ISO 200, 8 stops of ND with the 10 stop B+W 110 ND filter

 Normally you do not see much in the way of Long Exposure  photography in the Infrared world.  The reason is that it is necessary to use Neutral Density filters (ND) to cut down the amount of light reaching the sensor to enable very long shutter speeds.  The infrared spectrum will reduce the the effective value of any ND filter that you attach to your lens from between 20% to 30%.  Have you ever taken a photograph of a person wearing a pair of sunglasses in infrared and noticed that they are totally clear?  This is the effect that I am talking about.   The general rule is that the cheaper filters suffer much greater loss in infrared and the variable ND filters do not work well at all (yes, even the expensive Singh Ray).  

B+W 110 10 Stop ND

B+W 110 10 Stop ND

Should you desire to pursue this style of photography I strongly suggest that you purchase and use B+W ND filters which loose around 20%.  I am also told that Lee filters do not loose too much effect as well but I have not yet tested them even though I own them all.

The B+W ND filters display the ND values on the side of the ring, but the easiest way to understand them is to simply look at the 3 digit number.

  • 110 equals 10 stops
  • 106 equals 6 stops
  • 103 equals 3 stops
  • 102 equals 2 stops
  • 101 equals 1 stop
Fuji X100s

Fuji X100s

I am using the Fuji X100s for the images in this post.  It is a 16 mpix camera that is a rangefinder styled system.  I includes an internal, drop down 3 stop nd filter that actually gives about 2 stops of reduction when used in the infrared spectrum.  I had the camera recently converted via Kolari Vision, http://www.kolarivision.com to what they call the Dual Spectrum conversion.  This is where the internal UV/IR blocking filter is removed and a strong UV filter is put in its place.  This gives you the same capabilities as any Full Spectrum conversion except that it will not work with any IR or UV filter that combines multiple spectrums that include UV.  This means that the 047b in camera Faux Color or Super Blue filter and the UG1 UV/IR dual band filter will Not work.  All of the others work fine from 590nm up!

Plus you can convert the camera back to normal visible color with the addition of a filter on the lens to block UV and IR.  With the Full Spectrum filter you need to stack the B+W 486 reflective UV/IR blocking filter with the LDP http://maxmax.com  CC1 absorption filter.   With the Dual Spectrum conversion you need only add the B+W 486!

So, I have ALL of the normal IR filters sized for 49mm which is what the X100s uses including the B+W 486.  I am using the B+W 093 820nm IR filter for this camera almost 100% of the time though.

Another nice thing about the X100s is the fact that it has aperture priority mode with a shutter speed up to 30 seconds and a BULB MODE that goes up to 60 minutes!   Where the X100 really excels is the fact that is gives a count up timer in the viewfinder or on the back LCD panel for timing your bulb exposure!

The camera is so small and easy to handle that it is a pleasure to work with and as you can see, the images are stunningly sharp!

I will be posting more long exposure images here in the future and discussing the various post processing recipes with you.  Now, one last image.  Here is the same shot with only the 3 stop internal filter engaged in the X100s.  The shutter speed at ISO 200 and f/16 was 1/6 second.  Not nearly long enough to slow the water down or blur the cloud movement but it would likely work for slowing down the moving water in waterfalls!

Pawleys Pier, 830nm IR, 3 stop internal ND, 1 second, f/16, ISO 200

Pawleys Pier, 830nm IR, 3 stop internal ND, 1 second, f/16, ISO 200

If any of you all out there shooting in Infrared work in long exposures please drop me a line or comment and we can share data about the various ND failures and successes!

You can also consider signing up for one of my (along with  Jamie Davidson) Infrared/Color Workshops.  We take you to amazing locations in the South East Coastal area for world class photography and INTENSE post processing classroom training!  You will find posts here talking about each workshop as it approaches!

Going to the Dark Side: 830nm Infrared and the Fuji X100s


830nm Infrared Conversion on the Fuji X100s


Oak Reflections, 830nm

Image 1:  Oak Reflections, 830nm


Infrared photography with digital camera systems have been around for several years now and a lot of photographers have embraced this different spectrum of photography.  Infrared is wildly popular in photography and fine art galleries now and my workshops are full of lots of talented photographers who desire to learn or expand their infrared skills.

Pawleys Marsh, 830nm X100s

Pawleys Marsh, 830nm X100s

The typical starting point for most infrared shooters is 720nm (standard) or 590nm (Goldie) IR conversions. We have all seen the amazing color images that these two conversions can generate. As previously discussed, we always process not only in Faux Color, but for B&W also. The B&W images are usually more accepted among the arts community though.

Pawleys Marsh, 720nm

Image 3:  Pawleys Marsh, 720nm


But did you know that with each increase in the IR Nano Meter band (the frequency goes down as the number goes up) that the contrast levels go up in B&W as well? This increase in the NM band starts to generate the most stunning, contrasty, ethereal images that have to be seen to be believed! The higher you go in the NM range also increases the white “glow” around the leaves and grass and the blue sky takes on a deep black. This effect is named the “Wood Effect” after doctor Robert Wood who discovered it 1910. What happens is that the leaves get a bloom or glow of white around them that generate that wonderful ethereal feel in the image. Take a look at image 1 which was taken at 830nm. Do you see the dark black where the blue sky is? Look at the leaves on the trees and how they take on the pure bright whites! Now compare that to 720nm image above in Image 2. The most striking difference is the gray sky rather than black, plus the leaves are grayer rather than white.

Shrimp Boat at 830nm

Image 3: Shrimp Boat at 830nm


I would like to suggest that if you shoot in IR or are interested in doing so then you should consider a deep contrast IR conversion beyond 800nm. There are a lot of benefits to be found in that spectrum. This new spectrum sees ONLY in B&W, which will force you to visualize your scene in B&W.


The benefits to a Deep B&W IR conversion are:

  • Extremely sharp images.
  • Wood Effect bloom on plant leaves.
  • Dark moody skies.
  • Only works in B&W
  • Post processing is easy and quick using Nik Viveza and Silver EFX for texturing and contrasts. Photoshop CC, Elements or Lightroom, they all work for Deep B&W IR!
  • White Balance is easy.


Mabry Mill, 830nm

Image 4:  Mabry Mill, 830nm

There are several ways to have a camera converted to deep B&W above 800nm.

  1. The easiest is to simply take ANY digital and have it converted by removing the internal UV/IR blocking filter and replacing it with a 800nm, 830nm or a 850nm internal filter. With this type of conversion you can use any digital camera type or style because only the sensor will see the infrared light and you will either see the scene via the optical path or via a live view from the sensor. Typically, this type of conversion should cost around $300 to $350 thru any of the normal conversion companies.
  2. If you are shooting a Full Spectrum or Dual Spectrum conversion then you can purchase and attach a B+W 093 830nm filter to your camera lens! This filter blocks ALL visible light so you MUST have a camera with a live view only to use this otherwise you will never be able to see thru the optical path to focus and compose. The Full Spectrum camera is one that has had the internal UV/IR blocking filter removed and replaced with clear glass and the Dual Spectrum conversion is where the internal UV/IR blocking filter is removed and replaced with a strong UV filter.
Rock Run Mill, 830nm

Image 5:  Rock Run Mill, 830nm


With either the full or dual conversions you can shoot every of the following light spectrums:

  • Ultra Violet                                               Full Spectrum *
  • UG1 UV & IR                                            Full Spectrum *
  • 047b In Camera Faux Color                  Full Spectrum *
  • 530nm Faux Color                                  Full & Dual Spectrum
  • 590nm Super Color                                Full & Dual Spectrum
  • 630nm Pinkie Faux Color                     Full & Dual Spectrum
  • 665nm Enhanced Color                        Full & Dual Spectrum
  • 720nm Standard                                    Full & Dual Spectrum *
  • 800nm B&W                                          Full & Dual Spectrum *
  • 830nm Deep B&W                                Full & Dual Spectrum *
  • Normal Visible Color                            Full & Dual Spectrum

* Requires Live View capable camera


Now, Normal Visible Color simply means that your camera can take normal color images as it did from the factory! This means that you have a multi purpose camera that can take anything.

The only issue is that if you have a Full Spectrum conversion you need to stack a B+W 486 reflective IR/UV blocking filter on your lens with a LDP CC1 absorption filter to get back to good normal color.

For the Dual Spectrum conversion you only need to put the B+W 486 reflective IR/UV filter on your lens and it is back to normal color!

Disadvantages to the Full or Dual Spectrum Camera Conversion:

  • More expensive to convert.
  • External filters for each of our lens sizes.
  • Color filters (530 – 665nm) are not expensive but the B+W 093, B+W 486 and the LDP CC1 filters are VERY expensive.
  • Your camera MUST have a live view mode to focus and compose.


Charlotte Marie, 830nm X100s

Image 6:  Charlotte Marie, 830nm X100s

 I have several cameras converted to above 800nm and several full spectrum and a new dual spectrum converted Fuji X100s. The images that I am getting from the Fuji with a B+W 093 830nm filter are the sharpest and most stunning deep IR images that I have ever produced! But that doesn’t mean that you need to go out and purchase that one. Any camera with live view will work great with the 830nm spectrum. Keep in mind though, that the more modern your camera is the higher the usable ISO will be!

You can contact Mark at his web site at http://www.MarkHilliardAtelier-blog.com for information on his Color & IR workshops, which he teaches with Jamie Davidson, and for his IR Post Processing DVD Tutorials!

Fuga City, 830nm, Georgetown, SC

Fuga City, 830nm, Georgetown, SC


How to get the BEST B&W images out of your Infrared camera!


How to get the BEST B&W images out of your Infrared camera!

Final B&W Version!

Final B&W Version!

I am VERY particular in how I process my images, either color or IR it doesn’t make any difference!  This comes from years of visualization,   photography, a career at Eastman Kodak, endless hours of post processing and just plain being old and cranky!  I look for specific compositional elements in each and every image I create then look to create a stepped series of varying  contrast levels to draw the viewer into the image.  This is important in my color work, but CRITICAL in my B&W images.

This post though, is specifically about B&W IR post processing.   But before we actually get to that point I wish to share with you my workflow that I go through up to the point of processing it for B&W.

Assuming that our images have been edited for choice and artistic content and been processed from RAW to 16 bit TIFF…

  1. I evaluate each image to see if it is viable as a processed RAW image.  This means that it has been converted to TIFF, then evaluated as is.  If it looks good (nice bronze skies and monochromatic leaves), I will then post process it according to the the same workflow below that I use for B&W and save it.  Then…
  2. Convert the image to Faux Color IR but running the Faux Process (channels swap and color saturation & hue adjustments) and save.
Step 1  Evaluate the RAW image to see it it stands on its own!

Step 1 Evaluate the RAW image to see it it stands on its own!

Step 2 Process the RAW image into Faux Color.

Step 2 Process the RAW image into Faux Color.

Only when these steps are completed do I start my B&W conversion and processing.  The reason for this is that the best B&W conversions are generated when we have gotten the best possible color adjustments done!  The better the colors the better the B&W!  This is true of both color camera or an IR camera.

As you can see from the B&W image above of the bone yard at Cape Romain here in South Carolina, the image is full of alternating contrast areas that draw the viewers eyes into the image from the bottom left corner up to the center.  This was a choice made in post processing.  

So remember, you will get a much better B&W image if you first post process the color version!  This will give the software (Nik’s Silver EFX Pro) a greater latitude of colors and contrasts to work from rather than just converting the RAW version directly into B&W.

Compositional Elements

In Infrared photography, there are 3 main elements that we need to get an emotionally charged image:

  1. Sky with moody cloud structure.
  2. Water
  3. Green plants.

If you can get all 3 you will get a much more powerful image, but as long as you can get at least 1 you will have more to work with to get a good image. If you find yourself in a location where none of the 3 desired elements can be found then look for repeating patterns! Look at the example below.  This image is of old Rt. 66 through the west taken at the height of a world class snow storm a few years ago in 720nm IR.  There is no water, clouds or plants to work with.  But we have a vanishing perspective due to the repeating telephone poles plus great structure in the snow cover scrub!  There is also just a hint of the sun behind the top of the first telephone pole which adds interest and change of contrast.

Old Rt. 66.  A hint of sun behind the top of the first telephone pole.  720nm IR

Old Rt. 66. A hint of sun behind the top of the first telephone pole. 720nm IR

Now, as easy as all of this sounds, it really does take some planning and simple photoshop skills.  Plus the more you practice it the better and faster you will get!

So lets take a look at our sample B&W converted per post processed B&W image below.  To get to this point, you take your color image and open it in Niks Silver EFX software filter.  You would then choose the recipe that you like the best from the left hand menu watching the effect on the preview image on the screen.  When you find the version you like the best  you would then adjust the contrast, structure and highlights/shadows to get your starting image, then accept it and drop it back into Photoshop!  

This then is the results of what we just did:

Adams Mill Bridge, IN, B&W Converted NO Post Processing!

Adams Mill Bridge, IN, B&W Converted NO Post Processing!

This is a very nice image to be sure!  But, it can be drastically improved with very little work.  By selecting areas of alternating contrasts we can enhance the emotional impact of this image and draw the viewers eyes into the image giving it an almost 3 dimensional feel!  Lets take a look at these areas!

Take a close look at the image.  Look for ways to give alternating areas of light and dark, low contrast and high contrast.  Use these areas to create steps into your image.  For the image above of the Adams Mill un processed this is how I approach it:

Visualizing areas of light/dark, low/high contrasts to step your viewer through the image!

Visualizing areas of light/dark, low/high contrasts to step your viewer through the image!

Looks like a puzzle doesn’t it!  But is is really easy once you decide HOW you want to approach the image.  We are going to use the Nik plugin filter called Viveza to accomplish all of these changes.  Simply start on one edge of the image and work your way across. Nik gives you a very powerful selection and masking tool call selection points.  These points pick out areas of similar color or shading.  

So here is how it all works:

  1. Start Nik Viveza in your editor.
  2. Start from one edge and work across the image.
  3. Using a selection point, place it on the first area to be edited.
  4. Adjust the size if the selection point as necessary.
  5. Adjust the brightness slider to set the light/black point you desire.
  6. Adjust the structure (sharpness) with the structure slider.
  7. Adjust the contrast with the contrast slider.
  8. If you find that your edits affect areas outside of your desired area simply add another (or several) adjustment points with no editing in those affected areas to bring them back to where they were. This is called an anchor point. You will find that you will add anchor points all over your image to bring areas back to their un edited version.  
  9. Simply work your way across the image editing as you go.  Create areas of alternating contrasts and you will generate a powerful B&W image in very little time!  

Here is the finished version of the image above!

Adams Mill Bridge, IN, B&W Converted Post Processed

Adams Mill Bridge, IN, B&W Converted Post Processed

Go back and forth, look at the differences between the 2 images.  In the 2nd image, there is a tonal range of complete black to complete white. The un-edited version has a little contrast but lacks punch and it does NOT have a complete tonal range!

This looks very simple doesn’t it!  Well it is!!  It just requires that you pre visualize what you desire in your finished image then simply make it so.

I hope that you enjoyed this simple tutorial.  If you would like an enhanced version with complete step by step instructions and screen captures please visit my BLOG at:

http://www.markhilliardatelier.wordpress.com

and look at the post on my Color & Infrared Video Post Processing Tutorial on a 2 DVD set.  

Please let me know what you think of all this!!

Fuji X-E2 Long Exposures and Wild Sunsets!


Every Time I take the X-E2 out I am amazed…

Fire In The Sky, X-E2 w/ 18-55 and 3 stop soft grad ND on the sky.

Fire In The Sky, X-E2 w/ 18-55 and 3 stop soft grad ND on the sky.

We have been having amazingly turbulent weather here in Pawleys Island for the last week or so.  The sky has been moody and dark.  Mornings filled with dense fog and the ocean surf rough…   Perfect for long exposures and wild sunsets

What better excuse then to take the Fuji X-E2 out and capture these wild and moody scenes?  With my full kit of the Lee Seven 5 filters and B+W ND filters in hand I grabbed the X-E2 and the XF 55-200mm F3.5-4.8 Zoom Lens (which has kind of turned into my main carry around lens) and headed out to the beach.  

The X-E2 (in fact, the entire line of Fuji X cameras) is exceptionally adept at long exposure photography.  It generates low noise exposures and has NEVER let me down.  I usually shoot in the 2 to 4 minute range but once in a while will go up to 10 to 15 minutes depending upon the subject.  

In todays post I am shooting between 30 seconds and 4 minutes and one of the sunset images was just a short exposure (1/13).  

The setup for all of the long exposure water images was either a 6 or 10 stop B+W ND filter and the sunset had an added 3 stop soft graduated Lee filter (Seven 5 system).  The sky was just too bright with the wild colors to give anything but a black foreground otherwise! I also used the Fuji RR-90 remote shutter release (but you can also use a mechanical release or a Canon RS60 E3 release).

One of the big benefits of the Fuji X system is the fact that when in the  BULB mode Fuji gives you a count up timer on the LCD screen so that you can easily time your exposure.  This doesn’t sound like much but when you are out in the cold and dark shooting it is a BIG DEAL!  Try doing this with a Nikon 300 and you will understand!

Now, lets talk a little about your exposure metering.  

  • You can (and I sometimes do) use the cameras metering system, but I do find that when metering through the 10 stop ND that it will sometimes confuse the meter.  
  • You can also meter without the ND attached then attach it and adjust the exposure for whatever value the ND is but there is NO guarantee that the filter is actually what it is advertised to be!  
  • What I like to do is to use the Seikonic  758DR spot meter which can factor in the ND filter automatically for you and give you an accurate exposure.  You can also meter through the filter with the 758 to see what the real value of the filter is!.
  • You can also just get close with your first exposure then evaluate your histogram and adjust the exposure as desired.

Which ever way you choose you will be surprised how quickly you can get “on target” by taking just 1 exposure then adjusting! But remember. when we are spot metering either in camera or in an external meter whatever spot you  are metering on will give an exposure for Zone 5 or 18% grey. It is up to you to adjust the exposure up or down to place it into the proper Zone!  What I like to meter on is the sky just above the horizon then adjust it up about 1 stop (move from Zone 5 to Zone 6).  

I ALWAYS have the Long Exposure Noise Reduction turned on in my cameras.  This means that you will double your exposure time.  After you take your image, the camera will close the shutter and take a 2nd one with the same shutter speed.  This is called Dark Frame Noise Reduction and the camera will look for bright pixels in the 2nd shot and subtract them from the first.  This is very worthwhile and will allow you to create much better output images but cut down the amount of time you have to stand there and shoot!

As I said earlier, the mornings have been very foggy so lets start off with several examples of this type of photography.  Of course, you must remember to increase the exposure so that the fog is not a DARK GREY, these have been adjusted from Zone 5 to Zone 6.5 or 1 1/2 stops!

Salt Marsh in the morning fog...

Salt Marsh in the morning fog…

Pawleys Island Pier, Foggy Morning.  X-E2 with 10 stops of ND, 30 seconds.

Pawleys Island Pier, Foggy Morning. X-E2 with 10 stops of ND, 30 seconds.

Foggy Feast, X-E2. Sometimes simple is best!

Foggy Feast, X-E2. Sometimes simple is best!

Ok, lets move on to the evening.  The intent here was simple long exposures to smooth out the surf and remove the surfers (yes I hate surfers as they are always in your shot and don’t care!).  For these type of images you really need to start at 30 seconds and move up.  If the sky is within 3 stops of the foreground then you do not need to add a graduated ND on the sky.

Fire In The Sky,  90 second exposure with 3 stops of grad ND on the sky and 6 stops of ND overall.  X-E2

Fire In The Sky, 90 second exposure with 3 stops of grad ND on the sky and 6 stops of ND overall. X-E2. Notice the cloud movement in the sky and the smooth surf!

X-E2-240s BW LE Pawleys Pier-0255-2013

B&W Pier & Groin, Pawleys Island, SC 240 second exposure, 10 stop ND X-E2

X-E2-240s LE Pawleys Pier-0255-2013

Color version of above image. Notice how the sky and water are close to the same density? 240 seconds.

X-E2-BW LE Pawleys Pier-0246-2013

B&W version of “Fire in the sky”. Yes you should evaluate ALL of your images for B&W.

There is something very soothing about well done long exposures of the ocean.  They really are not difficult to do and the results are worth the investment in time and discomfort (did I mention that it is winter here and I was standing on the beach in the wind?).

As you can see, the Fuji X-E2 excels in all areas of photography.  It has proven itself to be a serious tool to photographers who understand its capabilities and master it functionality!

I hope that you enjoyed this post. Please let me know what you think!

Fuji X-E2 – Amazing Quality!


My Fuji  X-E2 – Just Perfect!

Shrimper Carolyn Ann, Fuji X-E2

Shrimper Carolyn Ann, Fuji X-E2

I have to tell you that I am REALLY a Fuji fan.  I have the following Fuji bodies:

  1. X-Pro 1 – Color
  2. X-Pro 1 – 720nm Infrared Conversion
  3. X-E1 – Color
  4. X100s – My walk around companion!
  5. X-E2 – Color

I also have ALL of the lenses but 2!

I moved to Fuji after a long search for a small light weight camera system after loosing 80% use of both hands and arms.  I went through ALL of the micro 4/3 systems (and even kept 2!).  I sold $40,000 in Canon bodies and L glass and have NEVER looked back!  

In the Fuji, not only have I found perfections but being a range finder styled system it is like going home to mom!

X-E2

X-E2

I have a X100s that I use for most of my walk around work, it is just so tiny and generates amazing images.  So when Fuji announced the X-E2 with the same sensor and with even more upgrades I ordered one from Amazon.  Much to my amazement it shipped a week later!  I have had it in hand now for about 2 weeks and just yesterday took it out to a local fishing port for a bit of creative work.  I love the upgrades and how fast this camera is.  It even passes the X100s in ability.  I originally purchased the X-E1 in order to take advantage of its electronic remote shutter release.  It enables me to hook it up to devices like a lightning trigger and my water drop collision system.  The X-E1 did a great job with these devices and I expect no less with the X-E2 but that is for another day.

X-E2 Top Panel

X-E2 Top Panel

Yesterday I took it out to shoot shrimp boats in North Carolina and have to tell you that the camera just blew me away.  It is such a major upgrade over the X-E1 that I cannot believe that they came from the same company!  The controls are CRISP, the knobs just snap from position to position with no play and they stay where you put them.  The larger LCD is nice but the faster EVF is a sight to behold. I dressed the camera in a RRS L bracket with grip and put on a nice soft release.  Physically except for new buttons and placement the camera is identical to the X-E1.  One MAJOR improvement is the addition of 3 stops of EV adjustment instead of the normal 2 that Fuji has provided in the past.

All in all I am really happy with this upgrade.  I will keep the X-E1 and convert it to 800nm IR in the near future.  There is no sense in letting that viable and great camera go to waste!

Little Scrapper, X-E2, RAW converted in ACR

Little Scrapper, X-E2, RAW converted in ACR

Next I put the camera into the JPG mode and shot color & B&W images in camera.  The results speak for them selves!

Shrimper Donkey X-E2

Shrimper Donkey X-E2


Shrimper Donkey, CAMERA B&W  X-E2

Shrimper Donkey, CAMERA B&W X-E2

Carolyn Ann, Color, X-E2

Carolyn Ann, Color, X-E2

Carolyn Ann, In Camera B&W X-E2

Carolyn Ann, In Camera B&W X-E2

Working Shrimper Deck, X-E2

Working Shrimper Deck, X-E2

Working Shrimper Deck In Camera B&W, X-E2

Working Shrimper Deck In Camera B&W, X-E2

This posting was never meant to be a review, rather a statement of its impact upon me with sample images!

Please let me know what you think…

Video Workshop Customer Comments & Feedback!


Customer Comments on the Color & Infrared Post Processing From Beginning To End Video Workshop

IR Post Processing in Color and B&W

IR Post Processing in Color and B&W

I have started getting feedback and comments on the new IR/Color Video Tutorial.  As they arrive I will share them here in this post with you.  I am very excited over these.  So far there are about 100 shipped videos out there!

TO ORDER THE DVD SET:

US  Orders CLICK    HERE

The cost is $29.95 plus shipping which will automatically be added when you order.

___________________________________________

INTERNATIONAL ORDERS:

Pay via Paypal using the payee address:

ellen@thelensworkgallery.com

International Charges

  • England: DVD SET $29.95 SHIPPING $25.00
  • France: DVD SET $29.95 SHIPPING $25.00
  • Hong Kong: DVD SET $29.95 SHIPPING $25.00
  • Canada: DVD SET $29.95 SHIPPING $22.00

All prices are in USD

___________________________________________

________________________________________________________

I attempted IR several years ago and was totally frustrated when it came to post processing.  Despite enrolling in an online course and spending hundreds of dollars on IR books, it was a hit and miss proposition in getting any decent images. Everyone said the same  thing – “swap your red & blue channels in Photoshop”.  Sorry, that doesn’t work all of the time.
Everything changed after taking Mark’s IR workshop.  Now it’s even easier to learn IR though this wonderful DVD set.  Get your White Balance right in the beginning, watch your red channel in your histogram, then follow Mark’s IR post processing methods.  He makes it that simple.
 Mark is truly a master!

________________________________________________________

Mark, I demand my money back on the IR & Color Post Processing Video tutorial ! How dare you sell DVD of that quality for $30 when it is easily worth 3 times that amount!  Mark – this was the best training DVD I ever saw.  You covered everything perfectly.  I watched it twice yesterday and intend to watch it again today.  You covered everything perfectly. You are truly a master!  Thanks

________________________________________________________

The DVD arrived today, thank you. The cover, case, packaging all looks great: very professional.  Will delve into it while traveling next week.

________________________________________________________

I really like your suggested folder structure, of leaving the original RAW files untouched, then having a separate Develop folder, for work in progress images, and another Archival folder for final, processed images. I’ve spent the past 5 years processing my original RAW files. Goodness know what damage I’ve done. Your system is much smarter. Thank you!

________________________________________________________

I have Ingestamatic working reasonably reliably now and am coming to appreciate its utility in naming files and organizing sub-folders. It’s certainly smarter than any other uploading programs I’ve used.

________________________________________________________

I love my videos!

________________________________________________________

I would like to thank those who have taken the time to send feedback and comments!  It means a lot to me and will help improve on the next Video Tutorial that I put together!  

Please keep them coming!

UPDATED: IR & COLOR POST PROCESSING VIDEO TUTORIAL!! INTERNATIONAL SHIPPING


UPDATED: Color & Infrared Post Processing From Beginning To End INTERNATIONAL SHIPPING!

2 – 1/2 hour video series on two DVDs by

Master Photographer Mark Hilliard

DVD OUTSIDE LABEL

DVD OUTSIDE LABEL

  1. This covers image ingestion using Ingestimatic for both Mac & Windows
  2. Raw conversion using Adobe ACR – Capture 1 Pro and Capture 1 Express
  3. RAW Library Setup
  4. Backup Strategies 
  5. Intelligent IR channel swap using the Khromagraphy PS Plugin Action
  6. Post Processing Color, Infrared and B&W using the Nik filter set in Photoshop. 
  7. Ideas on creating intense high impact images.

The majority of the video is screen capture taking you through the post processing workflow button by button, click by click.  All of the major RAW converters have their own separate video and you will learn about all 3 which will enable you to make intelligent decisions on which one is for you then be able to run it!

This is an in-depth tutorial and will give you the knowledge and recipe to take your own images from one end of the process to the other without pulling your hair out in frustration!

TO ORDER THE DVD SET:

US  Orders CLICK    HERE

The cost of the video for US customers is $29.95 plus $5.95 shipping which will be automatically added when you order.

___________________________________________

INTERNATIONAL ORDERS:

Pay via Paypal using the payee address:

ellen@thelensworkgallery.com

International Charges

  • England: DVD SET $29.95 SHIPPING $25.00
  • France: DVD SET $29.95 SHIPPING $25.00
  • Hong Kong: DVD SET $29.95 SHIPPING $25.00
  • Canada: DVD SET $29.95 SHIPPING $22.00

All Prices are USD

___________________________________________


If you would like to read a little feedback from my students please click   HERE  and   HERE.

Video Course Inside

Video Course Inside

Fuji X100s: Oh Yea…


You know the feeling, and usually need tissues to clean up afterwords!

A little background is in order…

Fuji X100s

Fuji X100s

Fuji X, what can you say except “Yes Please!”.  I am a LONG time X shooter.  I started out several years ago with the Fuji X100 and loved every moment of it.  I likened shooting with it to going home to Mama…  If you know what I mean then you understand.   I did decide that I really desired to have a camera with interchangeable lenses and when the Fuji X Pro 1 came out I jumped on it and all of the FX lenses that have since arrived plus several CV lenses as well.   The X Pro 1 has become may main goto camera system.  I Then purchased the X-E1 due to its electronic shutter release, thus its ability to connect to my lightning trigger and water drop computer system!  The X-E1 only lives for such things…  When I get it out to play with lightning it is like coming home to a doggy after a long day! I then decided to get another X Pro 1 and have it converted to 720nm Infrared.  This system (my 16th IR conversion) is the BEST IR camera that I have ever used and that is a big statement!

Passion Flower Macro, Fuji X100s hand held in bright sunlight.

Passion Flower Macro, Fuji X100s hand held in bright sunlight.

So, along comes the X100s, and I look it over and think on it for months.  I though that gee, what a neat system to add to my bag.   Finally I decided to get one but let me tell you that they are HARD TO FIND!  I found on at a little online camera store in Oregon and had them ship it to me last month.  I am very glad I made  this decision!  To say that the X100S is a world class camera is really short selling its capability!   I find that I carry it EVERYWHERE I go now.  I still use the X Pro 1 for most of my work but the X100s really gives stunning results and the new XTran 2 sensor is amazing.  I love the split image manual focus system and wish the other Fuji cameras offered it as well.

Adams Mill Wheel, Lafayette, IN, Fuji X100s

Adams Mill Wheel, Lafayette, IN, Fuji X100s

The X100s works very well in macro mode and the sharpness, colors and texture are simply breathtaking!  You could not ask more of a walk around camera than the Fuji delivers.  Even without image stabilization the camera is flawless due to its ability to shoot cleanly at high ISOs!

Abstract, Glass Block Floral, Fuji X100s

Abstract, Glass Block Floral, Fuji X100s

I am going to share a few of the images generated so far with this incredible camera and you be the judge!

The Dingy, Fuji X100s

The Dingy, Fuji X100s

Adams Mill, Lafayette IN, Fuji X100s

Adams Mill, Lafayette IN, Fuji X100s

McHargue Mill, Fuji X100s

McHargue Mill, Fuji X100s

Old Truck, Fuji X100s

Old Truck, Fuji X100s

A Face in the trees, Fuji X100s, you have to figure this one out!

A Face in the trees, Fuji X100s, you have to figure this one out!

Ok thats it for today!  What do you think?