Or… What I Did On My Summer Vacation!
Warning, LONG post…

Canyon Lands Pano, Sony A7rii with the 24-240 and polarizer

Devils Tower
Travel Photography… Say it, let it roll off your tongue, think about it! I bet that the first thing that comes to mind are images from National Geographic, fine, super saturated color photographs that could take you anywhere in the world by simply looking at them! You know the kind, they enabled you over the years to travel vicarisly around the world just with the magazine and its images!
But is that what travel photography really is?
What is the intent of travel photography to document a place or a trip? Is it designed to tell a story on an individual level or to the masses?

Well for me, it is a combination of the two. Most importantly, the images are to refresh the memories of the trip. But there is a real market out there for well done travel photography whether in print publications, web, advertising or fine art prints. It can be quite profitable if you work at it and can step back and look at your own images in terms of the above markets. Even the housing deceration market has room for this type of photography provided that you can simplify your work to show colors and contrasts over locations.

Jordan, My 7 year old photographer grandson
For this trip, and pretty much all the time when I am shooting digital, I exclusively use the Sony 42 mpix A7rii camera system and the new Sony A6300 for high speed work with Sony G lenses or Sony Zeiss lenses. They are very well suited to this type of photography and give you enough (42 mix) resolution to get amazing images yet still have room to crop!
The drive for this post was a recent two week trip out West with my wife and 7 year old grandson Jordan who I am teaching film photography and darkroom processing to (photographically, I had grand plans for him this trip). Given time I plan on turning him into a photographic GOD for something fun while making sure he is a Rocket Scientist!
We flew into Rapid City, SD and picked up a one way rental car and our first night in a long string of hotels.

Devils Tower
Our Itinerary:

Drugstore of the West, Cody, WY
So as you can see there was a well thought out family plan for travel and location visits! But, I also had a plan, my photographic plan!
So lets talk first about my TRAVEL photographic equipment plan. I wanted to travel light (yea right). No backpack, rather a small rolling camera case that would fit into the over head of a small commuter plane so that I would not have to check it. I would not have room for a film camera… Dang!
So here is what I brought along:
- Sony A7rii camera body
- Sony a6300 camera body for Jordan
- Sony 24-240mm one lens does it all for Jordan
- Sony 24-70 Zeiss f/4
- Sony 70-200 G f/4
- Tamron 150-600 for those exotic animals I expected to see
- And yes… A Olympus XA 35mm film camera (but it is the worlds smallest rangefinder) with 6 rolls of Tmax 100
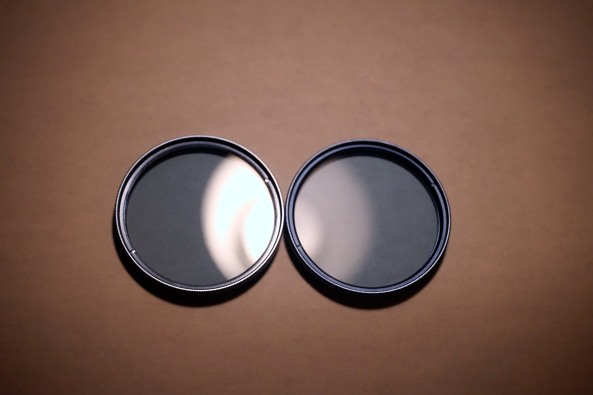
- Filters, ND for long water falls and polarizers for all of the rest in 67mm and 72mm.
- Batteries an chargers (both cameras used the same)
This was a good plan (or so I thought) until our very first stop at Mt. Rushmore where Jordan informed me that the 24-240 was too long and heavy. Oh well, I took that and gave him the 24-70.
RULE ONE: No camera plan survives first contact with a 7 year old!
Ok, so at least the part of the photographic plan of me being able to NOT check my camera equipment worked! (I did put all of my insulin and supplies in the camera case just to prove my need to have the case with me but did not need it).
RULE TWO: A super zoom really works best when you have to carry lots of glass around while traveling. See Rule One, Jordan did me a favor here!
Yes, I know that one would not normally trade a light 24-70 Sony/Zeiss f/4 lens for a 24-240 f/3.5-5.6 Sony super zoom but I have to be honest, I was VERY impressed with the super zoom! It was not really that much heaver but it was longer. I NEVER put on the 24-70 after that.
Things to look for on a cross country western trip:
- Wildlife
- Landscapes & Vistas
- Unique rock formations
- Waterfalls
- Wild colors
- Unique photographic visions
Trip Highlights!
Yellowstone
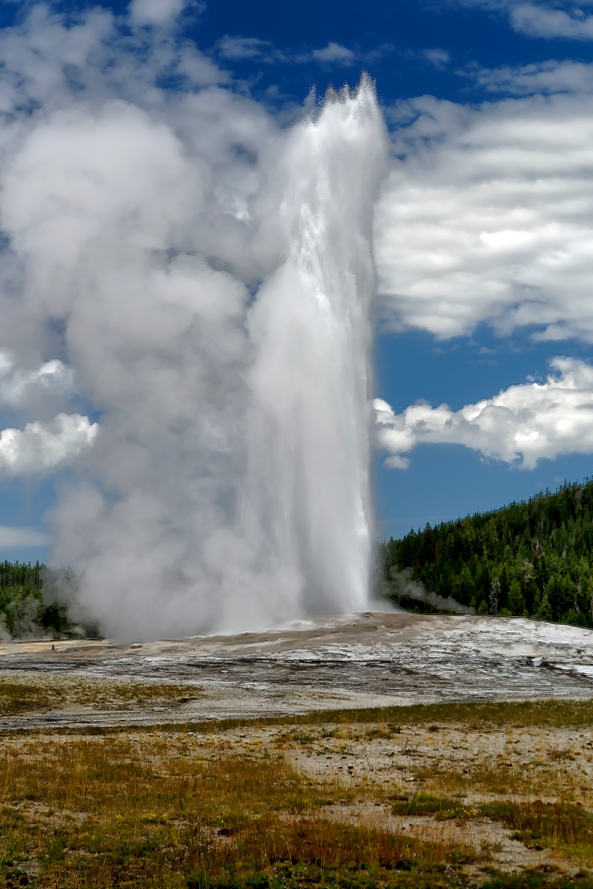
Old Faithful
Querimony: To Questionably Moan & Complain!
I expected great things of Yellowstone and that showed in the number of days there as well as staying in the park. Yellowstone is HUGE, so much so that you have to allow for HOURS of driving time from location to location. The roads are all good, 2 lanes with adequate pull offs. BUT having said that there are rules of behavior in pulling off and rules for how you treat the wildlife. I cannot tell you how many people (especially foreign visitors) who would jump out of the car (still in the road) and run off into the fields right up to the wildlife. To say that this is bad behavior is an understatement. It for one, keeps others from being able to photograph the wildlife and two puts the peoples lives in grave danger that approach the wildlife! Yet this happened almost every time wildlife was near the road. The park rangers had simply given up on trying to educate people who would not listen. They spend most of their time dealing with the MANY dreadful traffic accidents that happened every day. The traffic jams were terrible whenever an animal was near. Sometimes this was due to the animal being on the road but most of the time it was because people parked right in the middle of the road who left their cars.

Buffalo on the Yellowstone river in the early morning mist
I am going to share a few of my favorite images from Yellowstone with you. It is a good cross section of what you can expect to see while visiting!

Blue Pool, Prismatic Spring Upper Yellowstone

Prismatic Spring upper Yellowstone

Yellowstone Antelope, North Entrance

Teal Pool, Upper Yellowstone
And last….

Lower Yellowstone Falls Detail 1 second Exposure with 10 stops of ND
Moab, Arches & Canyonlands National Parks

Delicate Arch

Sandstone Arch, Arches

Courthouse Rock, Arches

Whale Tail Arch, Backcountry Tour

Windows Arch on the Back Country Tour, Arches

Dead Horse Point. Look at the lower left corner 1/3 up to see the dead horse outline.

Canyon Lands, Isle in the sky
General Utah

High Desart Train Pano
So…. I had this vision stuck in my head of a parked line of freight train box cars parked in the high desert with a mesa behind them. I found myself looking to the sides of the car as we traveled endless miles through Wyoming and Utah. Finally my wife asked me what I was looking for and when I told her she made a point to help me look and stop me when we came upon them. I know that out West there are ultra long stretched of road. Most are 4 lanes with lots of traffic. If you see that special scene make sure that you safely stop so as not to irritate the 7 year old in the back seat, pull safely off to the side of the road as you watch for the perfect compositional setup and get out and shoot it! DO IT!
Because…
RULE THREE: There are NO GO BACKS! If you see a subject or scene on the side of the road immediately stop and shoot it!
Bryce National Park

Whodos in Bryce Canyon
To say that Bryce National Park is anything less that amazing is an understatement. It was right up there with Arches and Yellowstone in amazing views, colors and the wow factor! This is the location that I would choose to visit again to try some different styles of photography. The colors of the Hodoos are simply amazing and full of wild colors and contrasts.

Natural Bridge Bryce
RULE FOUR: Revisit those scenes and compositions as many times a possible!
While in Arches, my 7 year old grandson decided that he had enough nature and vistas after driving Arches all day long. I took them (at my wife insistence) back to the hotel and went back out to Arches and drove it again in different light conditions and the 2nd time there were clouds in the sky. This made for much better images that I would not have gotten if I did not go back out again!
Final thoughts on what makes travel photography great!
Now as you have seen here, I presented this trip as a travel log. Attempting to document the many wonders of the high plains in the west. For images that have the possibility of selling you need to:
- Pay more attention to your editing, scene selection and composition.
- You must re-visit local scenes several times in order to get the best light and clouds.
- You MUST shoot with your best equipment in order to produce high resolution images for future publication.
- In your post processing you must choose only your best images and throw the non used images out.
- Be your WORST critique and select only what you would consider to be world class images. Case in point, the image above of the Court House Rocks in Arches. Yes it is a nice image but the lack of clouds in the sky reduce its impact to the point of it being a weak image!

Hood Valley, Bryce Canyon, Sunset overview.
This type of travel photography is more difficult that personal travel images traditionally done by the millions of photographers who roam the country. These types of images are still travel photography but basically serve to show and remember your great trips! They will include more family member in the scenes, less care about the total compositional elements because those are simply not as important to the memory of the trip and locations! They are just as important, but will not generally generate income from sales and publication.
Colophon: Very Important Lessons Learned:
- NEVER, and I do mean NEVER plan a 14 day photographic trip with a 7 year old and expect him to be excited beyond the first week. I would have been better off leaving the A6300 and 24-70 f/4 at home thus lightening my load and giving him MY camera when he desired to take a photograph!
- Make SURE that you explain to the said 7 year old that “NO! There are places that not only will there be no TV but also no internet! (I was able to get around this most of the time with my iPhone as a hot spot for his iPad!)
- Build in several fun days (as viewed by a 7 year old) that includes things like movies, water parks and so on! This is a small price to pay for 7 year old mental health and will refresh his young mind and keep it open for those wonderful scenes you travel to!
- How can you get those great travel shots when your walking is limited? As a cranky 63 year old man, make sure that you plan photographic stops THAT YOU CAN DRIVE TO! We (actually my thoughtful wife) did this ahead of time thus insuring my mental health and happiness at the stops we made!
- Take the time to occasionally stop at nice restaurants that actually serve wine and beer (this will assist with the mental healty of said wife!) Happy marriages are NOT built and fast food places in a rush!
- If you desire to shoot medium format film, you damn well better plan on space for the camera and film! Regrets upon your return will leave a sour taste in your mouth!
- Be flexible, very flexible. This will leave you happy in the hotel at night!
- Take your pain drugs! (See #7)
- If you see a photo subject on the side of the road STOP! There are no go backs! (see RULE THREE about this very thing and really your wife know this and will support your urges to stop in the middle of nowhere!
- Wildlife… What wildlife? How did I miss all the great shots of wolves, coyotes, and bears? I was in Yellowstone for heavens sake! The lesson here is to make sure you check the season for high animal activity. I have listened to my photographer Son talk about so much wildlife in Yellowstone that it was not safe to drive! I guess he should have mentioned when he was there! Oh well. I AM happy with what I actually did see (Buffalo, Antelopes, Elk and Prairie Dogs)
- Stop at EVERY overlook in every park. You will be happier having done so (and vicariously so will your wife). You will hate yourself when you return home only to have a photographer friend tell you that the one overlook you skipped was the only one you should have stopped at!
- If you find a scene that is magical for you revisit at a different time of day. This is VERY IMPORTANT and promote photographic health for those who have heeded these magic words.
- Would I do it all over again with a 7 year old? YOU BET!! But I would plan differently. If I take any of my grandkids I need to remember that it is their vacation as well. This means that you build in days doing fun stuff for their age also!
Please let me know what you think of this long post! I welcome all feedback.

Bryce Canyon in camera pano